The firebase-xplatform library lets you share business logic written in Java between web apps (via Google Web Toolkit), Android apps, and iOS apps (via the j2objc transpiler). The idea is to present a uniform Firebase database API to all three platforms.
An example application is provided in the sample/ directory, the tutorial below goes into more detail about the steps to set up the sample application.
If you want to skip the tutorial, you should be able to import the sample applications as Eclipse and XCode projects and get started right away.
To illustrate the use of this library, we will implement an app called NumberIncrementer. The app will present a single “increment” button to the user. When pressed, the app will pop up an alert with the total number of times any user of the application has pressed the button. The source code of the resulting project is available here. If something in this guide doesn’t work for you, please file an issue on github here.
Screenshots of the three apps we will implement:

- Eclipse
- Android ADT plugin for Eclipse
- Google Web Toolkit plugin for Eclipse.
- Chrome GWT developer plugin.
- A Mac with XCode installed
Finally, I’m afraid that there are some third-party libraries that you need to download (this is my fault for not moving this tutorial over to use Maven yet):
- awaitility.jar
- cglib-nodep.jar
- firebase-client-jvm.jar
- hamcrest-core.jar
- hamcrest-library.jar
- objenesis.jar
In addition, you’ll want to pick up copies of the following libraries from github:
In order to accomplish our goals, we are going to make 3 eclipse projects and 1 Xcode project. These will be:
- number-incrementer-shared: Common business logic, shared between our various apps
- number-incrementer-android: The android version of our app
- number-incrementer-web: The web (google web toolkit) version of our app
- number-incrementer-ios: The iOS version of our app

Create a new Eclipse Java project via File > New Java Project and name it “number-incrementer-shared”. Make sure to set the Java version to Java 6, or else you’ll get confusing ClassDefNotFound errors under Android. Once it’s created, you should already have a source folder called src/. Add another one called test/ to hold tests. In addition, add a folder called lib/ to hold jars.
Copy the following jars to lib/ and then add them to your build path:
- awaitility.jar
- cglib-nodep.jar
- firebase-client-jvm.jar
- hamcrest-core.jar
- hamcrest-library.jar
- objenesis.jar
- shared-test-case.jar
In addition, you need to add JUnit to the project. Go to Build Path > Add Library and add JUnit 4 to the project. Finally, in order to allow the hamcrest jars to override Eclipse, you must go to Build Path > Order and make sure JUnit is at the bottom. If you don’t do this, you will get a SecurityException when you try and use JUnit.
In the src/ directory, create a new java package called “com.example.incrementer.shared”. Add a new java class called NumberIncrementer to this package.
The complete source code for NumberIncrementer is available here. The general idea is that we expose a method called increment() which performs the increment and which takes a callback to be called with the number of times increment has been called. The callback is represented by a Procedure1 object instead of a custom interface. This interface -- borrowed from Eclipse’s xtext project -- will be easier to work with in Objective C later on thanks to CallbackWrappers.h from j2objc-utils. Note also that we accept a Firebase reference in the constructor - this will be a common pattern, allowing each client to obtain a Firebase reference however it wants (it also facilitates testing).
Shared project structure:

We can’t very well have business logic without testing it! Add the “com.example.incrementer.shared” package to the test/ directory as well and add a new class called NumberIncrementerTest to it, extended from SharedTestCase. The source code for NumberIncrementerTest is here. We override sharedSetUp() and create a new Firebase reference. We populate this Firebase reference with an initial value of 42 and then invoke done.run() in the completion callback to signal we are done initializing our test.
Our actual test is testIncrementNumber(). We wrap the test body in beginAsyncTestBlock() and endAsyncTestBlock() to make the test operate asynchronously, and then we invoke our increment() method and assert that we see that the value has been increased to 43. We then invoke finished() to indicate that the asynchronous test has completed.
If you run this test via Run As > JUnit test, it should pass. You can also go to incrementer-test.firebaseio-demo.com and watch the values while the test executes - you should be able to see the value being incremented in real time.

Create a new project via File > New > Android Application Project in Eclipse. Name the application NumberIncrementer, make the project name “number-incrementer-android”, and use “com.example.incrementer.android” as the package name. The default settings will work for the rest of the screens in the create flow, getting us a skeleton of an Android application based on a blank activity named MainActivity.
The first thing we need to do is set up our Android build path properly. Go to the build path settings and add number-incrementer-shared as a project dependency of number-incrementer-android. In addition, you must mark the shared project as Exported on the Order and Export screen so that it’s available to the app. You should also add firebase-client-jvm-LATEST.jar to your application’s libs/ directory and then to the project build path as well.
The user interface of our Android application will just be a button that says “Increment!”. Take a look here at the source for an activity_main.xml layout which will accomplish this. The source code for MainActivity (available here) is scarcely more complicated. We make a new NumberIncrementer in onCreate() and invoke increment() when the button is clicked, displaying a Toast with the current number of increments. Finally, you’ll need to add the INTERNET permission to your application, refer to the source of AndroidManifest.xml here.
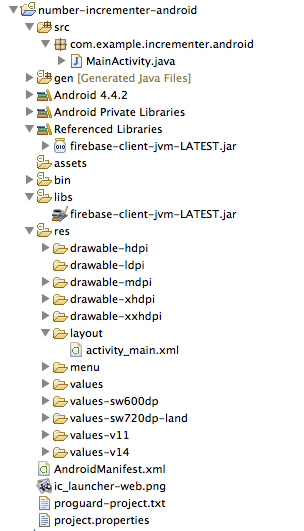
Android project structure:
After making these changes, you should be able to run the application via Run As > Android Application and click the button to see the message.

Create a new project via File > New > Web Application Project named number-incrementer-web with the package name “com.example.incrementer.web”. Uncheck the options to use Google App Engine and to generate project sample code, but leave the option to use Google Web Toolkit checked.
Once again, we need to configure the build path. Add number-incrementer-shared as a project dependency of your newly created GWT project. Copy firebase-gwt.jar into war/WEB-INF/lib and add it to your build path as well.
Use File > New > File to create a new file named NumberIncrementer.gwt.xml, and put this file under src/com/example/incrementer. Modify the file to look like this one. We’re marking the web/ directory as a source path, setting an entry point class named Main (to be created later), and including various other pieces of code we depend on.
We need a few other new files to figure everything properly. First, add an initial HTML file to war/ named Main.html as shown here. You’ll also need to list this as a “welcome file” in war/WEB_INF/web.xml (see here).
We also want to make the files in number-incrementer-shared available for Javascript translation. Add a file to src/com/example/incrementer in the number-incrementer-shared project named Shared.gwt.xml that indicates the shared/ directory is translatable, like this.
Finally, add a new class to com.example.incrementer.web named Main which implements the EntryPoint interface. The source code for Main is here. In the onModuleLoad() method, we inject the javascript for Firebase. It is not sufficient to load firebase.js from a <script> tag in Main.html, the library must be injected into the GWT iFrame via a ScriptInjector. Once the Firebase javascript has loaded, we create our user interface. It’s very similar to what we did in Android, just a simple button that pops up an alert when you click it.
Web project structure:

At this point, you should be able to run the web application via Run As > Web Application and see the result at a URL like http://127.0.0.1:8888/Main.html?gwt.codesvr=127.0.0.1:9997. Note that the UI might take a while to appear on the first run.

Open Xcode 5 and create a new project via File > New > Project. Use the Single View Application template. Name the product NumberIncrementer and use “com.example.incrementer” as the company identifier. I also tend to rename the resulting directory to someting like "number-incrementer-ios" for consistency, but this is not required.
Take firebase-objc.zip and extract it to your local file system. In Xcode, right click on the project and select “Add files to NumberIncrementer” and locate the extracted files. Select the firebase-objc/ directory and check “copy items into destination group’s folder” and “create groups for any added folders”.
Go to “Add files to NumberIncrementer” again and locate number-incrementer-shared on the file system. Select the src/ folder, and this time, you should uncheck “copy items into destination group’s folder” so it creates a reference to our files.
You also need to install j2objc. Go to github.com/google/j2objc/releases and download the latest release of j2objc.zip. Put the contents of this zip file at /usr/local/j2objc (you can use a different directory if you change the path in the instructions below). Now open up the Build Settings for the NumberIncrementer Xcode project and make the following changes:
- Other Linker Flags: -L/usr/local/j2objc/lib -ljre_emul -lz -ObjC
- Header Search Paths: add /usr/local/j2objc/include
- Library Search Paths: /usr/local/j2objc/lib
You’ll also need to install Firebase.framework. Grab the latest copy of it from firebase.com and drag a copy into your frameworks folder.
Go to the Build Phases tab for the NumberIncrementer target and look at the “Compile Sources” phase. You should see various .java files listed here such as Firebase.java and NumberIncrementer.java. You are going to need to keep this list up to date whenever you create a new java file in the shared project if you want it to get compiled. Also look at the “Link Binary with Libraries” section. Add the following libraries to be linked:
- Firebase.framework
- libicucore.dylib
- libc++.dylib
- CFNetwork.framework
- Security.framework
- SystemConfiguration.framework
Go to the Build Rules tab for the NumberIncrementer target. Go to Editor > Add Build Rule, and select “Process: Java source files”. Paste the following as the command to run:
/usr/local/j2objc/j2objc --no-package-directories --prefixes
prefixes.properties -use-arc -d ${DERIVED_FILES_DIR} -classpath
${PROJECT_DIR}/j2objc-utils:${PROJECT_DIR}/src
${INPUT_FILE_PATH};
Below this, where it says “Output Files”, put the following two entries:
${DERIVED_FILES_DIR}/${INPUT_FILE_BASE}.m${DERIVED_FILES_DIR}/${INPUT_FILE_BASE}.h
Next, right click on the NumberIncrementer project in the Project Navigator and create a new Empty file. Name the file prefixes.properties, and put the following lines in it:
com.firebase.client: FCcom.example.incrementer.shared: NI
This will help shorten our generated class names a little bit. Now go to the Main_iPhone storyboard and add a button that says “Increment”. Hook up a Touch Up Inside connection from here to a method in ViewController.m named onIncrement.
The complete source code for ViewController.m is available here. We store a reference to the NumberIncrementer class (called NINumberIncrementer in Objective C thanks to our prefixes file) in the ViewController, and we initialize it in viewDidLoad. The important stuff happens in the onIncrement method, though, where we invole our increment method. The ViewController itself implements the NumberIncrementer.Callback interface, so our onIncrementWithLong method gets called, and we show the alert.
iOS Project Structure:

The java compilation process can kind of confuse Xcode because the header files haven’t been generated yet, so you might see errors in ViewController.m Despite that, building and running NumberIncrementer should now work. In the build log, you should see the Java files getting converted to Objective C, and then the resulting Objective C files should get compiled. If everything went well, the app will start up in the simulator.
By definition, this library can only support the common subset of functionality
available between the three Firebase client libraries it wraps. That means that
several methods from the regular Java API are not available. The Java types
that are supported are: List, Map, Long, Double, String, and Boolean. Because
Javascript only has one numeric type, the original type associated with a
number you insert is lost. For simplicity, all numbers are returned as
instances of java.lang.Long if they can be represented as such, otherwise
java.lang.Double is used. The variants of getValue() on DataSnapshot that take
a type literal as an argument are simply implemented as casts - unlike in
firebase.jar, getValue(Integer.class) will not work.
Because of how transactions work in Javascript, the methods on MutableData other than getValue and setValue do not work there. Similarly, because of some omissions in the Objective C API, a few other methods don't work:
Query#getRef()OnDisconnect#cancel()
This isn't an exhaustive list of the things that won't work cross-platform, merely the ones that you're most likely to run into.
You should be able to import a clone of the project as an Eclipse project via Import > Existing Projects into Workspace. You then also need to clone shared test case and import it as a separate Eclipse project, since it's a depedency of the tests for firebase. The tests also require the Google Eclipse plugin to be installed to get the Google Web Toolkit SDK.
The goal of the Java tests is to run the test suite against the actual Firebase java implementation to verify that they're correct. In the Eclipse project, firebase.jar should be first on the build path, so running the tests should just work. There should be a configuration in the run menu called "FirebaseTest - Java" which does this.
The javascript tests are for the GWT implementation. This should also work
automatically, with an entry in the run menu called "FirebaseTest - JS". The
tests don't work in GWT Production Mode, however. I think this is because of
some problems with the setUp method & injecting firebase.js via a
ScriptInjector.
There's also a really simple example GWT application configured in
TestEntryPoint.java. You can run this via Run As > Web Application.
If you import Firebase.xcodeproj into XCode, you should get a project with two
targets. One of the targets is called FirebaseJUnit, and it should run on your
Mac (you need a Mac to run these tests). The Objective C Firebase wrapper
relies on j2objc to convert Java into Objective C code. You need to download
j2objc and extract the zip file to /usr/local/j2objc (I eventually intend to
stop hardcoding this location).
Assuming all goes according to plan, the tests should compile and run. You will get a bunch of "SSLHandshake failed" errors, but you can ignore them (they're just because the tests try and connect to a domain where there's no actual Firebase running). There's also a simple application target that you can run on an iOS simulator.
Unless otherwise noted in a source file, code is released under the terms of the Creative Commons Zero public domain dedication.