- Gustavo Sutter Pessurno de Carvalho - 9763193 - suttergustavo
- Rodrigo Geurgas Zavarizz - 9791080 - rgeurgas
- Victor Henrique de Souza Rodrigues - 9791027 - victorhenrique97
The presentation can be found here
Running the demo
python3 src/demo.py <IMG_PATH>
For more information on what which file does, instructions on how to run the programs and how to install the libraries check here
The aim of this project is to use a machine learning approach to the image upscaling problem. Our goal is to develop a deep neural network capable of generating a higher resolution image given a low resolution sample, a process known as super resolution. Finally, once the method is implemented, we will compare our results with other approaches, such as bilinear and nearest neighbour interpolations.
The CelebA Dataset [1] will be used to train and test our model. Although the dataset contains imagens and attributes information only the image data will be used. There are 202,599 images with dimension 218x178x3 that have already been aligned and cropped.
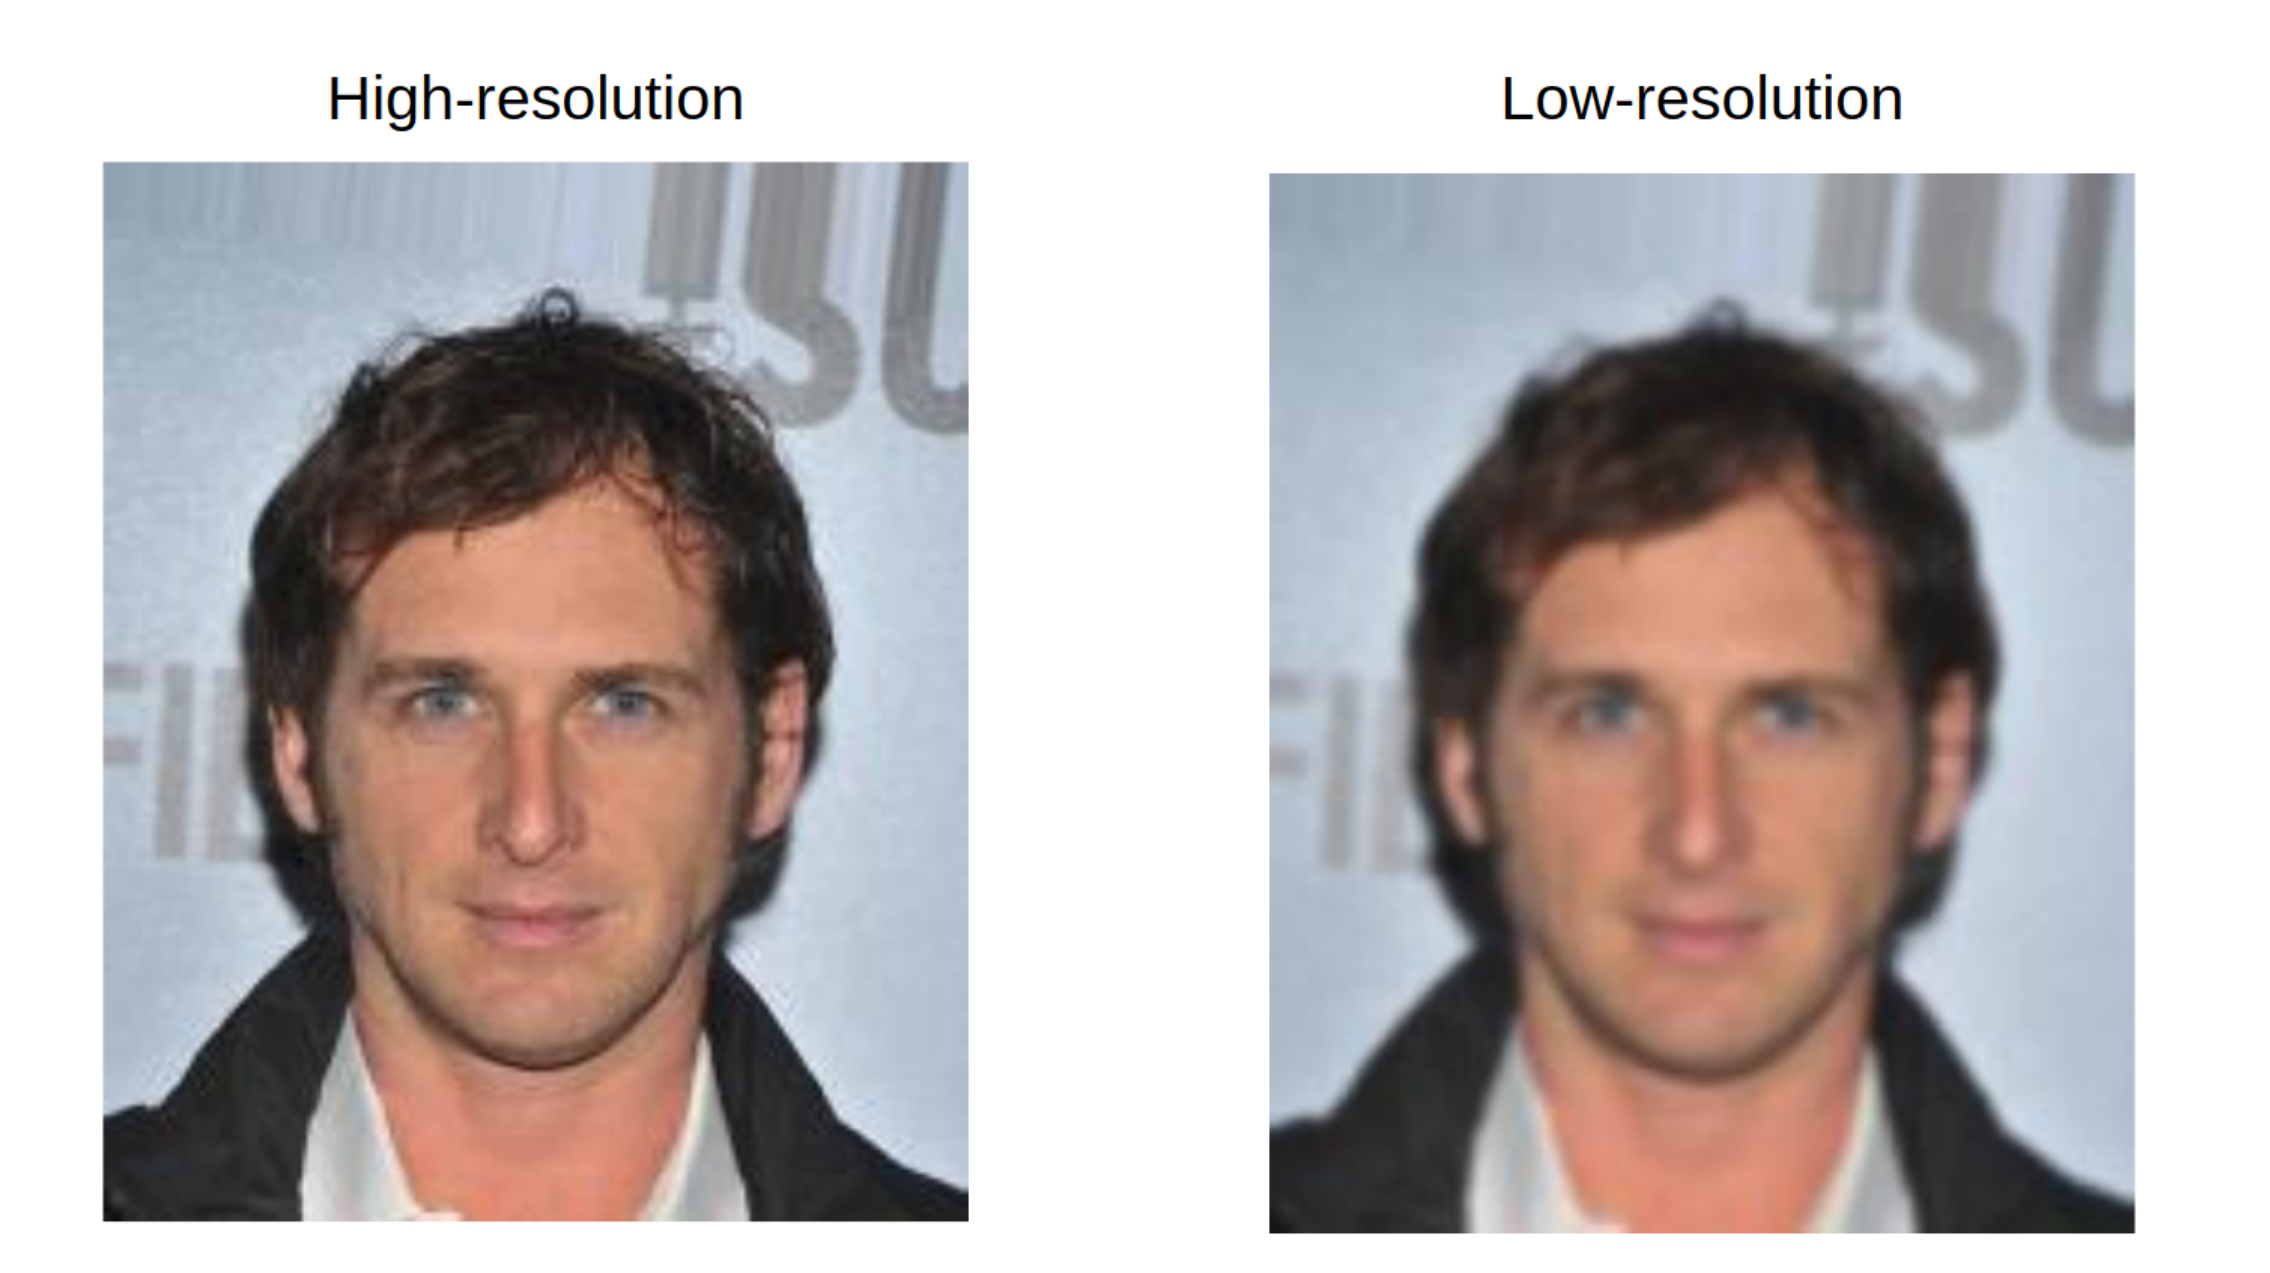
To performe the super resolution task this data is used to generate two datasets: one with high resolution (HR) and the other with low resolution (LR). The LR dataset is obtained by downscaling the original images by a factor of two, while the HR dataset contains the original images.
As mentioned, the goal of this project is to build a convolutional neural network capable of increasing the quality of an image that is given as an input. The approach proposed is end-to-end, that is, the mapping from the LR image to the HR image is done only by the neural network. The only necessary pre-processing is to upscale the LR image to the desired size using an interpolation method.
The following diagram demonstrates how this process works
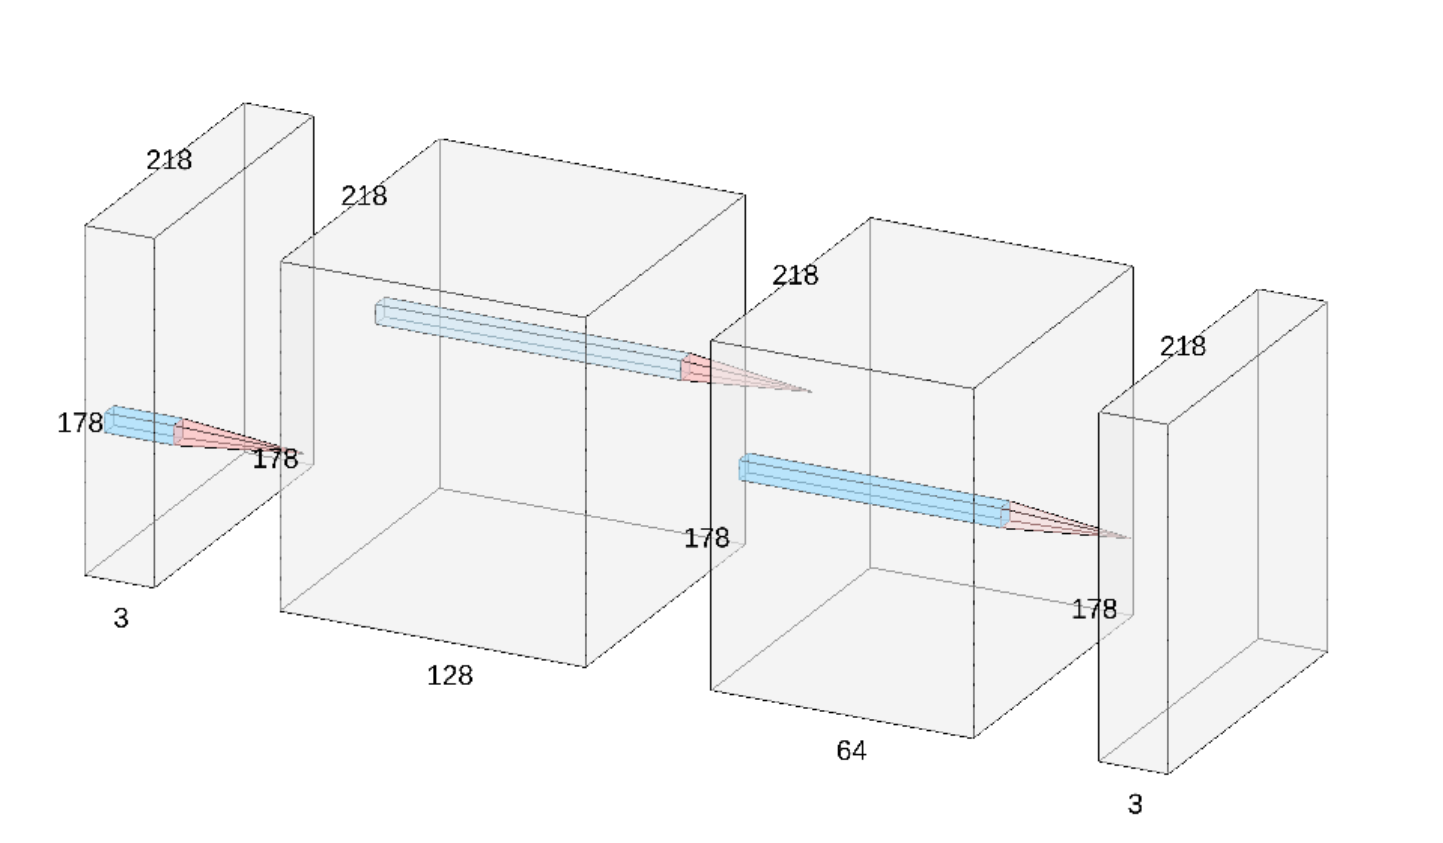
The network architecture used is fairly simple [2], containing only tree convoltutional layers, all with 3 x 3 kernels. The specific dimensios of each layer can be seen in the diagram that follows. The preliminary version did not use padding, however it was added to keep the same width and height from the input of the network to it's output.
The first version was implemented using Keras, aiming to be a test to see if it was possible to perform the task that was proprosed (This code can be found on this notebook). In this stage we did not care about any metrics, just the visual of the generated images.
We have trained the network that was described using only 800 images (and without any data augmentation) for 50 epochs we were able to obtain the following results on the validation set:
As one may notice the results generated by the network tend to be less blurred than the ones produced by the linear interpolation algorithm.
In order to have a more robust implementation th final version was develop using the Pytorch library. With Pytorch the programming the network and it's training was much easier and efficient, since it has a set of classes with different functionalities and it is compatible with GPUs.
The first advantage was using creating a Dataset, a class the is used to dynamically load the images from the disk when they are needed, avoiding the need to load all the dataset on the memory. The Dataset (which is implemented on celeba_dataset.py) takes care of creating the LR image during execution, so there is no need to save a LR copy for every HR image on disk.
Pytorch high level interface for neural network development was also very useful to develop the project in a simple but yet well functional way. Just like other deep learning frameworks it allowed us to easily train our model, save it weights and used the learned parameters later on.
Because of computational constraints the network was trained using only 5000 images for 20 epochs, which may appear to be too small but in fact gives good results. The training of the network consisted on minimizing the mean squared error between the SR image produced by the network and the image used to generate the LR image, that is, the original image. To do so the Adam optimizer with a learning rate of 0.001 was used and converged to as demonstrated on the following graph.
The decrease on the loss happenned quite fast, which might indicate that the learning rate used was to high. However even when smaller learning rates were used the same thing occured, so the hyperparameter was kept the same.
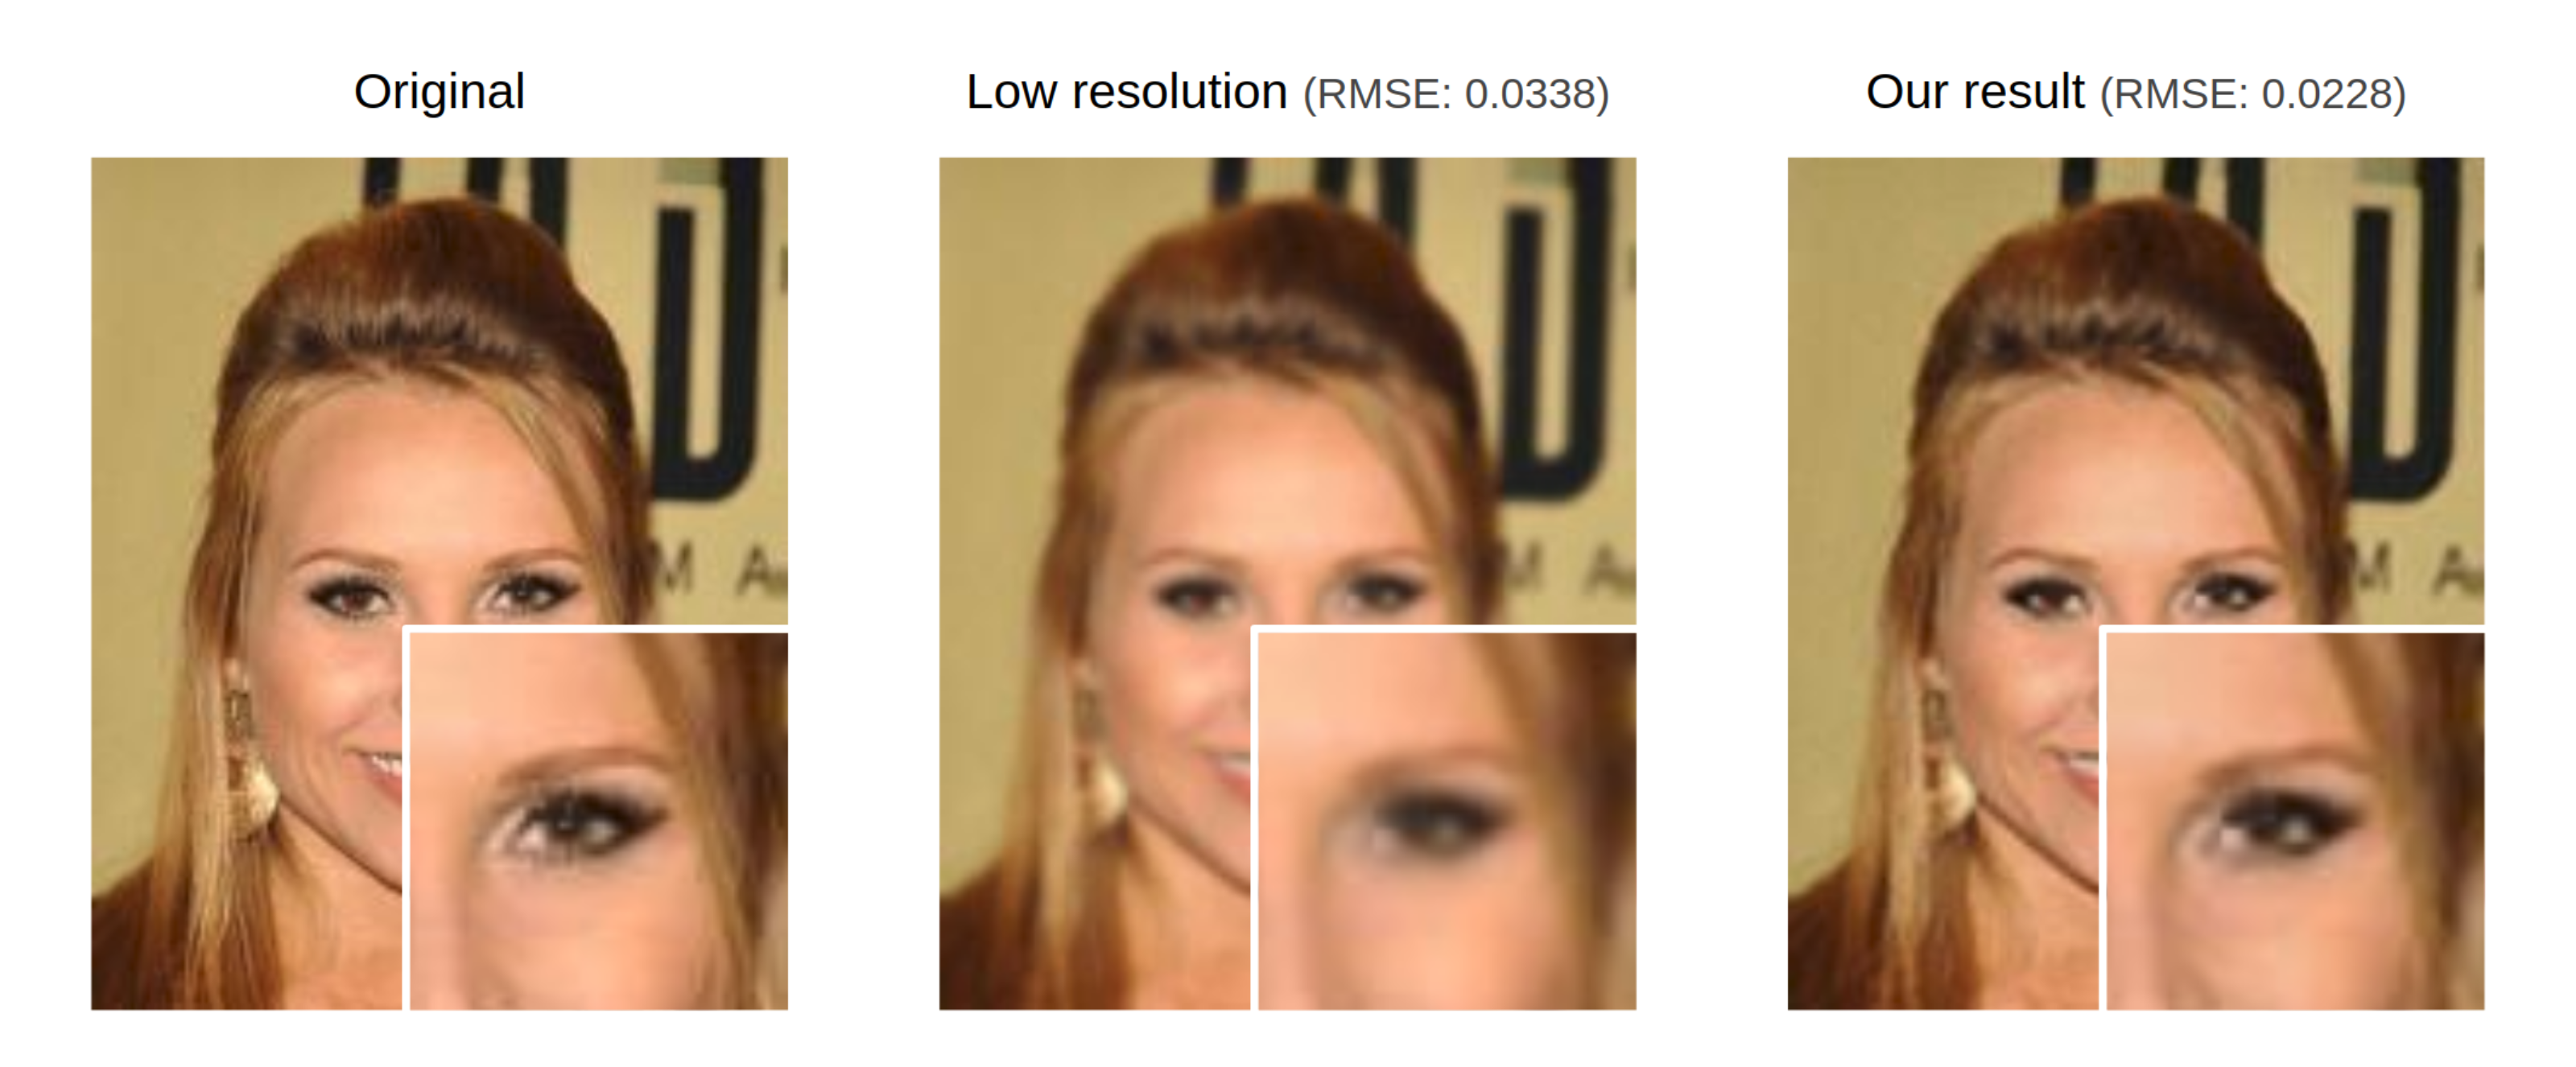
In this section, we will demonstrate the results provided by our model. All examples indicate the RMSE between the original image and between our result and the original image, which is always better in all our tests. For ease of viewing, an area of the image is enlarged so that the details are clearer.
An interesting thing about the network is that once the filters are learned they can be applied to images of any size, not necessarily the dimensions that were using during training. The following image shows exactly that:
Although the model was trained only on face images it is able to perform relatively well on other contexts. The following image demostrates how the algorithm performs on an image of a building, something that it has never seen before.
The reason why it works is because the main things that the network is looking for to perform super-resolution are not eyes, noses and other face attributes, but simple image structures, such as edges and curves. This also explains why a relatively shallow architecture gives a good performance.
(Other results can be found in here)
The results were satisfactory, always improving the result of the LR image giving a lower RMSE. Another great point was the generalization to different contexts, demonstrating that the filters learned by the network were capable of improving the quality of a wide range of images.
To improve the quality of the model it would be good to test different configurations of hyperparameters and network architectures. This task is very time and resource consuming, but for sure would result in a better model.
Finally it would be interest to test how other types of networks such as GANs would perform in this task, given that they do not consider a unique answer, like the MSE used in our approach. That would be benefitial given that more than one solution can be accepted as the HR version of a LR image.
[1] Z. Liu, P. Luo, X. Wang and X. Tang, "Deep Learning Face Attributes in the Wild," 2015 IEEE International Conference on Computer Vision (ICCV), Santiago, 2015, pp. 3730-3738.
[2] C. Dong, C. C. Loy, K. He and X. Tang, "Image Super-Resolution Using Deep Convolutional Networks," in IEEE Transactions on Pattern Analysis and Machine Intelligence, vol. 38, no. 2, pp. 295-307, 1 Feb. 2016.


