
This code repository, Bitcoin-Api-Full-Stack, is a JavaScript/NodeJS full stack Bitcoin API (see below for info about what APIs are), exchange, and game platform (the exchange and game platform are still under construction). The term "full stack" in the title means that all the instructions and all the components are in this repository so you can build your own Bitcoin-Api system from scratch and you can build every aspect of it from computer server to phone webapp. This system lets people have their own versions of APIs, exchanges, and game platforms instead of just having to use other companies', if they're okay with holding custody of their own Bitcoin. It's also designed in way so that even an individual can have control over these financial technologies instead of having to need a big team or a company.
About APIs and Bitcoin APIs
APIs allow developers to build technology that connects across the internet in a systematic way using URLs and internet requests from computers to those URLs. An example of this is sending a Tweet on Twitter from your phone, which is the computer in this case. Your phone makes an internet request to the Twitter API URL which is then responsible for creating Tweets.
What this Bitcoin API allows you to do is to easily send and receive Bitcoin using simple URLs. This lets developers program Bitcoin functionality into whatever technology they want, such as exchanges, wallet apps, IoT devices, or anything connected to the internet.
In this Bitcoin-Api system, the Bitcoin itself is stored on a Bitcoin node (Bitcoin node set up instructions provided) and the API connects to the Bitcoin node. Overall, your apps and your tech connect to the API and then the API connects to the Bitcoin node which is on your computer server.
The Bitcoin node and the API are considered to be the "backend" of the "stack" in the "full stack" concept. When implemented, the backend code and the associated data is on your computer servers and is not publicly accessible by users.
The "frontend" exchange and game webapp set up instructions and code are provided. The webapp connects to your built Bitcoin-Api backend. The webapp code is a processed version of the frontend code which is sent to users' devices which implies the webapp code is publicly accessible. Frontend webapp users retrieve data that they're authorized to access, such as their Bitcoin balance data, from the backend.
It's important to note that even though all the code in this repository is publicly accessible, an implementation of this system is still secure because you still need the system's backend access keys to operate it.
The Bitcoin-Api system uses a large amount of cloud services provided by Amazon Web Services (AWS). Bitcoin-Api is not sponsored by AWS although AWS is good because:
- They have very high quality and competitively priced cloud services
- You have full responsibility for and ownership of your data 💯🤠
☁️Additional cloud credits☁️
- Satoshi Nakamoto for Bitcoin
- Bitcoin.org for Bitcoin Core
- Google for email services, YouTube, and other Google services
- Linus Torvalds for Linux
- RedisLabs for Redis database
- pm2 for NodeJS process management
- Stack Overflow for tech guidance and ideas
- Apple for MacOS, iOS, and their devices
- MongoDB for MongoDB database
- Facebook for React and social media services
- Twitter for social media services
- Reddit for social media services
- Xapo for Bitcoin and fiat money services
- Mircosoft for Github, NPM, LinkedIn, and Microsoft Windows 95
- Open Source Developers - you're the best!!!🤗💜
Promote your material right here in this "Sponsored Content" section in this README.md file. More info on this in the Sponsored Content Info section below.
- the core API documentation and code is ready to be used although the exchange API documentation and code still needs to be updated
-
API fee data naming updates: updating fee data keys and calculations, choosing more descriptive fee data key names, and more configurable fee calculations
-
Exchange code updates: getting exchange code ready for production, cleaning up code, and adding necessary features like improved email handling logic including handling bounces and complaints
Visit the Development branch on GitHub and keep up to date with the latest Bitcoin-Api-Full-Stack documentation and code🚧👷♀️👷♂️🏗😃!
- Can configure the lowest possible fees (blockchain fee only on withdraw)
- Quick to set up
- Extremely scalable
- Highly economical operational fees
- Very robust security
- About
- Bitcoin Node Servers
- How to Set Up the Backend
- How to Deploy Backend
- How to Deploy API
- How to Deploy Frontend
The repo bitcoin-api-full-stack is a repo for anybody, even an individual,
to have their own Bitcoin management technology. Instead of needing an
entire group of individuals or a company to manage a Bitcoin wallet app,
exchange, or game platform, this repo aims to give the user complete individual control over
these powerful financial technologies.
Github Stars⭐️⭐️⭐️⭐️⭐️ are always super-greatly appreciated, thank you very much!😁✌️

Briefly put: The NodeJS services interact with the Bitcoin node which in turn interacts with the Bitcoin blockchain. Overall, this means the NodeJS services gather data from the Bitcoin blockchain. The NodeJS services then perform the required actions on the Bitcoin-Api database. For example the fee data worker gets an estimate for the fee from the Bitcoin blockchain and updates the Bitcoin-Api database with that fee. That fee estimate can then be retrieved publicly using the https://bitcoin-api.io/v3/fee-data endpoint.
-
Have a Mac or Linux server, this can be a computer in your home, or in the cloud (e.g. an EC2 instance). The Linux server must meet Bitcoin Core's computer requirements.
-
Have access to that server. This means you should be able to access a command-line or terminal in that server using ssh. You can also manually install the backend on a computer locally without ssh, that computer just needs to stay running and connected to the internet for the services to remain active.
-
Have a Redis service that you can access using a URL. Redis Labs provides great Redis services.
The backend node server is responsible for updating the database. The backend node server has three main functions:
-
Update the fee data
-
Update the bitcoin deposit data, this includes user balance data
-
Perform bitcoin withdraws
About multiple servers: You can set up multiple backend servers if you have lots and lots of addresses although you only need one backend server, even if you have a few hundred thousand addresses. (This hasn't been tested yet although this is according to what Andreas Antonopoulos said. It should be taken into consideration that this claim was made in 2019 and that the tech is always improving.)
This section assumes you have the requirements listed above.
About
Install and start Bitcoin Core on the server. This can take a while because the livenet blockchain takes a decent amount of time to transfer to your server through the internet because of its size which is currently over 250GB. The testnet blockchain downloads much faster because it's currently only around 25GB.
Steps
a) First, in the CLI of your Linux server, download the most recent Bitcoin Core code with the following command:
wget https://bitcoin.org/bin/bitcoin-core-0.20.0/bitcoin-0.20.0-x86_64-linux-gnu.tar.gz
(you can check the Official Bitcoin Core Download Page to make sure this is the most recent Linux download link)
b) Extract the computer-usable code from the downloaded Bitcoin Core code:
tar xzf bitcoin-0.20.0-x86_64-linux-gnu.tar.gz
c) Run this command to set up the Bitcoin Core Bitcoin node code on your Linux server:
sudo install -m 0755 -o root -g root -t /usr/local/bin bitcoin-0.20.0/bin/*
d) Start your Bitcoin node:
Start your bitcoin in staging mode (testnet):
bitcoind -testnet -daemon
OR
Start your bitcoin in production mode (livenet):
bitcoind -daemon
This should start up your Bitcoin node and trigger the blockchain to begin downloading onto your Linux server.
You can check to see that your Bitcoin node is running and how many blocks have currently been downloaded using the following command:
in staging
bitcoin-cli -testnet getblockcount
OR
in production
bitcoin-cli getblockcount
The resulting number of this bitcoin-cli command can be compared with the total number of blocks in the Bitcoin blockchain, also called the block height:
Warning: if the getblockcount command stops working, it could mean your Bitcoin node crashed due to insufficient memory on your Linux computer.
For reference: here's a list of commands you can use on your bitcoin node: Chain Query list of commands for bitcoin-cli.
When your node has finished downloading and is up to date with the Bitcoin blockchain, the number returned from getblockcount will be equal to the actual blockchain block height. In the meantime, you can move forwards to the next steps.
About
Next, NodeJS needs to be installed on your Linux server. NodeJS is used for the modules that interact with the Bitcoin node.
Steps
a) Install Git on your Linux server (Homebrew requires Git to be installed):
sudo apt install git
OR
sudo yum install git
b) Install and Configure Homebrew
First run:
/bin/bash -c "$(curl -fsSL https://raw.githubusercontent.com/Homebrew/install/master/install.sh)"
Then run:
sudo apt-get install build-essential
OR
sudo yum groupinstall 'Development Tools'
Then run:
echo 'eval $(/home/linuxbrew/.linuxbrew/bin/brew shellenv)' >> /home/<PUT COMPUTER USER NAME HERE (e.g. ec2-user)>/.bash_profile
eval $(/home/linuxbrew/.linuxbrew/bin/brew shellenv)
Homebrew also recommends running these commands:
brew install gcc
export LDFLAGS="-L/home/linuxbrew/.linuxbrew/opt/isl@0.18/lib"
export CPPFLAGS="-I/home/linuxbrew/.linuxbrew/opt/isl@0.18/include"
export PKG_CONFIG_PATH="/home/linuxbrew/.linuxbrew/opt/isl@0.18/lib/pkgconfig"
c) Install NodeJS and NPM with Homebrew
Run the following commands:
brew install node@12
echo 'export PATH="/home/linuxbrew/.linuxbrew/opt/node@12/bin:$PATH"' >> /home/<PUT COMPUTER USER NAME HERE (e.g. ec2-user)>/.bash_profile
export LDFLAGS="-L/home/linuxbrew/.linuxbrew/opt/node@12/lib"
export CPPFLAGS="-I/home/linuxbrew/.linuxbrew/opt/node@12/include"
Try typing in node in your CLI and see if your CLI turns into a NodeJS REPL interface. If not, try reconnecting to your Linux server. It's possible that will trigger NodeJS to be activated.
d) Install pm2 Globally
To install pm2 globally, run the following npm command:
npm install pm2@latest -g
Next, install pm2-logrotate with the following pm2 command:
pm2 install pm2-logrotate
About
MongoDB is used locally on your Bitcoin-Api Bitcoin node server for caching. It prevents unnecessary non local server database writes to the main cloud database when updating addresses and balances.
These instructions will go through setting up MongoDB on an Amazon Linux server. If your machine is not an Amazon Linux, you can find the appropriate instructions here in the official MongoDB Linux installation instructions.
Steps
a) Set Up Linux Server for MongoDB
Add the following as a file at this location, /etc/yum.repos.d/mongodb-org-4.2.repo, on your Linux server:
[mongodb-org-4.2]
name=MongoDB Repository
baseurl=https://repo.mongodb.org/yum/amazon/2/mongodb-org/4.2/x86_64/
gpgcheck=1
enabled=1
gpgkey=https://www.mongodb.org/static/pgp/server-4.2.asc
This file can be added using the
touchandnanoCLI commands. You may need to usesudoin front of those commands for admin access.
b) Install and Start mongod MongoDB Base Process
Install MongoDB with this CLI command:
sudo yum install -y mongodb-org
Start the mongod base process:
sudo systemctl start mongod
You can verify that the mongod base processes has started successfully with:
sudo systemctl status mongod
About
This section deals with set up for deployment to a remote Linux server. The deployment method used is called Giraffe Lick Leaf (GLL). The way GLL deployment works is you input a deploy command on your home computer that specifies a NodeJS service for the Bitcoin node. The deploy command triggers your home computer to send the most recent code for the specified NodeJS service to the remote Linux server. The Linux server accepts and installs the NodeJS service if it doesn't already exist, or it updates the existing service.
This section goes through how to set up the Bitcoin-Api Bitcoin node backend for deployment. The main task is to transfer the Tree Deploy🌲🌳 code to the Linux server. The tree deploy code runs on your Linux server and it accepts and install the incoming code sent from your home computer.
Steps
a) Set Up Files and Folders
Set up the appropriate files and folders using the following CLI commands:
touch currentWithdrawReports.txt
mkdir tigerScript
mkdir treeDeploy
mkdir treeDeploy/giraffeDeploy
and in staging:
mkdir treeDeploy/stagingCredentials
mkdir treeDeploy/stagingCredentials/tree
OR
in production:
mkdir treeDeploy/productionCredentials
mkdir treeDeploy/productionCredentials/tree
b) Set Up AWS Resources
This section goes over the AWS resources that are needed to operate the backend.
Here's the AWS IAM Policies that are needed for Bitcoin-Api's backend. The naming for the staging IAM policies is the same except for _staging is appended to the policy name.
AWS IAM Policy Management Console
Next, the AWS IAM Users for Bitcoin-Api's backend need to be set up. The naming for the staging IAM users is the same except for _staging is appended to the user name.
AWS IAM User Management Console
Calzone Sun User
user name: bitcoin_api_calzoneSun
policies: bitcoin_api_user_calzoneSun
Fee Fee User
user name: bitcoin_api_feeFee
policies: bitcoin_api_user_feeFee
Korg User
user name: bitcoin_api_korg
policies: bitcoin_api_user_korg, bitcoin_api_eFunction_addTransactionAndUpdateExchangeUser
TheOmega User
user name: bitcoin_api_theomega
policies: bitcoin_api_user_theomega, bitcoin_api_eFunction_addTransactionAndUpdateExchangeUser
This section describes the required AWS DynamoDB production tables for Bitcoin-Api. The staging tables are the same except for _staging is appended on the table name.
AWS DynamoDB Management Console
| Table Name | Partition Key (type) | Sort Key (type ) |
|---|---|---|
| bitcoin_api_addresses | userId (string) | address (string) |
| bitcoin_api_exchangeEmailDeliveryResults | email (string) | creationDate (number) |
| bitcoin_api_balances | userId (string) | - |
| bitcoin_api_exchangeUsers | userId (string) | - |
| bitcoin_api_loginTokens | exchangeUserId (string) | expiryTime (number) |
| bitcoin_api_metadata | key (string) | - |
| bitcoin_api_transactions | exchangeUserId (string) | transactionId (string) |
| bitcoin_api_users | userId (string) | - |
| bitcoin_api_withdraws | userId (string) | ultraKey (number) |
| Table Name | Index Name | Partition Key (type) | Sort Key (type ) |
|---|---|---|---|
| bitcoin_api_addresses | address-index | address (string) | - |
| bitcoin_api_exchangeUsers | email-index | email (string) | - |
| bitcoin_api_transactions | exchangeUserId-creationDate-index | exchangeUserId (string) | creationDate (number) |
| bitcoin_api_withdraws | state-creationDate-index | state (string) | creationDate (number) |
In the Bitcoin-Api system, some DynamoDB database operations are queued with Dr. Q👨🏿🔬 to prevent conflicting updates. For preciseness, the locking queues will be called Q-Locks👨🏿🔬 in this documentation.
Q-Locks run the operations their locking in series as opposed to running them concurrently in parallel. If an operation is in a Q-Lock and another operation with the same Q-Lock attempts to be performed, the second operation will have to wait until the first operation has finished in its own Q-Lock. A Q-Lock is identified in Bitcoin-Api using a string with the following format {type}:{id}. An example of this would be the Q-Lock used in the POST /withdraws endpoint whose identifier is withdraws:user_id. This endpoint starts the withdraw process for a user attempting to make a withdraw. What having the Q-Lock on this withdraw operation means is that for an individual user, a second withdraw operation can only occur after the first withdraw operation has finished, this prevents double spends.👨🏿🔬
Below lists in detail which operations specifically are in Q-Locks.
Terminology:
add exchange transaction- Adds an exchange transaction entry to the append only DynamoDB table "bitcoin_api_transactions". The balance information for a user is calculated by reviewing and processing all of the entries added for that user.
real deal the withdraw- Refunds the unused Blockchain withdraw fee if the fee estimate is higher than the actual fee.
| Q-Lock👨🏿🔬 | Component | Actions |
|---|---|---|
| withdraws:user_id | POST/withdraws |
|
| withdraws:user_id | korg |
|
| balances:user_id | POST/withdraws |
|
| balances:user_id | korg |
|
| balances:user_id | theomega |
|
| addresses:user_id | POST/addresses |
|
| users:user_id | POST/addresses |
|
| users:user_id | PUT/tokens |
|
| Q-Lock👨🏿🔬 | Component | Actions |
|---|---|---|
| exchangeUsers:email | POST/verify-user |
|
| exchangeUsers:exchangeUserId | POST/login |
|
| exchangeUsers:exchangeUserId | DELETE/exchange-users/:exchangeUserId |
|
| exchangeUsers:exchangeUserId | theomega |
|
| exchangeUsers:exchangeUserId | POST/withdraws |
|
| exchangeUsers:exchangeUserId | korg |
|
| exchangeUsers:exchangeUserId | POST/exchanges |
|
| exchangeUsers:exchangeUserId | POST/dreams |
|
| vanguard_withdraws:exchangeUserId | korg |
|
| Key | Type | Value |
|---|---|---|
| Q | stream - max length 300000 | all Dr. Q👨🏿🔬 operations |
| ipAddressRateLimiterQueueId | stream - max length 200000 | rate limit by ip address (per endpoint per ip address) |
| advancedCodeRateLimiterQueueId | stream - max length 200000 | rate limit by advanced code (per endpoint per advanced code) |
| bankStatusQueueId | stream - max length 2000 | The NodeJS services periodically send requests to this queue to indicate whether they're active or not. This is used by the API to determine if the entire Bitcoin-Api system is active or not. If the system is not active, all the API endpoints will respond with an error indicating the service is currently unavailable. |
| cacheOnAndOffStatus | stream - max length 1000 | cache for on and off status of API, you can edit a database value to switch the entire API off or back on |
| zarbonDeploy | stream - max length 1000 | Giraffe Lick Leaf (GLL) deploy queue |
| unusedAddressData | list of encoded JSON objects | contains unused address data, this data including the address itself is assigned to users (equivalently Bitcoin-Api tokens) when they make requests to the POST - /addresses endpoint |
This section goes over how to set up the required AWS S3 production bucket for Bitcoin-Api. The staging bucket is the same except for _staging is appended onto the bucket name (recommended for simplicity, although it's not necessary and the S3 staging bucket can have a completely different name if wanted).
Steps to Set Up Bitcoin-Api S3 Bucket (Staging or Production)
-
Create a bucket in S3
-
Create a folder on the root level of that bucket and call it
qr_codes. This is the folder where the Bitcoin address QR code images are stored.
c) Set Up Backend .env Environment Variable Files
The following environment files need to be created and set up:
Calzone Sun
.env path: /1-backend/<stagingCredentials OR productionCredentials>/calzoneSun/.env
.env Template: Calzone Sun .env Template File
Fee Fee
.env path: /1-backend/<stagingCredentials OR productionCredentials>/FeeFee/.env
.env Template: Fee Fee .env Template File
Giraffe
.env path: /1-backend/<stagingCredentials OR productionCredentials>/giraffe/.env
.env Template: Giraffe .env Template File
Korg
.env path: /1-backend/<stagingCredentials OR productionCredentials>/korg/.env
.env Template: Korg .env Template File
The Omega
.env path: /1-backend/<stagingCredentials OR productionCredentials>/theomega/.env
.env Template: The Omega .env Template File
Tree
.env path: /1-backend/<stagingCredentials OR productionCredentials>/tree/.env
.env Template: Tree .env Template File
d) Send and Start Initial NodeJS Services Modules
For this step, you will manually send and start up the NodeJS service modules (a.k.a. "The Tigers"). This is only necessary for the initial setup and after this the Giraffe Lick Leaf (GLL) deployment can be used for instant deploys with a single simple command.
For this command you will need to create a /infrastructure/scripts/1-backend/setUpTigers.sh pre-gitignored set up command file using the provided /infrastructure/scripts/1-backend/setUpTigers.template.sh template file.
A chart is provided showing how to replace the template placeholder values in detail:
| value to update | meaning | example |
|---|---|---|
| mode | environment | either staging or production |
| pemPath | path on your home computer to your Linux server's .pem access key file | /Users/user-name/user-files/super-secret-path/linux-server-access-file.pem |
| sourceRepoPath | the path on your home computer to where your bitcoin-api-full-stack repo is located (this repo!😎) |
/Users/user-name/my-code-folder/bitcoin-api-full-stack |
| destinationUserName | the user name you use to access your Linux server | ec2-user |
| destinationUrl | the URL of your Linux server | ec2-instance-name.ec2-instance-region.compute.amazonaws.com |
| destinationHomePath | the home path on your Linux server for your Linux user | /home/ec2-user |
After the values have been replaced, run the /infrastructure/scripts/1-backend/setUpTigers.sh command to transport the NodeJS service modules from your home computer to your Linux server.
In the /infrastructure/scripts/1-backend folder in your CLI, run:
./setUpTigers.sh
note: you may need to run
chmod 777 ./setUpTigers.shfirst before running the set up script
After the modules have been transported to your Linux server, it's time to start them up!
Calzone Sun (manually triggered)
This NodeJS service adds unused addresses to the system. Run the following commands in the /[Linux user home path]/tigerScript/calzoneSun path on your Linux server:
If not already, install the Calzone Sun node modules with:
npm install
Then, to add new addresses to your Bitcoin-Api system, you can run the following command:
node AddUnusedAddress [number of addresses to add, defaults to 1]
or in production:
node AddUnusedAddress.js [number of addresses to add, defaults to 1] --mode=production
Adding an address to your Bitcoin-Api system will look like this:

Fee Fee (runs in infinite loop)
This NodeJS service updates your Bitcoin-Api system's fee data which includes the fee itself in terms of how much the user pays on Bitcoin withdraw. This service is managed by pm2. To set up the NodeJS fee data service, in the /[Linux user home path]/tigerScript/feeFee path on your Linux server, first install the node modules:
npm install
Then, run the following command to start up the NodeJS fee data service:
pm2 start UpdateFeeDataWorker.js
or in production:
pm2 start UpdateFeeDataWorker.js -- --mode=production
You can also test the service without pm2 using:
node UpdateFeeDataWorker
or:
node UpdateFeeDataWorker --mode=production
After the main function finishes, it starts again after 10 seconds to keep the fee up to date in your Bitcoin-Api system.
When the main function has finished, it should look like this:

To watch your service's logs, first use this pm2 command:
pm2 list
and see which is the number associated with the UpdateFeeDataWorker.js process, in this case. Running this command also provides other useful data associated with your pm2 processes.
Next, to view the fee data worker logs in realtime, run:
pm2 logs [the number of your NodeJS service's process]
You can optionally sign up and log in to pm2's web services and see your NodeJS service's logs in your browser, in realtime, using the pm2 webapp.
This pm2 command can also be used to monitor your fee data service and all your other pm2 services:
pm2 monit
Important Note: In the file
/1-backend/feeFee/updateFee.js, you can adjust the fee levels using thegetFeeDatafunction. As a result of the fast seamless Giraffe Lick Leaf deployments, it's possible to do fast changes of what the fee is!! At the backend level... wow!!!😲🤠🧐👁
Errors: If the service stops working or if you see any errors, particularly as soon as you first run the service, it could be possible there's a misconfiguration. It's also possible there could be a network, a blockchain, or a cloud service provider error. The logs will provide details about the cause of any error that occurs.
TODO: update the code and the documentation related to the fee data 🚧👷♀️👷♂️🏗
This updates the AWS DynamoDB bitcoin_api_metadata_staging or bitcoin_api_metadata table with the new fee data. The key associated with the fee data in the metadata table is fee. The actual fee the user pays is calculated as follow (below is the new fee specification - currently in development🚧👷♀️👷♂️🏗):
Values stored in the DynamoDB database entry:
amount,
multiplier,
business fee data object of the form:
{
    [custom fee key 1]: {
        amount: x
    },
    [custom fee key 2]: {
        amount: y
    },
    ...
    [custom fee key n]: {
        amount: z
    }
}
where 0 <= x,y,z and x,y,z are real numbers

Calculation:

blockchain fee estimate = (amount x multiplier)
business fee = sum of the "businessFeeData" object's fee amounts

fee estimate to pay = (blockchain fee estimate + business fee)
This is a fee estimate because if the actual blockchain fee needed and used is less than the blockchain fee estimate, any unused blockchain fee from the estimate in the actual Bitcoin node withdraw will get refunded to the user after the Bitcoin node withdraw has finished.
For example, if the blockchain fee estimate is 0.0001 BTC and only 0.00003 BTC is needed for the Bitcoin node withdraw blockchain fee, then 0.00007 BTC will be refunded to the user.
Please consider contributing a portion of the fee you collect towards the environment, thank you very much!🌲🌳🌄
The Omega (runs in infinite loop)
This NodeJS service updates Bitcoin addresses and user balances for Bitcoin deposits to Bitcoin-Api addresses. To set up this pm2 managed NodeJS Bitcoin deposit worker service, in the /[Linux user home path]/tigerScript/theomega path on your Linux server, first install the node modules:
npm install
To run the Bitcoin deposit worker, input the following command:
pm2 start UpdateDepositData.js
or in production:
pm2 start UpdateDepositData.js -- --mode=production
You can also test the service without pm2 using:
node UpdateDepositData
or:
node UpdateDepositData --mode=production
A successful iteration of the Bitcoin deposit worker should look like this:

Korg (runs in infinite loop)
This NodeJS service performs Bitcoin withdraws. To set up this pm2 managed NodeJS withdraw Bitcoin worker service, in the /[Linux user home path]/tigerScript/korg path on your Linux server, first install the node modules:
npm install
To run the withdraw Bitcoin worker, input the following command:
pm2 start WithdrawMoneyDoer.js
or in production:
pm2 start WithdrawMoneyDoer.js -- --mode=production
You can also test the service without pm2 using:
node WithdrawMoneyDoer
or:
node WithdrawMoneyDoer --mode=production
When an iteration of the withdraw Bitcoin worker completes, it should look like this:

e) Transfer Tree Deploy🌲🌳 Code
This step explains how to set up the tree deploy code.
To transfer the tree deploy code first you must create a /infrastructure/scripts/1-backend/plantTree.sh file (pre-gitignored). A template file is provided at /infrastructure/scripts/1-backend/plantTree.template.sh.
Refer to the Set Up Tigers Configuration Chart for details on how to configure the required values which are the same for plantTree.sh.
After you've set up your plantTree.sh file, transfer your tree deploy files to your Linux server by running the following command in the /infrastructure/scripts/1-backend folder:
./plantTree.sh
note: you may need to run
chmod 777 ./plantTree.shfirst before running the plant tree script
Now, in your Linux server, go to the /[Linux user home path]/treeDeploy/giraffeDeploy/tree folder and install the node modules for your tree deployment code with:
npm install
You can test that the transfer and set up of your tree deploy code went successfully by running the following command:
node WaterTree
or in production:
node WaterTree --mode=production
It will look like this:
And that's it, your Bitcoin-Api backend Bitcoin node server is now operational and is also ready for ultra-fast Giraffe Lick Leaf deployments! See more on this in the next step.
Now that we've got our Bitcoin-Api backend Bitcoin node server up and running, let's go over how to do a super fast Giraffe Lick Leaf (GLL) deployment to instantly update your backend NodeJS services!
First, in your Linux server at /[Linux user home path]/treeDeploy/giraffeDeploy/tree, run:
node WaterTree
or in production:
node WaterTree --mode=production
This command will start up your tree code acceptor and installer.
Now, on your home computer in one of the /infrastructure/scripts/1-backend/giraffeLickLeaf/feeFee, /infrastructure/scripts/1-backend/giraffeLickLeaf/korg, or /infrastructure/scripts/1-backend/giraffeLickLeaf/theomega folders in this repo, run one of the following commands to do an instant deployment of a NodeJS service:
./deployStaging.sh
or in production:
./deployProduction.sh
This will trigger a GLL deployment to update your NodeJS service, here's an example demo video of what the deployment looks like:
GLL deployment provides continuous integration for the backend NodeJS services that interact with the Bitcoin node on the Linux server. The overall Bitcoin-Api service doesn't need to be shut down or be interrupted.
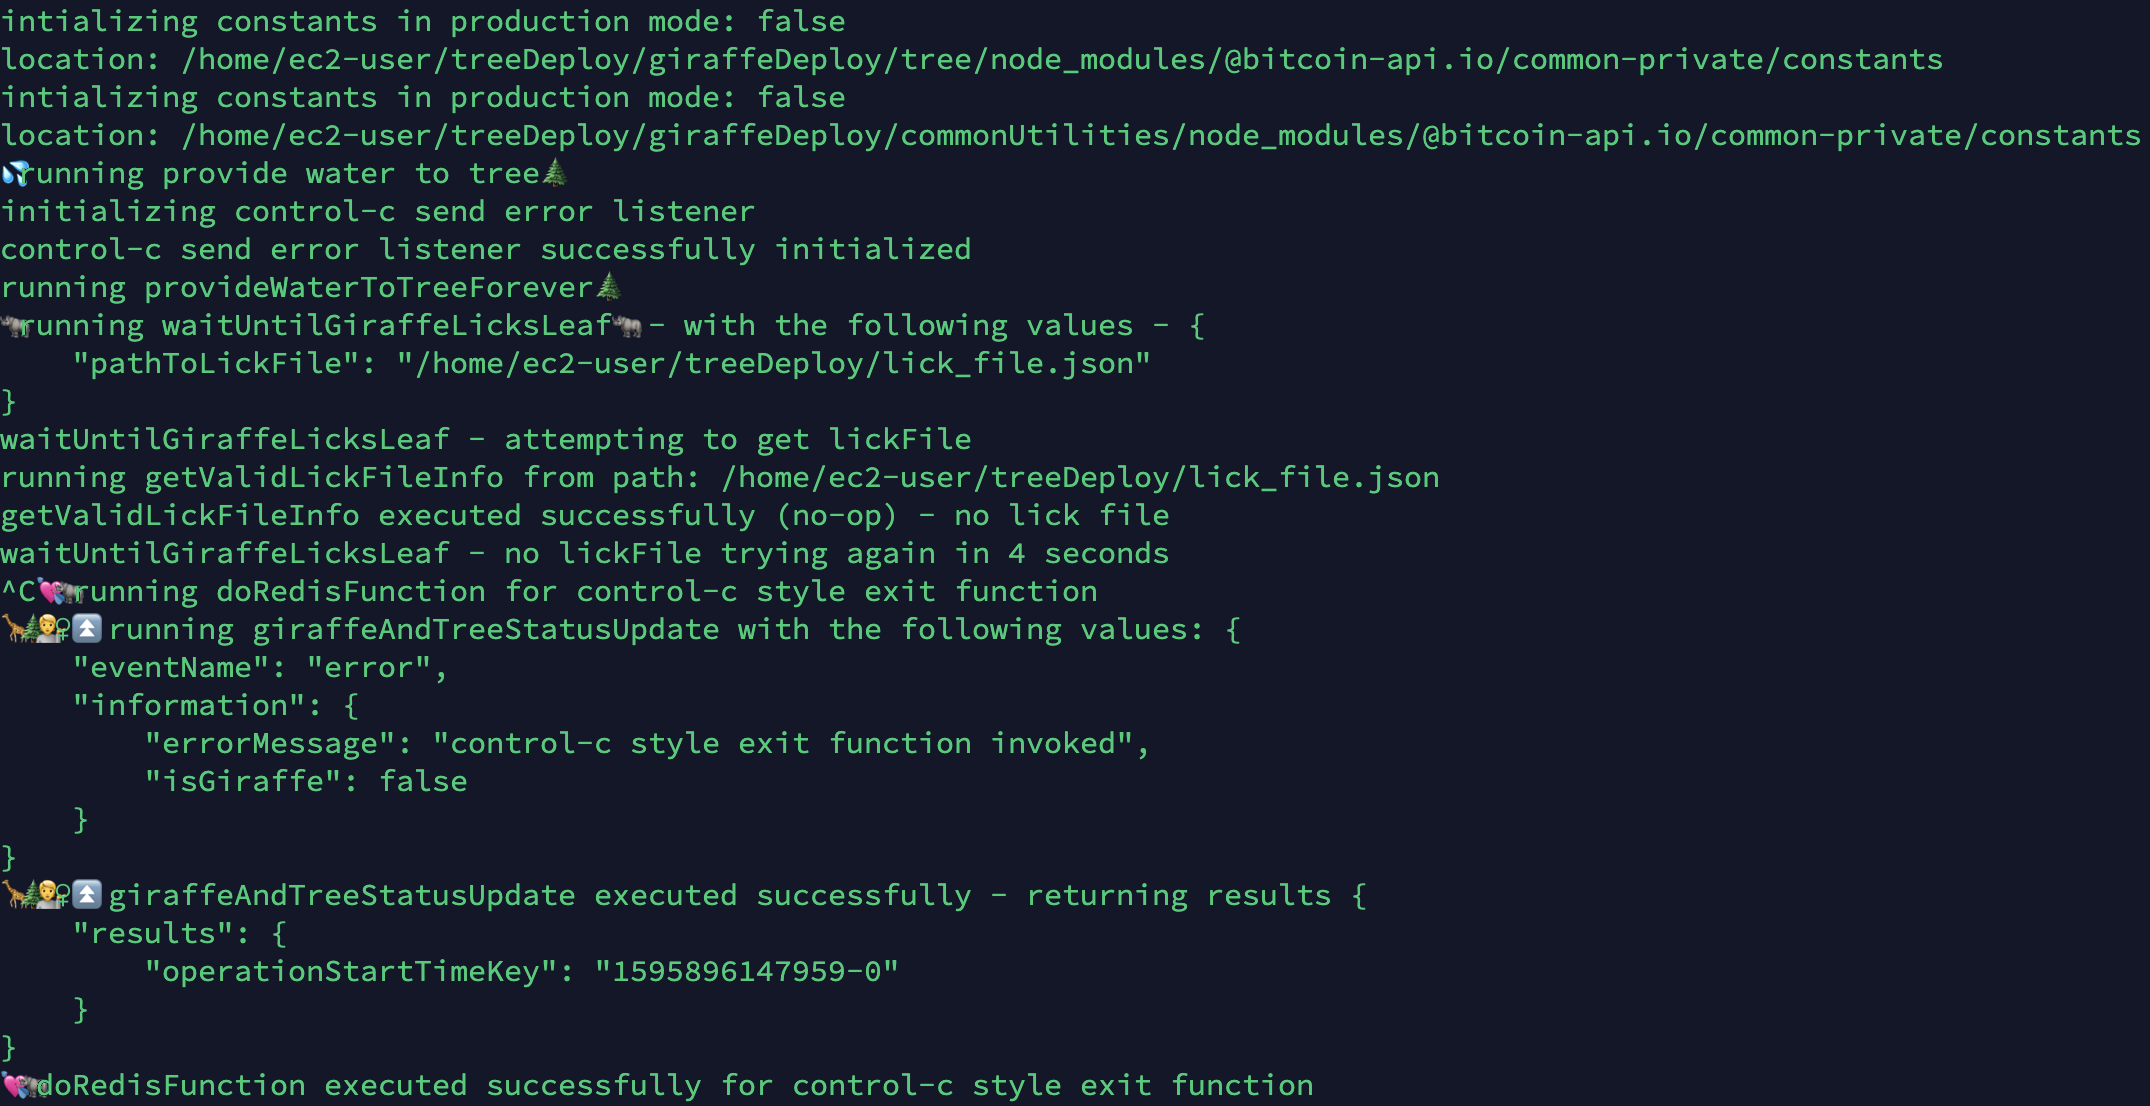
After you've finished your deployments, you can shut down your Water Tree code acceptor and installer process in your Linux server. To do this simply input the keyboard keys control plus c.
The API is serverless, it uses AWS Lambda functions which are accessed through API Gateway. This section goes over how to set the API up.
a) Set Up Environment Variables
Use the API Environment Variable Template File, create an environment variable file and add it to /2-api/credentials/beautifulRiver3/staging/.env in staging, and add it to /2-api/credentials/beautifulRiver3/production/.env in production.
b) Set Up AWS API Resources
This section goes over the AWS resources that necessary to set up and run the Bitcoin-Api API.
Here's the AWS IAM Policies that are needed for Bitcoin-Api's API. The naming for the staging IAM policies is the same except for _staging is appended to the policy name.
AWS IAM Policy Management Console
Built-In AWS Policies Used:
AWSLambdaBasicExecutionRole
Custom AWS Policies to Set Up:
The following AWS IAM Roles need to be created and set up. The naming for the staging IAM roles is the same except for _staging is appended to the policy name.
AWS IAM Role Management Console
Infrastructure: Empty Lambda
name: bitcoin_api_lambda_infrastructure_emptyLambda
policies: AWSLambdaBasicExecutionRole
API: POST - /tokens
name: bitcoin_api_lambda_api_tokens_post
policies: AWSLambdaBasicExecutionRole, bitcoin_api_role_lambda_api_tokens_post
API: GET - /tokens
name: bitcoin_api_lambda_api_tokens_get
policies: AWSLambdaBasicExecutionRole, bitcoin_api_role_lambda_api_tokens_get
API: PUT - /tokens
name: bitcoin_api_lambda_api_tokens_put
policies: AWSLambdaBasicExecutionRole, bitcoin_api_role_lambda_api_tokens_put
API: POST - /addresses
name: bitcoin_api_lambda_api_addresses_post
policies: AWSLambdaBasicExecutionRole, bitcoin_api_role_lambda_api_addresses_post
API: GET - /fee-data
name: bitcoin_api_lambda_api_feeData_get
policies: AWSLambdaBasicExecutionRole, bitcoin_api_role_lambda_api_feeData_get
Service - Cache On and Off Status
name: bitcoin_api_lambda_service_cacheOnAndOffStatus
policies: AWSLambdaBasicExecutionRole, bitcoin_api_role_lambda_service_cacheOnAndOffStatus
API: POST - /withdraws
name: bitcoin_api_lambda_api_withdraws_post
policies: AWSLambdaBasicExecutionRole, bitcoin_api_role_lambda_api_withdraws_post
Exchange API: POST - /exchange-users
name: bitcoin_api_lambda_eApi_eUsers_post
policies: AWSLambdaBasicExecutionRole, bitcoin_api_role_lambda_eApi_eUsers_post
Exchange API: GET - /exchange-users/:exchange-user-id
name: bitcoin_api_lambda_eApi_eUsers_eUserId_get
policies: AWSLambdaBasicExecutionRole, bitcoin_api_eFunction_mongolianBeginningDragonProtection, bitcoin_api_role_lambda_eApi_eUsers_eUserId_get
Exchange API: DELETE - /exchange-users/:exchange-user-id
name: bitcoin_api_lambda_eApi_eUsers_eUserId_delete
policies: AWSLambdaBasicExecutionRole, bitcoin_api_eFunction_mongolianBeginningDragonProtection, bitcoin_api_role_lambda_eApi_eUsers_eUserId_delete
Exchange API: POST - /verify-user
name: bitcoin_api_lambda_eApi_verifyUser_post
policies: AWSLambdaBasicExecutionRole, bitcoin_api_role_lambda_eApi_login_post, bitcoin_api_role_lambda_eApi_verifyUser_post
Exchange API: POST - /login
name: bitcoin_api_lambda_eApi_login_post
policies: AWSLambdaBasicExecutionRole, bitcoin_api_role_lambda_eApi_login_post
Exchange API: POST - /withdraws
name: bitcoin_api_lambda_eApi_withdraws_post
policies: AWSLambdaBasicExecutionRole, bitcoin_api_eFunction_addTransactionAndUpdateExchangeUser, bitcoin_api_eFunction_mongolianBeginningDragonProtection
Exchange API: POST - /logout
name: bitcoin_api_lambda_eApi_logout_post
policies: AWSLambdaBasicExecutionRole, bitcoin_api_eFunction_mongolianBeginningDragonProtection, bitcoin_api_role_lambda_eApi_logout_post
Exchange API: POST - /exchanges
name: bitcoin_api_lambda_eApi_exchanges_post
policies: AWSLambdaBasicExecutionRole, bitcoin_api_eFunction_addTransactionAndUpdateExchangeUser, bitcoin_api_eFunction_mongolianBeginningDragonProtection
Exchange API: POST - /dreams
name: bitcoin_api_lambda_eApi_dreams_post
policies: AWSLambdaBasicExecutionRole, bitcoin_api_eFunction_addTransactionAndUpdateExchangeUser, bitcoin_api_eFunction_mongolianBeginningDragonProtection
Exchange Service - Handle Exchange Email Delivery Results
name: bitcoin_api_lambda_eService_handleExchangeEmailDeliveryResults
policies: AWSLambdaBasicExecutionRole, bitcoin_api_role_lambda_eService_handleExchangeEmailDeliveryResults
To deploy the API, the following AWS IAM User needs to be created and set up. The naming for the staging IAM user is the same except for _staging is appended to the user name.
AWS IAM User Management Console
Deploy API User
user name: bitcoin_api_deployApi
policies: bitcoin_api_user_deployApiFunctions, bitcoin_api_user_deployExchangeFunctions
To deploy the AWS Lambda functions required for the Bitcoin-Api API, in the /infrastructure/scripts/2-api path in this repo, run the following script:
./deployStaging --meta="a"
or in production:
./deployProduction --meta="a"
For reference here are the API deploy command options:
| command name | meaning | possible values |
|---|---|---|
| functions | filter functions by nickname, function names separated by commas | any Lambda function nickname (e.g. POST/tokens,GET/tokens) |
| meta | API(a) or exchange(e) | a, e, or ae (deploy all functions, defaults to ae) |
This will set up the Lambda functions associated with the core API part of your Bitcoin-Api. Next, the set up for the AWS API Gateway API used as your core API will be explained in detail. How this works is you create an HTTP API with API Gateway and you attach your deployed Lambda functions to the HTTP API Gateway. After you set up the core API, you will be able to set up the exchange API.
First go to the AWS API Gateway Console and press "Create API".
For the "Choose an API type" section, choose "Build" for the "HTTP API" type API.
You will next be prompted to input a name for your API. Input the following API name bitcoin_api_core_api_staging or bitcoin_api_core_api and press "Next".
Next, you will be prompted to "Configure routes". Press "Next".
You will then be prompted to "Review and create". Pres "Create".
Next, create six Lambda integrations, and attach them to the appropriate routes:
-
bitcoin_api_api_tokens_post_staging -
bitcoin_api_api_tokens_get_staging -
bitcoin_api_api_tokens_put_staging -
bitcoin_api_api_addresses_post_staging -
bitcoin_api_api_feeData_get_staging -
bitcoin_api_api_withdraws_post_staging
CORS Settings Configuration:
| Setting | Value |
|---|---|
| Access-Control-Allow-Origin | * |
| Access-Control-Allow-Headers | * |
| Access-Control-Allow-Methods | * |
| Access-Control-Expose-Headers | * |
| Access-Control-Max-Age | 0 Seconds |
Next, now your core Bitcoin-Api API is almost active, only a couple more steps.
First, add the following database entry to the bitcoin_api_metadata or the bitcoin_api_metadata_staging DynamoDB table:
{
  "key": "onAndOffSwitch",
  "bitcoinApiIsOn": true,
  "bitcoinApiIsOffReason": "This Bitcoin-Api instance is off because I'm out having fun with my lover!!!🌹💕💘️💖💏💖💘️💕🌹"
}
You can use this database object to control whether the whole API is on or off. Simply set
bitcoinApiIsOn to false to turn the API off.
Now, add the following Lambda function to run periodically using CloudWatch:
bitcoin_api_lambda_service_cacheOnAndOffStatus- every one minute
And now, your Bitcoin-Api core API is active!
(🚧👷♂️👷♀️🏗 the code for this section still needs to be updated)
To finish the rest of the set up which includes setting up the exchange, there's a few more steps.
Set Up Exchange Bitcoin-Api Token
Create a token using the POST - /tokens endpoint on your newly created API. The token and the userId associated with this token both need to be added for your API environment variables EXCHANGE_BITCOIN_API_TESTNET_TOKEN and EXCHANGE_TOKEN_USER_ID.
Deploy Exchange API Lambda Functions
Deploy your Bitcoin-Api exchange API functions with the following command in the /infrastructure/scripts/2-api path in this repo:
./deployStaging --meta="e"
or in production:
./deployProduction --meta="e"
Set Up AWS SES
Set up your AWS SES email. SES is used to send emails for setting up exchange accounts.
First, verify the email that you're going to be using to send the exchange emails from, this can be your exchange's support email. You can also verify the entire domain of the email that you're sending from. Verifying your email can be done on this page in the AWS SES browser console.
Next, create an AWS SNS topic to forward email events to an AWS Lambda function. Call this topic bitcoin_api_exchangeEmailDeliveryResultsForwarder_staging or bitcoin_api_exchangeEmailDeliveryResultsForwarder. On creation, give it a nickname s_ba_email or p_ba_email (this is optional, you can give it another nickname if you want😃🤠). You can create and configure your SNS topics in the AWS SNS browser console.
For the SNS topic you've just created, attach your bitcoin_api_lambda_eService_handleExchangeEmailDeliveryResults_staging or bitcoin_api_lambda_eService_handleExchangeEmailDeliveryResults Lambda function as a subscriber.
Now, back in your AWS SES browser console, go to your email's or your domain's settings. In the settings, go to the notifications section and click "Edit configuration". In the "SNS Topic Configuration" settings, for Bounces, Complaints, and Deliveries choose bitcoin_api_exchangeEmailDeliveryResultsForwarder_staging or bitcoin_api_exchangeEmailDeliveryResultsForwarder. Leave the "Include original headers" checkbox unchecked. Press "Save Config" after.
In your API's .env file, your EXCHANGE_MANAGEMENT_EMAIL environment variable must be set to your verified SES's email used to send emails for your exchange.
Set Up API Gateway HTTP API
For the Bitcoin-Api exchange API, just repeat creating an HTTP API in the same way you created the bitcoin_api_core_api API except using the exchange Lambda functions. You can name it bitcoin_api_exchange_api_staging or bitcoin_api_exchange_api.
And there go!! Your very own Bitcoin-Api API, exchange, and game platform!!!😃🤠🧐😎👁🎉🎊🥳
Here is an example video of a live production API deployment. The website contents for Bitcoin-Api.io are retrieved using an AWS Lambda function:
The frontend code modules are React webapps made with Create React App. They can be deployed in the same way as any other React webapp. The deployment tool currently used for the webapp in the exchange and game platform video demo is AWS Amplify using its monorepo functionality.
PRs and collaborative efforts welcome.👏
Sponsor this page and get sought after marketing towards developers or you can simply get recognition in the Contributors document - Bitcoin-Api GitHub Sponsor Page.
To add your sponsored content to this README.md file in the Sponsored Content section above, use one of the following sponsorship websites:
Here's the available sponsorship material types you can add to this README.md file:
This is the sponsored content, it contains text and it also contains a link. (100 characters max including text-embedded link)

This is the image sponsored content, there's an image above (50px by 50px) and it also contains a link. (100 characters max including text-embedded link)

This is the large image sponsored content, there's a large image (100px by 100px) above and it also contains a link. (100 characters max including text-embedded link)
Show your support for Bitcoin-Api to the world and be part of the development of new open source technologies.

Limited Edition Classic Watchful Eye Tee - 0.005 BTC, shipping included - contact support@bitcoin-api.io to purchase
Coding: Michael Stecky-Efantis - contact for enterprise Bitcoin-Api Bitcoin and crypto services - add crypto to your business!
Art Design: Azubuike Nwadike - contact to hire for excellent quality design and art work