This project has been forked and will be maintained here:
https://github.com/opsdisk/scantron

Scantron is a distributed nmap and masscan scanner comprised of two components. The first is a console node that consists of a web front end used for scheduling scans and storing scan targets and results. The second component is an engine that pulls scan jobs from the console and conducts the actual scanning. A majority of the application's logic is purposely placed on the console to make the engine(s) as "dumb" as possible. All scan target files and scan results reside on the console and are shared through a network file share (NFS) leveraging SSH tunnels. The engines call back to the console periodically using a REST API to check for scan tasks and provide scan status updates. There is also an option to generate nmap scan diffs emailed to you using the pyndiff library.
Checkout the Python Scantron API client for interacting with the Scantron API and driving automated workflows.

Scantron is coded for Python3.6+ exclusively and leverages Django for the web front-end, Django REST Framework as the API endpoint, PostgreSQL as the database, a Redis job queue for tasks, Postfix for email scan alerts, and comes complete with Ubuntu-focused Ansible playbooks for smooth deployments. Scantron has been tested on Ubuntu 18.04 and may be compatible with other operating systems. Scantron's inspiration comes from:

Scantron relies heavily on utilizing SSH port forwards (-R / -L) as an umbilical cord to the engines. Either an SSH
connection from console --> engine or engine --> console is acceptable and may be required depending on different
firewall rules, but tweaking the port forwards and autossh commands will be necessary. If you are unfamiliar with these
concepts, there are some great overviews and tutorials out there:
- https://help.ubuntu.com/community/SSH/OpenSSH/PortForwarding
- https://www.systutorials.com/39648/port-forwarding-using-ssh-tunnel/
- https://www.everythingcli.org/ssh-tunnelling-for-fun-and-profit-autossh/
Scantron is not engineered to be quickly deployed to a server to scan for a few minutes, then torn down and destroyed.
It's better suited for having a set of static scanners (e.g., "internal-scanner", "external-scanner") with a relatively
static set of assets to scan.
A Scantron API client is also available for
creating, retrieving, updating, or deleting sites, scan commands, scans, etc.

-
Engine: If you plan on compiling masscan on an engine, you'll need at least 1024 MB of memory. It fails to build with only 512 MB. If you do not want to build masscan, set
install_masscan_on_enginetoFalseinansible-playbooks/group_vars/all.yml -
Console: 512 MB of memory was the smallest amount successfully tested, however, if you plan on processing large scan files (using the scripts found in
console/scan_results:masscan_json_to_csv.py,nmap_to_csv.pyorxml_to_json_nmap_results.py), you'll need more memory.
This is your local box, preferably Linux. Ansible >= 2.4.0.0 is the minimum version required for utilizing ufw comments.
Clone the project and execute initial_setup.sh.
# Clone scantron project.
git clone https://github.com/rackerlabs/scantron.git
cd scantron
./initial_setup.sh  # Run as non-root user.
Installation requires a general knowledge of Python, pip, and Ansible. Every attempt to make the deployment as simple as possible has been made.
If the console server is actually a RFC1918 IP and not the public IP (because of NAT), the NAT'd RFC1918 IP
(e.g., 10.1.1.2) will have to be added to the ALLOWED_HOSTS in
ansible-playbooks/roles/console/templates/production.py.j2
This is common in AWS and GCP environments.
Per https://github.com/0xtavian: For the Ansible workload to work on IBM Cloud, edit the file /boot/grub/menu.lst
by changing
# groot=LABEL...to
# groot=(hd0)Edit the hosts in this file:
ansible-playbooks/hosts.ini
The recommendation is to deploy the console first.
Edit any variables in ansible-playbooks/group_vars/all.yml before running playbook. Note the time zone variables:
timezone_server- Set this to be the timezone you want the server to be in, usually UTC.timezone_django- Set this to be your local timezone. It makes dealing with dates, times, and scheduling easier.
If you plan on utilizing the same API key across all engines (not recommended, but easier for automated deployments),
change utilize_static_api_token_across_engines to True. This prevents you from having to log into each engine and
update engine_config.json with the corresponding API key. The group_vars/static_api_key will be created by the
the console ansible playbook. The Ansible engine playbook will autofill the engine_config.json.j2 template with the
API key found in group_vars/static_api_key.
WARNING: The engine_config.json.j2 will generate a random scan_engine (e.g., engine-847623), so if you deploy
more than 1 engine, you won't run into complications with engine name collisions. You will, however, need to add create
the user on the console, since the console returns scheduled jobs to the engine based off the engine's name!
Rename console/scantron_secrets.json.empty to console/scantron_secrets.json (should be done for you by
initial_setup.sh)
Update all the values console/scantron_secrets.json if you do not like ones generated using initial_setup.sh. Only
the production values are used.
-
All Scantron Django passwords have a minimum password length of 12.
-
For the "SECRET_KEY", per Django's documentation: The secret key must be a large random value and it must be kept secret.
The scantron operating system user password is not really leveraged and is populated by providing a salted hash of a
random password generated using Python's passlib library. If you want to change the password, you will have to
generate a hash for the desired password and update the temp_user_pass variable in
scantron/ansible-playbooks/roles/add_users/vars/main.yml.
pip3 install passlib

python3 -c "from passlib.hash import sha512_crypt; import getpass; print(sha512_crypt.encrypt(getpass.getpass()))"Ensure you have a SSH key (or username/password) to access the console box, specified by --private-key in the Ansible
command. User must also have password-less sudo privileges.
cd ansible-playbooks

# non-root user with password-less sudo capabilities.
ansible-playbook console.yml -u ubuntu --become --private-key=<engine SSH key>

# root user.
ansible-playbook console.yml -u root --private-key=<engine SSH key>cd into the console directory scantron/console and run the following to change the admin (or whatever user needs
their password changed) user password.
python3 manage.py changepassword adminEdit any variables in these files before running playbook:
ansible-playbooks/group_vars/all.ymlansible-playbooks/roles/engine/vars/main.yml
Ensure you have a SSH key (or username/password) to access the engine box, specified by --private-key in the Ansible
command. The user must also have password-less sudo privileges. If you are creating the boxes on AWS, then the
user is ubuntu for Ubuntu distros and the user already has password-less sudo capabilities. If you need to add
password-less sudo capability to a user, create a /etc/sudoder.d/<USERNAME> file, where <USERNAME> is the actual
user, and populate it with:
<USERNAME> ALL=(ALL) NOPASSWD: ALLSSH-ing in as root will also work for the Ansible deployment, but is not generally recommended.
cd ansible-playbooks

# non-root user with password-less sudo capabilities.
ansible-playbook engine.yml -u ubuntu --become --private-key=<engine SSH key>

# root user.
ansible-playbook engine.yml -u root --private-key=<engine SSH key>A Scantron engine is synonymous with a user.
engines <--> users
Users / engines are added through the webapp, so once a user / engine is added, an API token is automatically generated for that user / engine. The user's / engine's password is not necessary for Scantron to function since all user / engine authentication is done using the API token. The username and password can be used to login to the webapp to test API functionality. More API testing information can be found in the Test Engine API section of this README.
This is done automatically for one engine through Ansible. You may have to add additional lines and update SSH keys for each engine if they are different. These commands are for the console connecting to the engines.
In this example:
- console - 192.168.1.99
- engine1 - 192.168.1.100
- engine2 - 192.168.1.101
# console --> engine 1
su - autossh -s /bin/bash -c 'autossh -M 0 -f -N -o "StrictHostKeyChecking no" -o "ServerAliveInterval 60" \
    -o "ServerAliveCountMax 3" -p 22 -R 4430:127.0.0.1:443 -R 2049:127.0.0.1:2049 \
    -i /home/scantron/console/autossh.key autossh@192.168.1.100'

# console --> engine 2
su - autossh -s /bin/bash -c 'autossh -M 0 -f -N -o "StrictHostKeyChecking no" -o "ServerAliveInterval 60" \
    -o "ServerAliveCountMax 3" -p 22 -R 4430:127.0.0.1:443 -R 2049:127.0.0.1:2049 \
    -i /home/scantron/console/autossh.key autossh@192.168.1.101'
If the console cannot SSH to an engine, then the autossh command will be run on the engine and the port forwards will be
local (-L) instead of remote (-R).
# console <-- engine 1
su - autossh -s /bin/bash -c 'autossh -M 0 -f -N -o "StrictHostKeyChecking no" -o "ServerAliveInterval 60" \
    -o "ServerAliveCountMax 3" -p 22 -L 4430:127.0.0.1:443 -L 2049:127.0.0.1:2049 \
-i /home/scantron/console/autossh.key autossh@192.168.1.99'engine_config.json is a configuration file used by engines to provide basic settings and bootstrap communication with
the console. Each engine can have a different configuration file.
The "api_token" will have to be modified on all the engines after deploying the console!
Engine settings:
scan_engine: Name of the engine. This name is also used in the engine's HTTP User-Agent string to help identify
engines calling back in the nginx web logs.
api_token: Used to authenticate engines. Recommend different API Tokens per engine, but the same one could be used.
console_address: Web address of the console. Could be 127.0.0.1 if engine traffic is tunneled to the console through an SSH port forward.
console_port: Web port the console is listening on.
callback_interval_in_seconds: Number of seconds engines wait before calling back for scan jobs.
number_of_threads: Number of threads used to execute/kill scan jobs.
target_files_dir: Name of actual engine target_files directory on the engine box.
scan_results_dir: Name of actual engine scan_results directory on the engine box.
log_verbosity: Desired log level for logs/engine.log
# Level     Numeric value
# CRITICAL  50
# ERROR     40
# WARNING   30
# INFO      20
# DEBUG     10
http_useragent: HTTP User-Agent used instead of nmap's default
Mozilla/5.0 (compatible; Nmap Scripting Engine; https://nmap.org/book/nse.html).
supported_scan_binaries Experimental. Supported scan binaries advertised by the engine.
This repo also contains a stand-alone binary engine/engine that can be used for the engine. This
allows for a quicker deployment if managing the Python environment is difficult or cumbersome. The basic requirements
are:
nmapandmasscanmust exist on the system- the
engine_config.jsonfile exists and thescan_engineandapi_tokenvalues have been updated - An SSH tunnel to/from the console still exists to read target files and write scan results
The standalone binaries can be generated on a local box.
cd engine
virtualenv -p python3.6 .venv
source .venv/bin/activate
pip install pyinstaller
pyinstaller --onefile engine.py --name engine
mv dist/engine .

./engine -v > standalone_engine_binary.txt
echo -e "MD5     `md5sum engine`" >> standalone_engine_binary.txt
echo -e "SHA-256 `sha256sum engine`" >> standalone_engine_binary.txt

rm -rf __pycache__ build dist engine.spec .venvUpdate all the engines' engine_config.json files with their respective api_token for the engine by logging in as
admin and browsing to https://<HOST>/scantron-admin/authtoken/token to see the corresponding API token for each
user / engine.
Enable scantron-engine service at startup.
systemctl daemon-reload  # Required if scantron-engine.service changed.
systemctl enable scantron-engine
Disable scantron-engine service at startup.
systemctl disable scantron-engineScantron service troubleshooting commands.
systemctl status scantron-engine
systemctl start scantron-engine
systemctl stop scantron-engine
systemctl restart scantron-engineUse screen to avoid the script dying after disconnecting through SSH.
screen -S engine1  # Create a screen session and name it engine1, if using screen.

cd engine
source .venv/bin/activate
# Option 1: Python virtual environment
python engine.py -c engine_config.json
# Option 2: Stand alone binary
./engine -c engine_config.json

CTRL + a + d  # Break out of screen session, if using screen.
screen -ls  # View screen job, if using screen.

screen -r engine1 # Resume named screen session, if using screen.Verify SSH connection from the console with reverse port redirect is up on each engine. Any traffic hitting 127.0.0.1:4430 will be tunneled back to the console. This port is for communicating with the API. Any traffic hitting 127.0.0.1:2049 will connect back to the NFS share on the console.
tcp    0    0 127.0.0.1:4430    0.0.0.0:*    LISTEN    1399/sshd: autossh
tcp    0    0 127.0.0.1:2049    0.0.0.0:*    LISTEN    1399/sshd: autossh
Check each engine's root crontab to ensure nfs_watcher.sh is being run every minute.
crontab -l -u rootIf you need to test the API without running the engine, ensure there is a "pending" scan set to start earlier than the current date and time. The server only returns scan jobs that have a "pending" status and start datetime earlier than the current datetime.
# Not using SSH tunnels.
curl -k -X GET -H 'Authorization: Token <VALID API TOKEN>' https://192.168.1.99:443/api/scheduled_scans

# Using SSH tunnels.
curl -k -X GET -H 'Authorization: Token <VALID API TOKEN>' https://127.0.0.1:4430/api/scheduled_scans
You can also log into the webapp using the engine name and password and browse to /api/?format=json to view any scan
jobs. The username and engine name are the same from the webapp's point of view.
- Place files with target IPs/hosts (fed to nmap
-iLswitch) inconsole/target_files/ target_filesis an NFS share on the console that the engine reads from through an SSH tunnel.
- nmap scan results from engines go here.
console/scan_results/is an NFS share on the console that the engine writes to through an SSH tunnel.
1). Ensure SSH tunnels setup in /etc/rc.local are up.
netstat -nat | egrep "192.168.1.100|192.168.1.101"
ps -ef | egrep autossh
2). Django logs can be found here: /var/log/webapp/django_scantron.log
3). Check nginx logs for engine name in User-Agent field to determine which engines are calling home.
nginx logs: tail -f /var/log/nginx/{access,error}.log
4). uwsgi logs: /home/scantron/console/logs
If you need to reboot a box, do it with the provided clean_reboot.sh script that will stop all relevant services.
Without stopping the nfs-kernel-server service gracefully, sometimes the OS will hang and get angry.
A vanilla Postfix instance is installed on the console that can be used to send email alerts when a scan starts, errors
out, or finishes. Email settings and credentials are kept in the scantron_secrets.json file. Out of the box, most
mail will likely be marked as spam/junk. The recommendation is to use a credentialed account to send email alerts to
users.
Ubuntu's nmap version pulled using apt is fairly out-of-date and the recommendation for Scantron's engines is to pull
the latest version.
For RPM-based Distributions, the latest .rpm packages can be found here https://nmap.org/dist/?C=M&O=D. However,
for Debian-based distributions, you must utilize alien to convert the .rpm to a .deb file
https://nmap.org/book/inst-linux.html or compile from source. Recommend going down the alien route before compiling
from source.
VERSION=7.70-1  # CHANGE THIS TO LATEST VERSION

apt install alien -y
wget https://nmap.org/dist/nmap-$VERSION.x86_64.rpm
alien nmap-$VERSION.x86_64.rpm

apt remove nmap -y
apt remove ndiff -y
dpkg --install nmap_*.debAnother option is to compile nmap from source. This is dynamically compiled and must be done on the box where nmap is going to be run from. Note that past experience had a compiled nmap version returning a different banner than the provided apt version...so your mileage may vary.
VERSION=7.70-1  # CHANGE THIS TO LATEST VERSION

wget https://nmap.org/dist/nmap-$VERSION.tar.bz2
bzip2 -cd nmap-$VERSION.tar.bz2 | tar xvf -
cd nmap-$VERSION
./configure --without-ncat --without-ndiff --without-nmap-update --without-nping --without-subversion \
--without-zenmap --with-libdnet=included --with-libpcap=included --with-libpcre=included
make
./nmap -VThis provides a list of the actual ports being scanned when the --top-ports option is used:
# TCP
nmap -sT --top-ports 1000 -v -oG -

# UDP
nmap -sU --top-ports 1000 -v -oG -
Sorted list based on frequency.
# TCP sorted list based on frequency.
egrep /tcp /usr/share/nmap/nmap-services | sort -r -k3

# UDP sorted list based on frequency.
egrep /udp /usr/share/nmap/nmap-services | sort -r -k3A standalone script to carve out a range of the top TCP/UDP ports according to the nmap-services file.
This is useful when:
-
You want to scan a subset of the ports specified in
--top-ports, say the 10th through 20th top TCP ports, but not the 1st or 9th ports. -
You want the 1337th ranked TCP port.
-
You want to utilize nmap to scan both TCP and UDP, but not scan the same number of top ports.
This works and will scan the top 10 ports for BOTH TCP and UDP
nmap --top-ports 10 -sU -sT <TARGET>
but you can't only scan the top 20 TCP and top 10 UDP ports using
--top-ports.
-
Create user/engine. By default, Ansible creates
engine1.
-
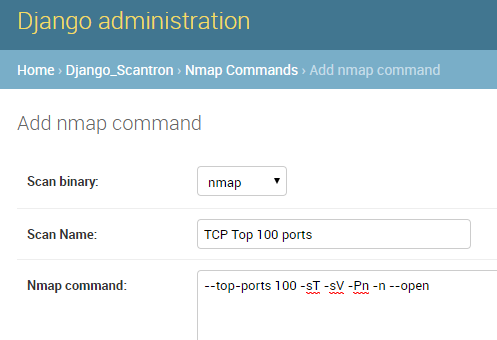
Create scan command
-
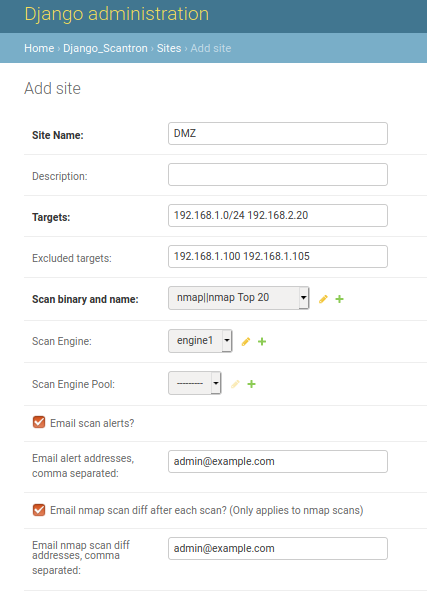
Create a site
- IPs, IP subnets, and FQDNs are allowed.
- IP ranges (
192.168.1.0-10) are not currently supported. - The targets and excluded_targets are validated using
console/extract_targets.py, which can also be used as a stand alone script.
-
Create scan
- Select start time
- Add start date
- Add recurrence rules (if applicable)
The
/home/scantron/console/scan_scheduler.shcronjob checks every minute to determine if any scans need to be queued. If scans are found, it schedules them to be picked up by the engines.
You can use the
console/scan_scheduler_visualizer.pyscript found on the console to print out scheduled scan times:# Print out the scan start dates and times for all enabled scans in the next 10 days. cd /home/scantron/console source .venv/bin/activate python scan_scheduler_visualizer.py -d 10
-
View currently executing scan results
cd /home/scantron/console/scan_results/pending
ls -lart
Completed scans are moved to the
/home/scantron/console/scan_results/completeddirectory. -
Process scans
Scan files are moved between a few folders.
/home/scantron/console/scan_results/pending- Pending scan files from engines are stored here before being moved toscan_results/complete/home/scantron/console/scan_results/complete- Completed scan files from engines are stored here before being processed bynmap_to_csv.py/home/scantron/console/scan_results/processed- nmap scan files already processed bynmap_to_csv.pyreside here./home/scantron/console/for_bigdata_analytics- .csv files for big data analytics ingestion if applicable


Checkout the Python Scantron API client for interacting with the Scantron API and driving automated workflows.
There are 3 ways to explore and play around with the API. The first is the Django REST Framework view:

You can also dig through the API documentation using ReDoc:

Lastly, you can interact with the API using Swagger:

Generated using django-extensions's graph_models.

If you would like to contribute, please adhere to the Python code black formatter rules specifying a line length of 120.
More information about black can be found here (https://github.com/ambv/black)
Robot lovingly delivered by Robohash.org (https://robohash.org)