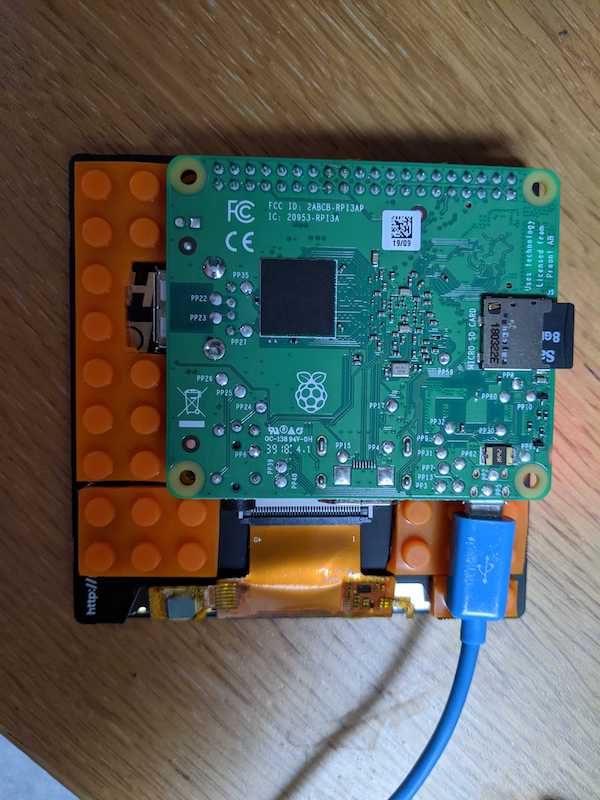
I got a HyperPixel ages ago but it wasn't suitable for the thing I wanted it for, so it's been sat in a drawer. I recently came across a very lovely D3.js clock and it gave me an idea.
This repo is mostly just a few bits of glue tbh, all the good stuff was created by other people.
This was all done on a pristine install of Raspberry Pi OS Lite (i.e. no desktop) via NOOBS 3.5.
You'll need to use a proper screen for the install because the Hyperpixel won't work until you've installed the drivers.
After the first boot, you need to enable SSH:
sudo raspi-config nonint do_ssh 0Once you've done this you should be able to get to the Pi with
ssh pi@raspberrypi.localPresuming this works, power it off, and attach the Hyperpixel (or move the card to the Pi which has the Hyperpixel on it). When you boot it, the screen won't work, but we'll fix that in a minute.
SSH onto the Pi, and then, per this:
curl https://get.pimoroni.com/hyperpixel4 | bashSelect the correct screen and Pi combination (in my case it's 3 : Weirdly Square - Pi 3B+ or older) and let it do its thing. When it's done it will reboot, and the screen should work. Now
Per this blogpost:
Install some stuff:
sudo apt-get update
sudo apt-get install \
  --no-install-recommends \
  --yes \
  xserver-xorg-video-all \
  xserver-xorg-input-all \
  xserver-xorg-core \
  xinit x11-xserver-utils \
  chromium-browser \
  unclutter \
  nginx
Start X on login:
cat << EOF > ~/.bash_profile
if [ -z $DISPLAY ] && [ \$(tty) = /dev/tty1 ]
then
  startx
fi
EOF
Run Chromium when X starts:
cat << EOF > ~/.xinitrc
#!/usr/bin/env sh

URL=http://localhost
SCREEN_SIZE=720

xset -dpms
xset s off
xset s noblank

unclutter &
chromium-browser \${URL} \\
  --window-size=\${SCREEN_SIZE},\${SCREEN_SIZE} \\
  --window-position=0,0 \\
  --start-fullscreen \\
  --kiosk \\
  --incognito \\
  --noerrdialogs \\
  --disable-translate \\
  --no-first-run \\
  --fast \\
  --fast-start \\
  --disable-infobars \\
  --disable-features=TranslateUI \\
  --disk-cache-dir=/dev/null \\
  --overscroll-history-navigation=0 \\
  --disable-pinch
EOF
And now make it auto-login:
sudo raspi-config nonint do_boot_behaviour B2git clone https://github.com/pikesley/station-clocksudo ln -sf /home/pi/station-clock/nginx/site.conf /etc/nginx/sites-enabled/defaultecho "avoid_warnings=2" | sudo tee -a /boot/config.txtsudo rebootI first tried this on a Pi Zero but its single-core absolutely could not handle the JavaScript animation: the sweeping second-hand was creaking and jerking, and it eventually ground to a complete halt when I left it running overnight. Right now I'm running it on Pi 3 A+, which seems to just-about keep up.
Anybody remember Nimuno Loops (which I think maybe became Mayka Tape)? I have 4 boxes of this stuff from when I backed it on IndieGogo but I never found a use for it until now.
The screen is just about 10 Lego studs by 10 Lego studs, so with the Pi mounted, I worked out where I could attach some bits of the Nimuno, attached the Nimuno stud-side-up to a Lego scaffold to keep it all in the right place, and stuck it down:
And then I attached a frame made out of Lego:
I added a Dockerfile to make it easier to hack on the design. To run it:
make build
make run
Once in the container, spin up nginx with make serve and it should be running at http://localhost:8080/.
If you're editing the Sass you need to run make sass to see the changes.
Once you're happy, just push the code to the Pi:
cd ../
rsync -av station-clock pi@raspberrypi.local:
You might need to sweeten that to taste depending on hostnames and things.


