Located here: https://github.com/jimblizzard/azure-dev-day-github-devops-lab
In this lab we're going to see how easy it is to create a functional Azure Web App with its source code stored in GitHub and a GitHub CICD workflow that builds and deploys the web app. . . in just a matter of minutes.
-
Open a browser and sign into the Microsoft Azure Portal at https://portal.azure.com
-
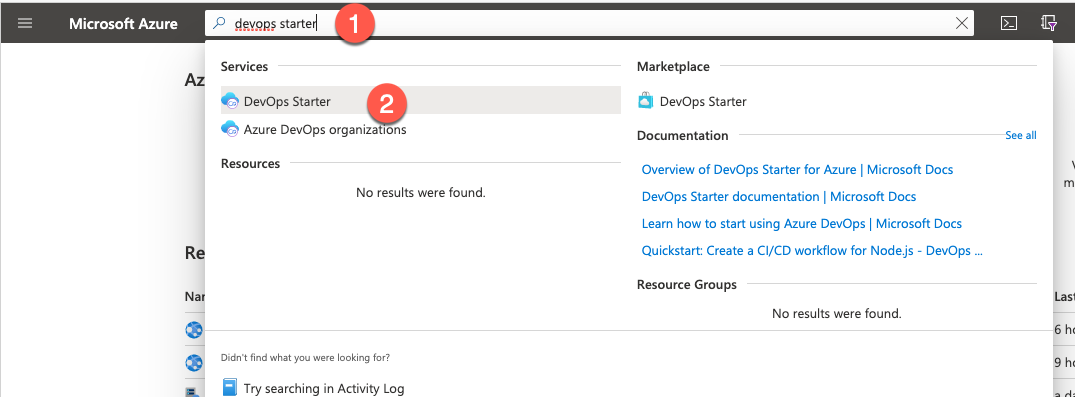
In the search bar, type DevOps Starter and then either press Return or click on DevOps Starter under Services
-
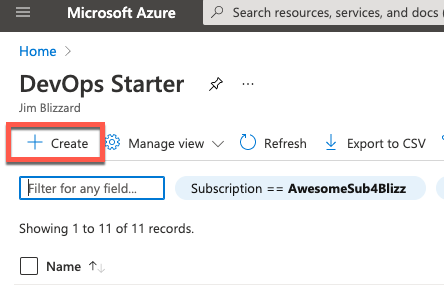
Click on + Create
-
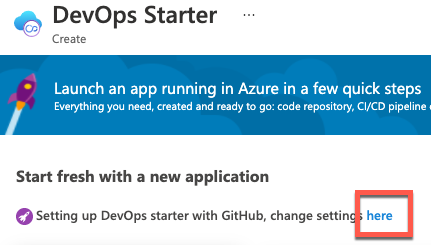
On the next screen, make sure that the DevOps Starter is going to use GitHub. If it isn't, click on the change settings here link.
-
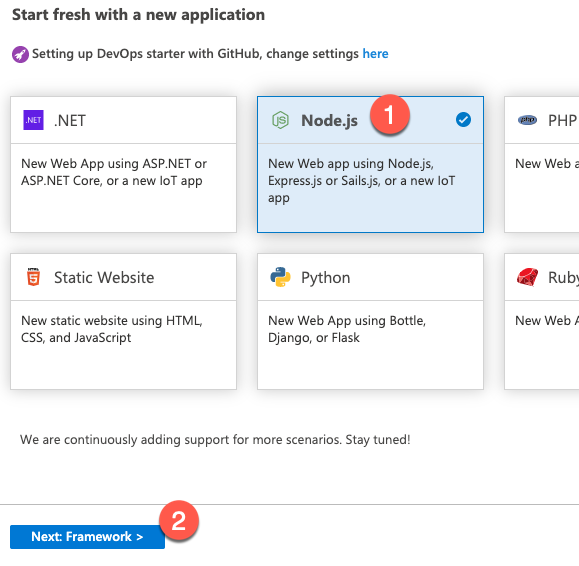
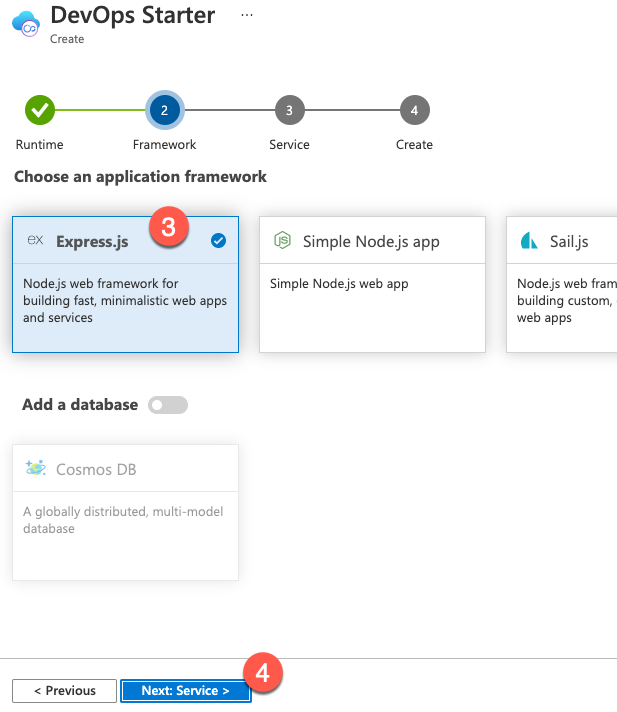
For this lab, create a Node.js web app that uses Express.js, and runs as a Windows Web App.
-
Select the Node.js box.
-
Click Next: Framework >
-
Select the Express.js box. There's no need to add a database.
-
Click Next: Service >
-
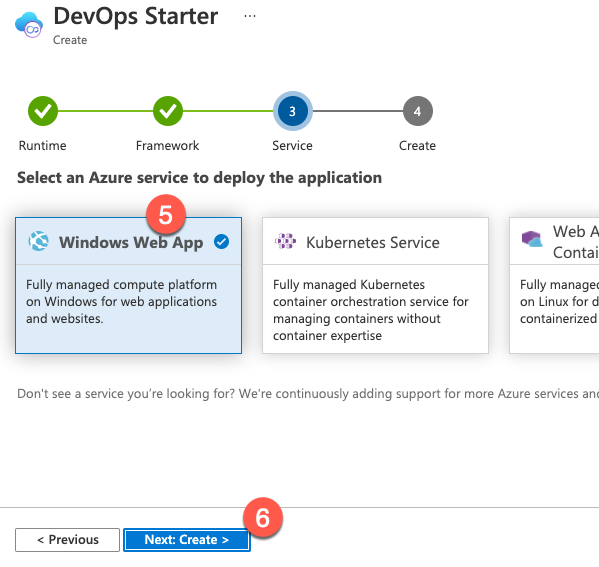
Select the Windows Web App box.
-
Select Next: Create >
-
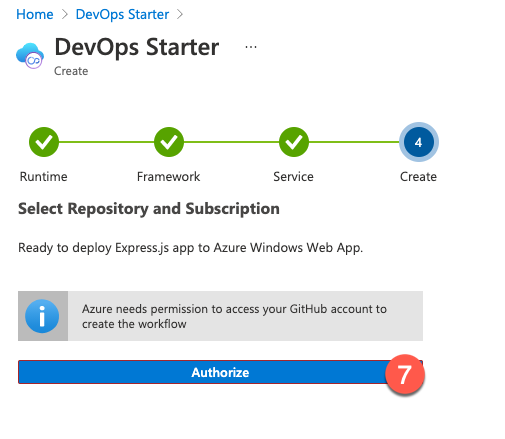
Click Authorize to allow Azure to access your GitHub account & create the workflow.
-
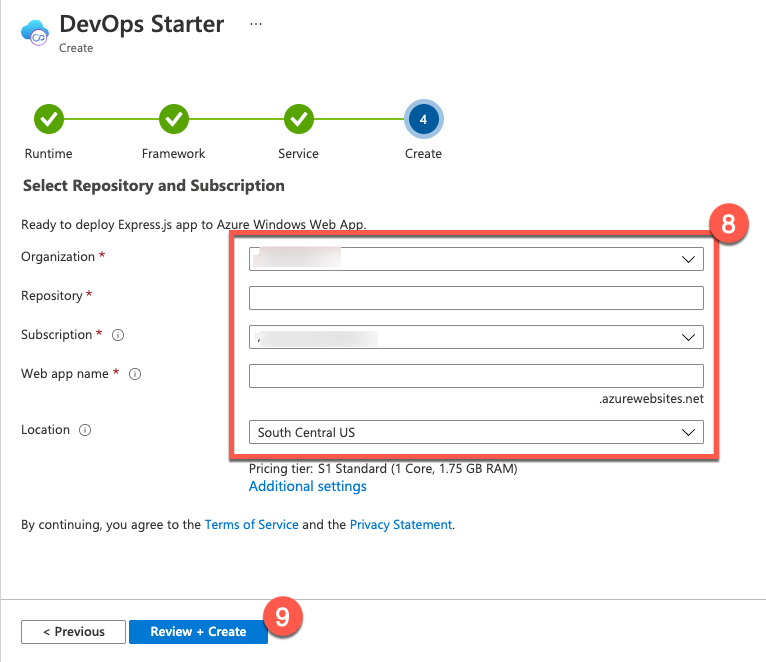
Enter your GitHub Organization, Repository, Azure SubScription, Web app name, and Location.
-
Click Review + Create
Note: It will take a few minutes to create the Azure and GitHub resources. Go grab a soda or some coffee.
-
-
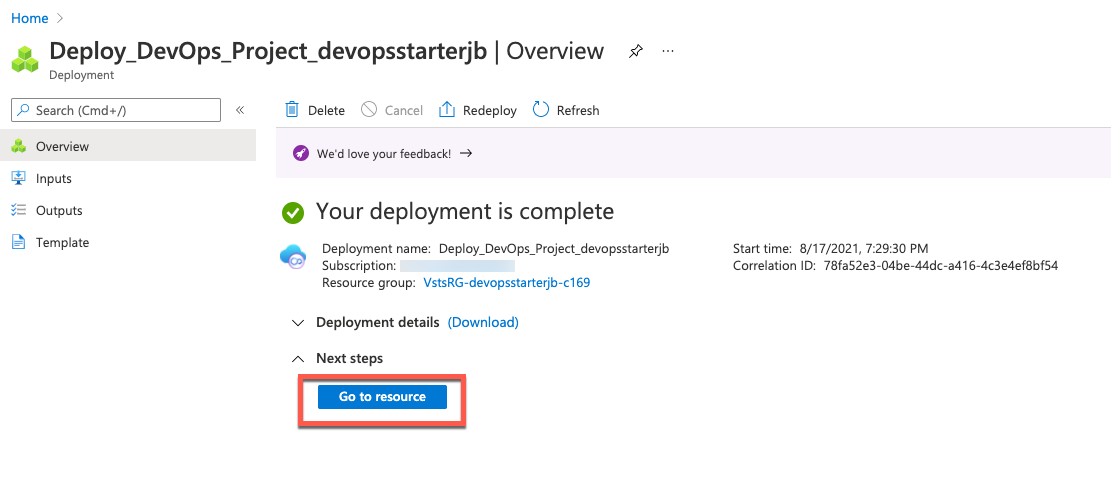
Once the deployment completes, click on Go to resource to view the deployment.


- Click on Authorize to allow Azure to access your GitHub account to view the latest workflow execution and status of jobs
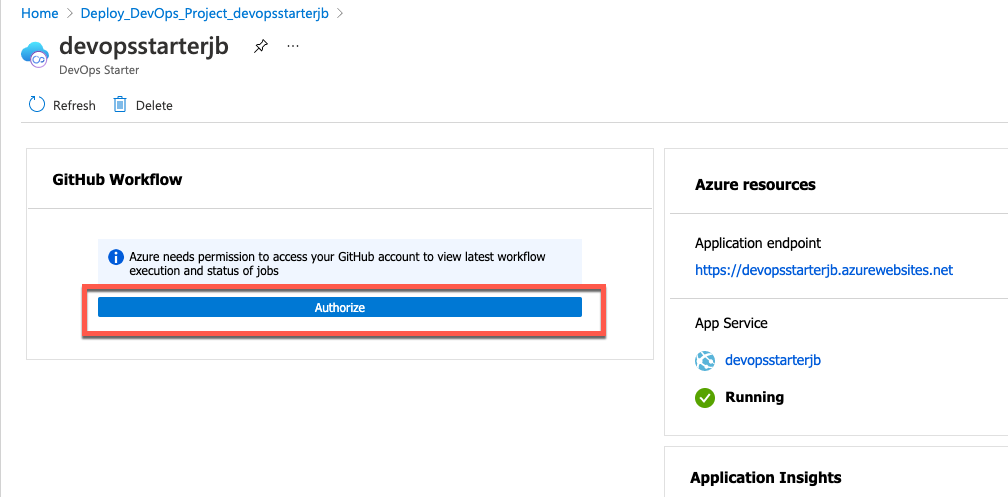
- Cick on Authorize to finish connecting your GitHub account.

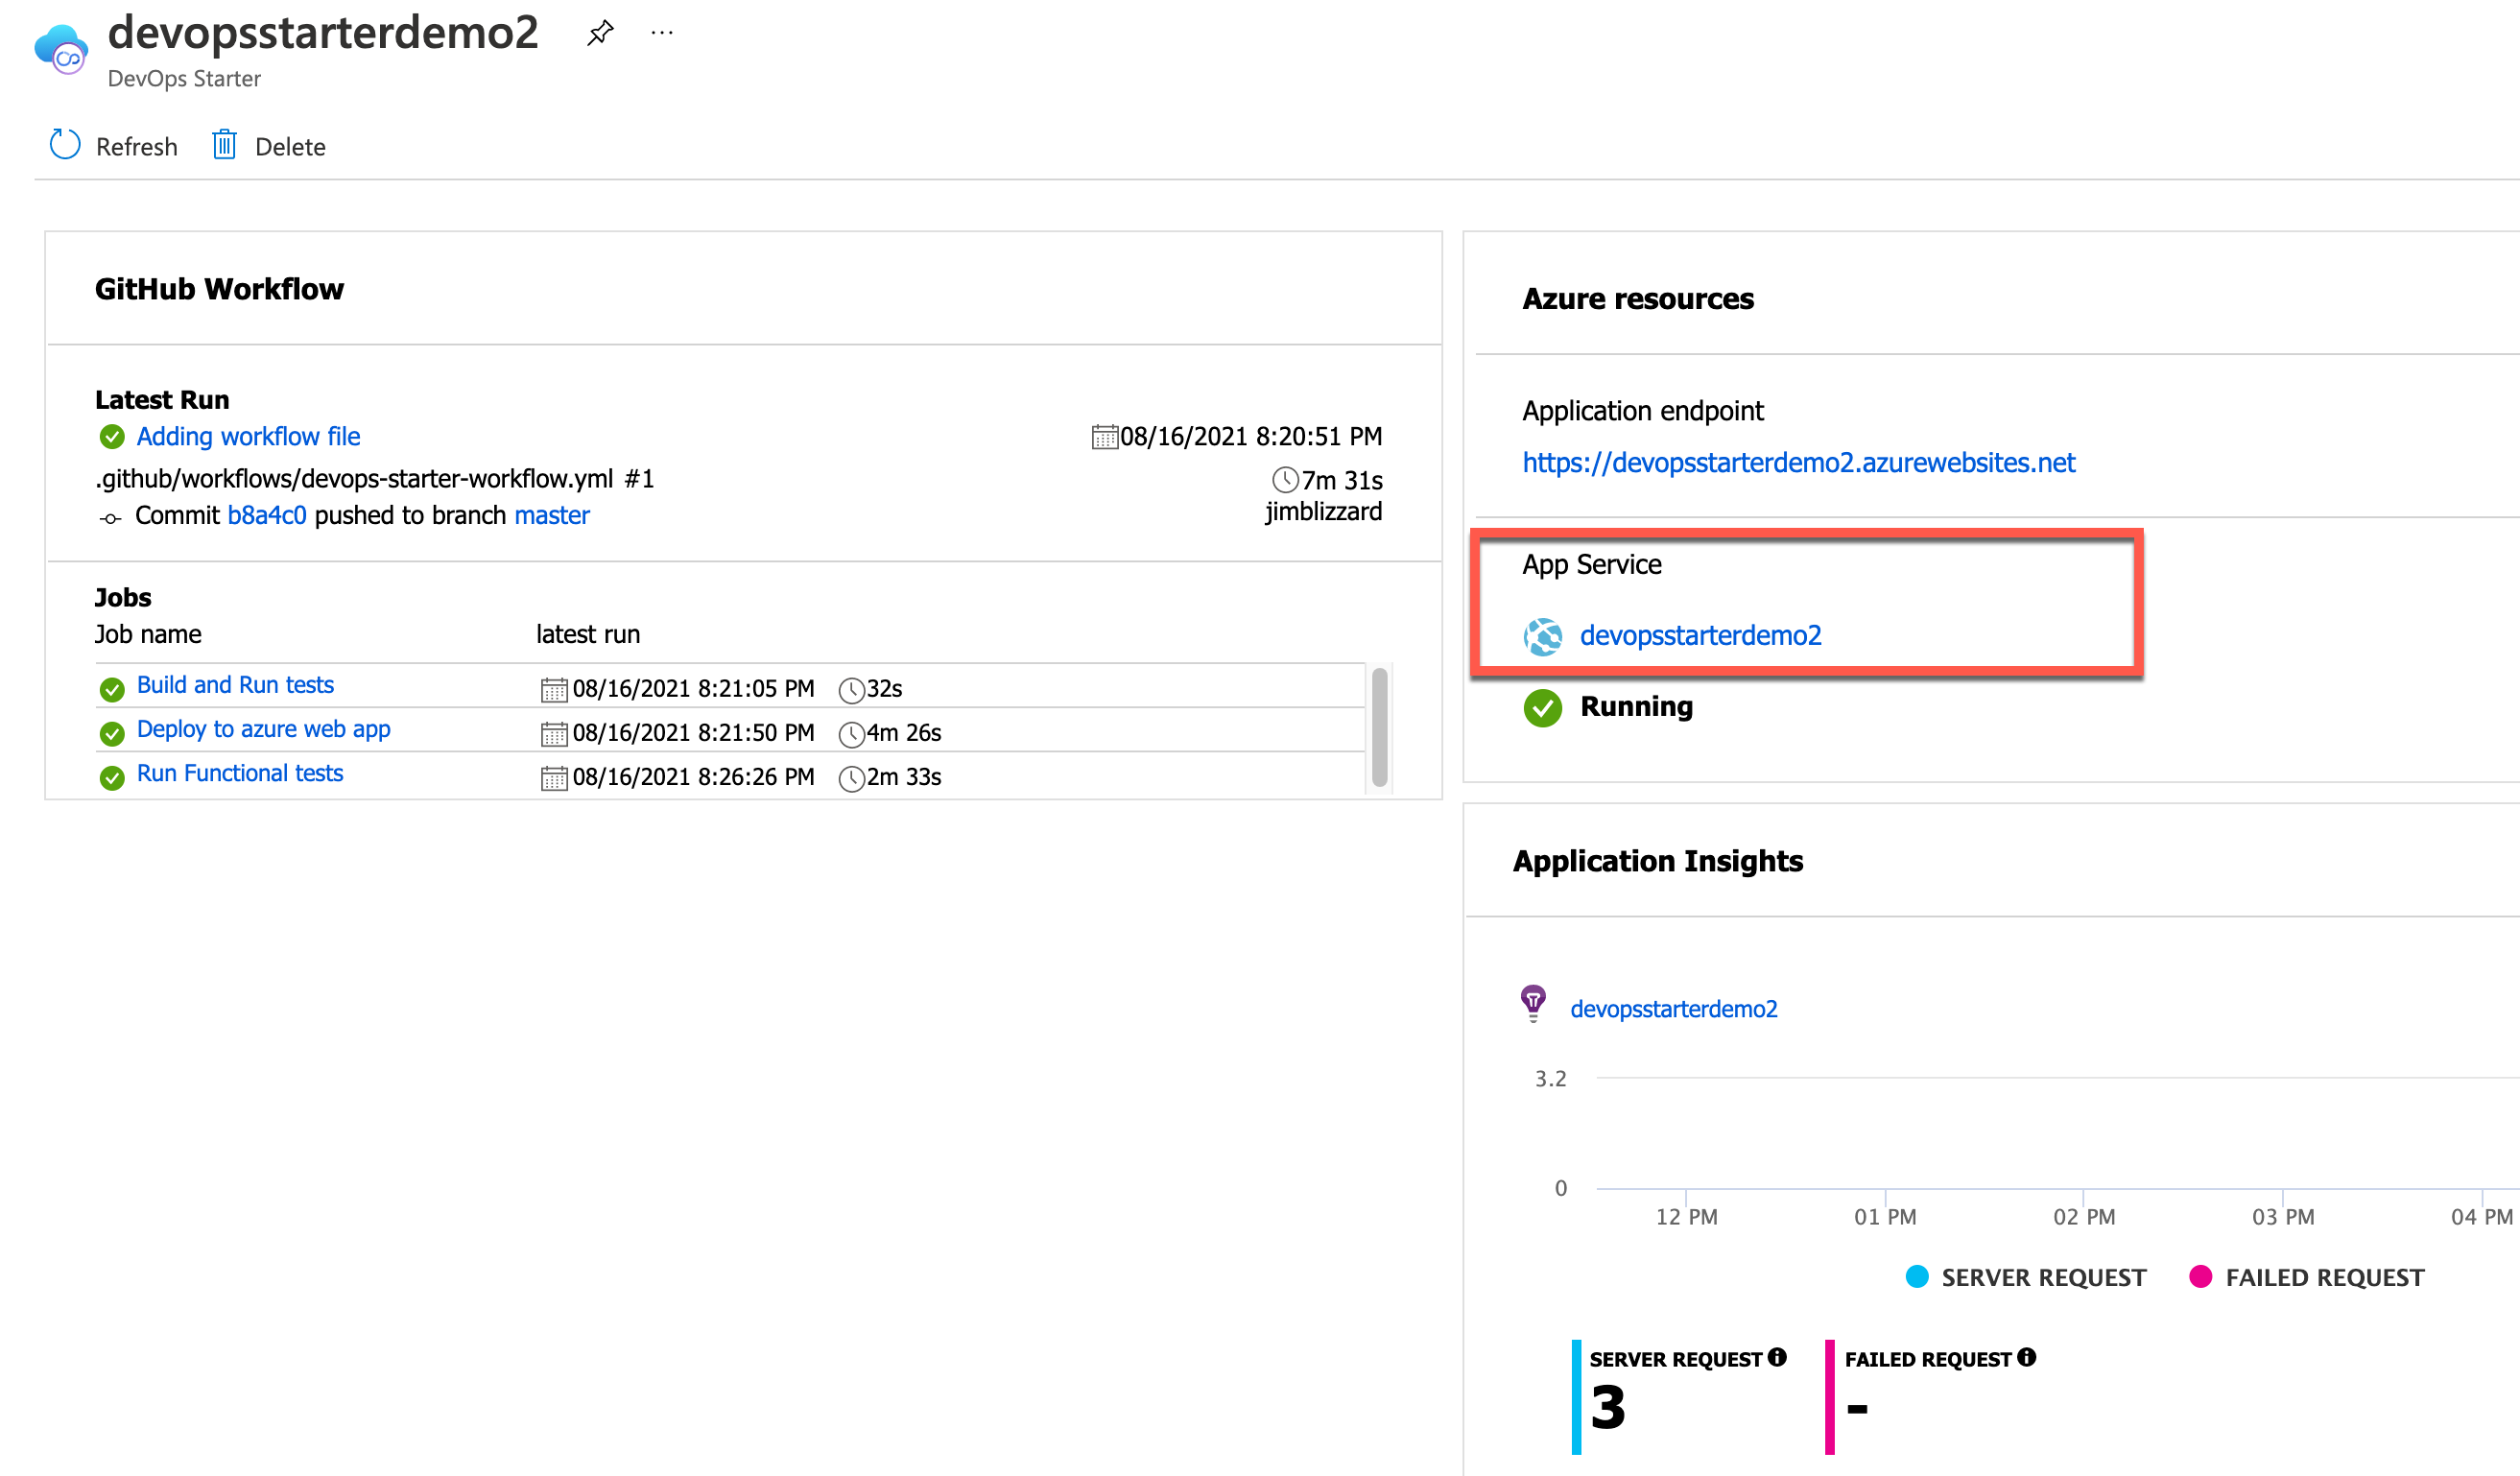
- At this point you can see the GitHub workflow and the Azure resources that were created.
- Click on your App Service name to go to the App Service definition in the Azure portal.
- To create the deployment slot,
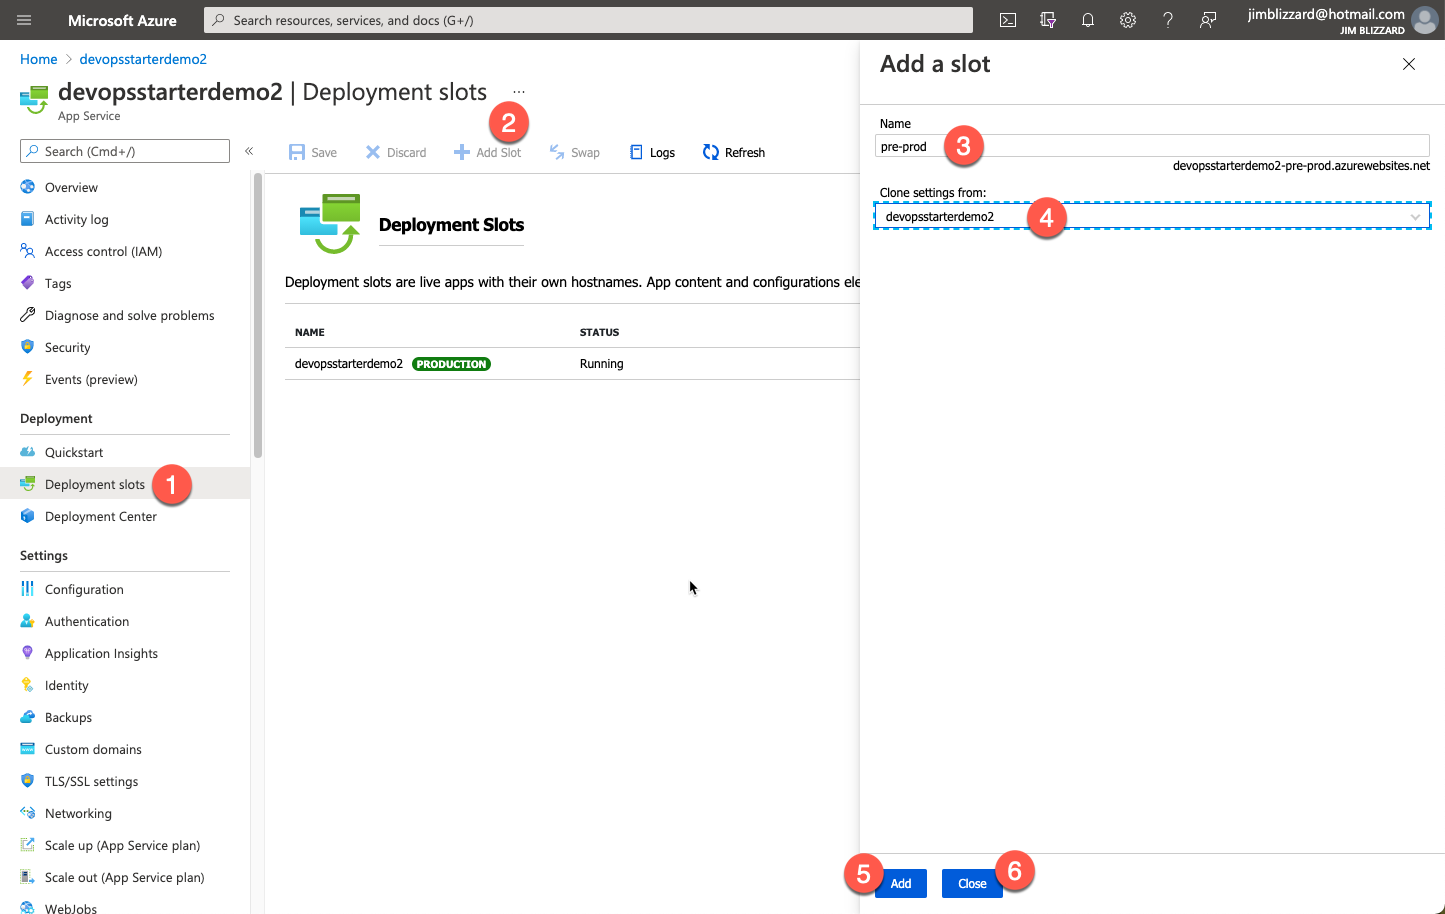
- Click on Deployment slots
- Click on + Add Slot
- Name the slot "pre-prod" NOTE: You'll use the slot name later on when you update your CICD pipeline.
- Choose Clone settings from: {your production slot name}
- Click Add.
- It will take a minute or so to create the pre-prod slot. Once it finishes, click Close at the boottom of that window.


-
Open a new tab and go to your GitHub account. https://github.com/{your-gh-account}
-
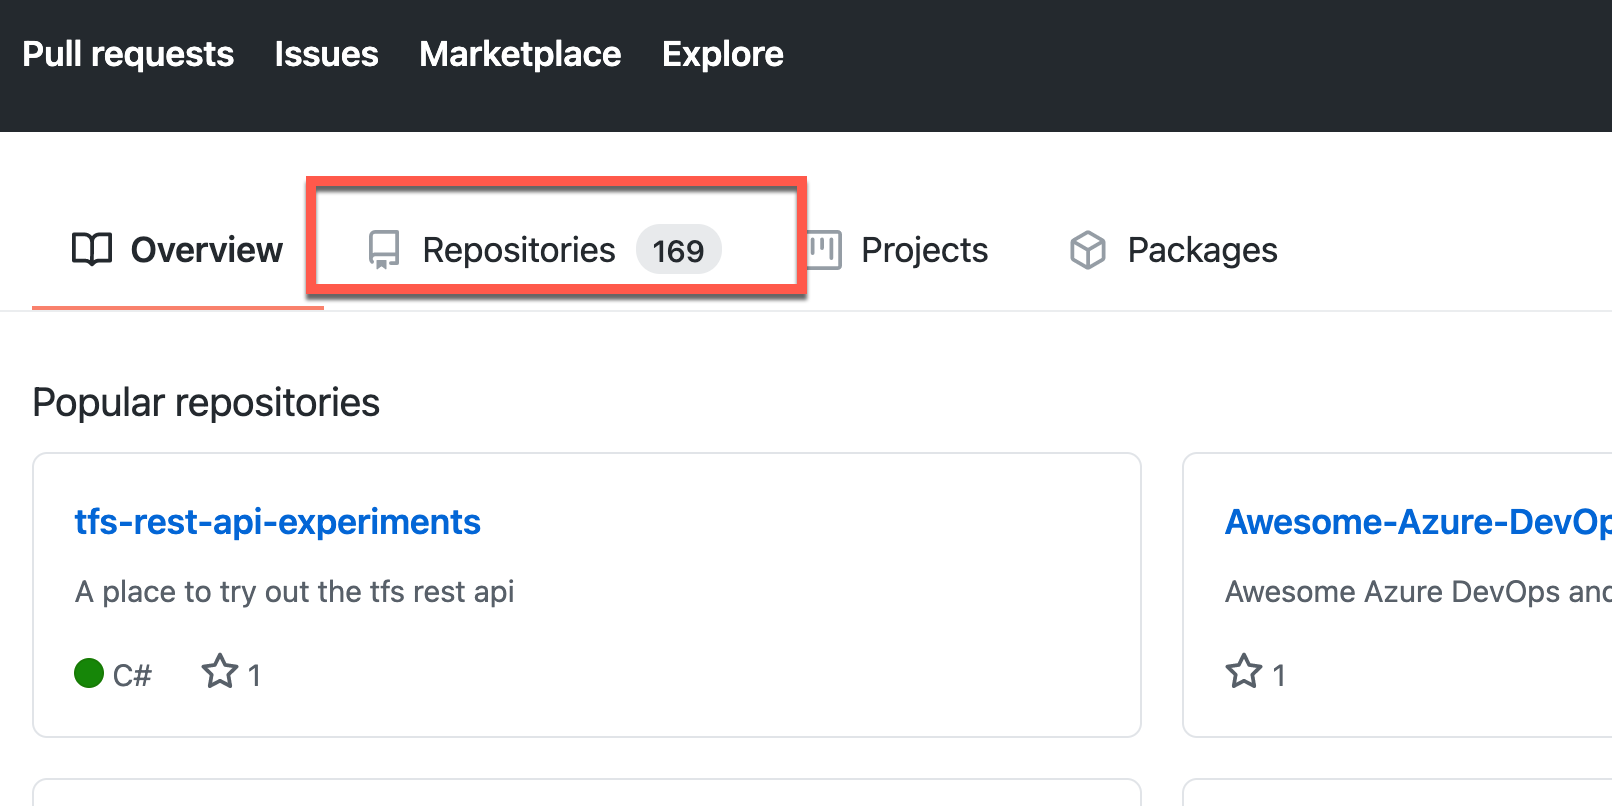
Click on Repositories to view your repositories.
-
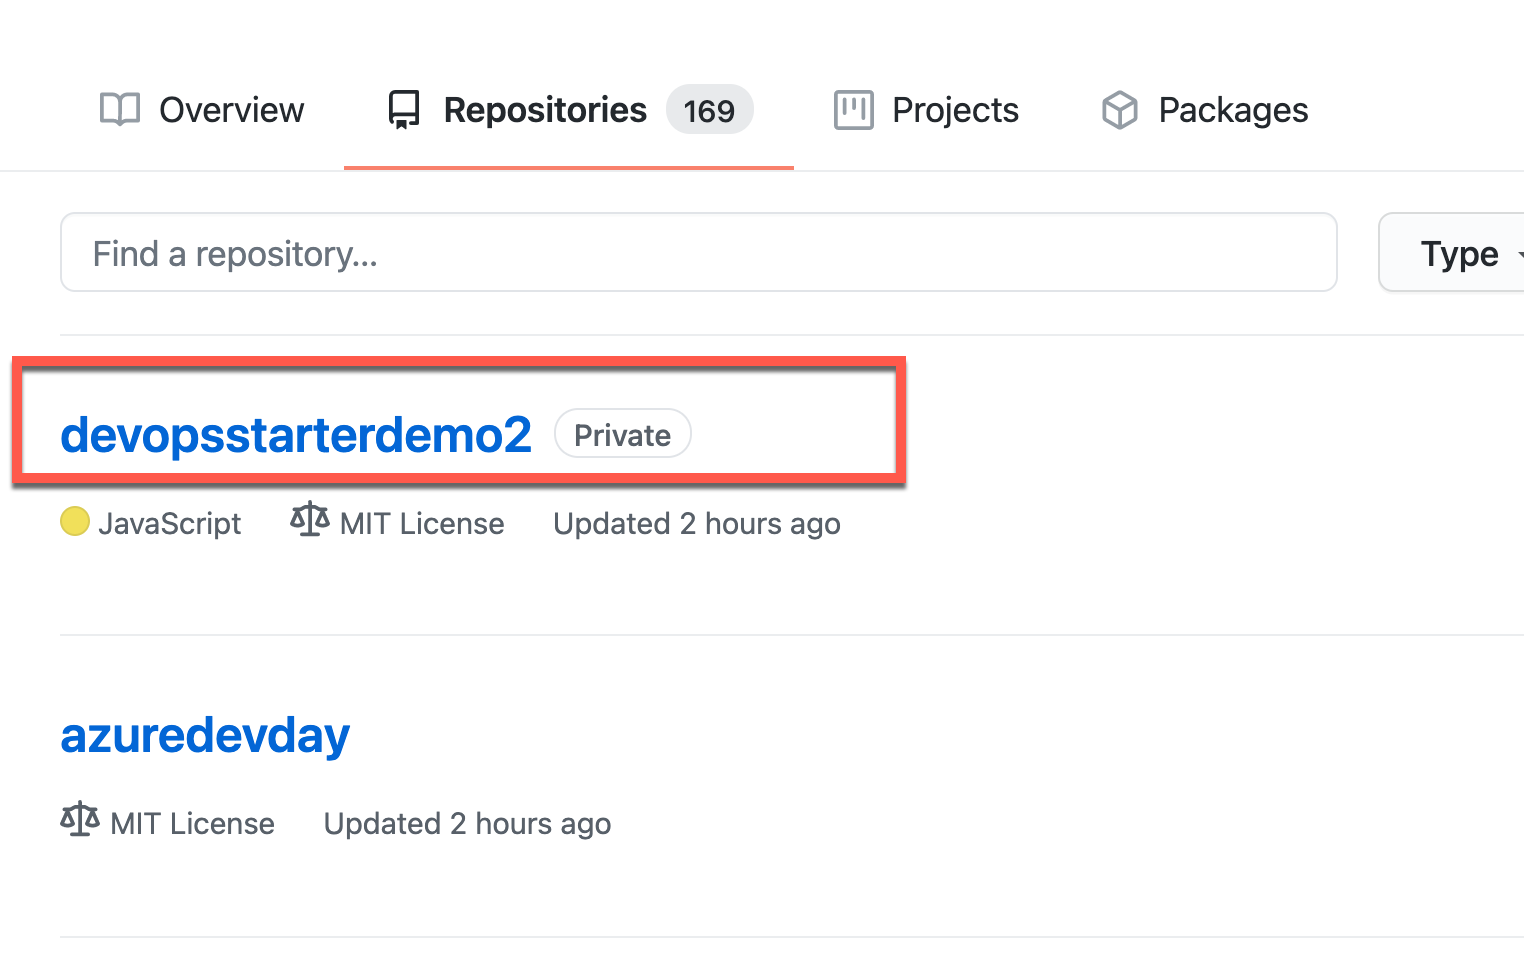
Open the repository that the DevOps Starter created for you by clicking on its name. It's name is the same as the name of the App Service you created.
-
Open the CICD workflow.
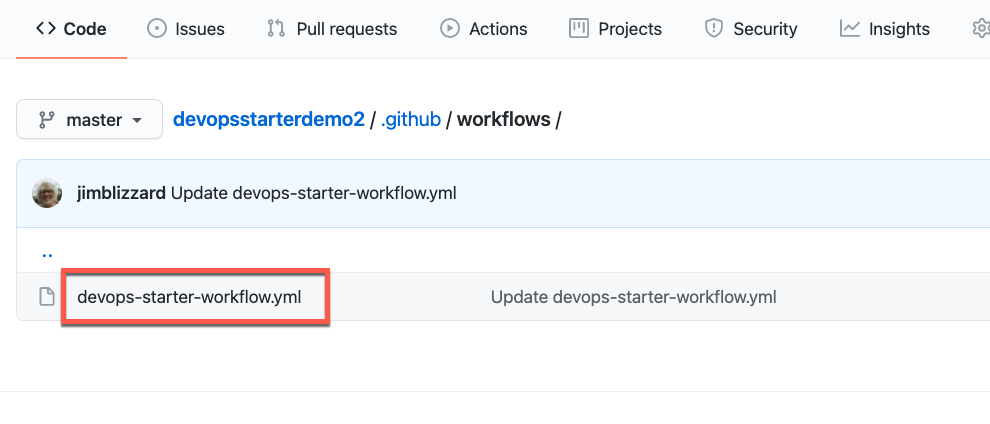
- Click on .github/workflows
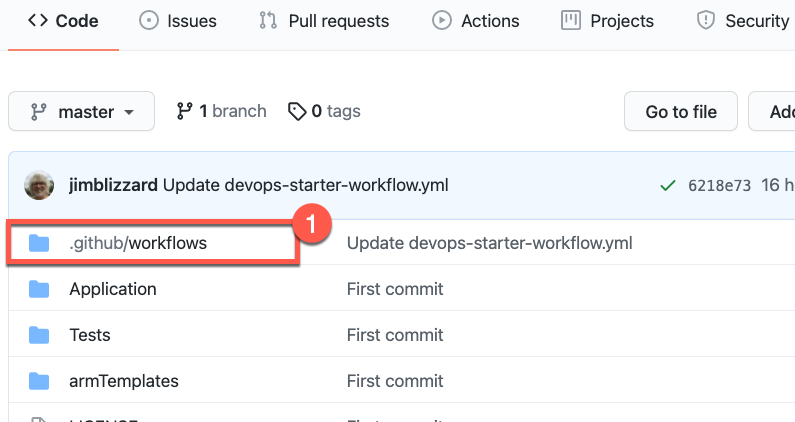
- On the page that opens up, Click on devops-starter-workflow.yml to see the CICD pipeline that was created by the DevOps Starter project.
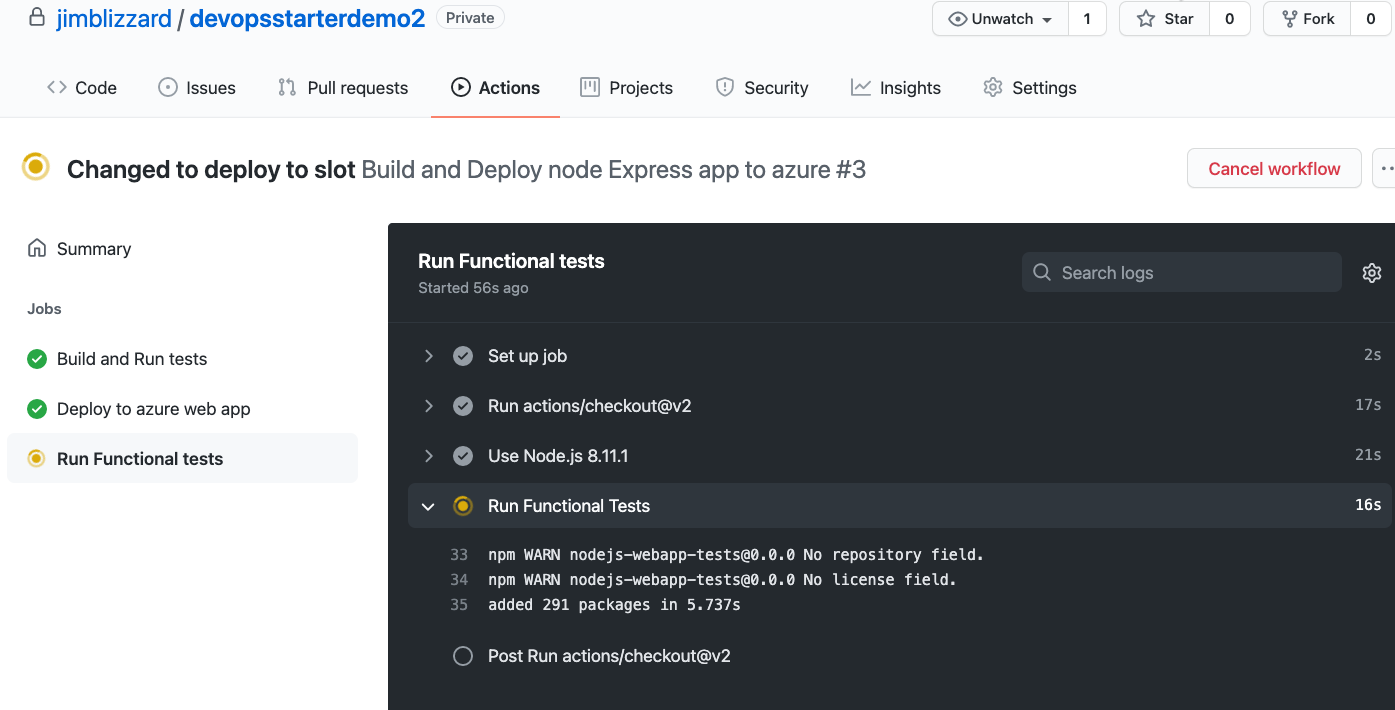
The workflow contains three jobs. build, Deploy, and FunctionalTests. We're going to update the workflow to add a slot swap action.
- Click on .github/workflows
-
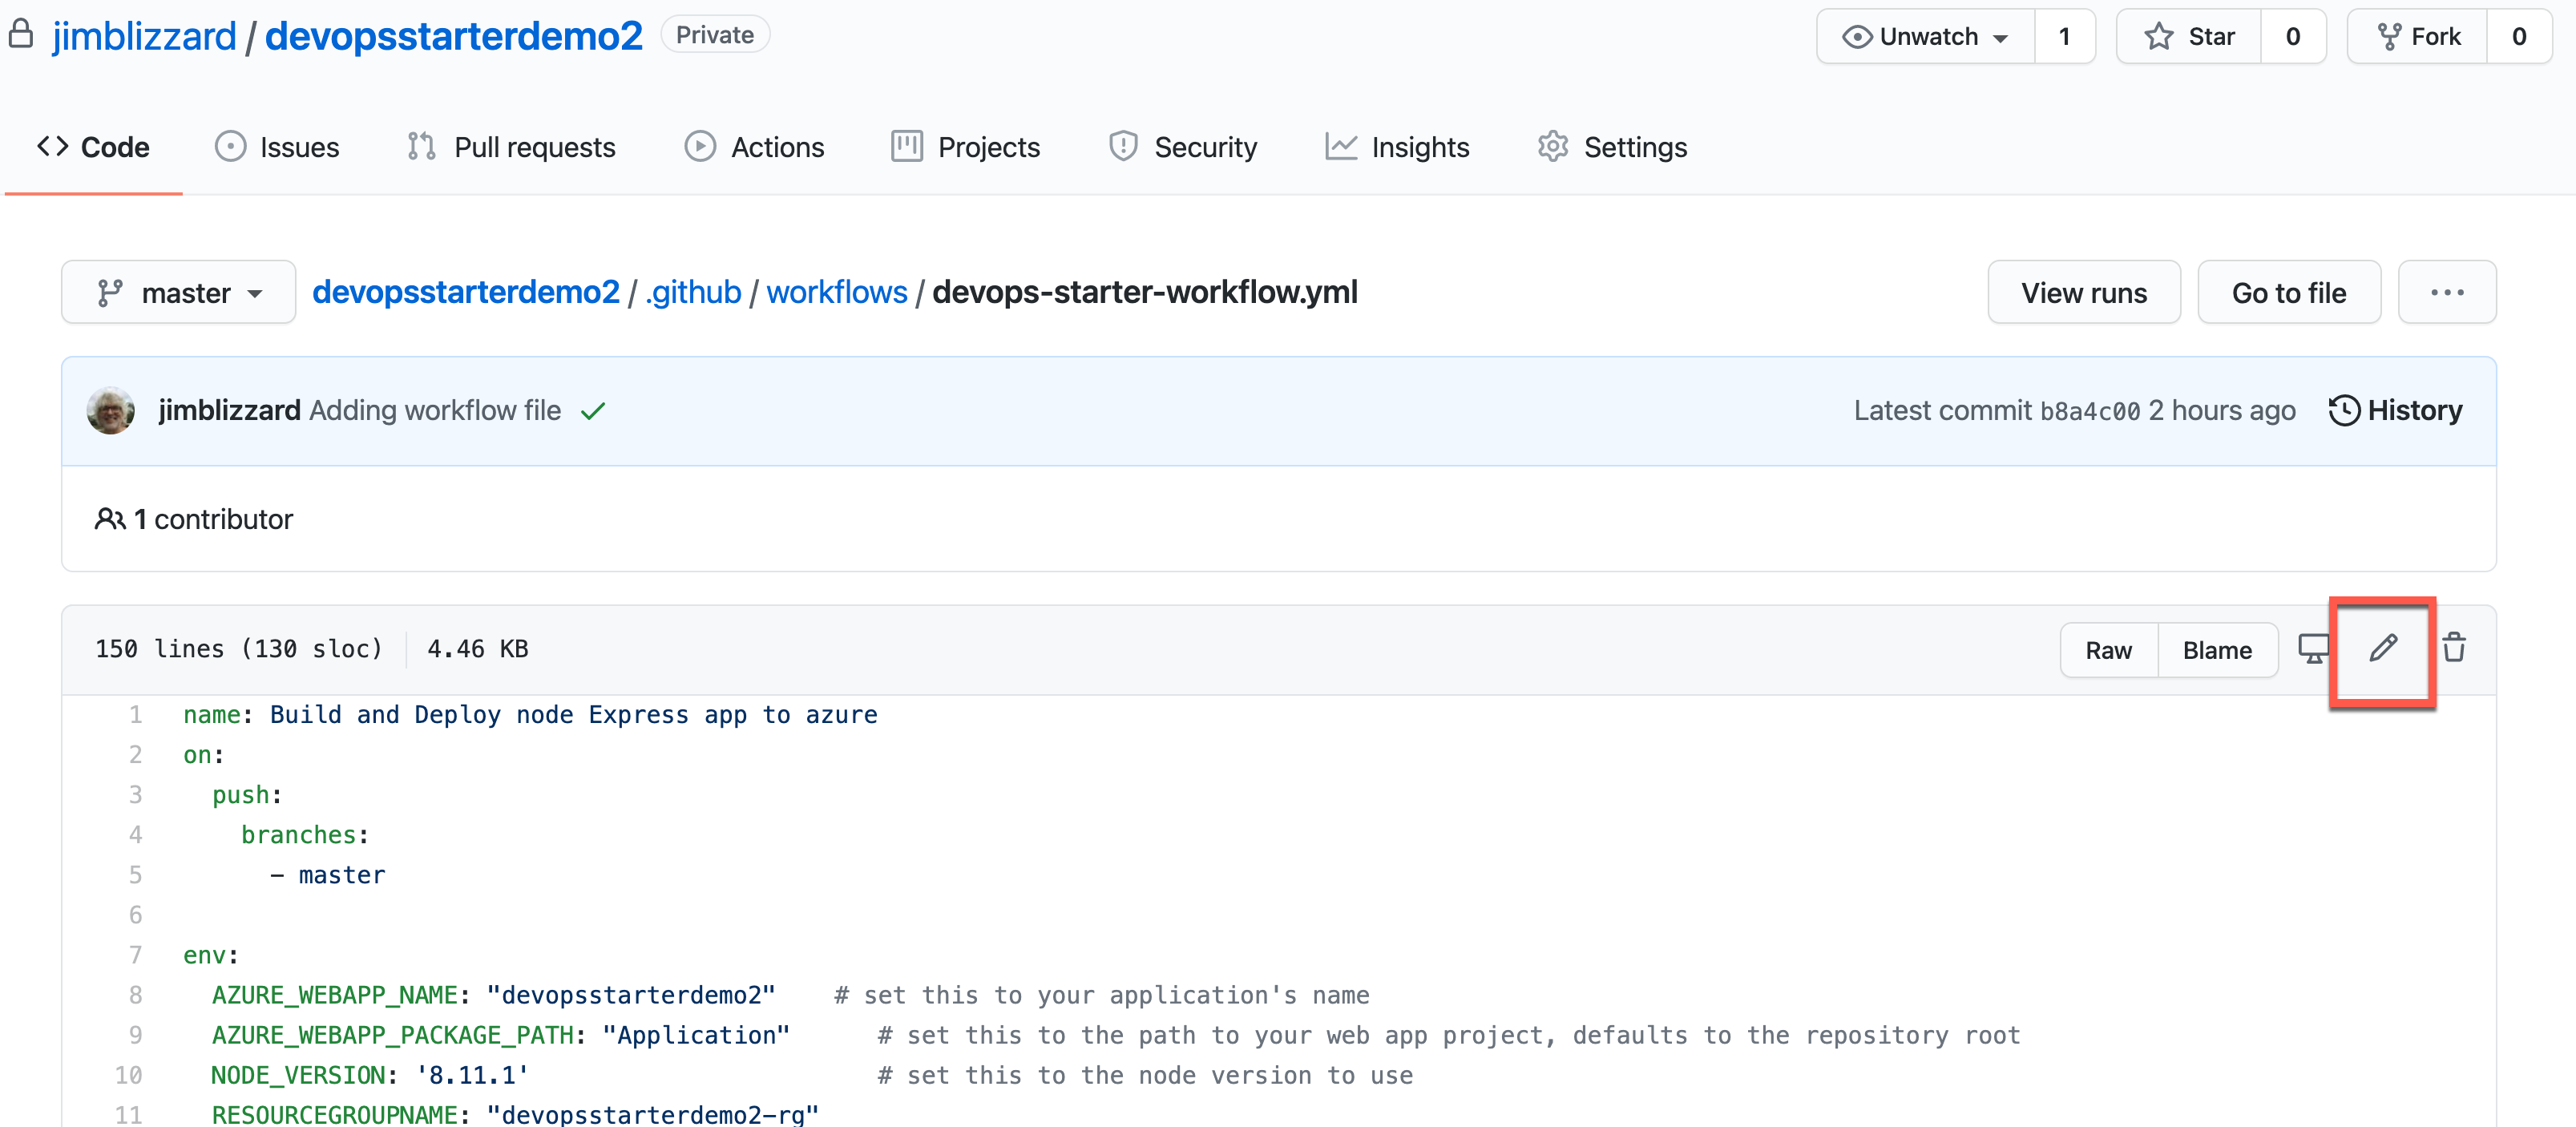
Enter edit mode by clicking on the pencil icon at the top right of the file listing.
-
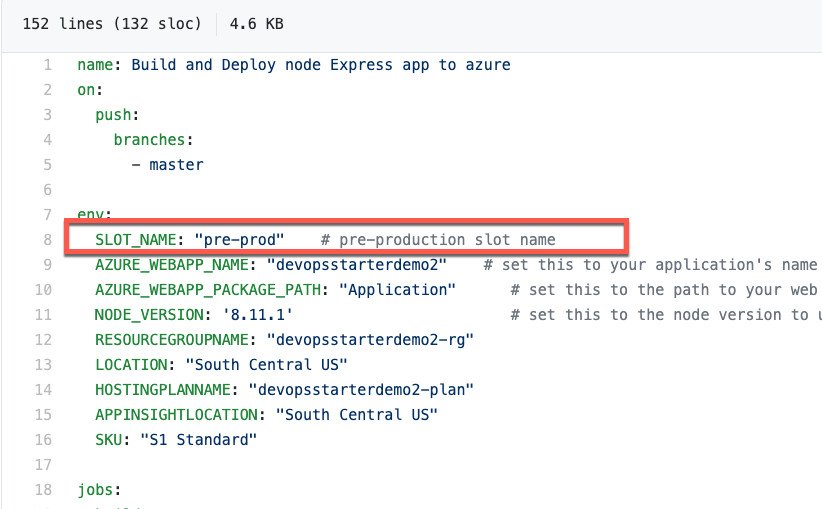
Add an environment variable called SLOT_NAME: with the value of "pre-prod". Be sure to indent the variable the same as the other enviromnent variables.
-
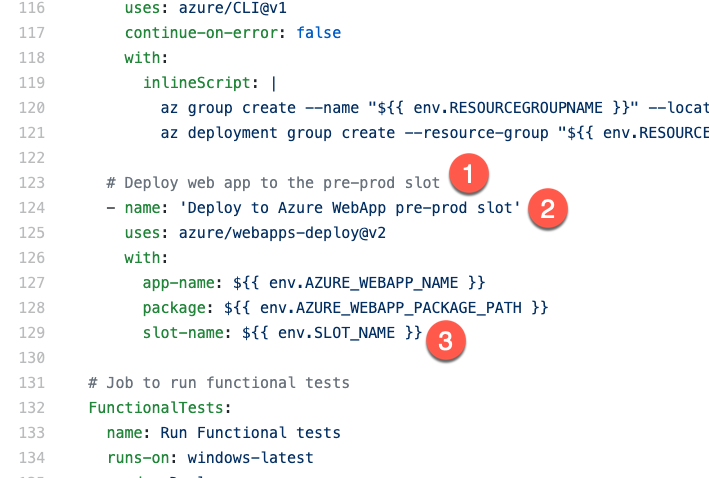
Modify the web app deploy action to deploy to the pre-prod slot instead of the production slot. (It should be on line 123 or so.)
- Change the comment to Deploy web app to pre-prod slot
- Change the name of the action to 'Deploy to Azure WebApp pre-prod slot'
- After the package: attribute, add a blank line and type slot-name: ${{ env.SLOT_NAME }} (Be sure the slot-name: attribute is indented the same as the package: attribute.)
-
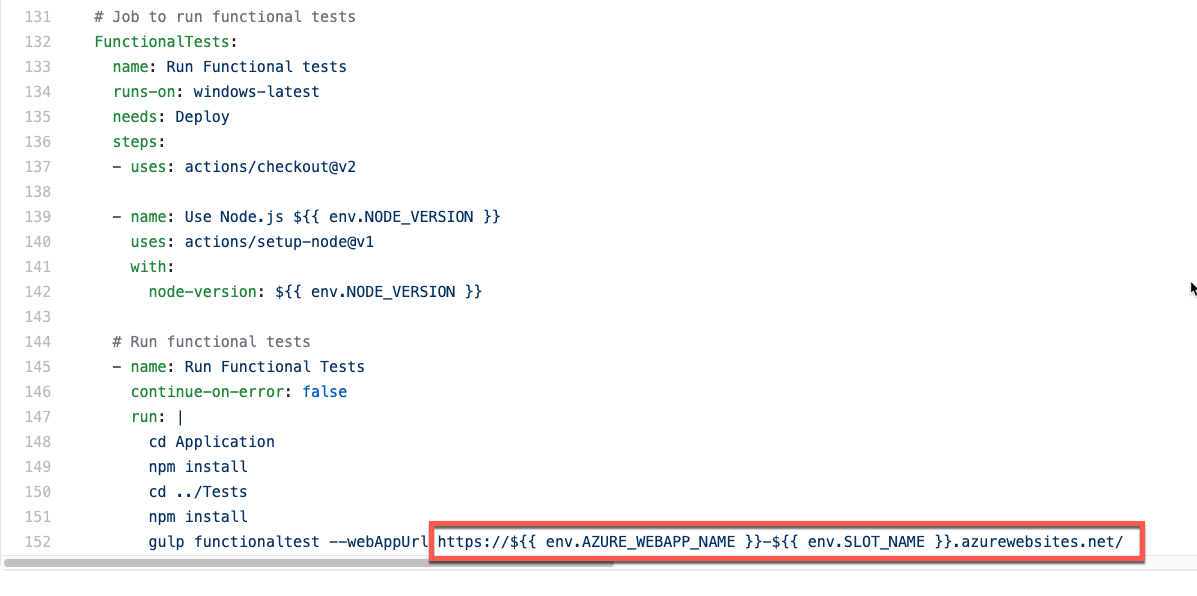
Update the Run Functional Tests action to run against the pre-prod slot, by adding the new environment variable to the website's URL. Don't forget to include a dash between the web app name and the slot name so it looks similar to this:


-
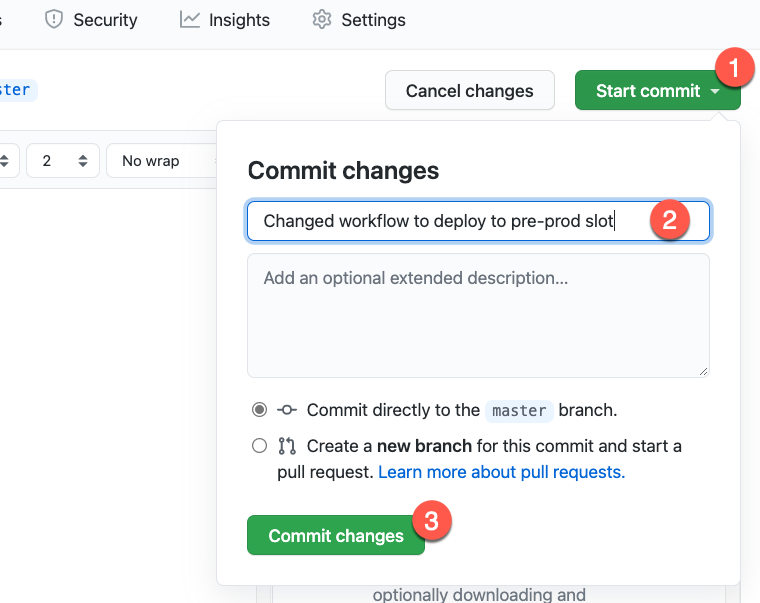
In the upper right of the page, 1) click on Start commit, 2) enter a commit message, and 3) click on commit changes. Note that your workflow will immediately start running since it's configured to run anytime anything is pushed to the master branch.
-
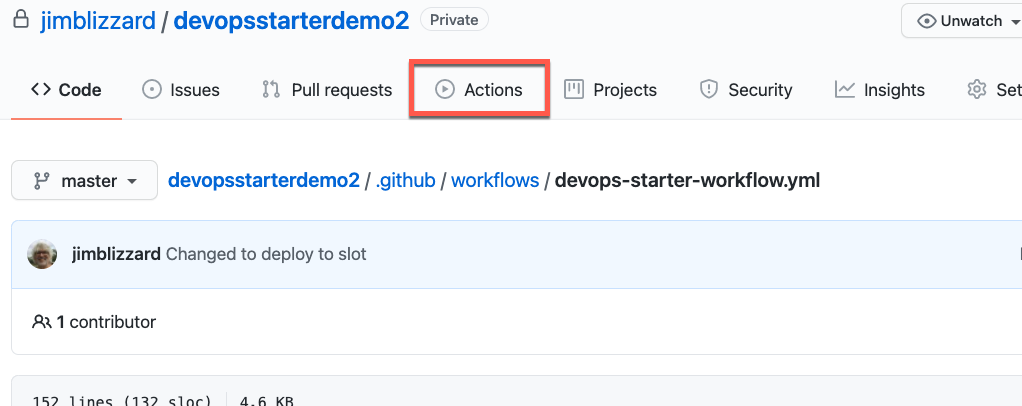
Click on Actions to see the workflow runs.
-
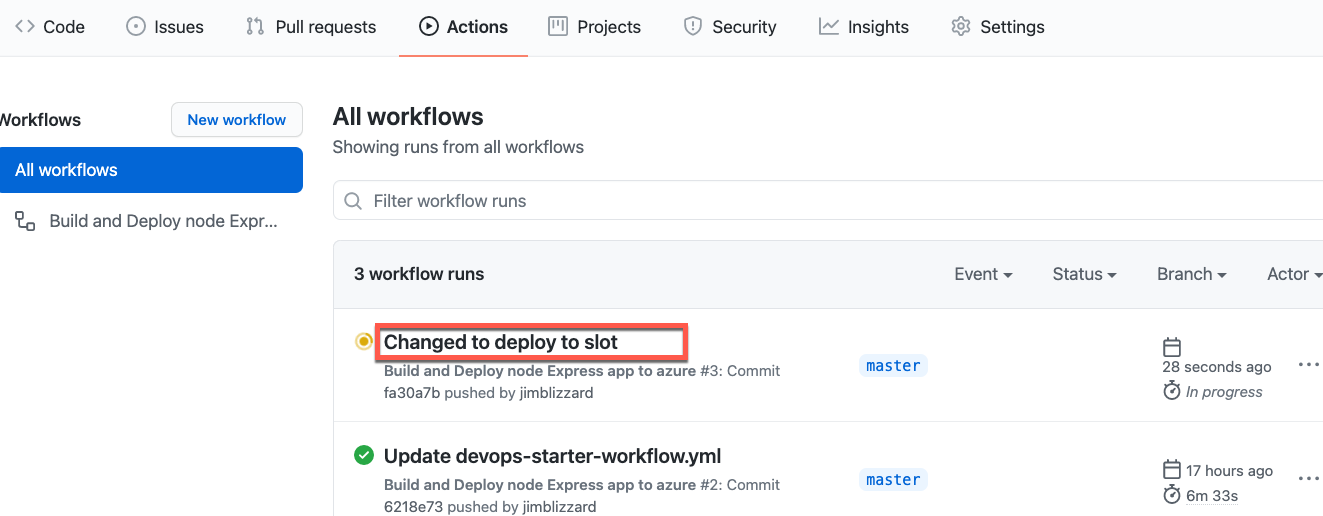
Click on the latest workflow to see it running. It will take several minutes to complete. Note: In this view, the workflow will be whatever you typed for your commit message.
-
You'll see the current state of the three jobs that are in the workflow.
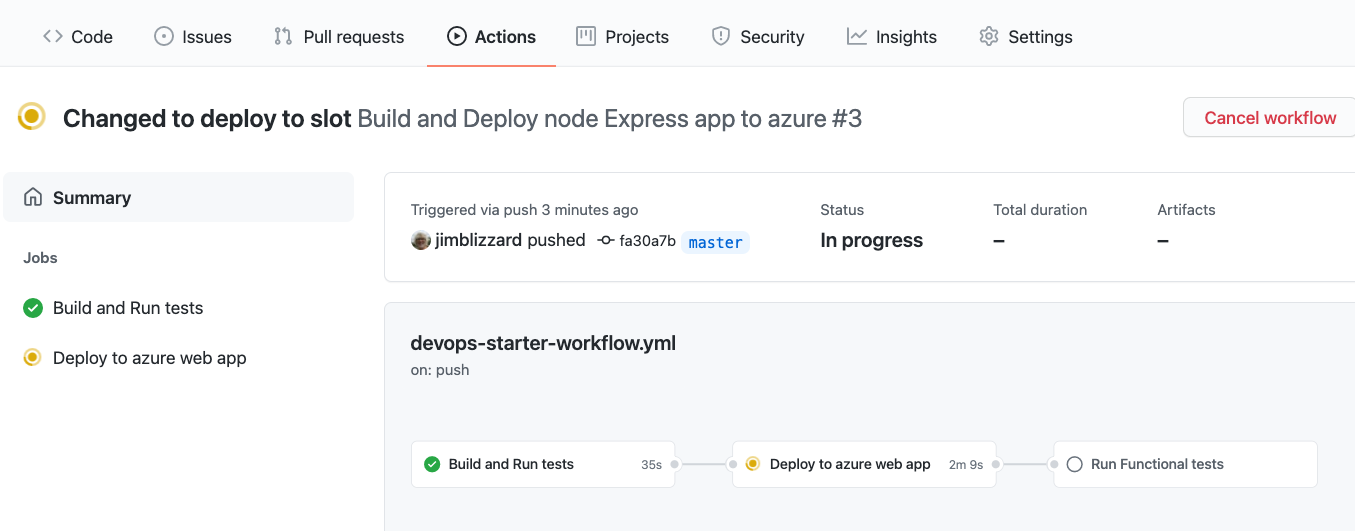
You can click on each job name within the run to see the log messages for it.
-
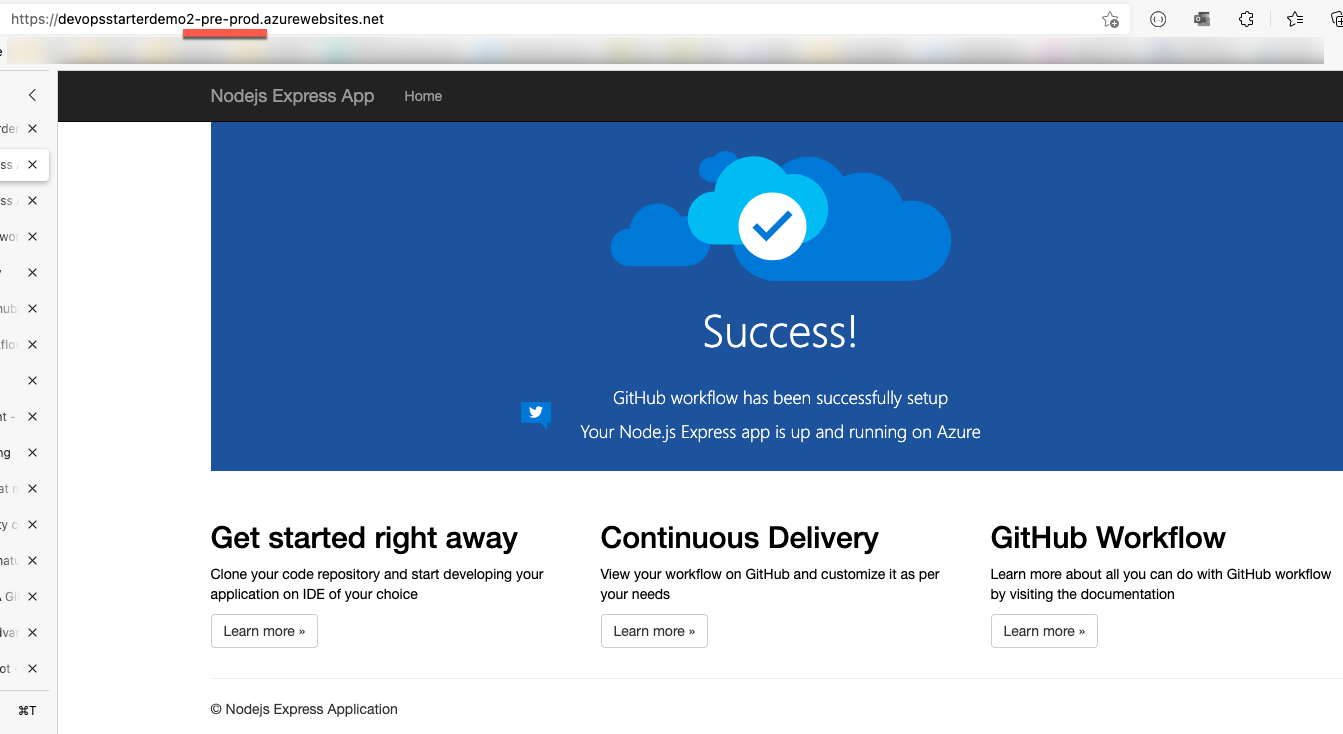
Once the workflow completes, switch back to the Azure Portal tab and from the Deployment slots view, click on the pre-prod slot link, then click on the URL for the pre-prod website.
You should see the Success message on the pre-prod site.


Update the workflow to do a slot swap, to swap the production and pre-prod slots, then make a change to the website. Basic outline:
-
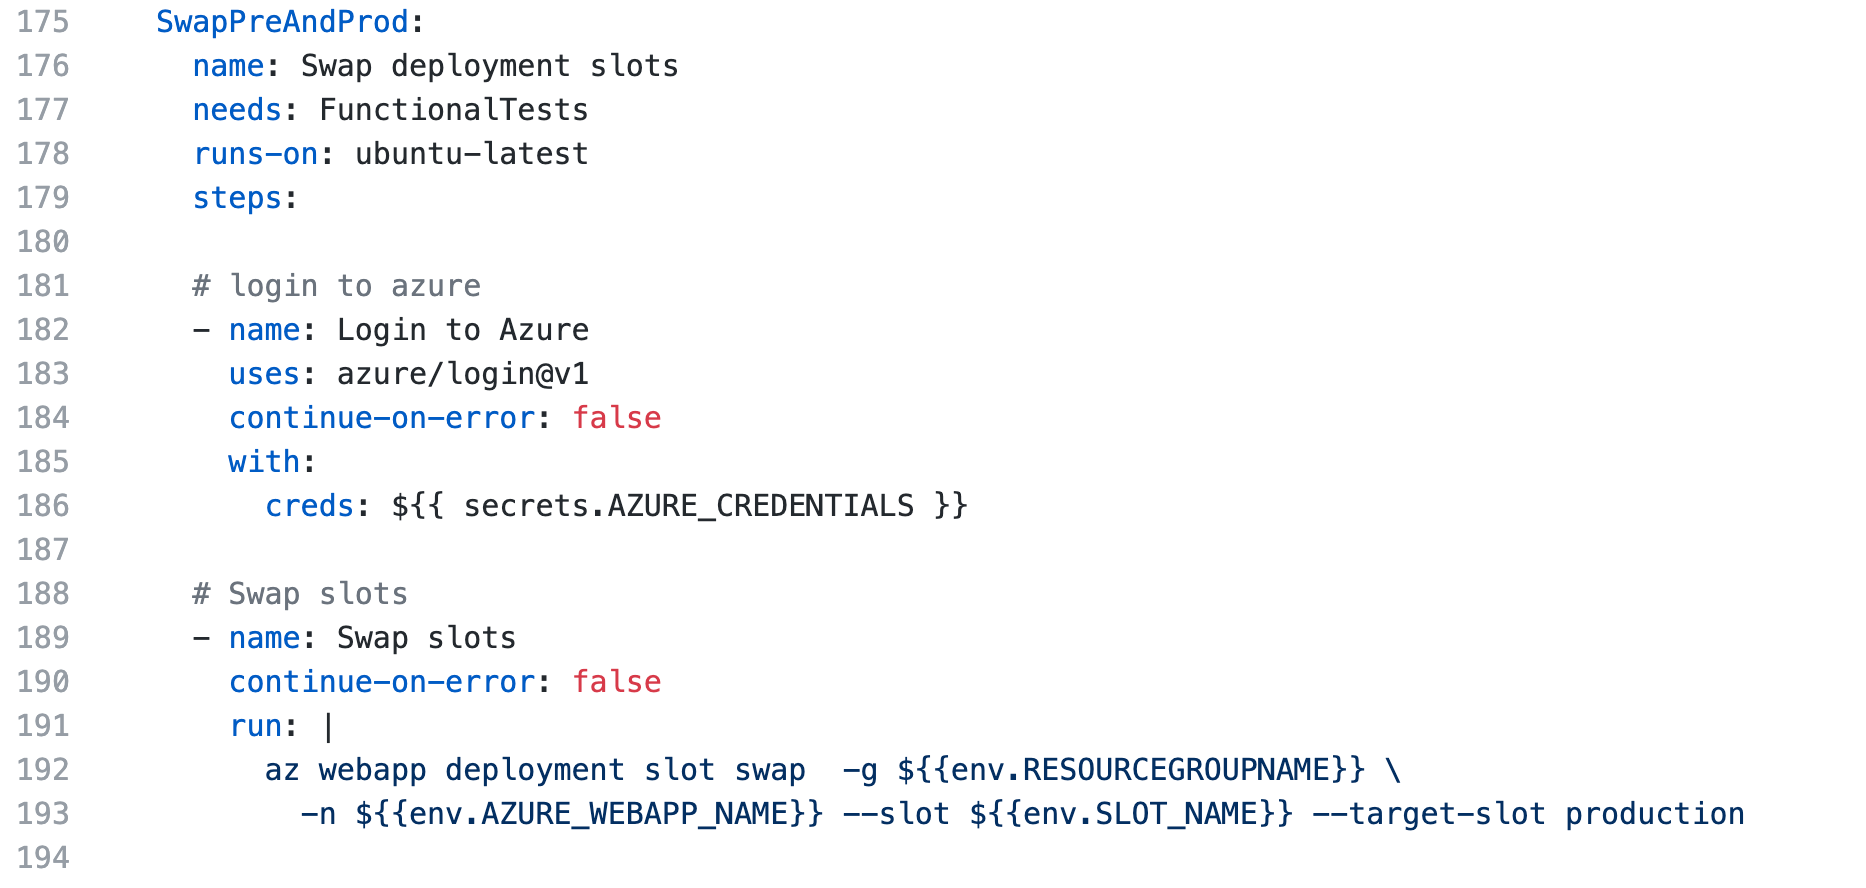
Add new job to the end of the workflow. Be sure to add "needs: FunctionalTests" to make sure it runs after the FunctionalTests job completes.
-
Add a login to Azure action
-
Add a swap slots action (you'll need to use the Azure CLI to run the command).
The newly added job should look similar to this:
-
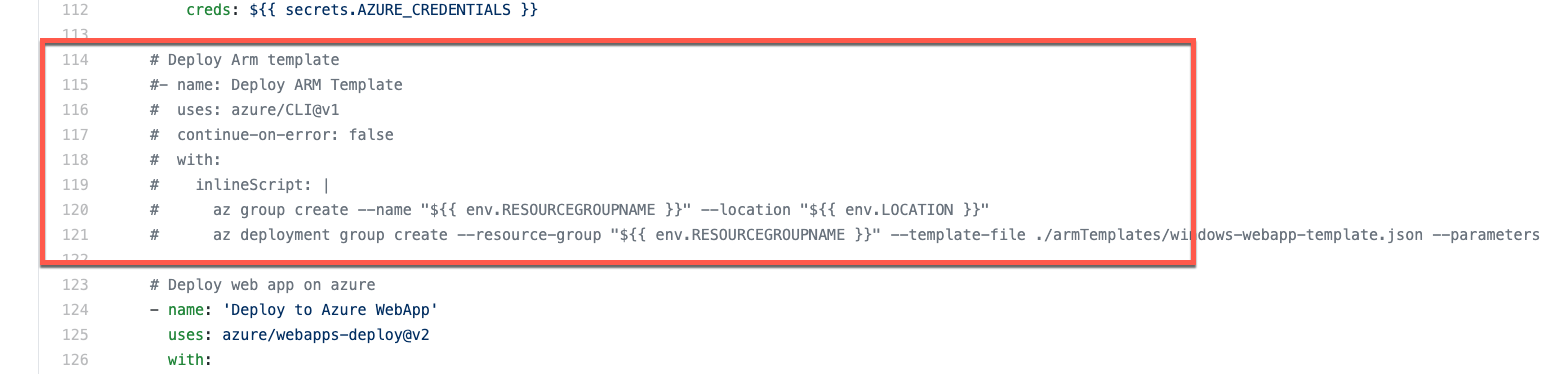
Comment out the ARM Template deploy action. (If you don't do this, your pipeline will fail.)
-
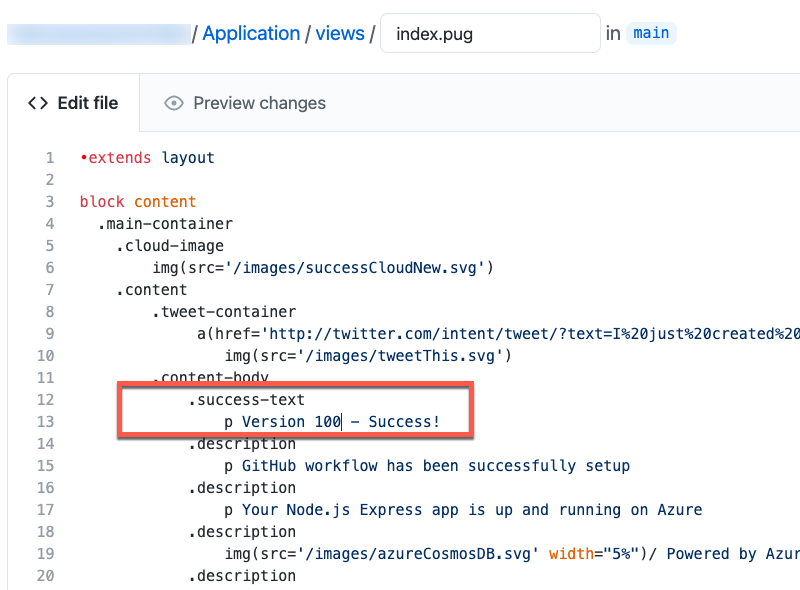
In the file Application/views/index.pug change the .success-text message to something such as p Version 100 - Success!!
-
Commit the change.
-
Watch the workflow run.
-
Once the workflow completes, check the pre-prod website and the production website. The production website should have the new version message, and the pre-prod slot will have the old message.


