This is a proof of concept app with NativeScript for iOS and the WatchKit APIs.
To set up a project:
tns create project TNSWatchKitApp
cd TNSWatchKitApp
tns platform add ios
tns prepare ios
Open the Xcode project in /platforms/ios/TNSWatchKitApp.xcodeproj.
NOTE: To manually set up a WatchKit extension with NativeScript you will have to work in Xcode. This is not supported from the CLI yet.
Go to File > New > Target and select Apple Watch > WatchKit App.
In the dialogue set:
- Include Notification Scene.
- Include Glance Scene.
Click on the TNSWathcKitApp to open the targets and set the deployment targets to iOS8.2 in:
Targets > TNSWathcKitApp WatchKit App > Build Settings > iOS Deployment Target
NOTE: This may change in future. I have the iOS8.3 SDK and my Xcode generates the WatchKit App extensions with deployment target set to iOS8.3.
I had CFBundleVersion mismatch in the Info.plist files in:
TNSWathcKitApp WatchKit Extension > Supporting Files > Info.plist >(was '1.0')TNSWatchKitApp WatchKit App > Supporting Files > Info.plist > Bundle version(was '1')
Just set it to '1.0' everywhere to perfectly match the version string.
Run TNSWatchKitApp WatchKit App in iPhone 6 simulator. Select the simulator and show the watch display from: Hardware > External Displays > Apple Watch - 42mm.
It should be still blank.
Click on the TNSWatchKitApp > TNSWatchKitApp WatchKit App > Interface.storyboard to open the interface builder.
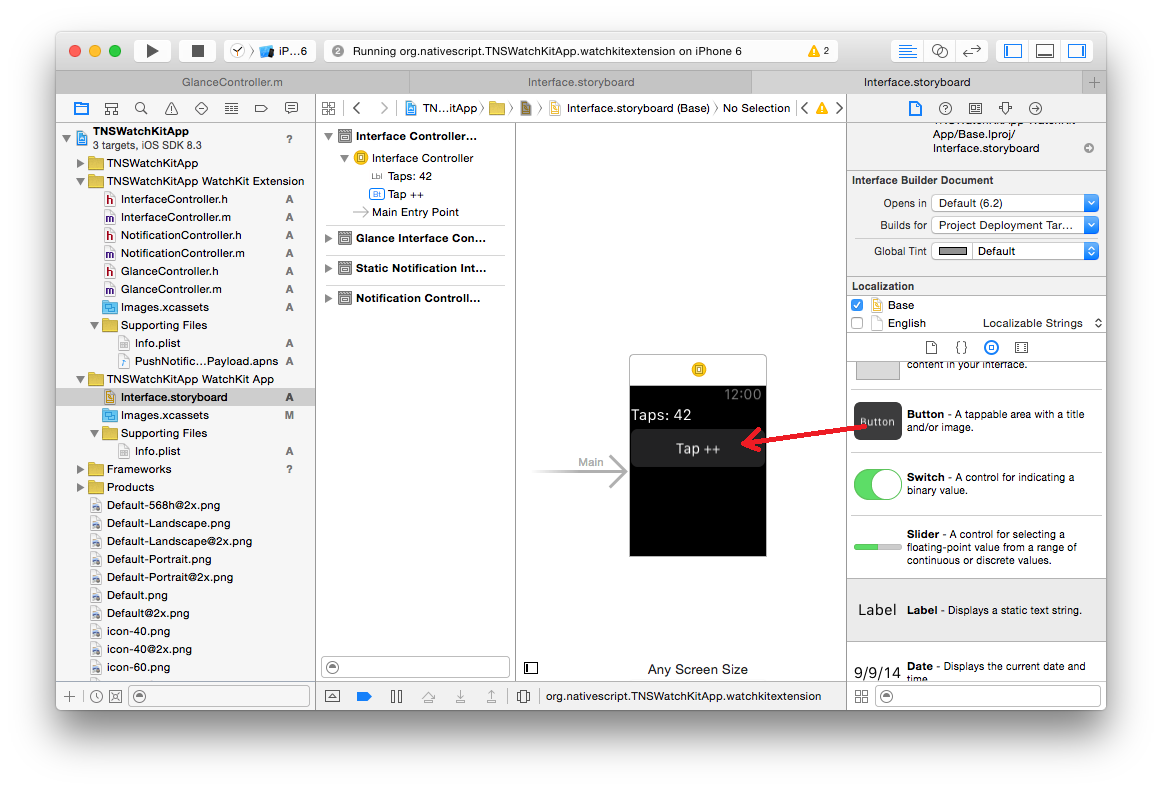
From the widgets menu drag a label and a button on the small clock the "Main" arrow points to.
Note that you have WatchKit Extension and WatchKit App pair. The App is deployed on the watch and has storyboards describing the UI. The Extension will be executed on the phone and will handle input and changes. There is a nice overview of the framework in the apple's documentation.
NOTE: We plan to distribute the shared NativeScript.framework in "tns-ios" in a "NativeScriptEmbedded/" folder of sort.
Open the Targets > TNSWatchKitApp > Build Phases > Link Binary With Libraries and remove the static NativeScript.framework from there.
Then from the NativeScriptEmbedded folder add the shared NativeScript.framework to:
Targets > TNSWatchKitApp > General > Embedded BinariesTargets > TNSWatchKitApp WatchKit Extension > Embedded Binaries
You also have to add metadata in the Extension to support the Objective-C APIs in JavaScript. You need to copy the metadata build phase from the app.
Get to the Targes> TNSWatchKitApp WatchKit Extension > Build Phases and add new Run Script Phase executing the following:
pushd "$SRCROOT/metadataGenerator/bin"
./metadata-generation-build-step.sh
popd
Check if the app is running.
Go to the TNSWatchKitApp/platforms/ios/TNSWatchKitApp WatchKit App folder and create app folder with bootstrap.js inside:
.
├── Base.lproj
................
├── Info.plist
└── app
    └── bootstrap.js
bootstrap.js:
console.log("Hello World!");
And add the app folder to the TNSWatchKitApp WatchKit Extension as reference. It should look similar to the TNSWatchKitApp's app.
You also need to add a main.m file in TNSWatchKitApp WatchKit Extension/Supporting Files to bootstrap the runtime.
#import <WatchKit/WatchKit.h>
#import <NativeScript/NativeScript.h>

static TNSRuntime* runtime;

__attribute__((constructor))
void initialize() {
    runtime = [[TNSRuntime alloc] initWithApplicationPath:[NSBundle mainBundle].bundlePath];
    TNSRuntimeInspector.logsToSystemConsole = YES;
    [runtime executeModule:@"./"];
}
If you run the 'TNSWathcKitApp WatchKit App` now the bootstrap.js will execute printing "Hello World!" in the console.
The next step will be to implement the controllers in bootstrap.js.
NOTE: Building the WatchKit App interface will use the storyboards and will require the controller headers at compile time. We plan to solve this by providing our own templates that will allow you to focus on the JavaScript.
NOTE: We will try to implement all that work in the CLI so you can start up from here.
For each of the files:
- InterfaceController.m
- NotificationController.m
- GlanceController.m
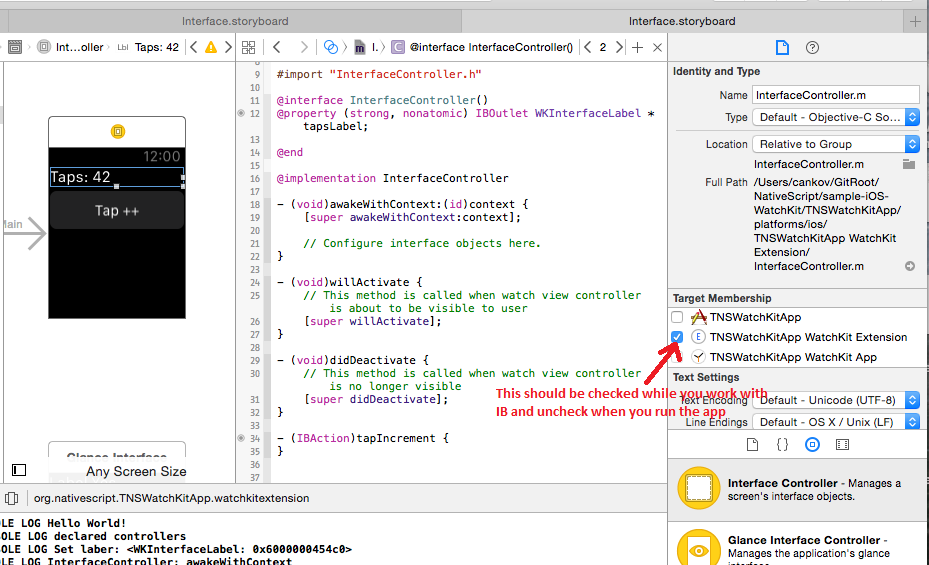
Go to the "Target Membership" of the file and un-check the "TNSWatchKitApp WatchKit Extension". We do not need these classes to compile, will implement these classes in JavaScript, bootstrap.js:
console.log("Hello World!");

var taps = 42;
var InterfaceController = WKInterfaceController.extend({
    awakeWithContext: function(context) {
        this.super.awakeWithContext(context);
        console.log("InterfaceController: awakeWithContext");
    },
    willActivate: function() {
        this.super.willActivate();
        console.log("InterfaceController: willActivate");
    },
    didDeactivate: function() {
        this.super.didDeactivate();
        console.log("InterfaceController: didDeactivate");
    },
    tapIncrement: function() {
        console.log("Here!");
        taps++;
        this._tapsLabel.setText("Taps: " + taps);
    },
    tapsLabel: function() {
        return this._tapsLabel;
    },
    "setTapsLabel:": function(value) {
        this._tapsLabel = value;
        console.log("Set label: " + value);
    }
}, {
    name: "InterfaceController",
    exposedMethods: {
        tapIncrement: { returns: interop.types.void, params: [] },
        tapsLabel: { returns: interop.types.id, params: [] },
        "setTapsLabel:": { returns: interop.types.void, params: [interop.types.id] }
    }
});

var NotificationController = WKUserNotificationInterfaceController.extend({
    willActivate: function() {
        this.super.willActivate();
        console.log("NotificationController: willActivate");
    },
    didDeactivate: function() {
        this.super.didDeactivate();
        console.log("NotificationController: didDeactivate");
    }
}, {
    name: "NotificationController"
});

var GlanceController = WKInterfaceController.extend({
    awakeWithContext: function(context) {
        this.super.awakeWithContext(context);
        console.log("GlanceController: awakeWithContext");
    },
    willActivate: function() {
        this.super.willActivate();
        console.log("GlanceController: willActivate");
    },
    didDeactivate: function() {
        this.super.didDeactivate();
        console.log("GlanceController: didDeactivate");
    }
}, {
    name: "GlanceController"
});

console.log("declared controllers");
As you have seen we have the tapIncrement, tapsLabel and setTapsLabel: methods in the InterfaceController. They will handle basic interaction.
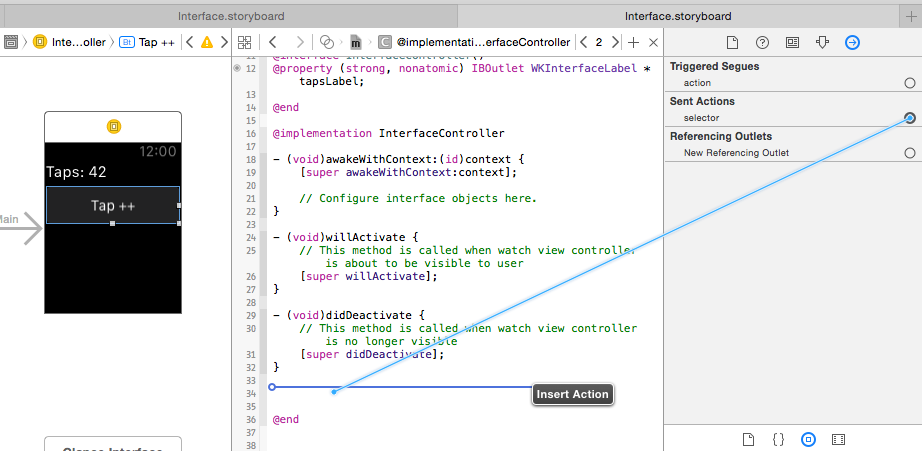
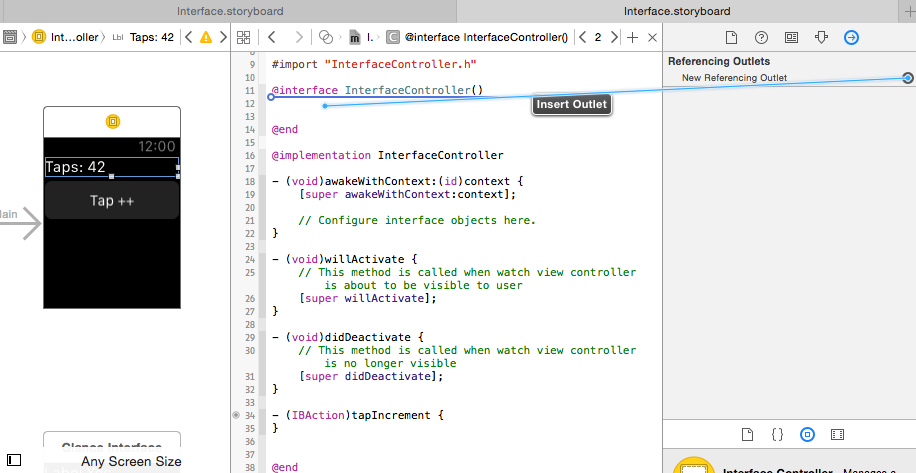
To make the button fire the tapIncrement and export the label in the "tapsLabel" property in the interface builder (IB) you will have to include the "InterfaceController.m" back in the TNSWatchKitApp WatchKit Extension target.
Then show the "Assistent Editor" and drag the buttons's "Sent Actions" and label's "Referencing Outlets" in the InterfaceController.m to generate the stubs:
Then uncheck the "InterfaceController.m" again, build and run.
NOTE: Having to add the .m files when you work with the IB and remove them during compilation is boring and tricky but we will try to provide automated assistance with templates, custom markup or even generate these manually from by examining your JavaScript.


