(swedish) Throwing Board
Credit goes out to Ben for introducing me to this awesome device. This documentation will first show you how to build a throwing board for yourself. This includes some pictures, technical drawings and even possible improvements. At the end it will give you a tutorial for basic usage. There is no video for the first steps yet, but we took some from advanced tricks:
Why
- its a fun and easy thing to do, also quite safe if bases know what they are doing
- easier for and on the bases than banquine
- more spectacular than trampoline
How to build one
- multiplex wood gives best stability and lowest weight
- it should fit in a normal car, so the outer diameter is limited to about 100 cm (this limitation depends on your preferences)
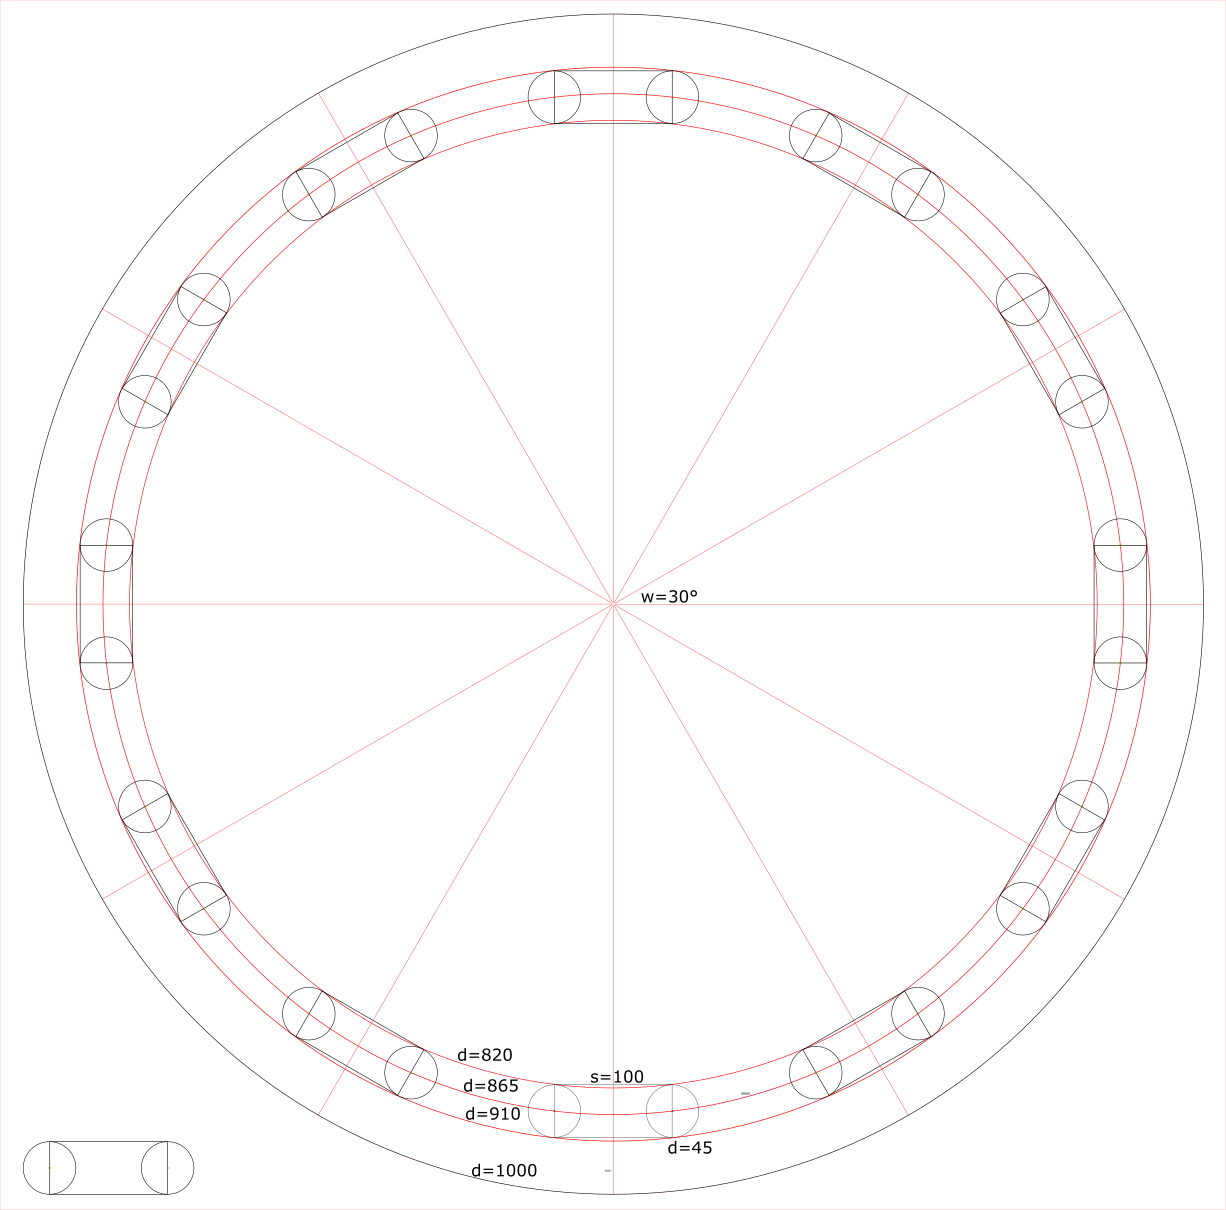
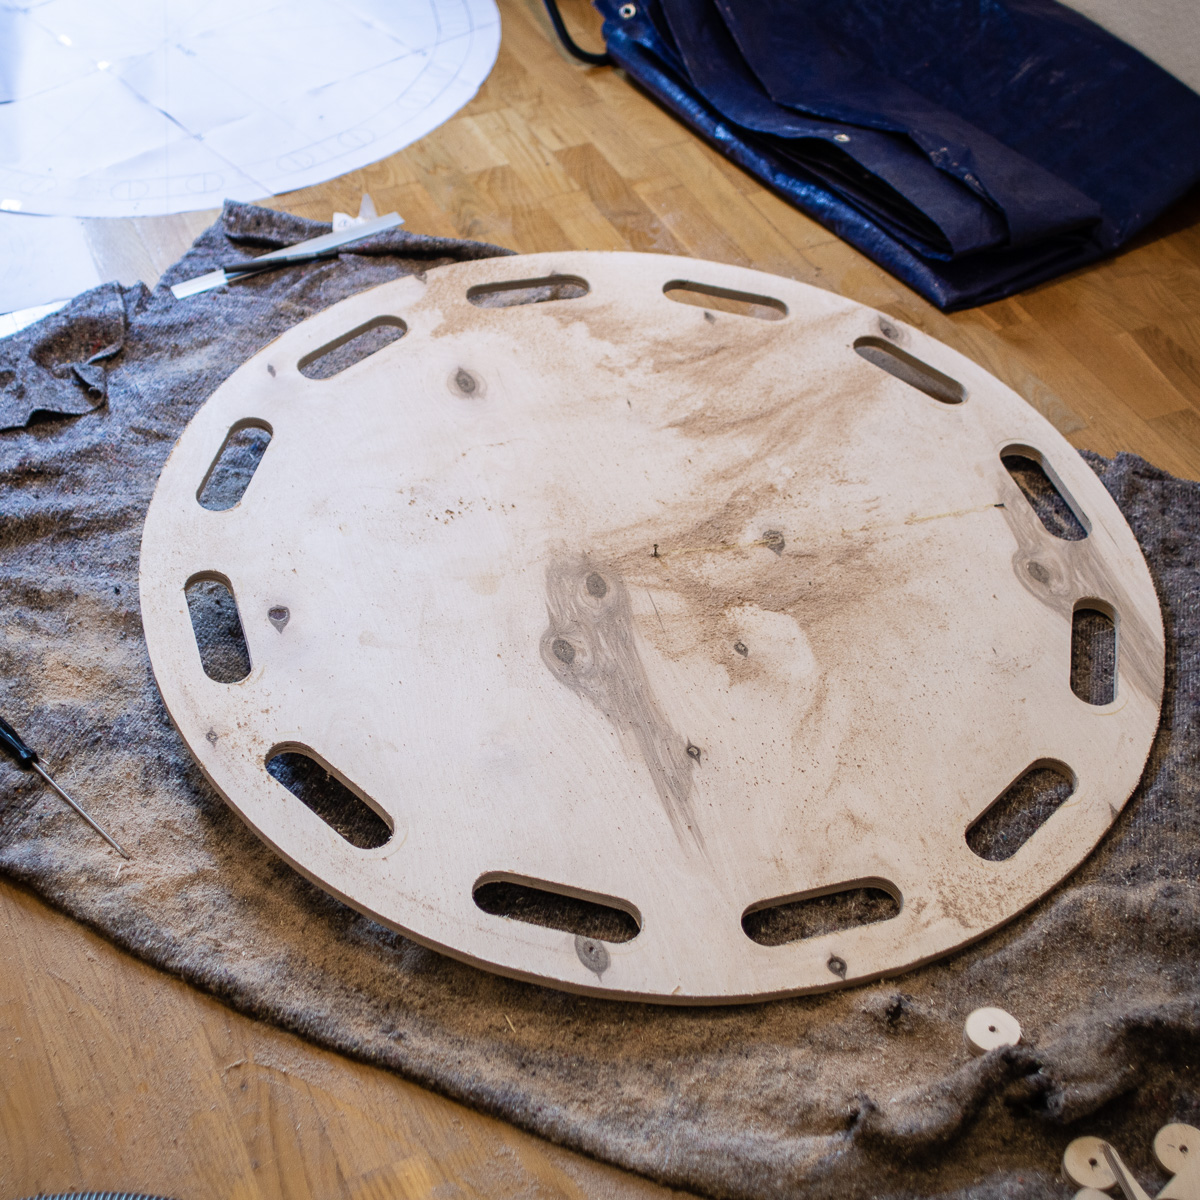
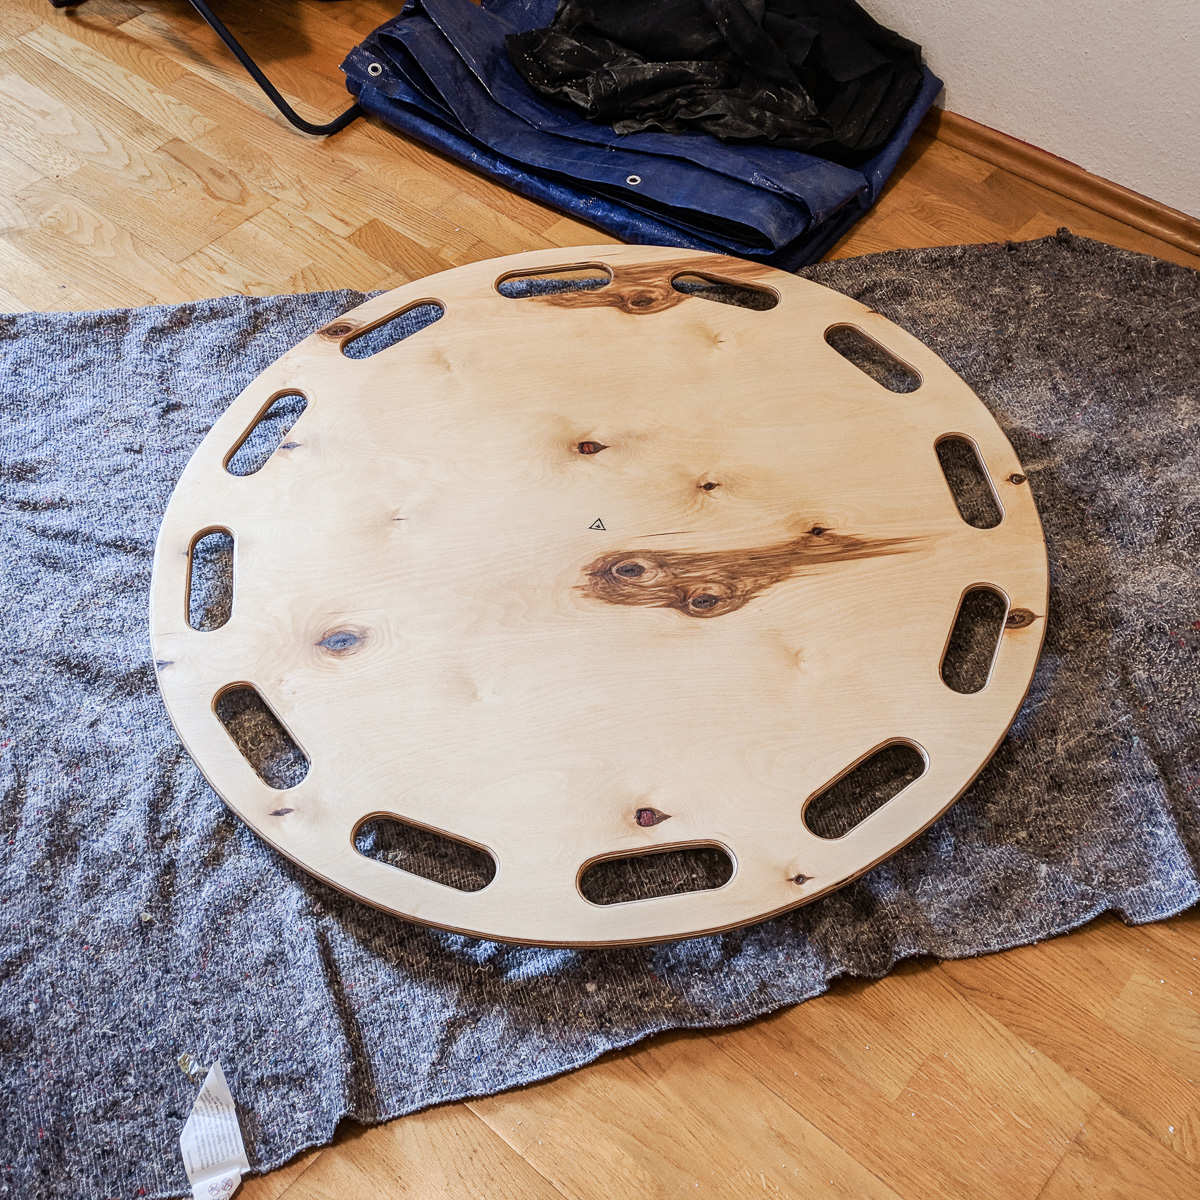
- the count of holes for the hands for this board-size are best to be 12, so you can use the board with 2, 3, 4, 6 bases evenly
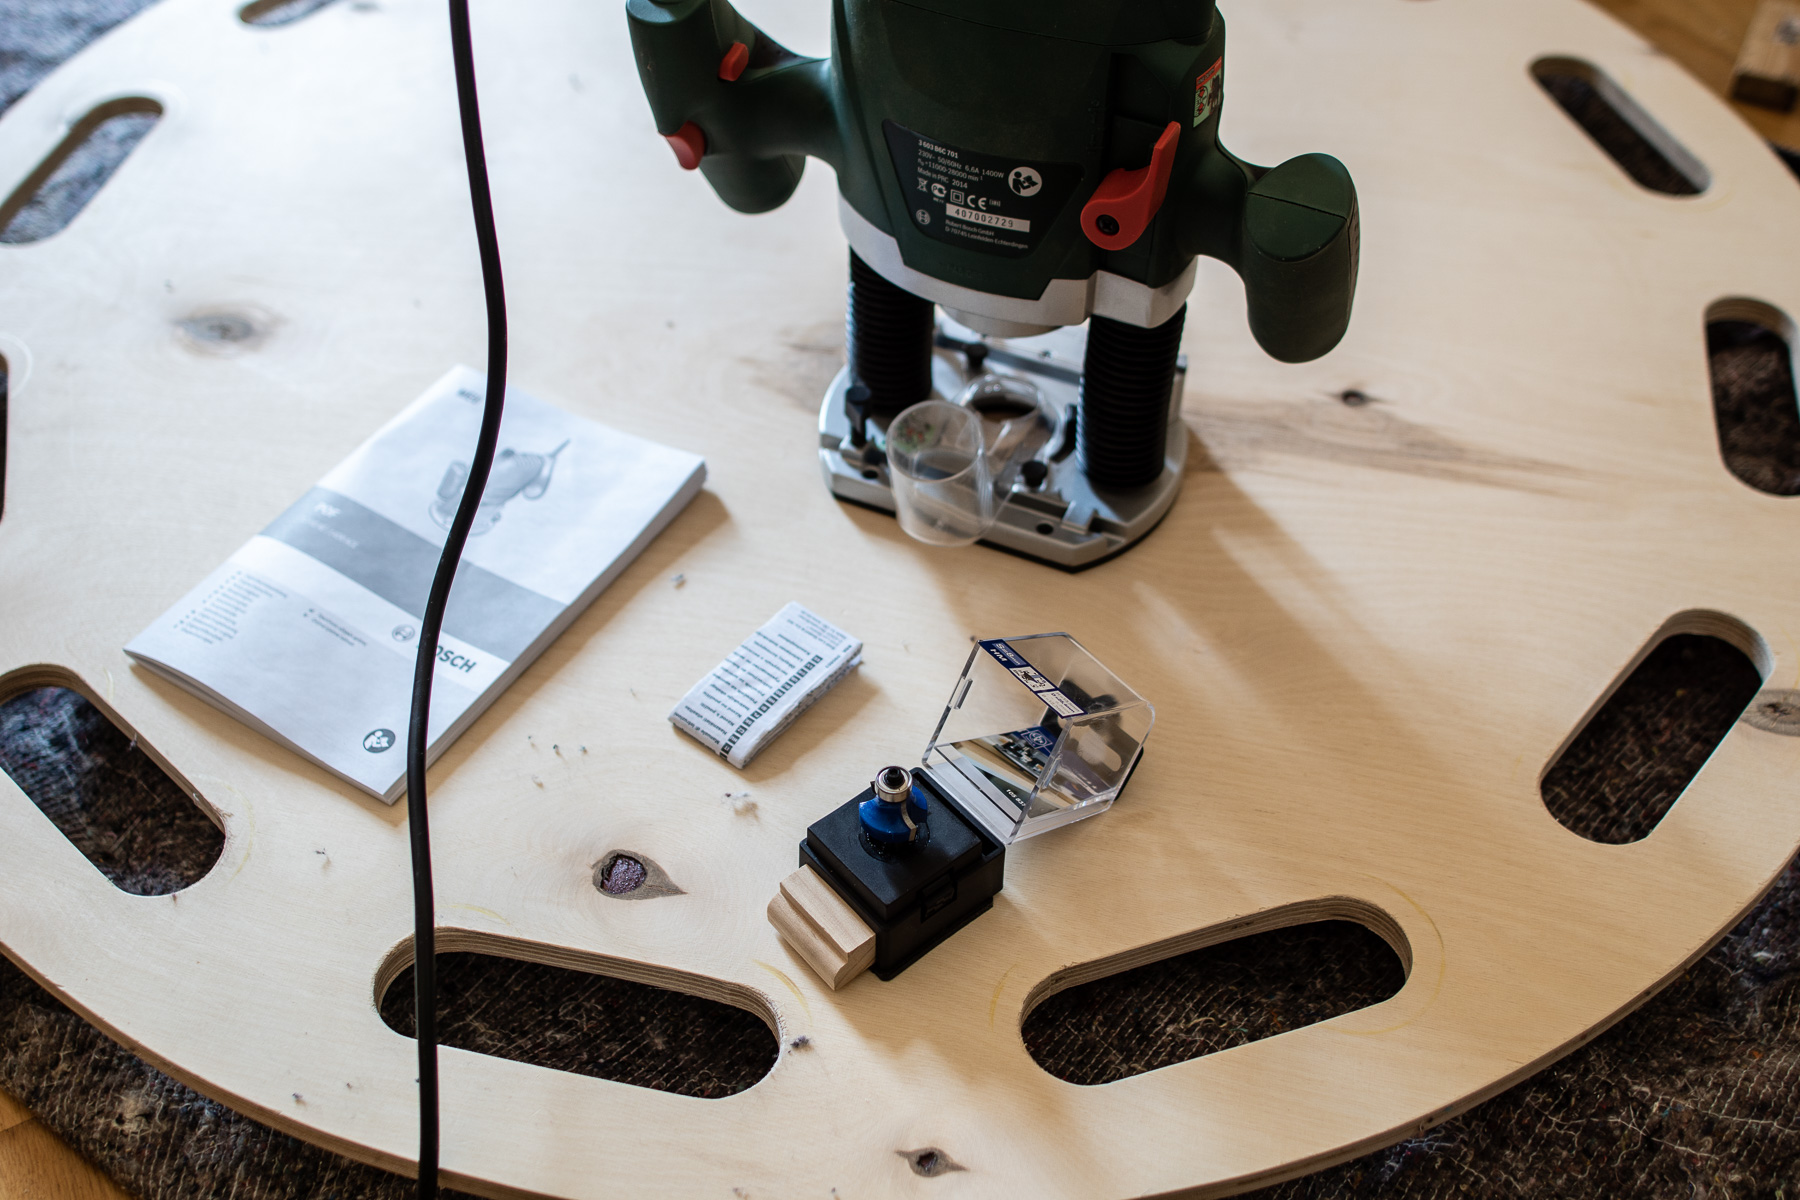
- you need at least a jigsaw, a hole-saw (power-drill) and a lot of sandpaper (an additional mill / router makes your life so much easier)
- hand holes should be about 45 mm deep and the width of 140 mm should be enough for even the biggest hands
My Build-log
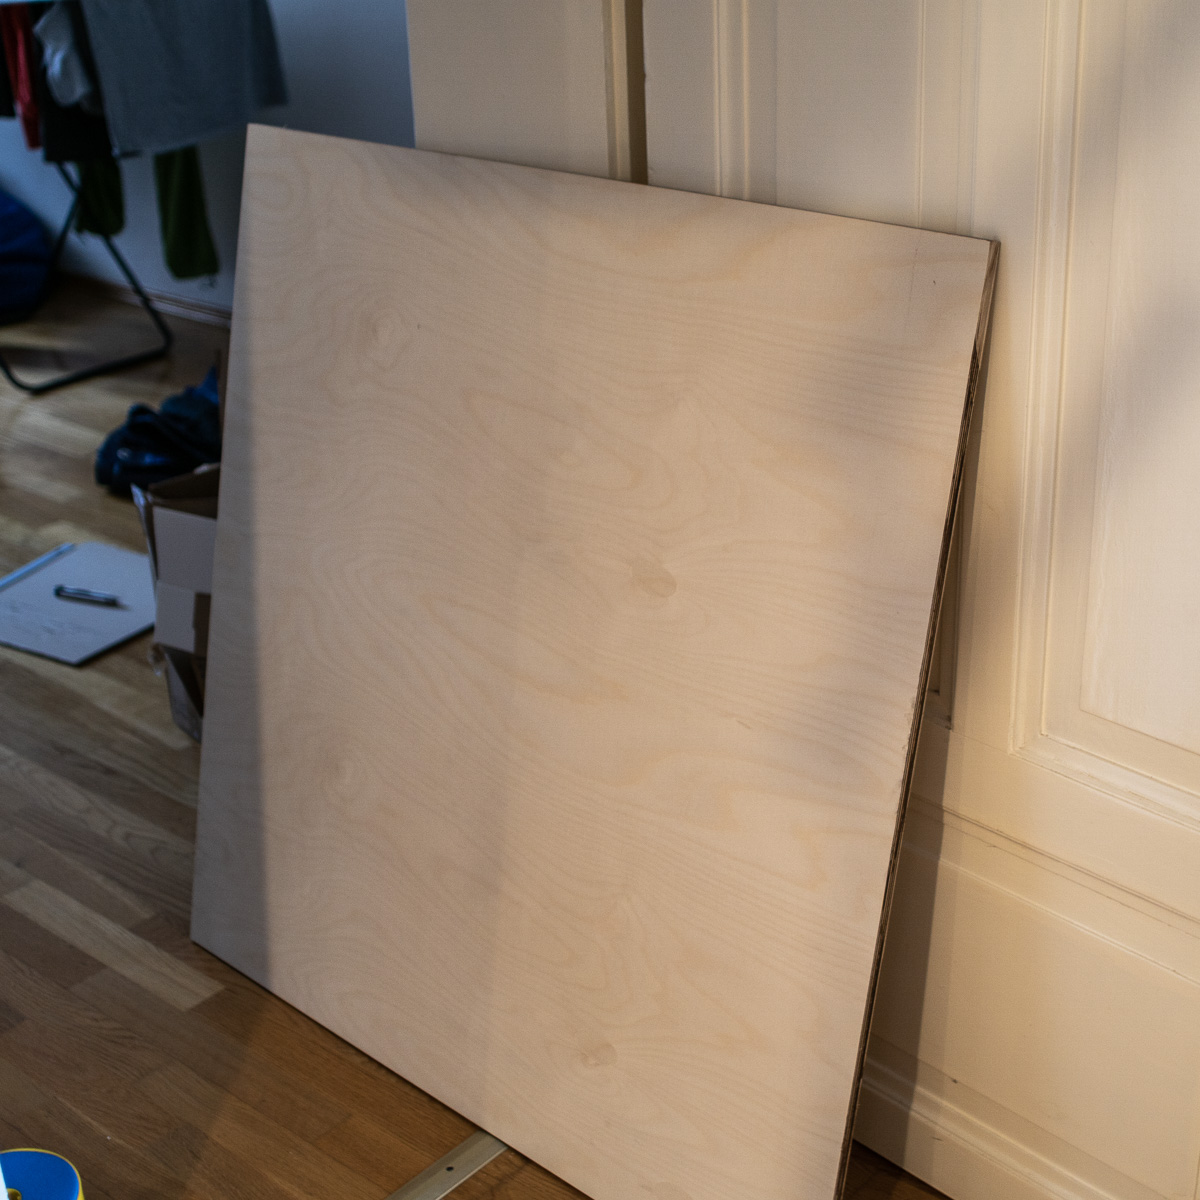
- i chose birch multiplex with an area of 1 m², 15 mm thickness and 9 equal layers (costs about 30 € in germany)
- the glue is water resistant and the board is stiff but able to flex very much before it breaks (i was able to test this with a long piece of trim at the home improvement store)
- be sure to get multiplex wood (even layers, as many as possible) instead of cheap plywood (sometimes only 3 layers with thick wood-core)
- beech would be heavier but not significantly more stable (but there is some expensive high quality multiplex available with 5 layers over 3 mm)
- poplar would have the same weight but less stability
- the rectangular piece weights about 9.5 kg
- I calculated that the round board weights 7.46 kg, with holes cut it goes down to 6.74 kg
- the real weight (after rounding the edges) came down to 6.7 kg, this is about 10% of the flyers weight
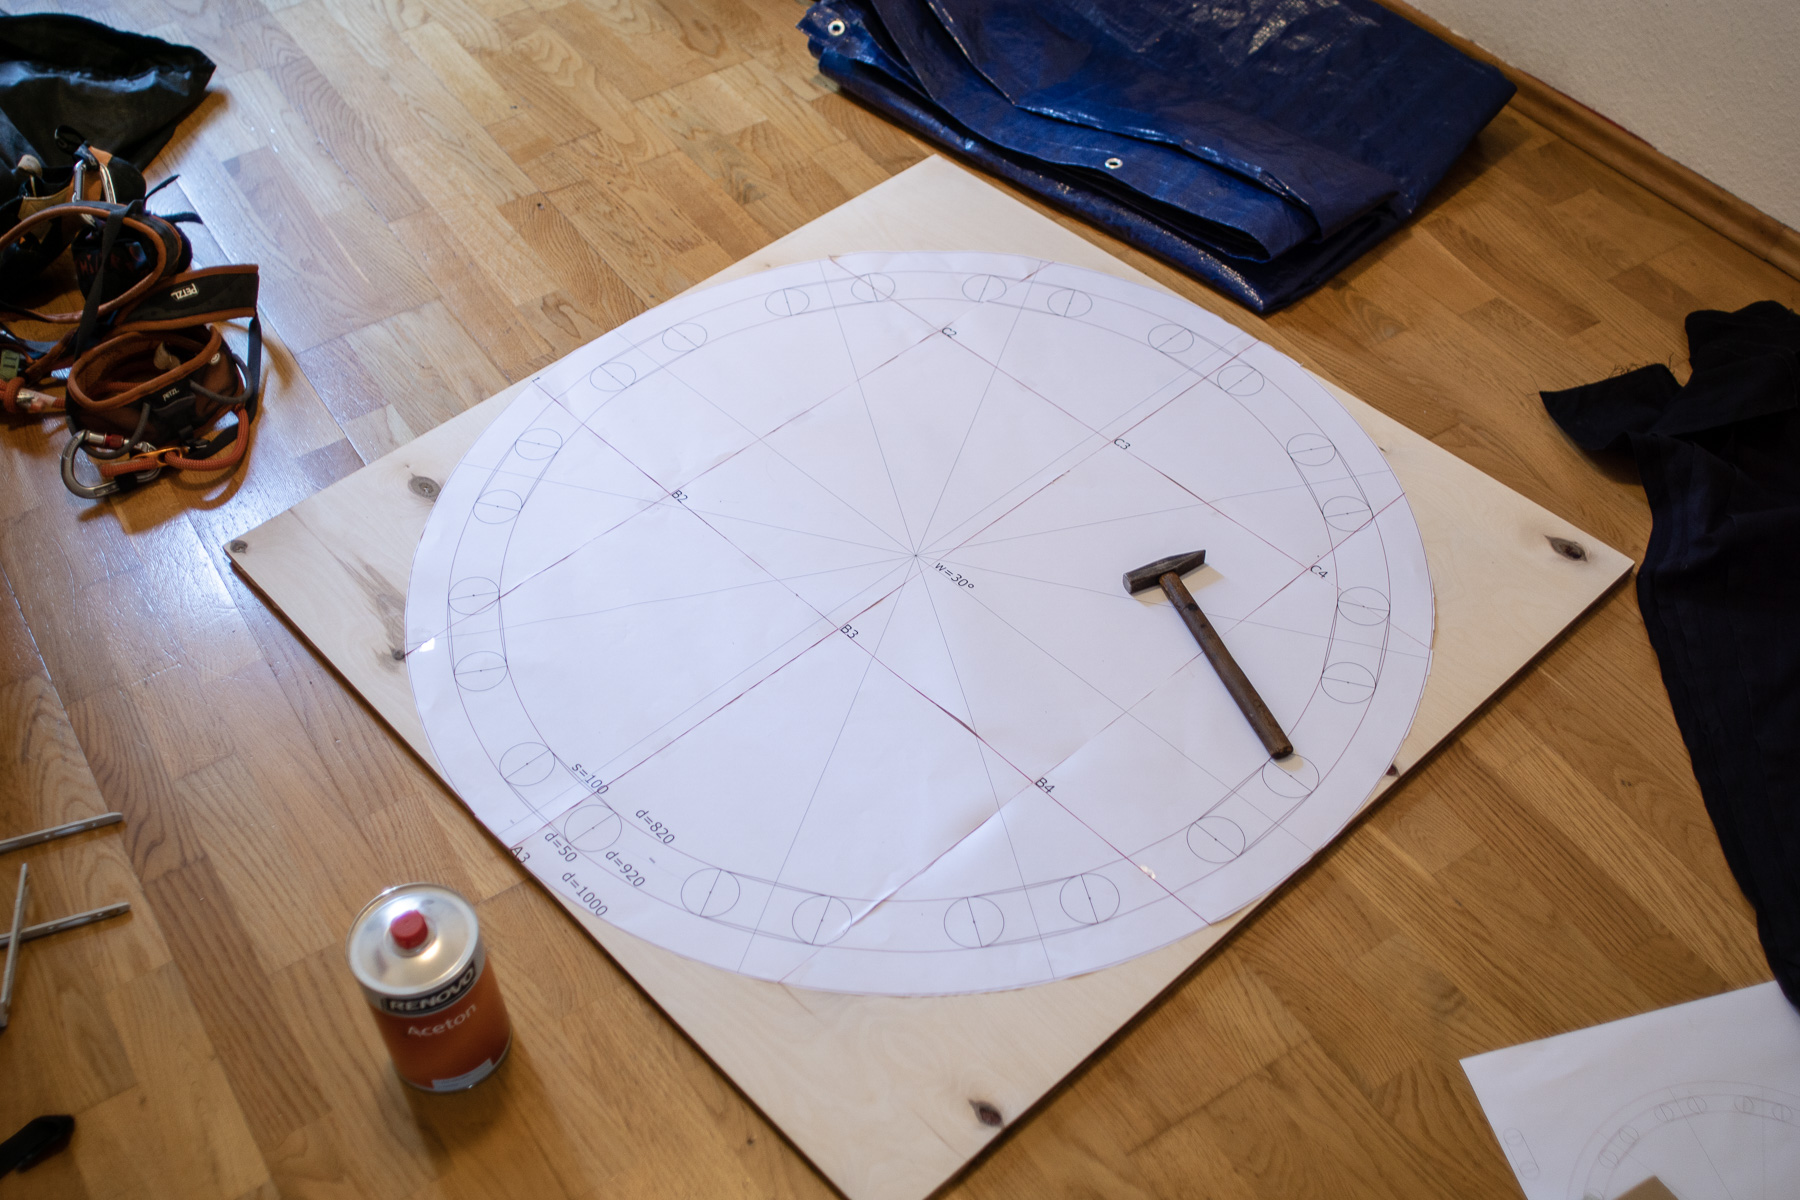
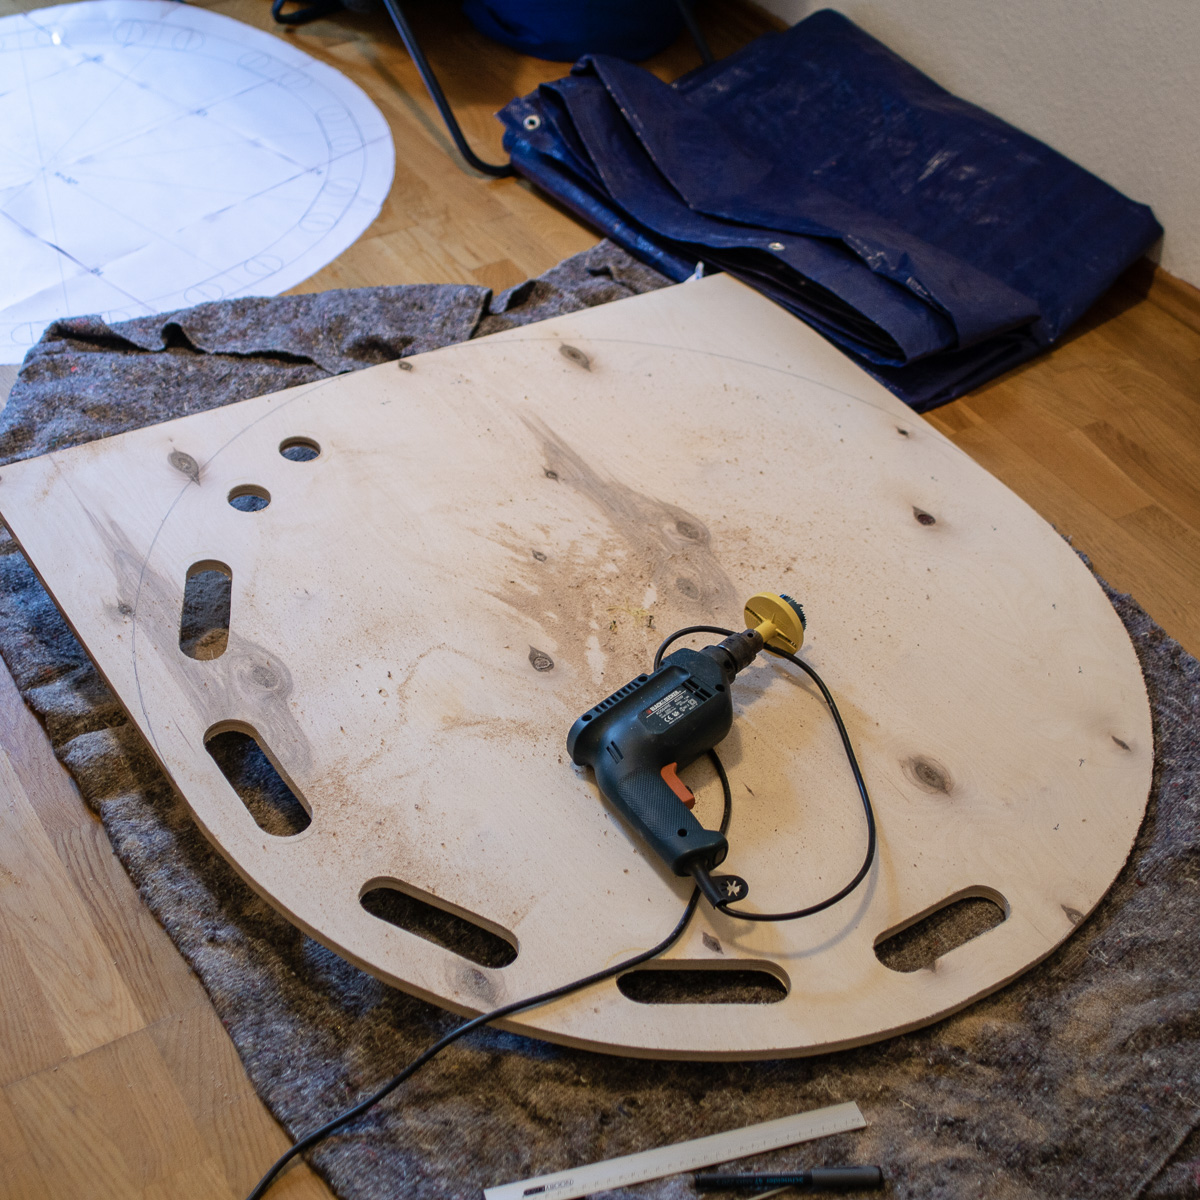
- i put a small screw in the middle of the board and attached a string to it to draw a circle at 865 mm and also 1000 mm diameter
- i made markings 30 degree apart (on the inner circle) and made a second marking 100 mm to the right of the first markings (also on the inner circle) to guide the hole-saw
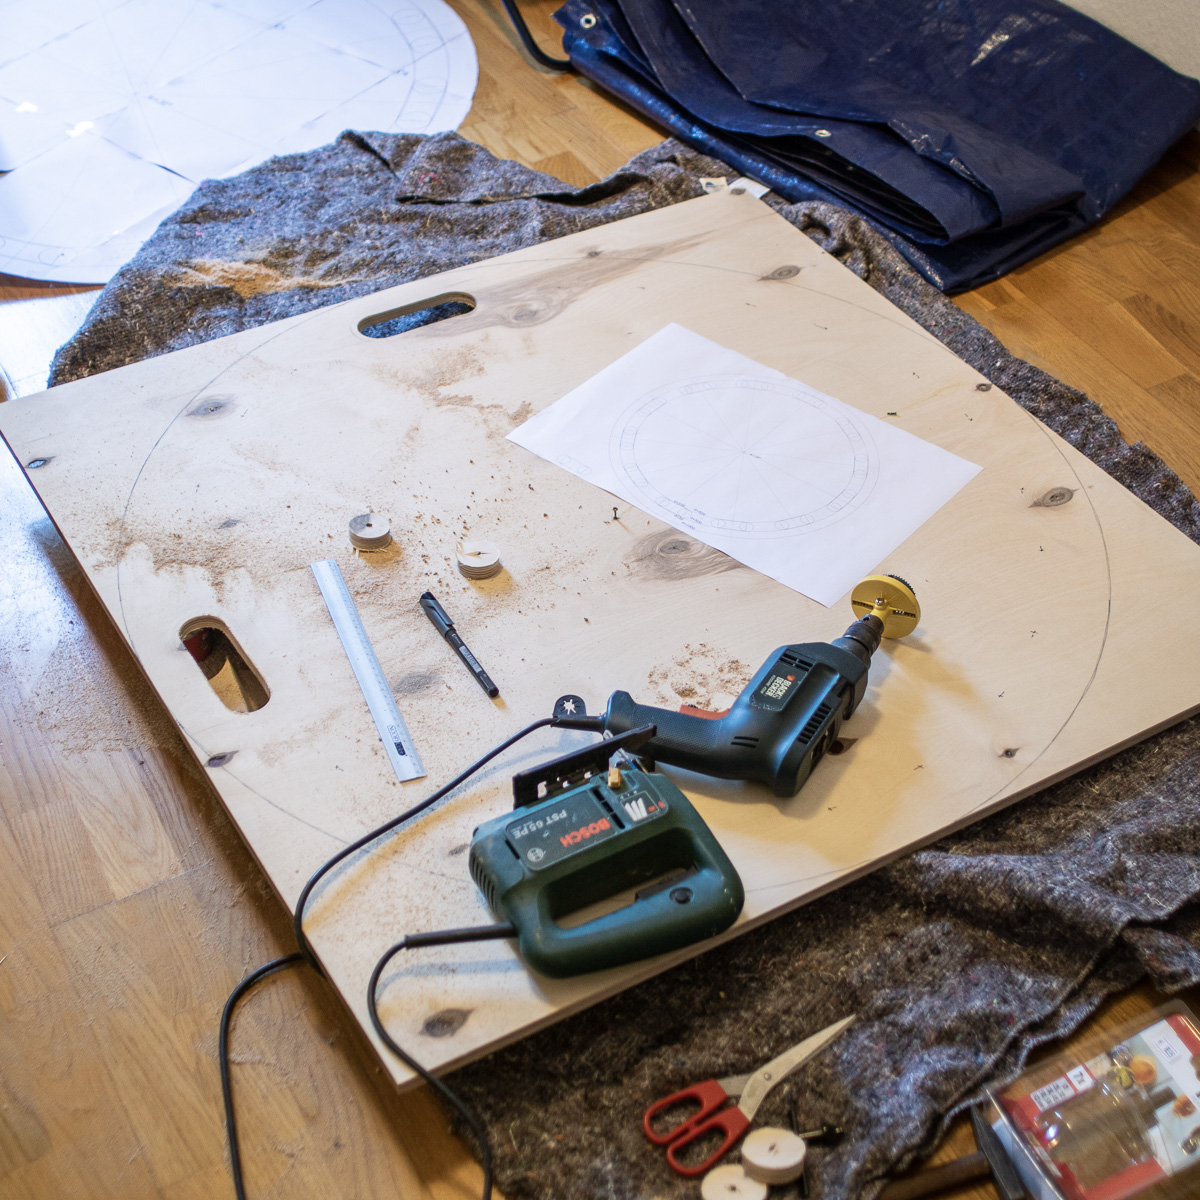
- i used the power-drill / hole-saw to get started with the round edge-holes for the handles
- after that i could use a ruler to connect the holes and then use the jigsaw to follow the line
- the jigsaw is also used for cutting the outer circle (it won't be perfectly round, but who cares)
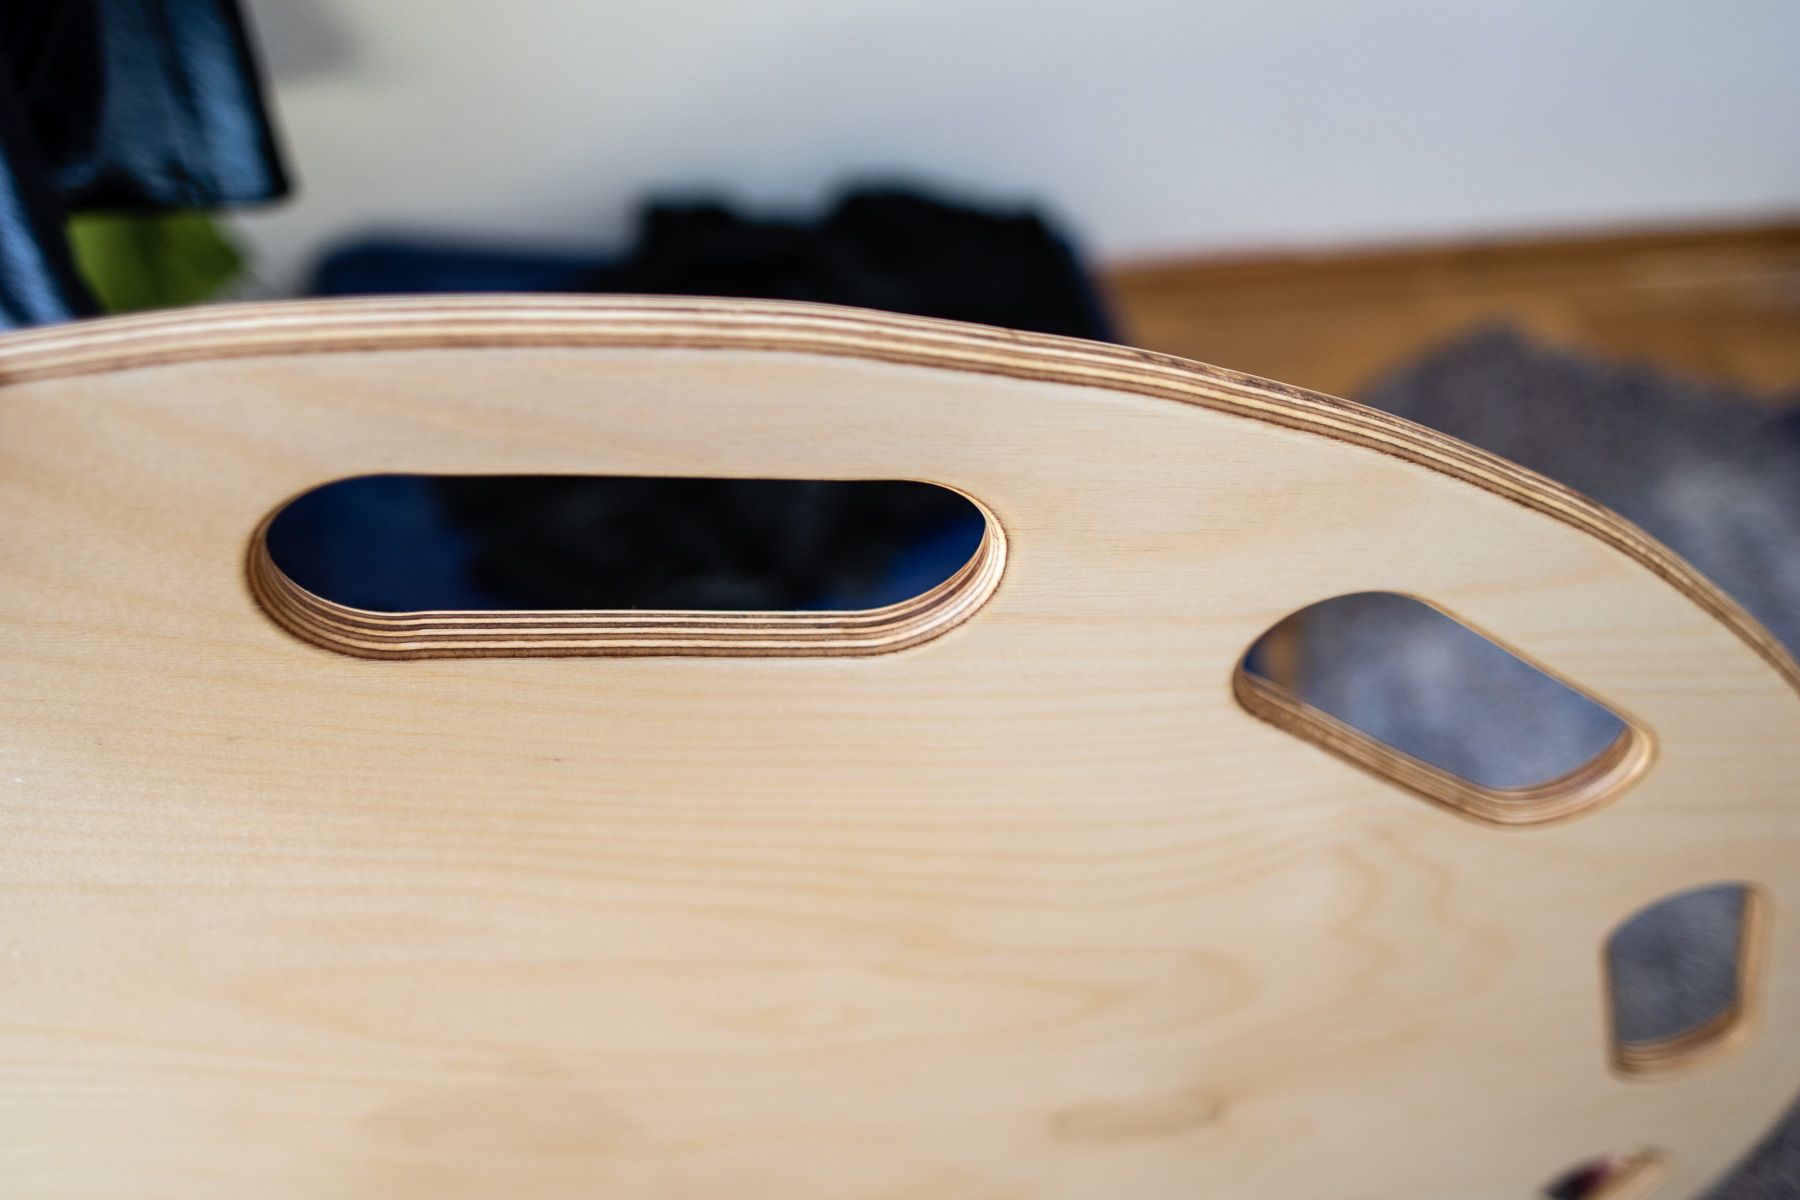
- a router bit should be used to round the edges (it is a million times faster then using sand paper, knife or carpenter's plane)
- sand paper (60, 400, 1000) can be used to smooth the handles, but the main surface should stay rough (!!!) for better grip
- smooth handles allow a better hand-transition between low and high position
- i marked the middle of the board on both sides with a permanent marker
- i wanted to seal the surface but did not want to use any paint or varnish so i used olive oil (had no linseed oil or special oil for kitchen tops from the home improvement store)
- at first there was an instant regret because it was slippery (who would have thought), but after two days (and one more coating) it was perfect
- the surface is now a bit like rubber, good for standing barefoot on it
- we used the board with shoes, socks and barefoot and it is good for all three but I prefer barefoot or shoes
Possible Improvements and other lessons learned
if you try one of these options i would be very happy to hear some feedback
- the board could be a bit bigger, but not because it is easier for the flyer (that's absolutely fine) but for more room for the bases knees
- the board could be thinner than 15 mm (test with a 90 kg flyer), but my source only had 12 mm with disproportional less layers and i wouldn't dare to use it
- for better grip for the flyer you could use some very fine sand (i have read that bird sand is ok) and mix it with paint or lacquer to get a rougher surface (like a boat deck)
- the oil coating seems like a good compromise between grip (on the rough board) and smoothness (on the polished handles) to me
- i have used an uncoated board before and it was not easy on the hands (close to blisters)
- better handles
- my first concern using the thin wood was that it is not easy on the hands, but it is quite good because there is enough grip-surface below for the fingers (the neck is about 45 mm wide)
- if you have the wood working tools you could make round handles with some extra wood glued to the neck of the handle
- the lazy option would be to wrap grip-tape (available for bikes) around it to make it more ergonomic
- the board is a good sound emitter, it is quite loud even on a soft landing, so don't be to concerned for the flyer
How to use it
Games to become accustomed
- Note: play without throwing board
- Slow motion stage diving: choose a flyer of your group and lift him up with several bases. Wait for the movement of the flyer. Keep it controlled. No spontaneous rolling or tipping over. Base is stationary while lifting with long arms. If free (as a base) go to where the flyer is floating to
- Support like concrete: flyer makes his own movements and only gets offered static support like a stair or other things to lean, knee, lie on. Keep it ultra-slow and controlled
Basics for the Base
- Important side notes
- bases should keep calm and only exchange short precise commands. Distraction is dangerous!
- At least two bases should know what they are doing
- Try to balance strength of bases evenly
- If one base gets tired it should be replaced or simply do less (counterbalance that on the opposite side)
- Lift board and try turning points without losing synchronization
- Standing straight with arms down
- Squat a bit, board should be right above knees, arms still straight
- Stand up again, move board to top (again straight arms). Height-Orientation is focussed on smallest base
- Exercise tempo without a flyer
- One person leads the bases by giving commands. Start with "and" or "breath in"
- Breath in without lifting, just open chest
- Going down, more by pulling less (weight of flyer), charge muscles, very slow, even slow down more…
- Reach lowest point, knee-high
- Accelerate on the way up and keep the last kick for the very end
- wait for turning point of flyer and prepare to go down, ready to catch the flyer softly.
- Static positions with flyer on board
- Begin with getting flyer up, flyer should take a step directly to the middle to make it easy for the bases and use shoulders of bases for stability
- Flyers stands on feet, elbow-wide open. Board center should be right before the heels (~3/4 of the foot)
- Bases hold board with straight arms and straight back, squatted, right above the knee
- Bases with straight arms down, standing straight
- Board shoulder high. Reposition hands.
- Long arms up.
- Step by step down
- Learn to move with flyer on board
- Practice cycling through static positions and do this movement while board in high position
- Var1: rotate board by doing one step with each foot. Discuss the direction first! The foot that is "behind" should do the first step, so you don't run into your neighbour-base
- Var2: lateral movement. Discuss direction first! This is harder, but most likely essential later to catch rogue flyers
- Var3: try combining Var1 and Var2 more freely and continuous. Flyer has to react, can even rotate by itself
Dynamic movements aka. Throwing
- Some more important side notes
- If flyer falls during landing one base can use hands to save flyer. Normally the base that the flyer is falling to. But be clear who! Two hands are enough. So in between two bases use one hand each.
- Use short and precise commands. No chatting in between
- flyer defines start and tempo, bases have to adapt
- Bases have to catch flyer softly, but flyer can also soften the landing by bending knees (squatting)
- Tempos
- Tempo is even slower than banquine
- Bases present whole process to flyer at least two times. Flyer tries to balance, but shouldn't need though
- Flyer then shows its tempo. Keep it slow. Normally from this point on the people have to be calmed constantly
- Var1 standing with arms in front. Breath by slowly, open chest, lifting arms slightly. Go down slowly, stay and jump up with arms rising. Push high.
- Var2 crouch, with hands touching ground. Breath, go down, jump up and go back on all four limbs
- Progression of throws
- Note: Keep it synchronized, slow and throw board up till the top, walk below flyer if needed. Normally bases do that on their own without teaching
- Do two to four throws with each flyer then replace flyer if more are available
- First try basic throws
- next could be tucked position at highest point
- Rotation of 90 or 180 deg
- Try salto with a lunge, rotation is different than anything else. Usually flyers do not rotate enough
