An Ontop tutorial using the Bgee database
Copyrights
- Data (under the data directory): CC0
- Text: CC-BY 4.0
- Code: Apache 2.0
Table of Contents
- 0. Repository structure
- 1. Setting up the PostgreSQL database
- 2. Setting up the VKG using Ontop-Protégé
- 3. Deploy a SPARQL endpoint using Ontop CLI
- 4. Deploy a SPARQL endpoint using Ontop Docker
Repository structure
.
├── data
│   ├── mysql.zip
│   └── postgresql.zip
├── LICENSE
├── obda
│   ├── bgee_v14_genex.obda
│   ├── bgee_v14_genex.owl
│   ├── bgee_v14_genex.properties
│   ├── bgee_v14_genex.q
│   └── bgee_v14_genex.r2rml
└── README.md
data: MySQL and postgres dumpsbgee_v14_genex.obda: Mapping file (Ontop syntax)bgee_v14_genex.r2rml: Mapping file (R2RML syntax)bgee_v14_genex.owl: Ontology filebgee_v14_genex.properties: Properties filebgee_v14_genex.q: Queries file for Protege
Setting up the PostgreSQL database
- Create a database called
easybgee_v14_2. For example, inpgsqlyou can use the command:
pgsql> CREATE DATABASE easybgee_v14_2;-
Unzip the postgres archive to extract the dump file.
-
Use the extracted dump file to create a database
easybgee_v14_2. For example, you can use the following bashpgsqlinvocation:
$> PGPASSWORD=$pwd psql -h $host -p $port --user=$user --dbname=easybgee_v14_2 -f $dump_file
- Provide the connection parameters to your database in the bgee_v14_genex.properties file. Replace the placeholders
<host>,<port>,<user>, and<password>with appropriate values.
jdbc.url=jdbc\:postgresql\://<host>\:<port>/easybgee_v14_2
jdbc.driver=org.postgresql.Driver
jdbc.user=<user>
jdbc.password=<password>
Setting up the VKG using Ontop-Protégé
-
Download the latest version of Ontop+Protégé bundle. For this tutorial, we will use the Ontop 4.1.0 bundle for Linux systems. Choose a bundle suitable to your operating system.
-
Unzip the bundle. Launch Protégé through the dedicated script. In case of linux, the command is
$> ./run.sh
- Click on the
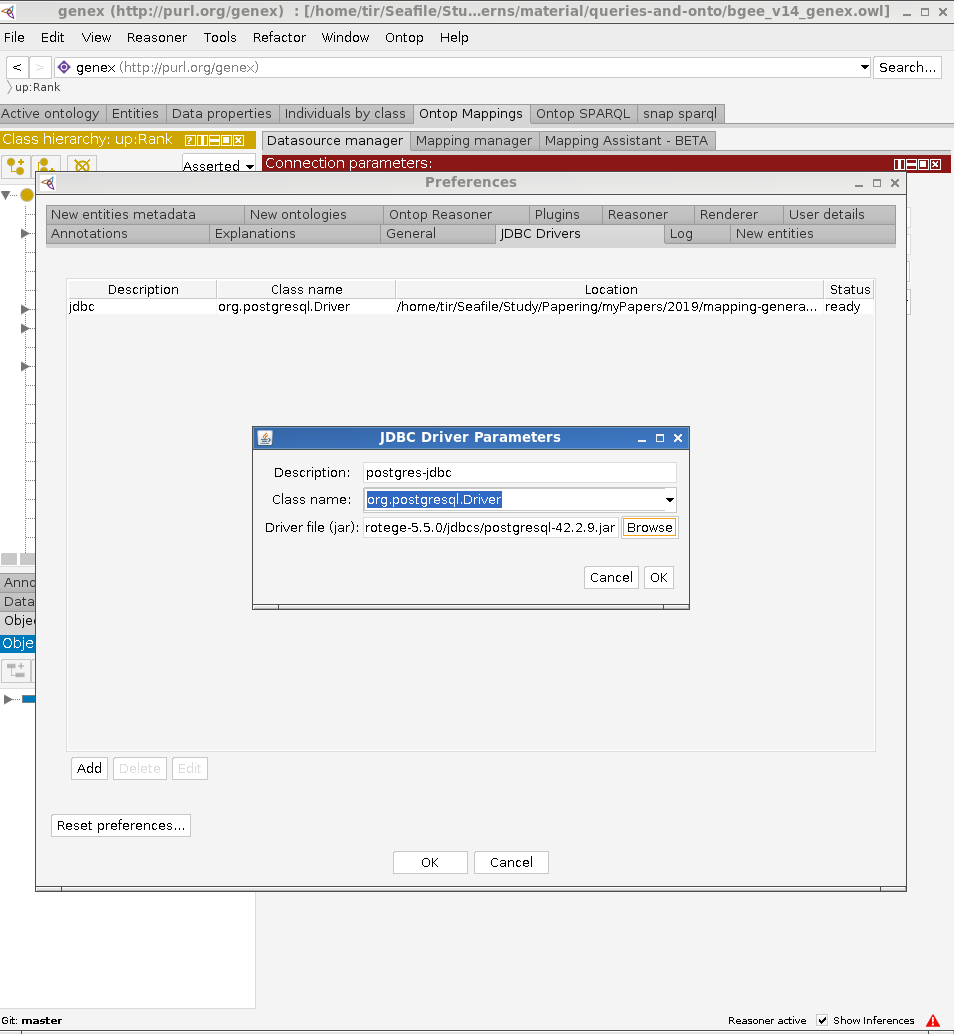
FileMenu, thenPreferencesand then to theJDBC Driverstab to add the downloaded jdbc driver to Protégé:
- Click on the
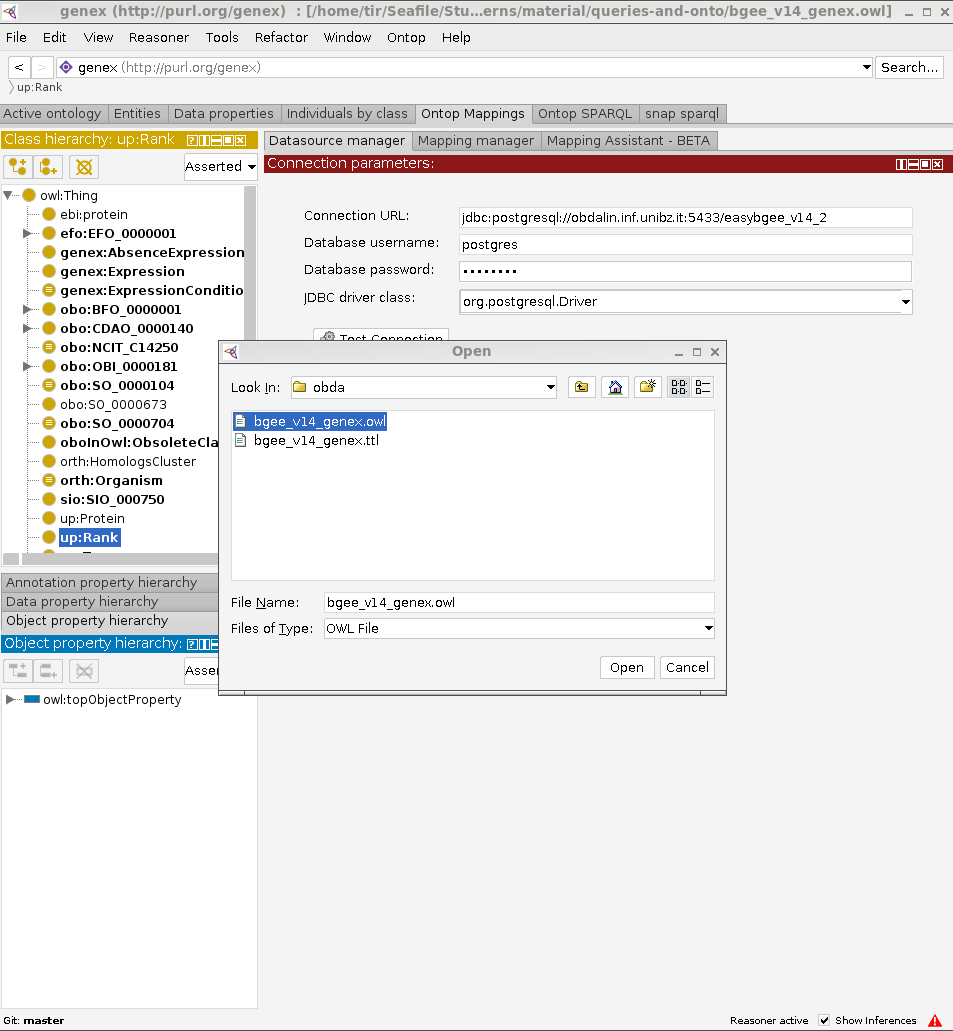
FileMenu, thenOpento open the Bgee ontology (bgee_v14_genex.owlfile).
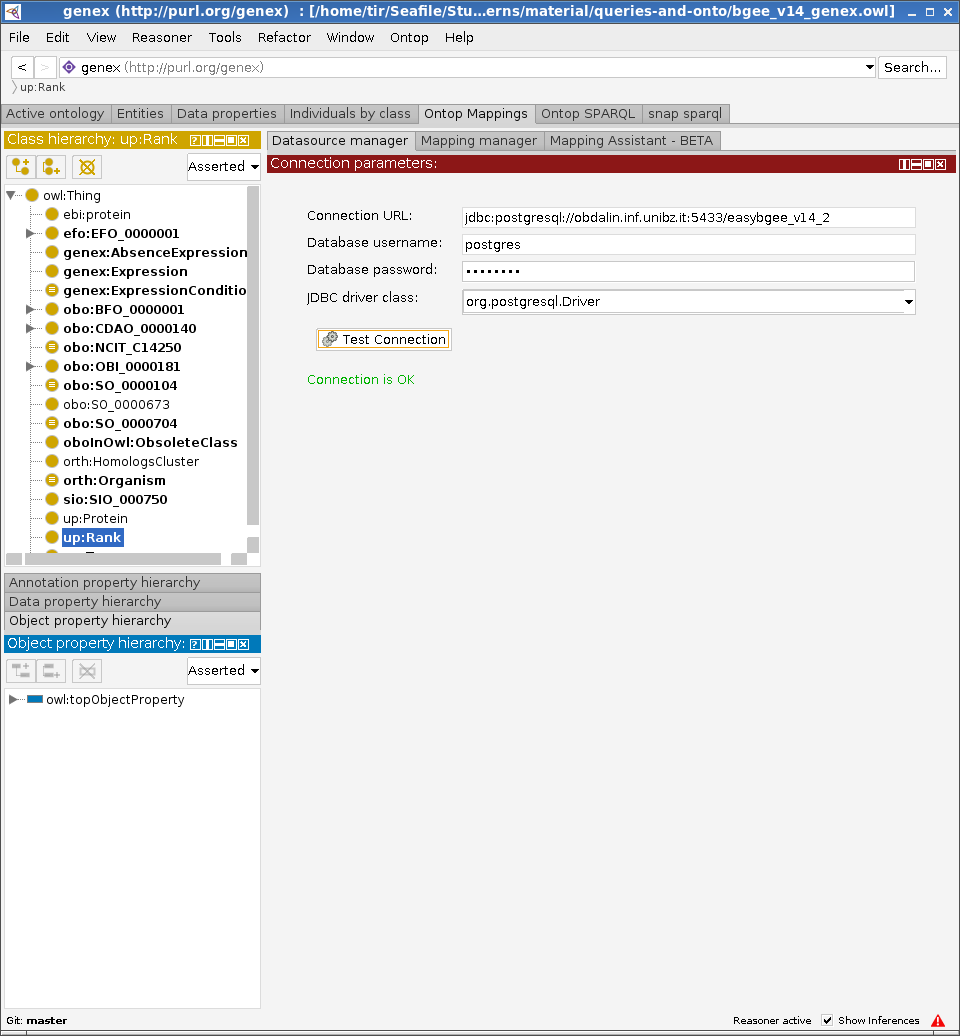
- Check whether the connection to the database is working property, by clicking the
Test Connectionbutton under theDatasource Managersub-tab of theOntop Mappingstab.
-
Browse the ontology and mapping in the
Ontop Mappings/Mapping Managertab. -
Click on the
ReasonerMenu, then selectOntop 4.1.0 -
Click again on the
ReasonerMenu, and onStart Reasonerto start Ontop
SPARQL Query answering in Ontop-Protégé
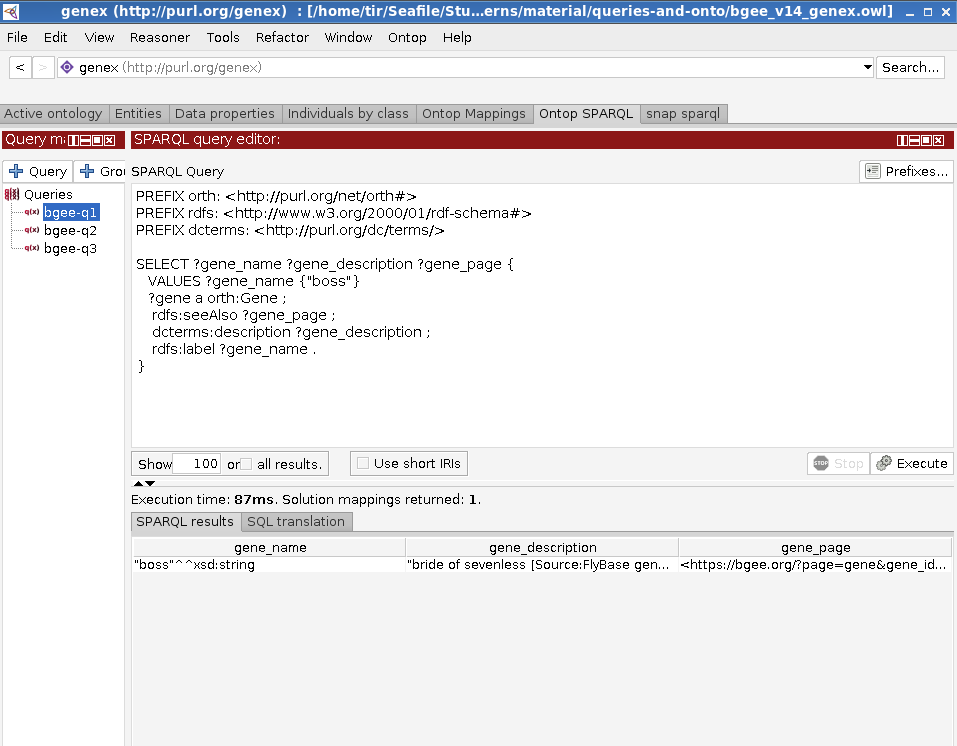
- At this point, you are ready to try Ontop to answer the Bgee queries. To do so, use the
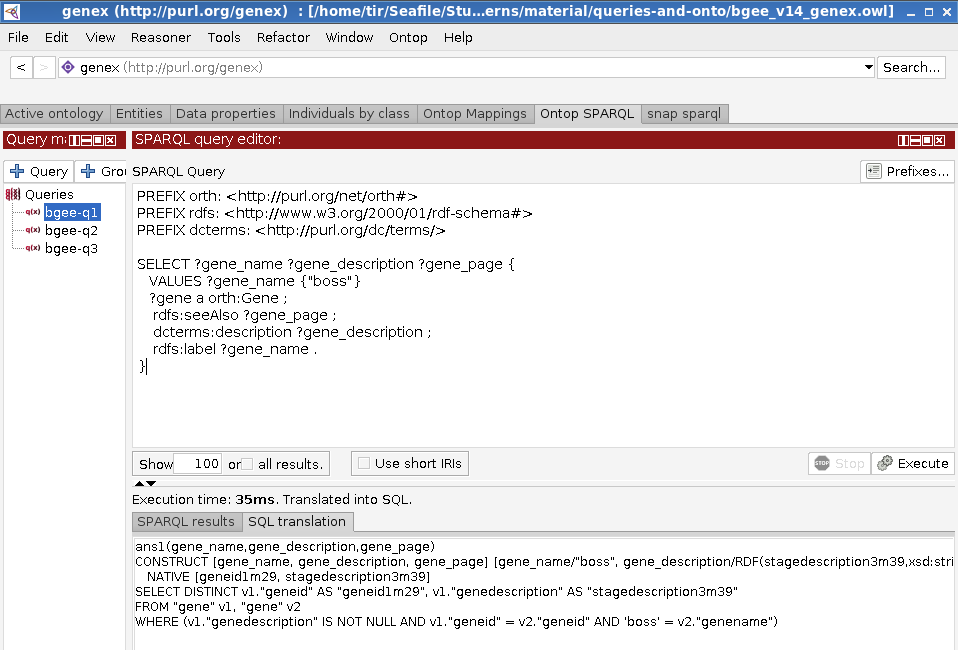
Ontop SPARQLtab.
How Ontop Answers your Queries
Ontop operates in virtual mode, that is, the KG extracted from the mappings is not materialized. The SPARQL queries are translated on-the-fly into corresponding SQL queries executable over the original data source, by exploiting the mapping definitions and the ontology axioms. To see what is the SQL translation corresponding to your SPARQL query, you can right-click on the SPARQL query editor field and select the View SQL translation option:
Materialize RDF Triples in Ontop-Protégé
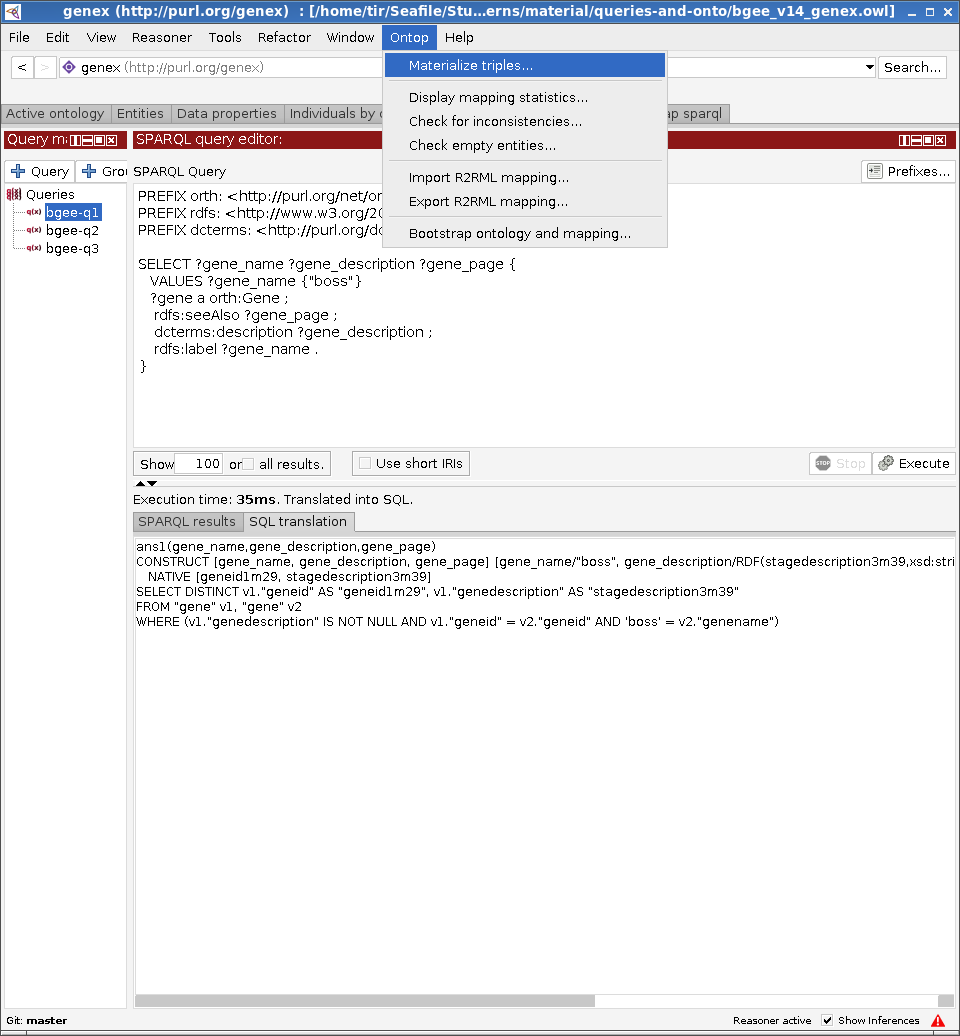
If you do not want to use Ontop for SPARQL query answering, you have the option to materialize the KG and import it into your favorite triple store. To do this, click on the Ontop Menu and then Materialize triples... option.
Deploy a SPARQL endpoint using Ontop CLI
-
Download Ontop CLI. For this tutorial, we will use the Ontop 4.1.0 CLI bundle. Exact the zip file of Ontop CLI to a directory, which is denoted as $ONTOP_CLI_DIR below.
-
Copy the jdbc driver to the
$ONTOP_CLI_DIR/jdbc -
Go to the
obdadirectory and start the Ontop SPARQL Endpoint
$ONTOP_CLI_DIR/ontop endpoint --ontology=bgee_v14_genex.owl --mapping=bgee_v14_genex.obda --properties=bgee_v14_genex.properties --portal=bgee_v14_genex.toml
- Navigate to http://localhost:8080 to try the Web portal of the SPARQL endpoint
- A SPARQL endpoint backed by ontop at URL http://localhost:8080/sparql (assuming default port
8880is used), which may be accessed using any HTTP client, including SPARQL clients and tools using the standard SPARQL HTTP protocol. For instance, using curl:
curl --request POST \
   --url http://localhost:8080/sparql \
   --header 'accept: application/json' \
   --header 'content-type: application/sparql-query' \
   --data 'SELECT * { ?s ?p ?o } LIMIT 5'
Deploy a SPARQL endpoint using Ontop Docker
Requirements
- Docker, version 17.09.0 or higher
- Docker Compose, version 1.17.0 or higher
Steps
- to start the prototype, downloading / building the required images and containers if needed
docker-compose up
(note: may add option -d to run in background, in which case logs are not be displayed to standard output but are still accessible via docker-compose logs)
Services When running, the prototype exposes the following services:
-
a PostgreSQL server with the sample data, with connection information defined in the .env file.
-
a Web portal of the SPARQL endpoint backed by ontop at URL http://localhost:8880/
-
a SPARQL endpoint backed by ontop at URL http://localhost:8880/sparql (assuming default port
8880is used).
- to stop the prototype, if running
docker-compose down
- to stop the prototype, if running, and also clean any image / container / data associating to it (useful for cleaning up)
docker-compose down --volumes --remove-orphans
(note: the above command does not remove Docker images that may result being unused after stopping and removing this prototype containers; to remove such images, add option --rmi all)
- to check the status of the containers forming the prototype
docker-compose ps
- to check the logs of specific container(s) or of all containers (if no container name is supplied)
docker-compose logs <container name 1> ... <contaner name N>
