jupyter-cadquery
An extension to render cadquery objects in JupyterLab via pythreejs.
Note: The extension relies on CadQuery 2.0 with PythonOCC and will not run with the FreeCAD version of CadQuery.
Quick use via Binder
Click on the icon to start jupyter-cadquery on binder:
Overview
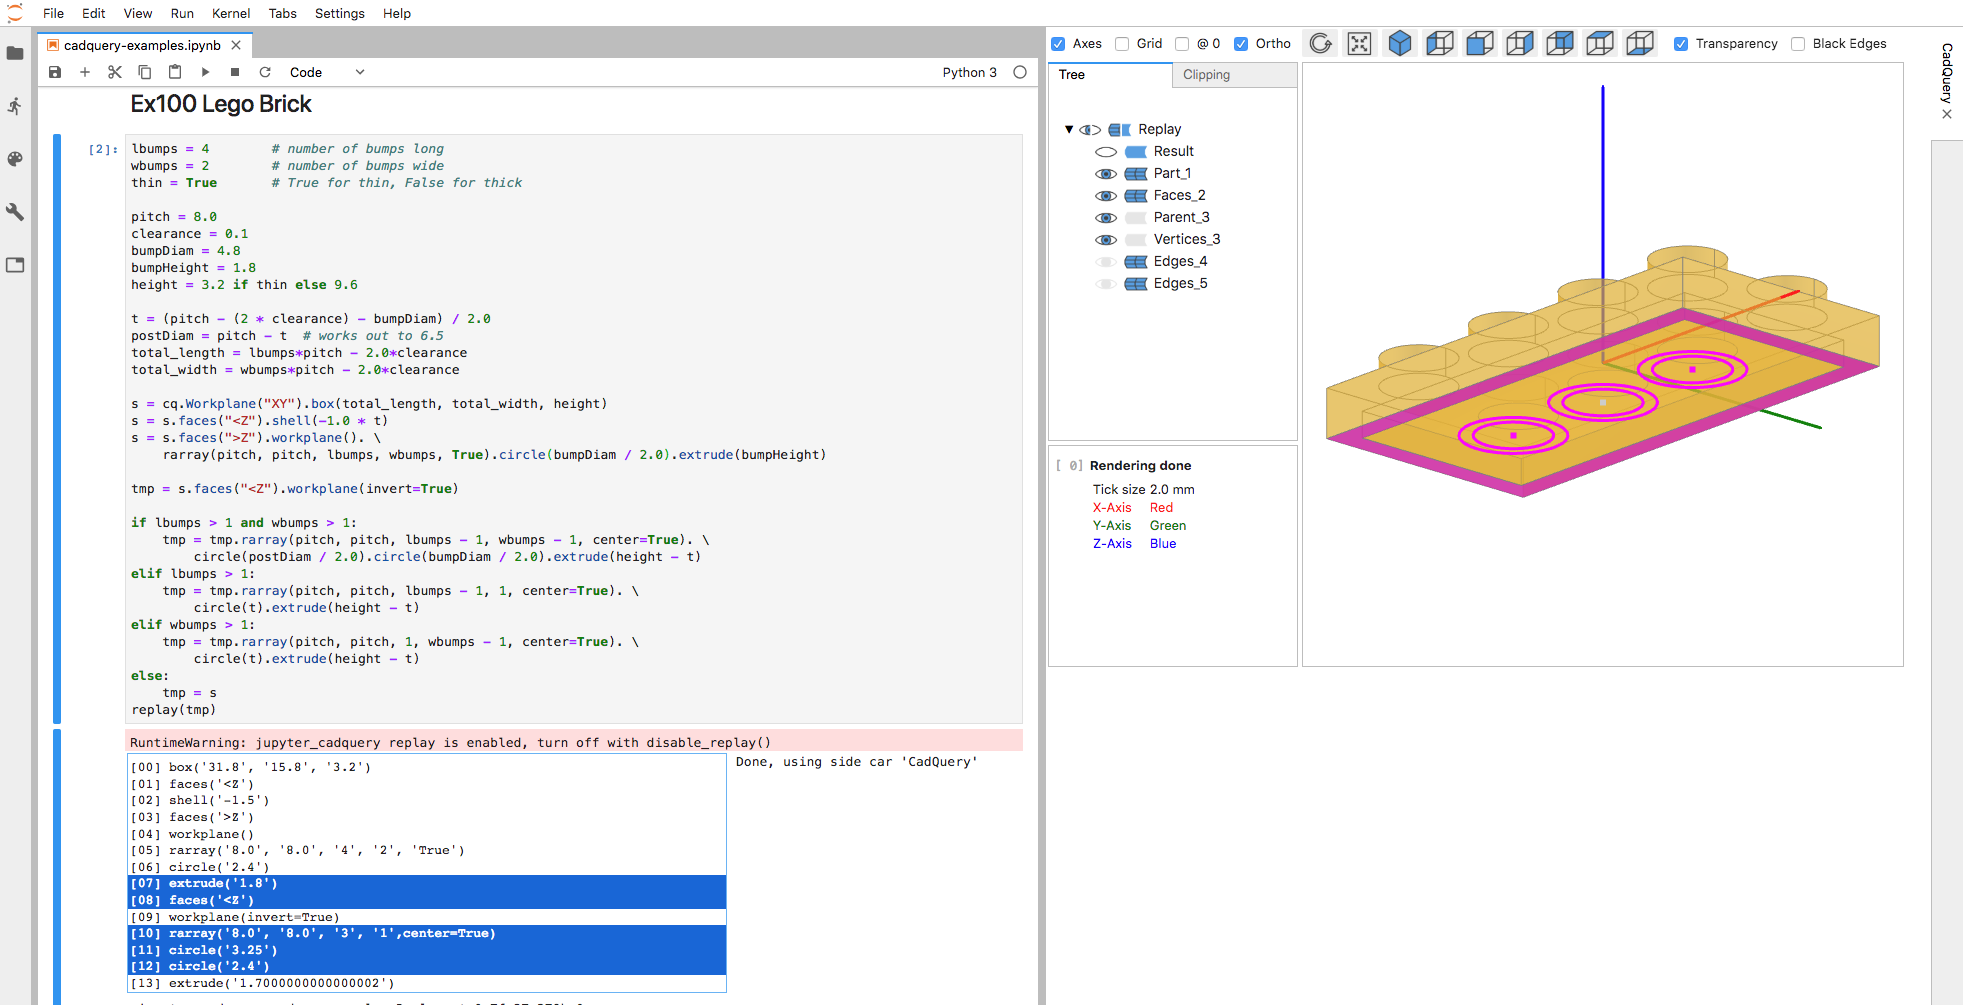
The screenshot shows one of the official cadquery examples in replay mode with more than one build step being selected and visualized
a) Key features:
- Support for CadQuery, CQParts and PythonOCC
- Auto display of CadQuery shapes
- Viewer features
- Jupyterlab sidecar support
- Toggle visibilty of shapes and edges
- Orthographic and perspective view
- Clipping with max 3 clipping planes (of free orientation)
- Transparency mode
- Double click on shapes shows bounding box info
- Visual debugging by
- displaying selected CadQuery faces and edges
- replaying steps of the rendered object
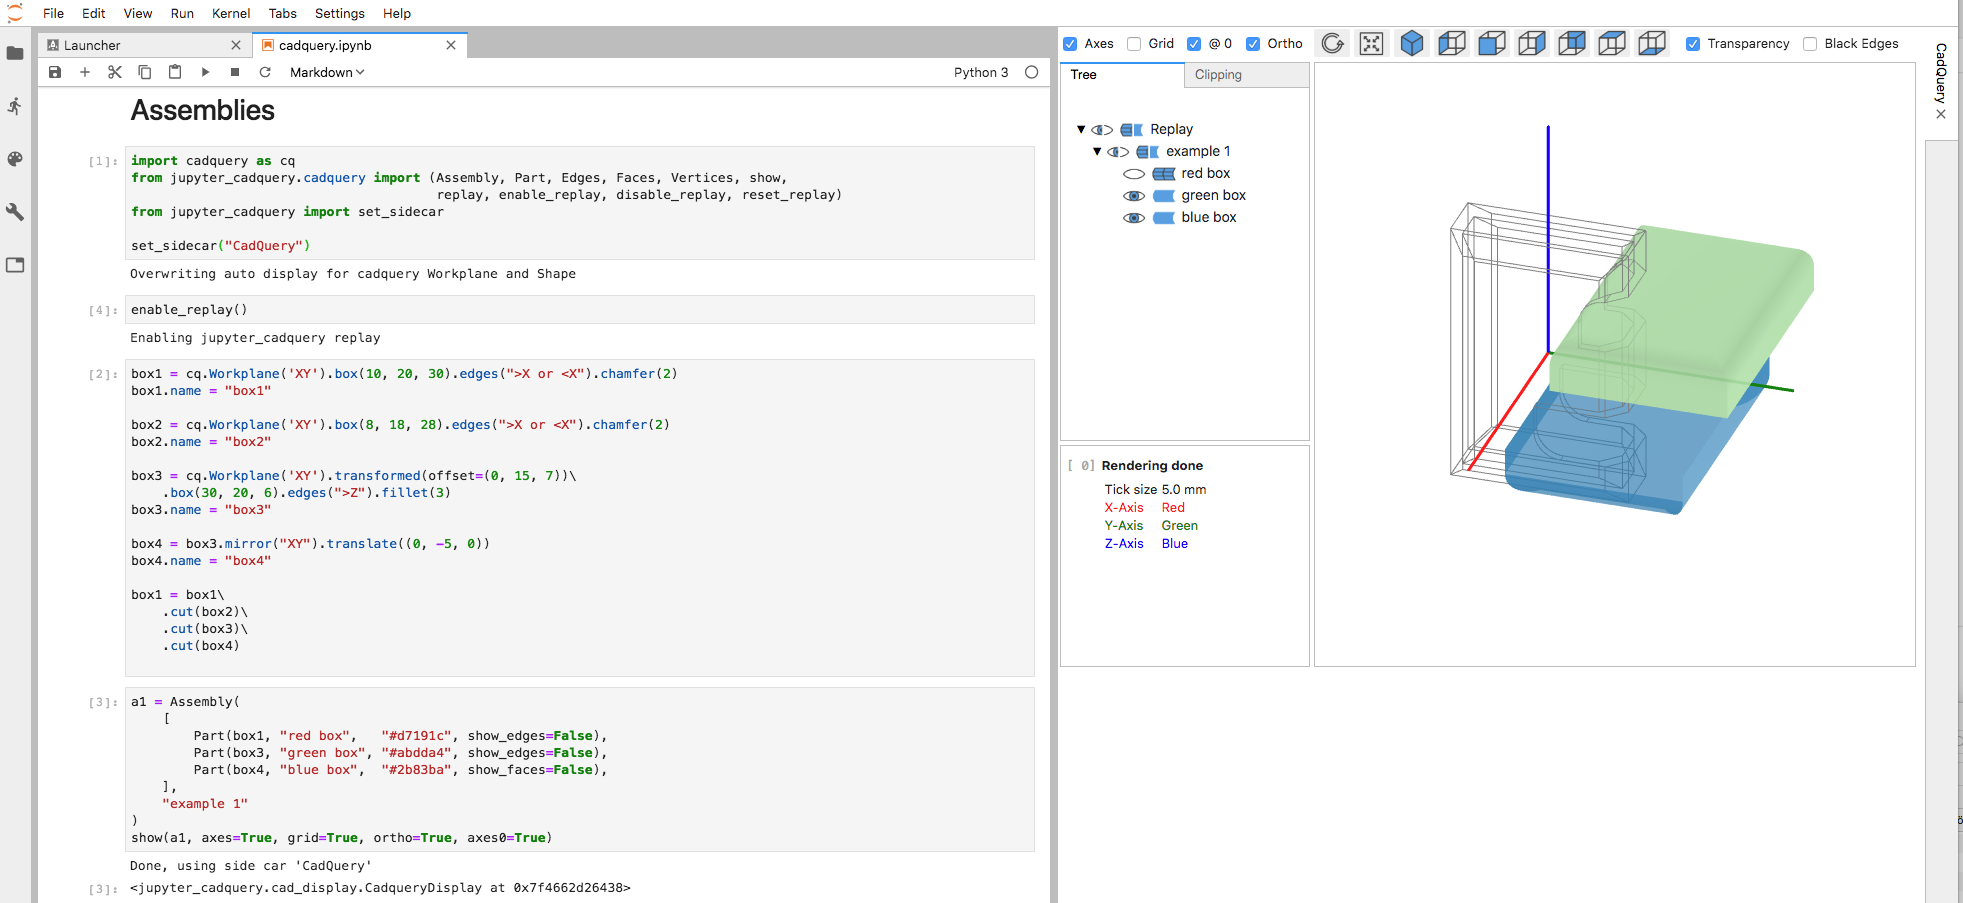
b) Example: CadQuery using Sidecar
import cadquery as cq
from jupyter_cadquery.cadquery import (Assembly, Part, Edges, Faces, Vertices, show)
from jupyter_cadquery import set_sidecar, set_defaults, reset_defaults

set_sidecar("CadQuery")  # force usage of one cad view on the right
set_defaults(axes=False, grid=True, axes0=True, ortho=True, transparent=True) # Set default values

box1 = cq.Workplane('XY').box(10, 20, 30).edges(">X or <X").chamfer(2)
box2 = cq.Workplane('XY').box(8, 18, 28).edges(">X or <X").chamfer(2)
box3 = cq.Workplane('XY').transformed(offset=(0, 15, 7)).box(30, 20, 6).edges(">Z").fillet(3)
box4 = box3.mirror("XY").translate((0, -5, 0))

box1 = box1\
    .cut(box2)\
    .cut(box3)\
    .cut(box4)

a1 = Assembly(
    [
        Part(box1, "red box",   "#d7191c", show_edges=False),
        Part(box3, "green box", "#abdda4", show_edges=False),
        Part(box4, "blue box",  "#2b83ba", show_faces=False),
    ],
    "example 1"
)

show(a1, grid=False)  # overwrite grid default value
Installation
a) Using conda
-
Create a conda environment with Jupyterlab:
-
Download the environment definition files:
wget https://raw.githubusercontent.com/bernhard-42/jupyter-cadquery/v1.0.0/environment.yml
wget https://raw.githubusercontent.com/bernhard-42/jupyter-cadquery/v1.0.0/labextensions.txt
-
Create the conda environment and install the Jupyter labextensions
conda env create -f ./environment.yml -n cq2-jl
conda activate cq2-jl

jupyter-labextension install --no-build $(cat labextensions.txt)
jupyter lab build --dev-build=True --minimize=False
Note,
jupyter-labextension listshould now show green "enabled OK" for “@jupyter-widgets/jupyterlab-manager, @jupyter-widgets/jupyterlab-sidecar, jupyter-threejs, jupyter_cadquery and jupyterlab-datawidgets
-
-
Run jupyter-cadquery
conda activate cq2-jl
jupyter lab
b) Using a docker image
-
Run the docker container (jupyter in the container will start in
/home/cq)WORKDIR=/tmp/jupyter mkdir -p "$WORKDIR" # this has to exists, otherwise an access error will occur docker run -it --rm -v $WORKDIR:/home/cq -p 8888:8888 bwalter42/jupyter_cadquery:1.0.0
Notes:
- To start with examples, you can
- omit the volume mapping and just run
docker run -it --rm -p 8888:8888 bwalter42/jupyter_cadquery:1.0.0or - copy the example notebooks to your
$WORKDIR. They will be available for JupyterLab in the container.
- omit the volume mapping and just run
- If you want to change the Dockerfile,
make dockerwill create a new docker image
- To start with examples, you can
Demos
(animated gifs)
- Features demo
- Clipping demo
- Faces-Edges-Vertices demo
- Replay demo (experimental)
- OCC demo
- CQParts demo
Usage
a) Show objects
-
show(cad_objs, **kwargs)kwargs:
cad_objs: Comma separated list of cadquery objects; Note: For OCC only one object is supportedheight(default=600): Height of the CAD viewtree_width(default=250): Width of the object tree viewcad_width(default=800): Width of the CAD viewquality(default=0.5): Rendering quality (mesh quality)edge_accuracy(default=0.5) Precision of edge discretisationaxes(default=False): Show X, Y and Z axisaxes0(default=True): Show axes at (0,0,0) or mass centergrid(default=False): Show gridortho(default=True): View in orthographic or perspective modetransparent(default=False): View cadquery objects in transparent modeposition(default=(1, 1, 1)): Relative camera position that will be scaledrotation(default=(0, 0, 0)): z, y and y rotation angles to apply to position vectorzoom(default=2.5): Zoom factor of viewmac_scrollbar(default=True): On macos patch scrollbar behavioursidecar(default=None): Use sidecar (False for none). Can be set globally withset_sidecartimeit(default=False): Show rendering times
For example isometric projection can be achieved in two ways:
- position = (1, 1, 1)
- position = (0, 0, 1) and rotation = (45, 35.264389682, 0)
b) Manage default values
-
set_defaults(**kwargs)kwargs:
- see
show
- see
-
get_defaults() -
reset_defaults()
c) Replay objects
-
replay(args)args:
cad_obj: cadquery objectindex(default=0): Element in the fluent API stack to showdebug(default=False): Trace building the replay stackcad_width(default=600): Width of the CAD viewheight(default=600): Height of the CAD view
d) Export the rendered object as STL:
-
OCC
from jupyter_cadquery import exportSTL

exportSTL(a1, "a1.stl", linear_deflection=0.01, angular_deflection=0.1)
Lower
linear_deflectionandangular_deflectionmeans more details.
e) Export the rendering view as HTML:
A straight forward approach is to use
w = show(a1)adapt the cad view as wanted (axis, viewpoint, transparency, ...) and then call
from ipywidgets.embed import embed_minimal_html
embed_minimal_html('export.html', views=[w.cq_view.renderer], title='Renderer')
Using w.cq_view.renderer this will save the exact state of the visible pythreejs view.
Of course, you can also call w = show(a1, *params) where params is the dict of show parameters you'd like to be used and then call the embed_minimal_html with views=w.cq_view.renderer
Notes:
-
If you use
sidecarthen you need to close it first:from jupyter_cadquery import cad_display cad_display.SIDECAR.close() -
Buttons and treeview can be exported, however the interaction logic of the UI is implemented in Python. So the treeview and the buttons won't have any effect in an exported HTML page.
Jupyter_cadquery classes
-
Part: A CadQuery shape plus some attributes for it:shape: Cadquery shapename: Part name in the viewcolor: Part color in the viewshow_faces: show the faces of this particular partshow_edges: show the edges of this particular part
-
Faces: Cadquery faces plus some attributesfaces: List of cadquery faces (shape.faces(selector)))name: Part name in the viewcolor: Part color in the viewshow_faces: show the faces for these particular facesshow_edges: show the edges for these particular faces
-
Edges:edges: List of cadquery edges (shape.edges(selector)))name: Part name in the viewcolor: Part color in the view
-
Vertices:vertices: List of cadquery vertices (shape.vertices(selector)))name: Part name in the viewcolor: Part color in the view
-
Assembly: Basically a list of parts and some attributes for the view:name: Assembly name in the viewobjects: all parts and assemblies included in the assembly as a list
Credits
- Thomas Paviot for python-occ. Ideas and some of the code in cad_view._render_shape are derived/taken from his
jupyter_renderer.py - Dave Cowden for CadQuery
- Adam Urbańczyk for the OCC version of CadQuery
Known issues
- z-fighting happens some times, especially when using multiple clip planes (cannot be solved in general)
- Using more than one clip plane will lead to cut surfaces not being shown as solid. (very hard to solve in general)
Development setup
To work with the latest master of caduery and jupyter-cadquery, clone both repos and use:
# install jupyter-cadquery
cd jupyter-cadquery
conda env create -f ./environment.yml -n cq-ocp
pip install jupyterlab==2.2.8
jupyter-labextension install --no-build $(cat labextensions.txt)
jupyter lab build --dev-build=True --minimize=False

# uninstall pythonocc
conda uninstall pythonocc-core oce

# install cadquery qith OCP from master
conda install -c conda-forge -c cadquery cadquery=master

# optional: install necessary cadquery branch
cd cadquery
git checkout -b assembly
git pull origin assembly #  or git pull upstream assembly
pip install .
pip install nptyping numpy scipy

# install latest jupyter cadquery
cd jupyter-cadquery
pip install .
