This repository includes:
- A re-implementation of matterport/Mask_RCNN with multiple backbone support (with imagenet pretrained weights) using the implementations of various backbone models in qubvel/classification_models. (See here for available backbone architectures)
- Unified training, inference and evaluation codes for Mask R-CNN and some semantic segmentation models (from qubvel/segmentation_models), for which you can easily modify various parameters with simple configuration file interface.
- COCO dataset and KITTI dataset viewers
  [Available segmentation models]
  Instance:
    'maskrcnn'
  Semantic:
    'fpn', 'linknet', 'pspnet', 'unet'

  [Available backbone architectures]
  MobileNet:
    'mobilenetv2', 'mobilenet'
  DenseNet:
    'densenet121', 'densenet169', 'densenet201'
  ResNet:
    'resnet18', 'resnet34', 'resnet50', 'resnet101', 'resnet152'
  ResNext:
    'resnext50', 'resnext101'
  SE-Net:
    'seresnet18', 'seresnet34', 'seresnet50', 'seresnet101', 'seresnet152', 'seresnext50', 'seresnext101', 'senet154'
  Resnet V2:
    'resnet50v2', 'resnet101v2', 'resnet152v2'
  Inception:
    'inceptionv3', 'inceptionresnetv2', 'xception'
  NASNet:
    'nasnetmobile', 'nasnetlarge'
  VGG:
    'vgg16', 'vgg19'
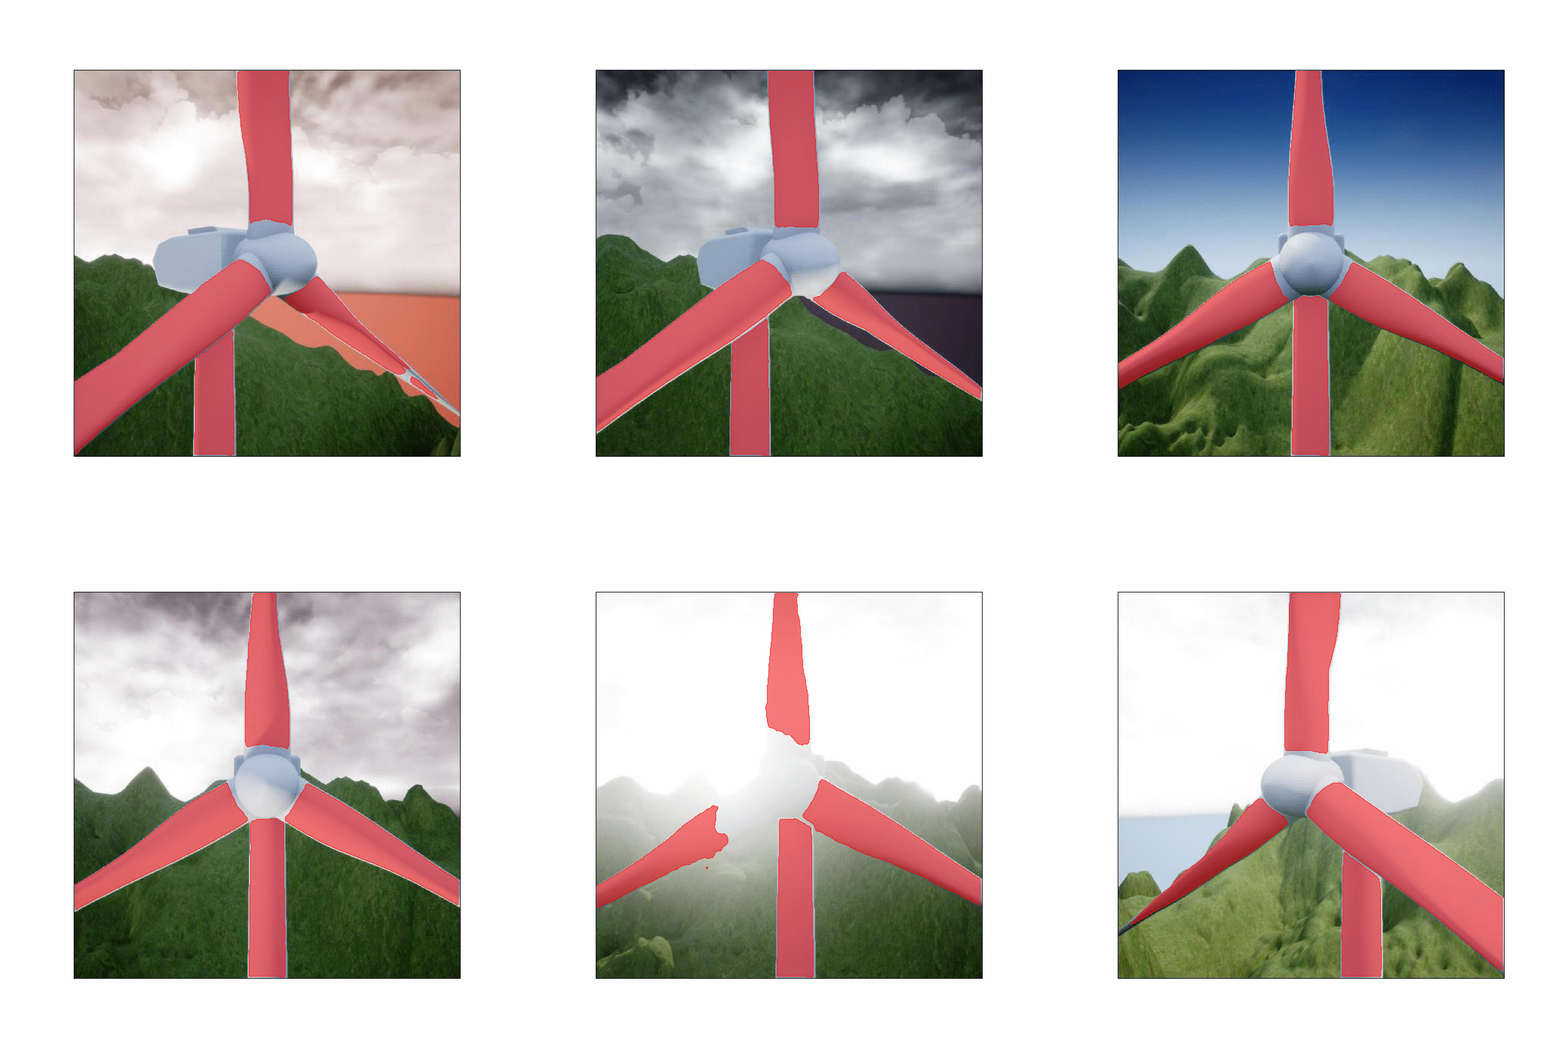
UNet with SeResNext101 backbone, trained on a synthetic dataset using this repository

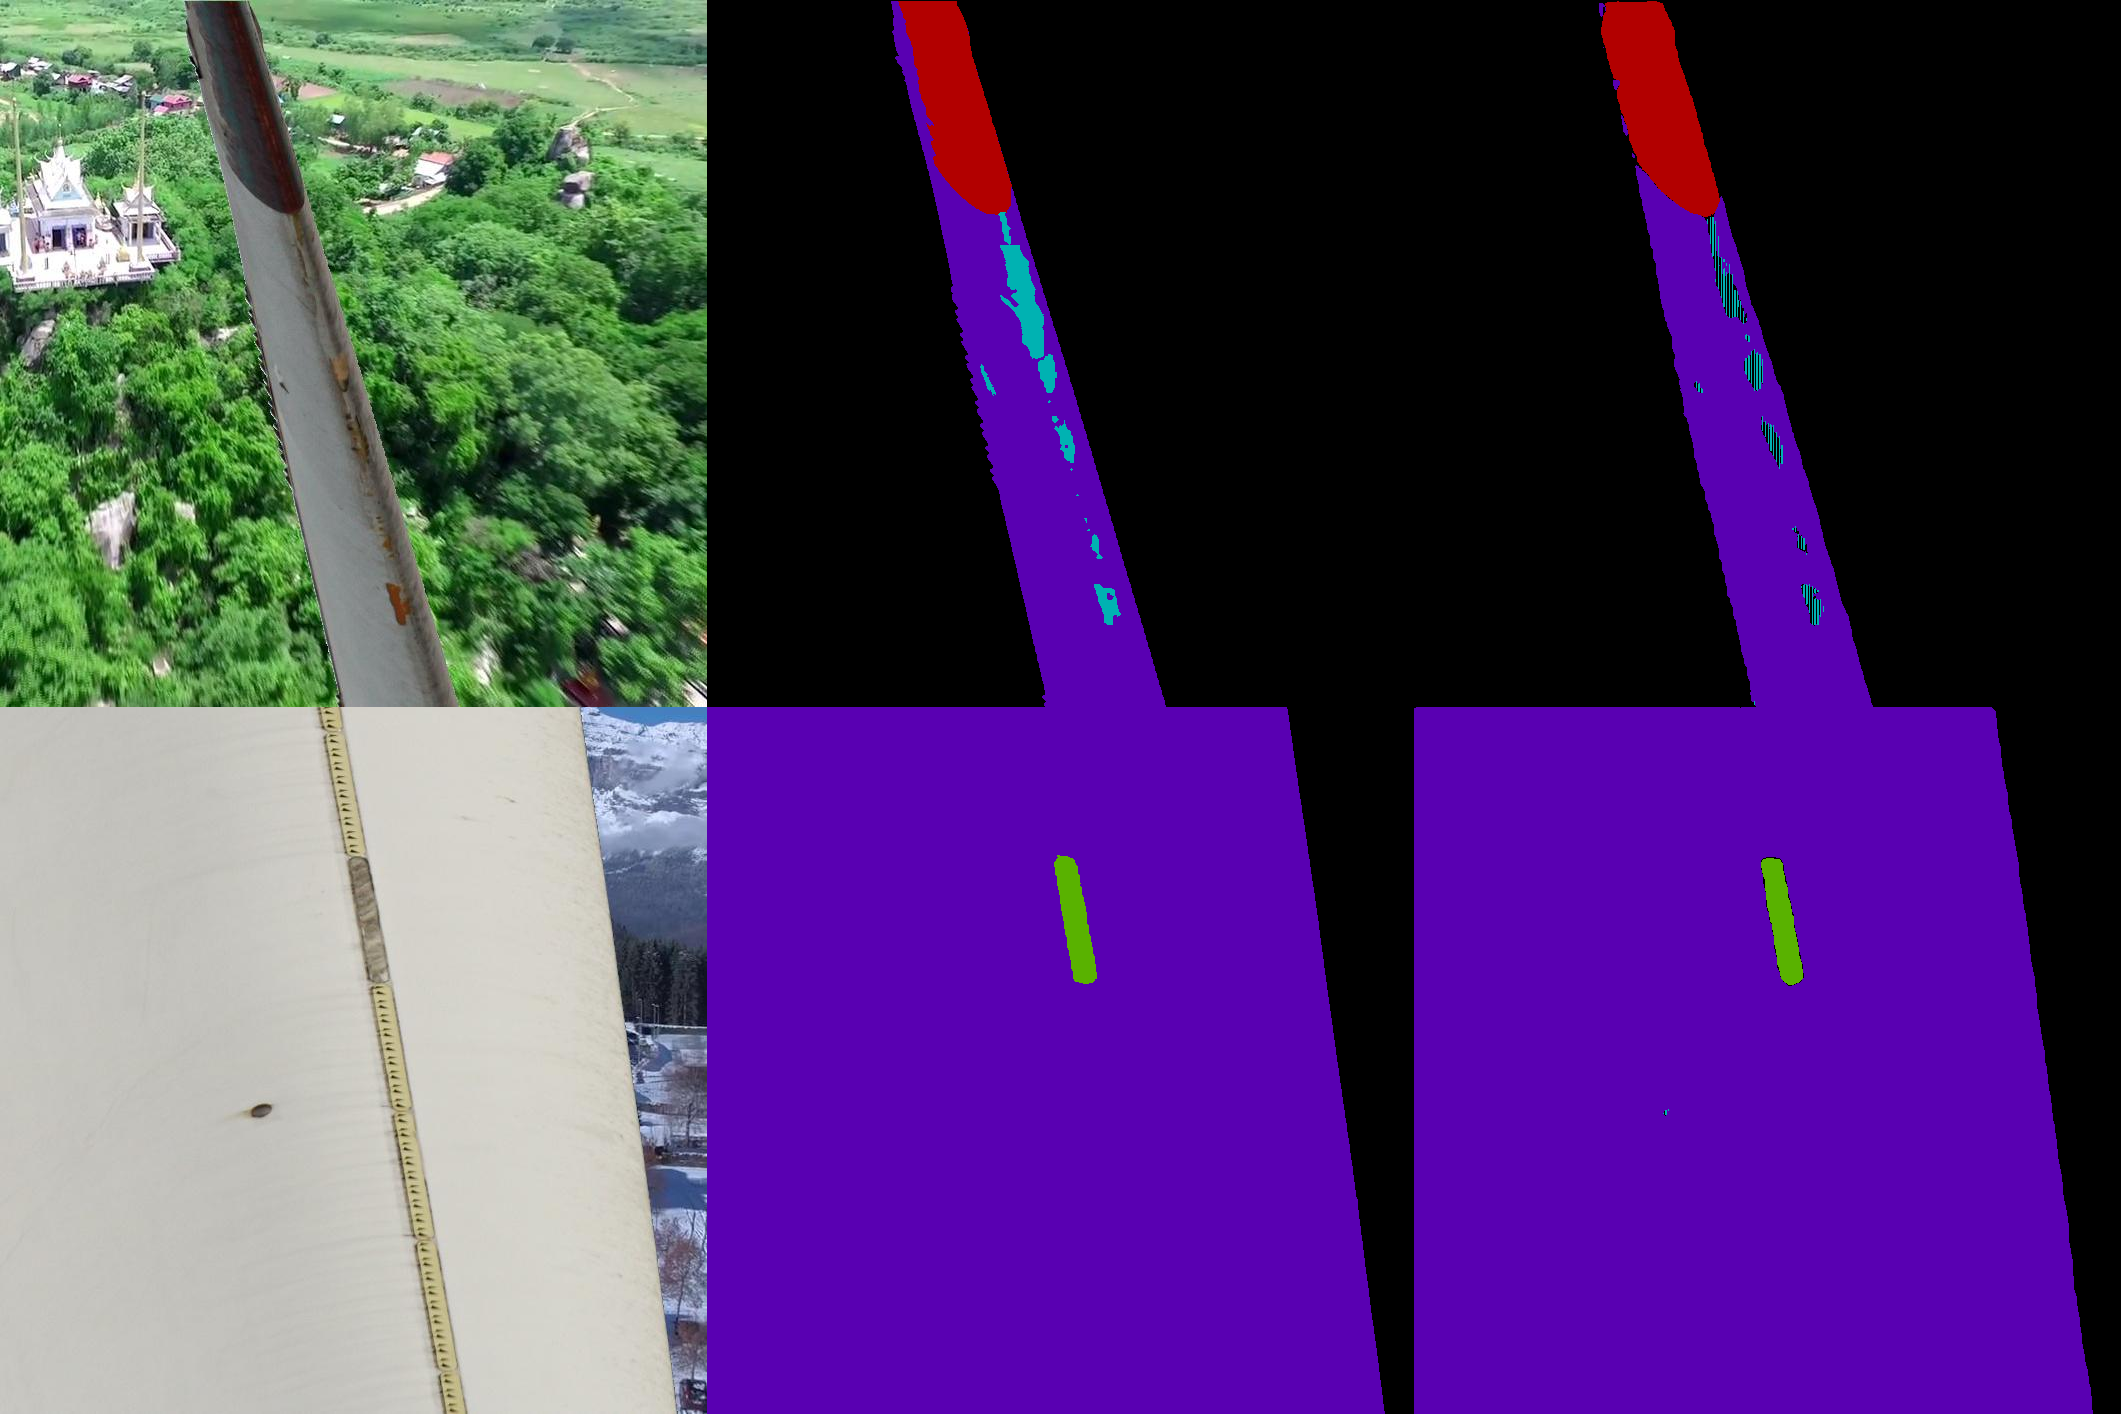
UNet with SeResNext50 backbone, trained on only 500 images + augmentation using this repository
(left: input image, middle: ground truth, right: prediction)

FPN with ResNet18 backbone, trained on only 180 images using this repository

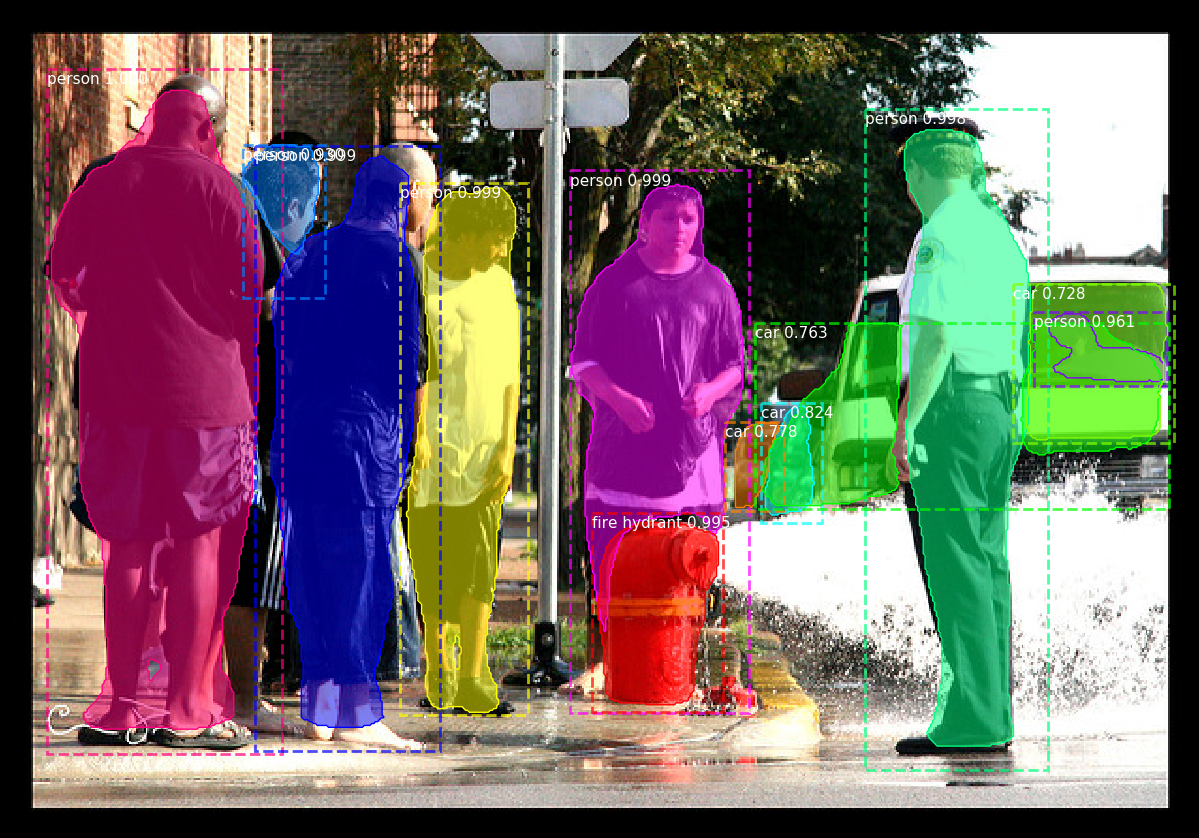
MaskRCNN with ResNet101 backbone, trained on COCO dataset, weights file ported from matterport/Mask_RCNN.
See Custom Backbone for more details.

i. How to set up a virtual environment and install on it
  sudo apt-get install virtualenv
  virtualenv -p python3 venv
  git clone https://github.com/nearthlab/image-segmentation
  cd image-segmentation
  source activate
  cat requirements.txt | while read p; do pip install $p; done
You should run the following commands every time you open a new terminal in order to run any of python files
  cd /path/to/image-segmentation
  source activate
  # the second line is equivalent to:
  # source ../venv/bin/activate && export PYTHONPATH=`pwd`/image-segmentation
  # i.e. activating the virtual environment and add the image-segmentation/image-segmentation folder to the PYTHONPATH
ii. How to install without a virtual environment
Note that working on a virtual environment is highly recommended. But if you insist on not using it, you can still do so:
  git clone https://github.com/nearthlab/image-segmentation
  cd image-segmentation
cat requirements.txt | while read p; do pip install --user $p; done- You may need to reinstall tensorflow(-gpu) if the automatically installed one is not suitable for your local environment.
Requirements
1. Python 3.5+
2. segmentation-models==0.2.0
3. keras>=2.2.0
4. keras-applications>=1.0.7
5. tensorflow(-gpu)=>1.8.0 (tested on 1.10.0)
Please read the instruction written in READ.md files in each example folder
-
Custom Backbone
This example illustrates how to build MaskRCNN with your custom backbone architecture. In particular, I adopted matterport's implementation of ResNet, which is slightly different from qubvel's. Moreover, you can run the inference using the pretrained MaskRCNN_coco.h5. (I slightly modified the 'mask_rcnn_coco.h5' in matterport/Mask_RCNN/releases to make this example work: the only differences are layer names) -
Imagenet Classification
This example shows the imagenet classification results for various backbone architectures. -
Create KITTI Label
This example is a code that I used to simplify some of the object class labels in KITTI dataset. (For instance, I merged the 5 separate classes 'car', 'truck', 'bus', 'caravan' and 'trailer' into a single class called 'vehicle') -
Configurations
Some example cfg files that describes the segmentation models and training processes
i. Download the modified KITTI dataset from release page (or make your own dataset into the same format) and place it under datasets folder.
-
KITTI dataset is a public dataset available online. I simply splitted the dataset into training and validation sets and simplified the labels using create_kitti_label.py.
-
Note that this dataset is very small containing only 180 training images and 20 validation images. If you want to train a model for a serious purpose, you should consider using much more larger dataset.
-
To view the KITTI dataset, run:
python kitti_viewer.py -d=datasets/KITTIii. Choose your model and copy corresponding cfg files from examples/configs. For example, if you want to train a Unet model,
  cd /path/to/image-segmentation
  mkdir -p plans/unet
  cp examples/configs/unet/*.cfg plans/unet
iii. [Optional] Tune some model and training parameters in the config files that you have just copied. Read the comments in the example config files for what each parameter means.
[Note that you have to declare a variable in .cfg file in the format
{type}-{VARIABLE_NAME} = {value}]
iv. Run train.py:
  python train.py -s plans/unet -d datasets/KITTI \
  -m plans/unet/unet.cfg \
  -t plans/unet/train_unet_decoder.cfg plans/unet/train_unet_all.cfg
This script will train the unet model in two stages with training information in plans/unet/train_unet_decoder.cfg followed by plans/unet/train_unet_all.cfg. The idea is:
we first train the decoder part only while freezing the backbone with imagenet-pretrained weights loaded,
and then fine tune the entire model in the second stage. You can provide as many training cfg files as you wish, dividing training into multiple stages.
Once the training is done, you can find the three files: 'class_names.json', 'infer.cfg' and 'best_model.h5',
which you can use later for the inference
v. KITTI Evaluation:
python evaluate_kitti.py -c /path/to/infer.cfg -w /path/to/best_model.h5 -l /path/to/class_names.jsoni. Download the COCO dataset. To do this, simply run:
  cd /path/to/image-segmentation/datasets
./download_coco.sh- To view the COCO dataset, run:
python coco_viewer.py -d=datasets/cocoii. Copy the example cfg files from examples/configs/maskrcnn.
  cd /path/to/image-segmentation
  mkdir -p plans/maskrcnn
  cp examples/configs/maskrcnn/*.cfg plans/maskrcnn
iii. [Optional] Tune some model and training parameters in the config files that you have just copied. Read the comments in the example config files for what each parameter means.
[Note that you have to declare a variable in .cfg file in the format
{type}-{VARIABLE_NAME} = {value}]
iv. Run train.py:
  python train.py -s plans/maskrcnn -d datasets/coco \
  -m plans/maskrcnn/maskrcnn.cfg \
  -t plans/maskrcnn/train_maskrcnn_heads.cfg plans/maskrcnn/train_maskrcnn_stage3up.cfg plans/maskrcnn/train_maskrcnn_all.cfg
This will train your MaskRCNN model in 3 stages (heads → stage3+ → all) as suggested in matterport/Mask_RCNN) Likewise, you can find the three files: 'class_names.json', 'infer.cfg' and 'best_model.h5', which you can use later for the inference
v. COCO Evaluation:
python evaluate_coco.py -c /path/to/infer.cfg -w /path/to/best_model.h5 -l /path/to/class_names.jsonYou can visualize your model's inference in a pop-up window:
python infer_gui.py -c=/path/to/infer.cfg -w=/path/to/best_model.h5 -l=/path/to/class_names.json \
-i=/path/to/a/directory/containing/image_files
or save the results as image files [This will create a directory named 'results' under the directory you provided in -i option, and write the viusalized inference images in it]:
python infer.py -c=/path/to/infer.cfg -w=/path/to/best_model.h5 -l=/path/to/class_names.json \
-i=/path/to/a/directory/containing/image_files@misc{matterport_maskrcnn_2017,
title={Mask R-CNN for object detection and instance segmentation on Keras and TensorFlow},
author={Waleed Abdulla},
year={2017},
publisher={Github},
journal={GitHub repository},
howpublished={\url{https://github.com/matterport/Mask_RCNN}},
}
