This sketch demonstrates the MCCI Catena® 4618 M201 as a remote temperature/humidity/light sensor using a LoRaWAN®-techology network to transmit to a remote server.
The Catena 4618 M201 is a single-board LoRaWAN-enabled sensor device with the following integrated sensors:
- Sensirion SHT-35-DIS-F temperature and humidity sensor
- Silicon Labs Si1133 light sensor
Documents on the MCCI Catena 4618 M201 are on GitHub here. You may also refer to the documents for the 4612, which are also on GitHub here.
In order to use this code, you must do several things:
- Clone this repository into a suitable directory on your system.
- Install the MCCI Arduino board support package (BSP).
- Install the required Arduino libraries using
git. - Build the sketch and download to your Catena 4618.
After you have loaded the firmware, you have to set up the Catena 4618.
This sketch uses the Catena-Arduino-Platform library to store critical information on the integrated FRAM. There are several kinds of information. Some things only have to be programmed once in the life of the board; other things must be programmed whenever you change network connections. Entering this information this involves entering USB commands via the Arduino serial monitor.
- We call information about the 4618 M201 that (theoretically) never changes "identity".
- We call information about the LoRaWAN "provisioning".
This is best done from a command line. You can use a number of techniques, but since you'll need a working git shell, we recommend using the command line.
On Windows, we strongly recommend use of "git bash", available from git-scm.org. Then use the "git bash" command line system that's installed by the download.
The goal of this process is to create a directory called {somewhere}/Catena-Sketches. You get to choose {somewhere}. Everyone has their own convention; the author typically has a directory in his home directory called sandbox, and then puts projects there.
Once you have a suitable command line open, you can enter the following commands. In the following, change {somewhere} to the directory path where you want to put catena4618m201_simple.
$ cd {somewhere}
$ git clone https://github.com/mcci-catena/catena4618m201_simple
Cloning into 'catena4618m201_simple'...
...

$ # get to the right subdirectory
$ cd catena4618m201_simple

$ # confirm that you're in the right place.
$ ls
catena4618m201_simple.ino git-repos.dat README.mdOpen the Arduino IDE. Go to File>Preferences>Settings. Add https://github.com/mcci-catena/arduino-boards/raw/master/BoardManagerFiles/package_mcci_index.json to the list in Additional Boards Manager URLs.
If you already have entries in that list, use a comma (,) to separate the entry you're adding from the entries that are already there.
Next, open the board manager. Tools>Board:..., and get up to the top of the menu that pops out -- it will give you a list of boards. Search for MCCI in the search box and select MCCI Catena STM32 Boards. An [Install] button will appear to the right; click it.
Then go to Tools>Board:... and scroll to the bottom. You should see MCCI Catena 4618; select that. From the IDE's point of view, the Catena 4618 and the Catena 4618 M201 are identical.
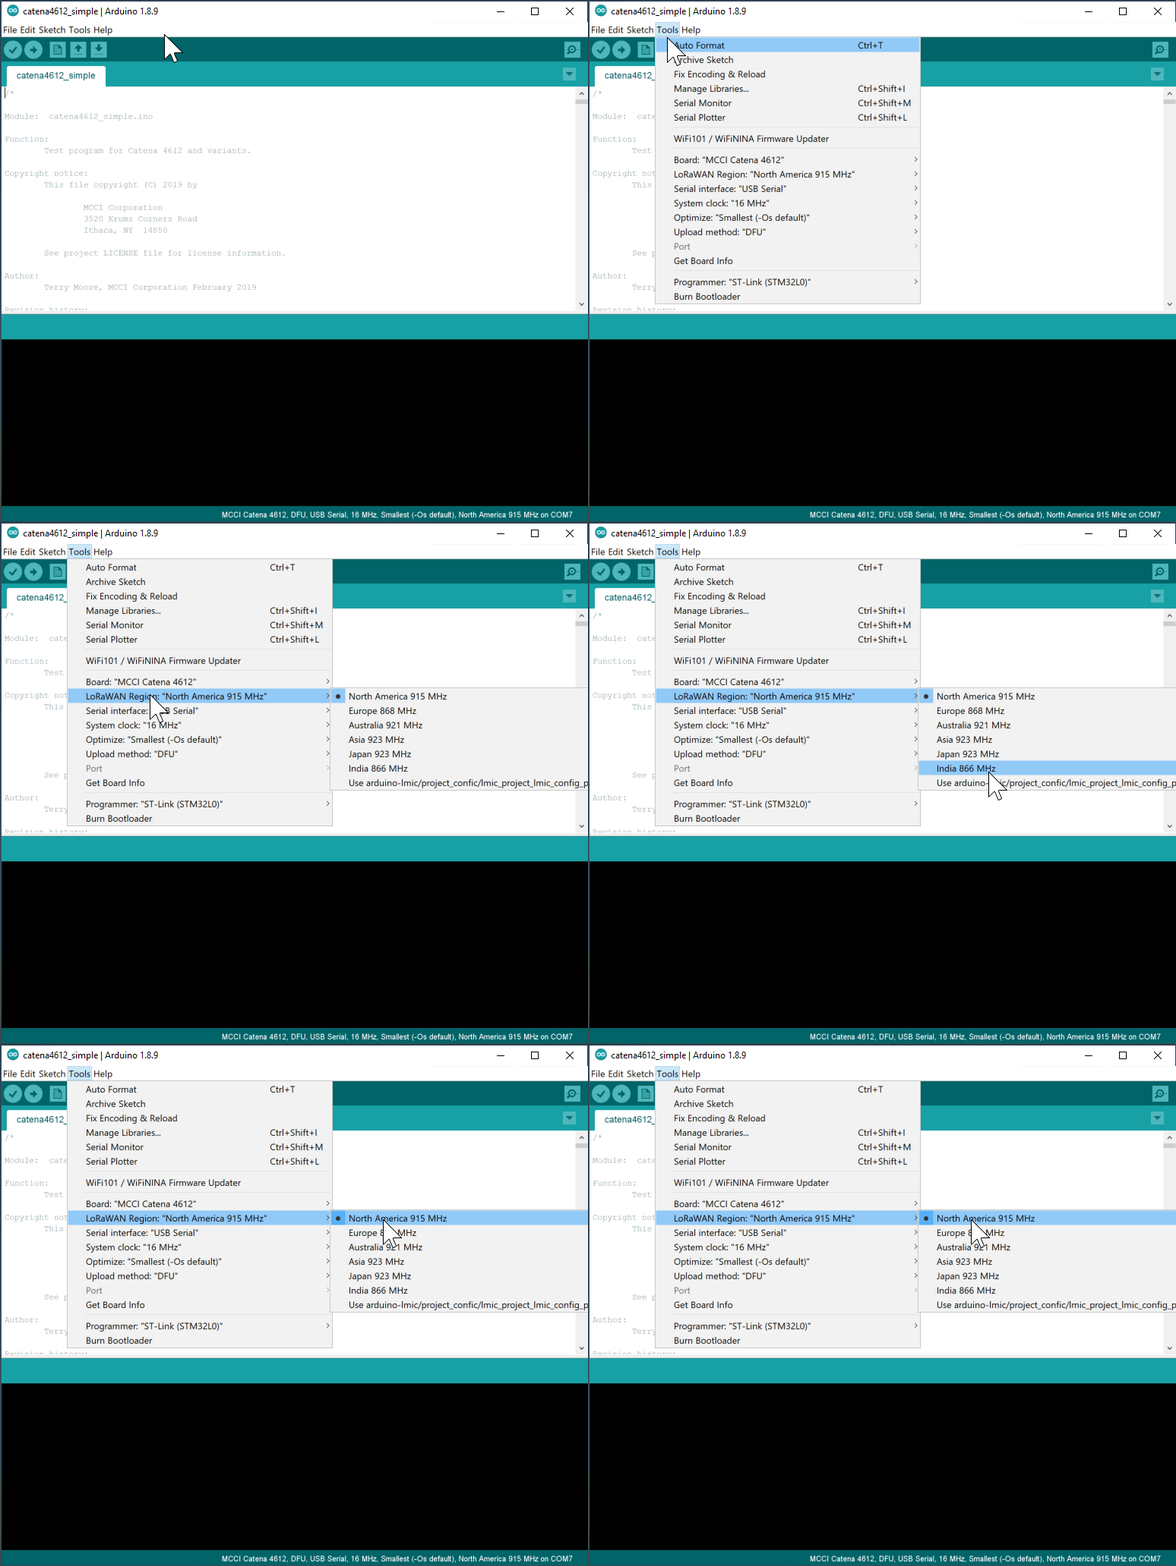
When you select a board, the default LoRaWAN region is set to US-915, which is used in North America and much of South America. If you're elsewhere, you need to select your target region. You can do it in the IDE:
As the animation shows, use Tools>LoRaWAN Region... and choose the appropriate entry from the menu.
This sketch uses several sensor libraries.
The script git-boot.sh in the top directory of this repo will get all the things you need.
It's easy to run, provided you're on Windows, macOS, or Linux, and provided you have git installed. We tested on Windows with git bash from https://git-scm.org, on macOS 10.11.3 with the git and bash shipped by Apple, and on Ubuntu 16.0.4 LTS (64-bit) with the built-in bash and git from apt-get install git.
Either clone [Catena-Sketches]https://github.com/mcci-catena/Catena-Sketches), or download a copy of git-boot.sh](https://github.com/mcci-catena/Catena-Sketches/blob/master/git-boot.sh) by itself.
Then you can make sure your library directory is populated using git-boot.sh.
$ cd catena4618m201_simple
$ ../git-boot.sh
Cloning into 'Catena-Arduino-Platform'...
remote: Counting objects: 1201, done.
remote: Compressing objects: 100% (36/36), done.
remote: Total 1201 (delta 27), reused 24 (delta 14), pack-reused 1151
Receiving objects: 100% (1201/1201), 275.99 KiB | 0 bytes/s, done.
Resolving deltas: 100% (900/900), done.
...

==== Summary =====
No repos with errors
No repos skipped.
*** no repos were pulled ***
Repos downloaded:      Catena-Arduino-Platform arduino-lorawan Catena-mcciadk arduino-lmic MCCI_FRAM_I2C MCCI-Catena-HS300x
It has a number of advanced options; use ../git-boot.sh -h to get help, or look at the source code here.
Beware of issue #18. If you happen to already have libraries installed with the same names as any of the libraries in git-repos.dat, git-boot.sh will silently use the versions of the library that you already have installed. (We hope to soon fix this to at least tell you that you have a problem.)
This sketch depends on the following libraries.
- https://github.com/mcci-catena/Catena4410-Arduino-Library
- https://github.com/mcci-catena/arduino-lorawan
- https://github.com/mcci-catena/Catena-mcciadk
- https://github.com/mcci-catena/arduino-lmic
- https://github.com/mcci-catena/MCCI_FRAM_I2C
- https://github.com/mcci-catena/MCCI-Catena-SHT3x
Shutdown the Arduino IDE and restart it, just in case.
Ensure selected board is 'MCCI Catena 4618' (in the GUI, check that Tools>Board "..." says "MCCI Catena 4618".
In the IDE, use File>Open to load the catena4618_simple.ino sketch. (Remember, in step 1 you cloned Catena-Sketches -- find that, and navigate to {somewhere}/Catena-Sketches/catena4618_simple/)
Follow normal Arduino IDE procedures to build the sketch: Sketch>Verify/Compile. If there are no errors, go to the next step.
Make sure the correct port is selected in Tools>Port.
Load the sketch into the Catena using Sketch>Upload and move on to provisioning.
This can be done with any terminal emulator, but it's easiest to do it with the serial monitor built into the Arduino IDE or with the equivalent monitor that's part of the Visual Micro IDE. It can also be done using Tera Term.
At the bottom right side of the serial monitor window, set the dropdown to Newline and 115200 baud.
Enter the following command, and press enter:
system configure platformguidIf the Catena is functioning at all, you'll either get an error message, or you'll get a long number like:
b75ed77b-b06e-4b26-a968-9c15f222dfb2If you get an error message, please follow the Platform Provisioning instructions. Otherwise, skip to LoRAWAN Provisioning.
The Catena 4618 has a number of build options. We have a single firmware image to support the various options. The firmware learns the build options using the platform GUID data stored in the FRAM, so if the factory settings are not present or have been lost, you need to do the following.
The Catena 4618 M201 is shipped with the catena4618m201_simple sketch installed, and properly provisioned with serial number and platform GUID.
If you reset the FRAM in your Catena 4618 M201, you will need to enter the following commands.
system configure syseui serialnumber
You will find the serial number on the bottom of the Catena 4618 M201 PCB. It will be a 16-digit number of the form 00-02-cc-01-xx-xx-xx-xx. If you can't find a serial number, please contact MCCI for assistance.
Continue by entering the following commands.
system configure operatingflags 1system configure platformguid b75ed77b-b06e-4b26-a968-9c15f222dfb2
The operating flags control a number of features of the sketch and of the underlying platform. Values are given in the README for Catena-Arduino-Platform.
Some background: with LoRaWAN, you have to create a project on your target network, and then register your device with that project.
Somewhat confusingly, the LoRaWAN specification uses the word "application" to refer to the group of devices in a project. We will therefore follow that convention. It's likely that your network provider follows that convention too.
We'll be setting up the device for "over the air authentication" (or OTAA).
For OTAA, we'll need to load three items into the device. (We'll use USB to load them in -- you don't have to edit any code.) These items are:
-
The device extended unique identifier, or "devEUI". This is a 8-byte number.
For convenience, MCCI assigns a unique identifier to each Catena; you should be able to find it on a printed label on your device. It will be a number of the form "00-02-cc-01-??-??-??-??".
-
The application extended unique identifier, or "AppEUI". This is also an 8-byte number.
-
The application key, or "AppKey". This is a 16-byte number.
If you're using The Things Network as your network provider, see the notes in the separate file in this repository: Getting Started with The Things Network. This walks you through the process of creating an application and registering a device. During that process, you will input the DevEUI (we suggest using the serial number printed on the Catena). At the end of the process, The Things Network will supply you with the required AppEUI and Application Key.
For other networks, follow their instructions for determining the DevEUI and getting the AppEUI and AppKey.
Make sure your device is still connected to the Arduino IDE, and make sure the serial monitor is still open. (If needed, open it using Tools>Serial Monitor.)
Enter the following commands in the serial monitor, substituting your DevEUI, AppEUI, and AppKey, one at a time.
lorawan configure deveui DevEUIlorawan configure appeui AppEUIlorawan configure appkey AppKeylorawan configure join 1
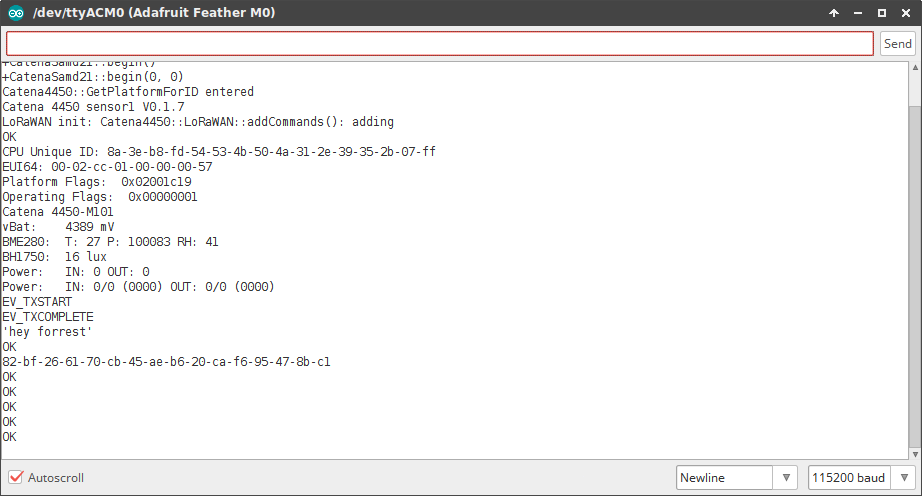
After each command, you will see an OK.
Then reboot your Catena using the command system reset. If you're using the Arduino environment on Windows, you will have to close and re-open the serial monitor after resetting the Catena.
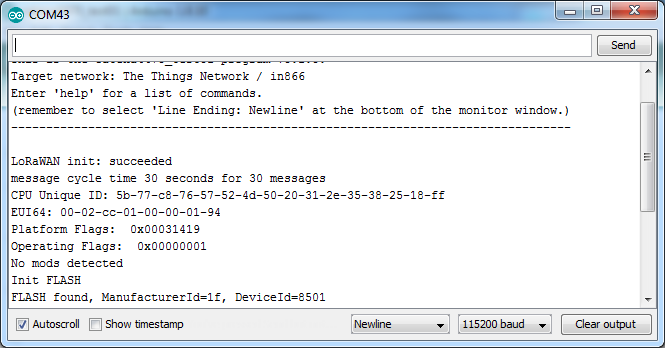
You should then see a series of messages including:
EV_JOINED
NetId ...Once your device has joined the network, it's somewhat painful to unjoin.
You need to enter a number of commands:
lorawan configure appskey 0lorawan configure nwkskey 0lorawan configure fcntdown 0lorawan configure fcntup 0lorawan configure devaddr 0lorawan configure netid 0lorawan configure join 0
Then reset your device, and repeat LoRaWAN Provisioning above.
If all the typing in Changing registration is too painful, or if you're in a real hurry, you can simply reset the Catena's non-volatile memory to it's initial state. The command for this is:
fram reset hard
Then reset your Catena, and return to Provision your Catena 4618.
Early versions of the MCCI BSP do not include an INF file (Windows) or sample rules (Linux) to teach your system what to do. The procedures posted here show how to set things up manually: https://github.com/vpowar/LoRaWAN_SensorNetworks-Catena#uploading-code.
Because the 4618 M201 is essentially identical to the 4612 other than sensors, you may also refer to the detailed procedures that are part of the Catena 4612 user manual. Please see:
Refer to the Protocol Description in the extras directory for information on how data is encoded.
The Catena 4618 dynamically uses power from the USB cable if it's available, even if a battery is connected. This allows you to unplug the USB cable after booting the Catena 4618 without causing the Catena 4618 to restart.
Unfortunately, the Arduino USB drivers for the Catena 4618 M201 do not distinguish between cable unplug and USB suspend. Any Serial.print() operation referring to the USB port will hang if the cable is unplugged after being used during a boot. The easiest work-around is to reboot the Catena after unplugging the USB cable. You can avoid this by using the Arduino UI to turn off DTR before unplugging the cable... but then you must remember to turn DTR back on. This is very fragile in practice.
When the Catena 4618 is in deep sleep, the USB port will not respond to cable attaches. When the 4618 wakes up, it will connect to the PC while it is doing its work, then disconnect to go back to sleep.
While disconnected, you won't be able to select the COM port for the board from the Arduino UI. And depending on the various operatingflags settings, even after reset, you may have trouble catching the board to download a sketch before it goes to sleep.
The workaround is use DFU boot mode to download the catena-hello sketch from Catena-Arduino-Platform, and use the serial port to reset any required flags so you can get control after boot.
Many of the sketches in other directories in this tree are for engineering use at MCCI. The git-repos.dat file in this directory does not necessarily install all the required libraries needed for building the other directories. However, many sketches have a suitable git-repos.dat. In any case, all the libraries should be available from https://github.com/mcci-catena/; and we are working on getting git-repos.dat files in every sub-directory.
- v0.2.0 adopts the common build system.
- v0.1.3 is the first official release
This repository is released under the MIT license. Commercial licenses are also available from MCCI Corporation.
MCCI invests time and resources providing this open source code, please support MCCI and open-source hardware by purchasing products from MCCI, Adafruit and other open-source hardware/software vendors!
For information about MCCI's products, please visit store.mcci.com.
MCCI and MCCI Catena are registered trademarks of MCCI Corporation. LoRaWAN is a registered trademark of the LoRa Alliance. LoRa is a registered trademark of Semtech Corporation. All other marks are the property of their respective owners.


