![]()
Our team name: DMD-Code-Fellows
⭐ Star us on GitHub!
Code base and resource repository use for raspberry pi interaction with Parking-Iot-Server
Documentation:
- Raspberry Pi Device
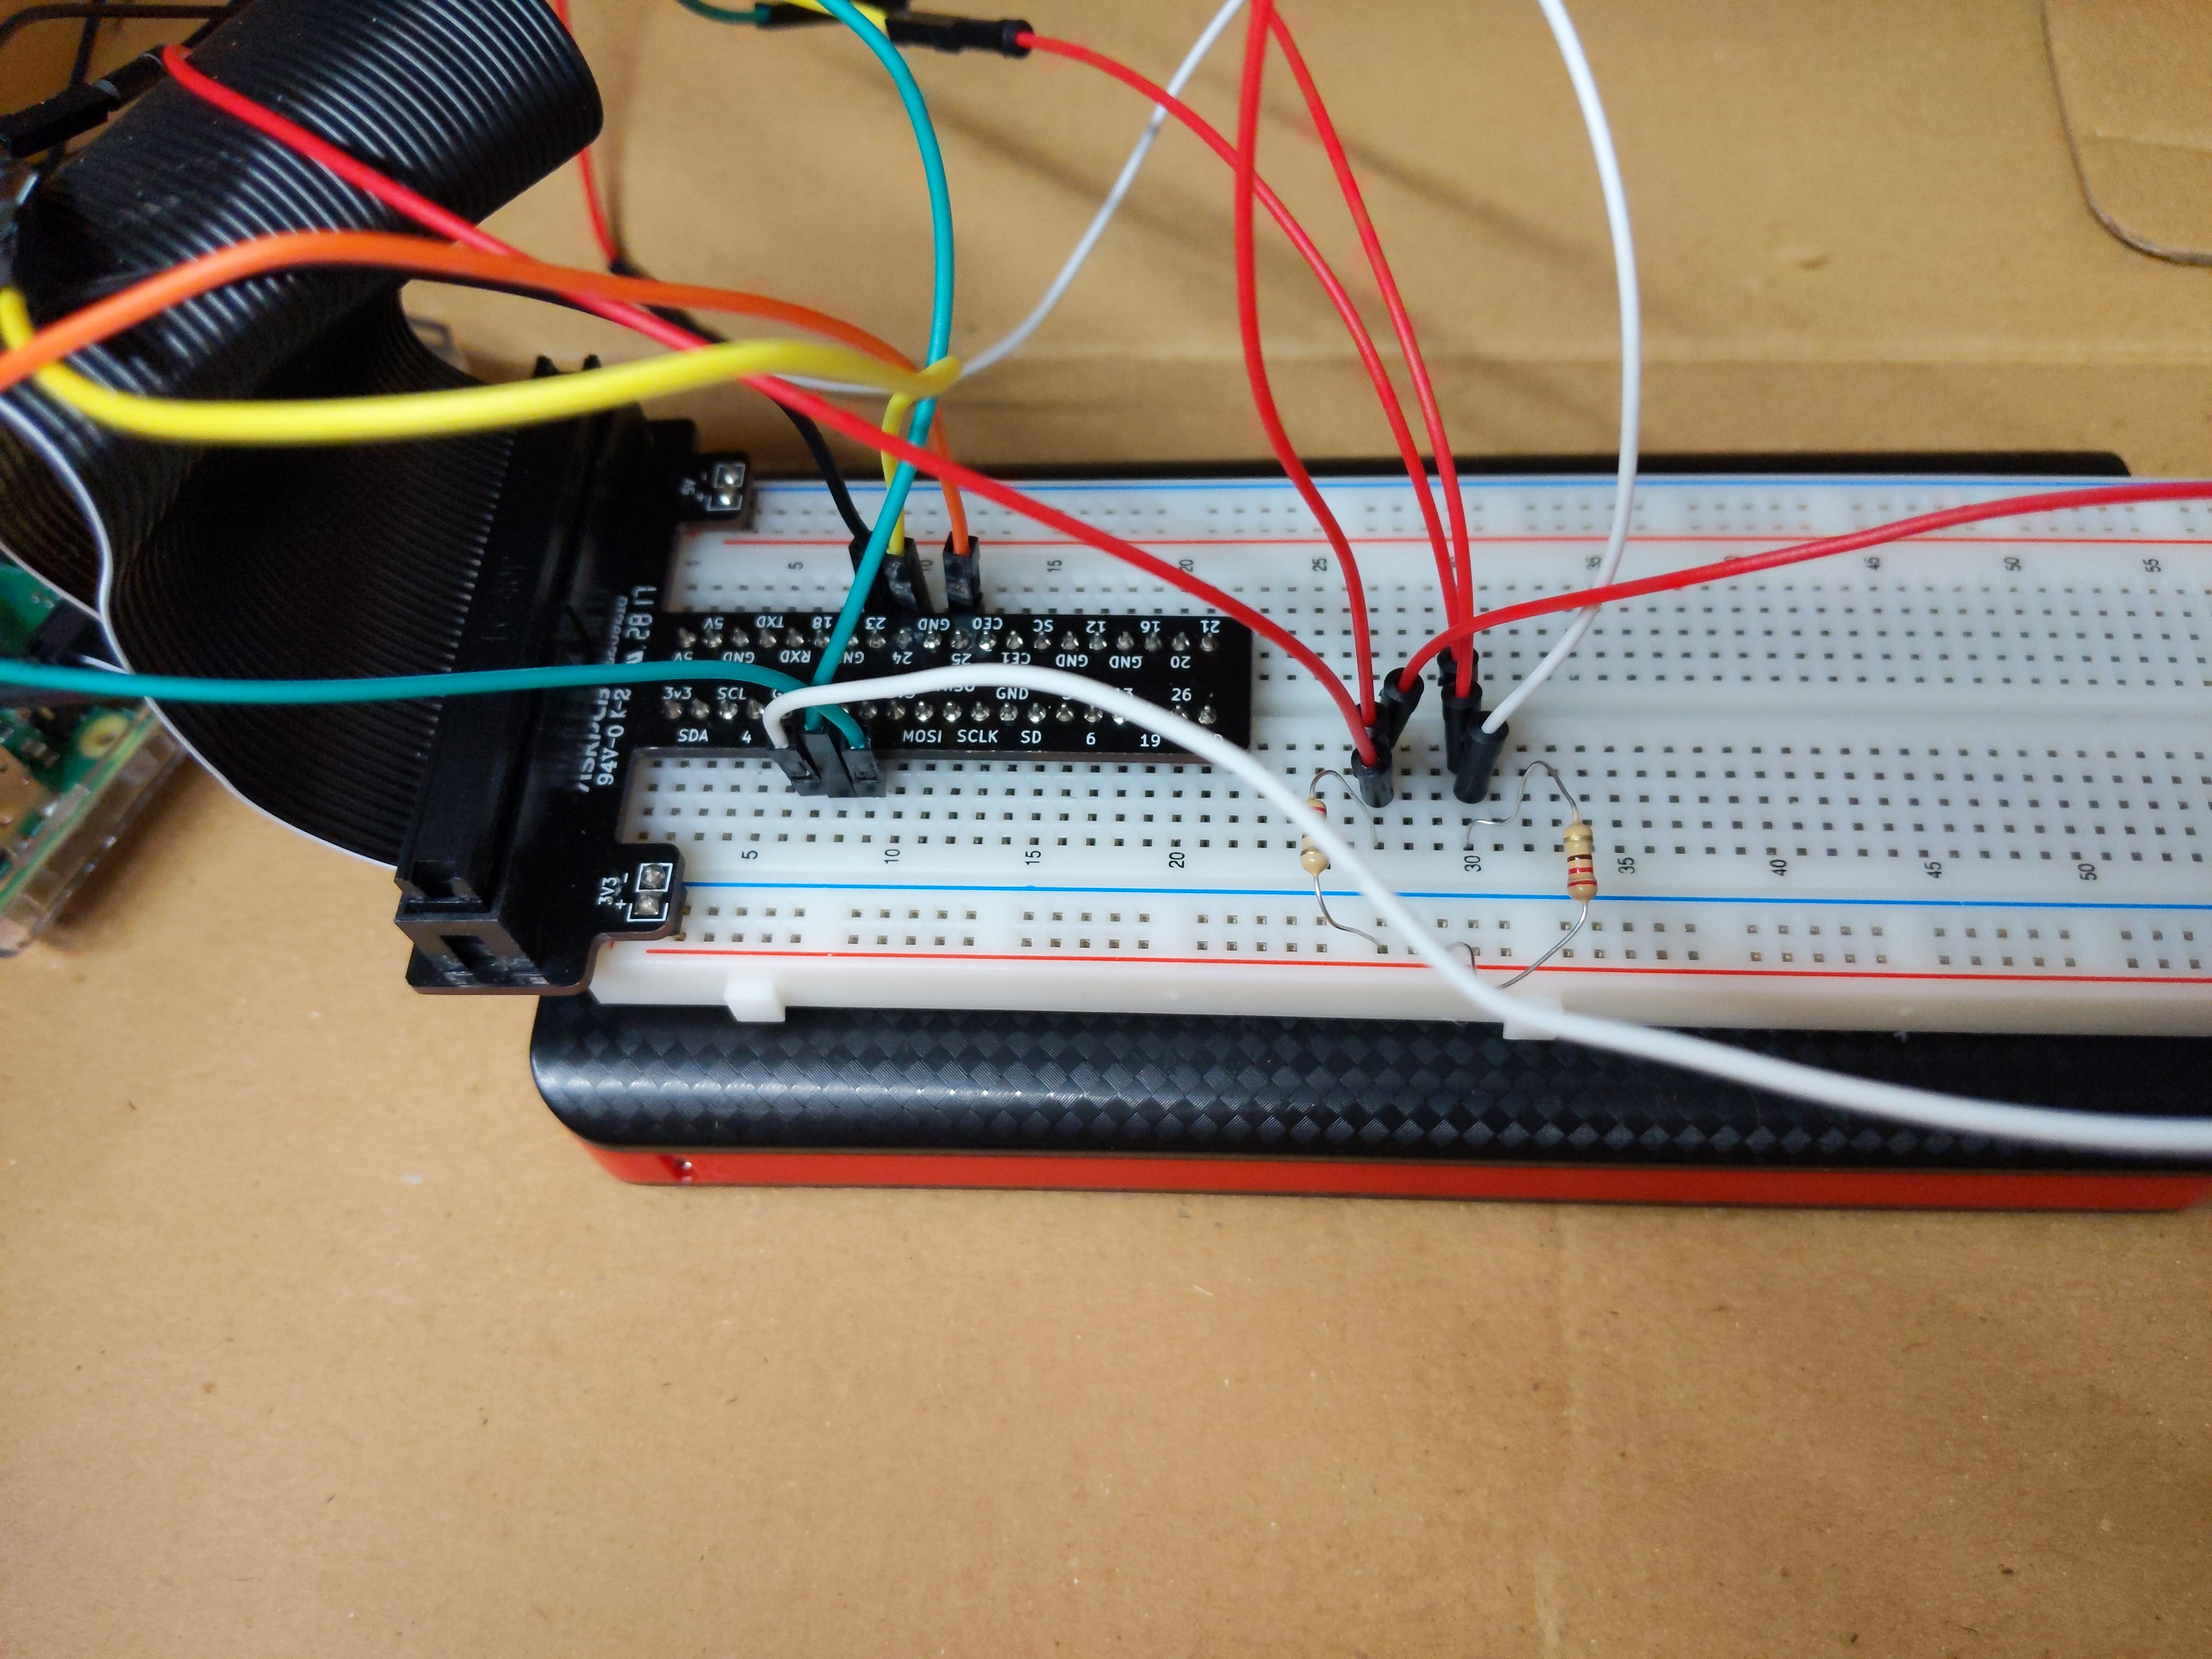
- jumper cables, breadboard, resistors
- Raspbian OS
- Clone project from Github
- Library (Wiring Pi, Pi4J)
In your Raspberry Pi :
- Follow Environment-setup
- Clone project from Github
- Run
./gradlew buildin console to compile code - Run
./gradlew bootrunto run application
The latest official release of NOOBS can be downloaded from : http://downloads.raspberrypi.org/NOOBS_latest
On first boot NOOBS will format your SD card and allow you to select which OSes you want. For the purpose of this project, ensure Raspian OS is selected to install.
Follow any of these tutorials to make your first basic circuit connection project!
Java - Lighting an LED with GPIO pin
Python - Lighting an LED with GPIO pin
If you are using a recent build of Raspian, then an Oracle Java runtime environment is pre-installed. Nothing more to do.
To check if you have Java installed run:
java -version
If you are using an older Raspian build that does not already include a Java runtime environment, then you need to follow these steps to setup the environment:
-
Install and boot the Raspberry Pi using Rasbian
-
run:
apt-get update
apt-get install oracle-java8-installer`
The library Pi4j is dependent on the use of an updated version of the library WiringPi. Even though it is native to Raspian, the most current dependency is using a deprecated version of WiringPi.
To install WiringPi in your local RaspberryPi follow these instructions:
- download: Wiring Pi 2.46
- note the unique identifier number and letters after wiringPi
- for example download file name: wiringPi-8d188fcf20.tar.gz
- unique identifier number: 8d188fcf20
- then run this code:
$ cd $ tar xfz wiringPi-98bcb20.tar.gz $ cd wiringPi-98bcb20 $ ./build - testing wiringPi's Connection
-
$ gpio -v $ gpio readall - A version result should display
-
- got the directory in which you want to install Physical application, for example:
/var/www:
cd /var/www
- Clone this repository for code to run your Raspberry Pi
To run client view locally with your database, clone: Parking-Iot-Server
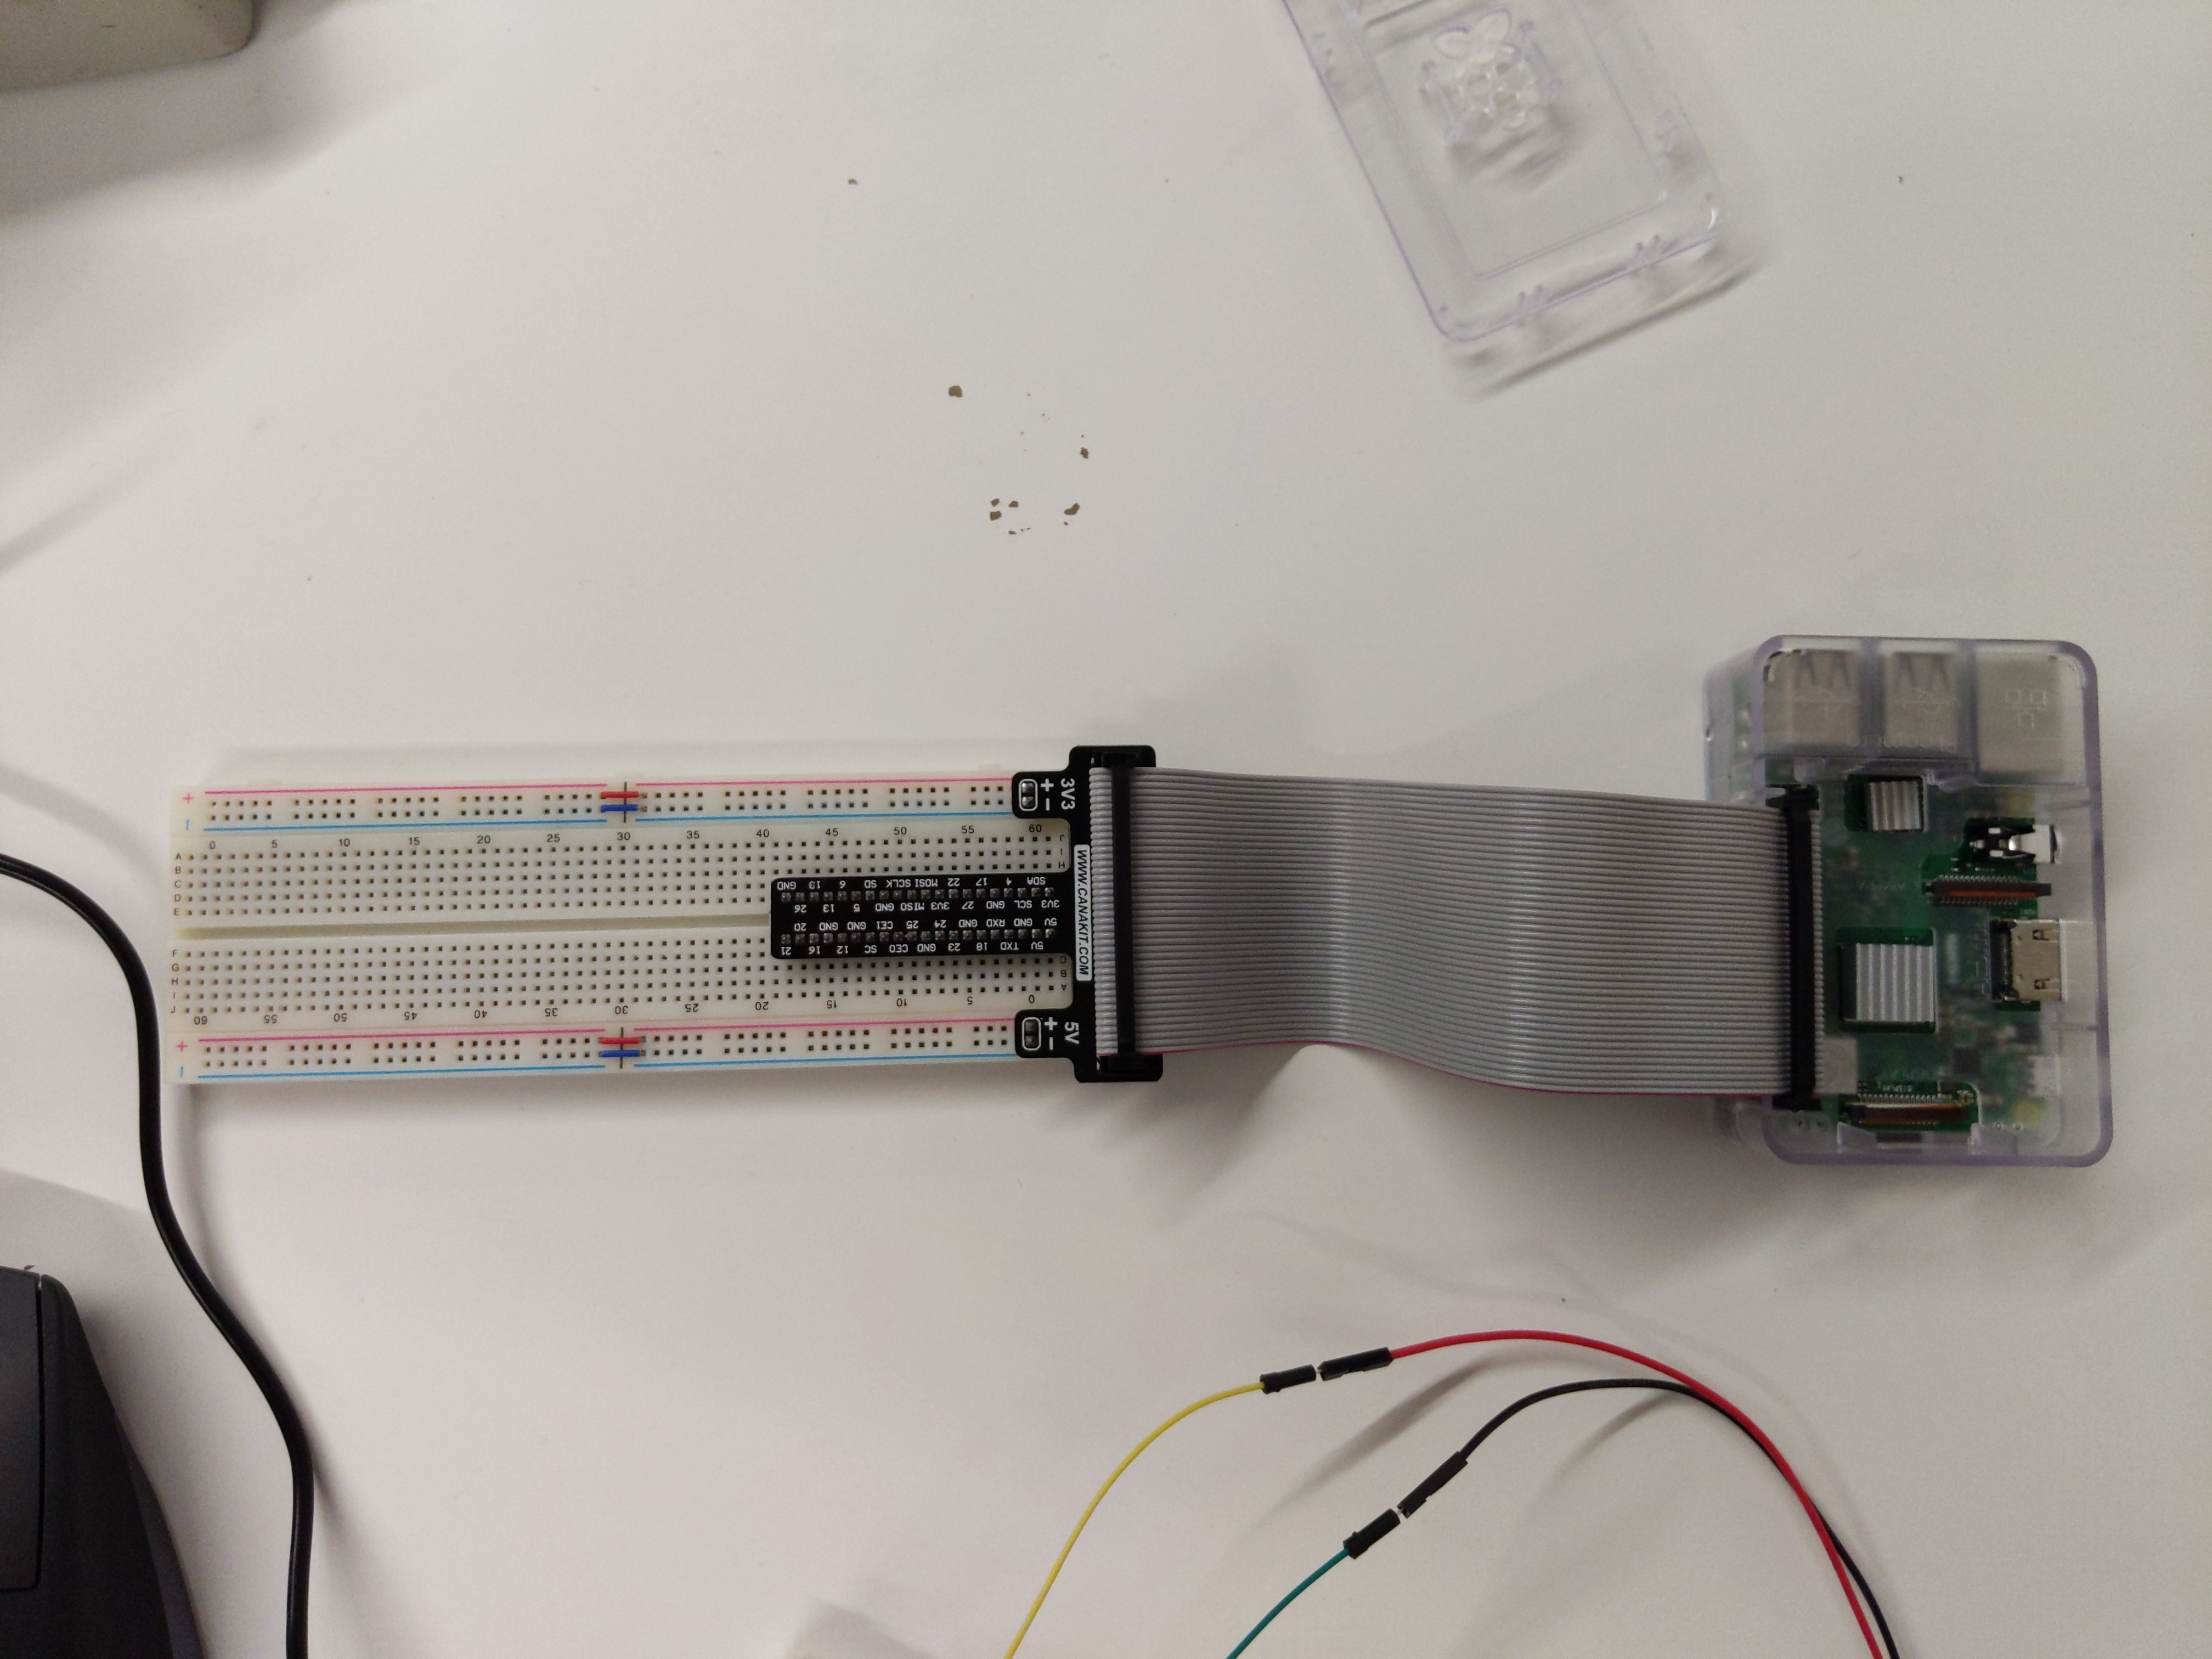
Refer to the schematic and connect your circuit in the proper pins. If you need a tutorial on how to setup your Raspberry Pi device refer back to Device Setup

Please note the number of pins that comes with your ribbon cable and cobbler needs to be compatible the model 3B header for the purpose of this tutorial