
After this lesson, you should be able to:
- Create an application using Google Places API.
- Show information from the database, based on the places found in a Map.
- Store information in the database, based on the user input.
- Fork this repo.
- Clone your fork into your
~/code/labsfolder.
Upon completion, run the following commands:
$ git add .
$ git commit -m"done"
$ git push origin master
Navigate to your repo and create a Pull Request -from your master branch to the original repository master branch.
In the Pull Request name, add your Campus, name, and last name separated by a dash "-".
All the files that make your Express app work, including the JavaScript files where you do the AJAX Requests.
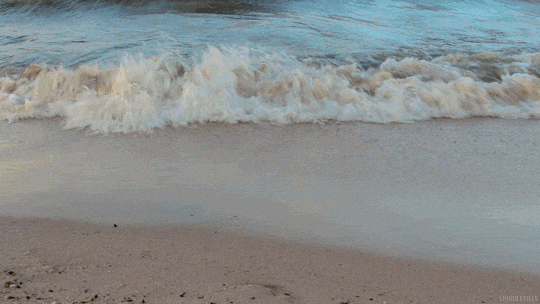
Everybody likes to go to the beach. But not everybody has a beach around, so some people has to do a lot of kilometers to go to the beach. What happens if once we are there, the weather is not the appropiate? Or you can't swim? Beach Finder will solve this!
In this lesson, we are going to create a web application that will allow our users to see which is any beach status all over the world. How does it work?
The beach lifeguard uses a flag to indicate if you can swim, you have to be careful, or you can't swim. This is done with a color flag:
- Green. You can swim.
- Yellow. You have to be careful.
- Red. It's forbidden to swim.
Our application will allow people to search for any beach, and indicate which is the current flag where we are. Then, other users will be able to check out the status to decide if they can go there or not.
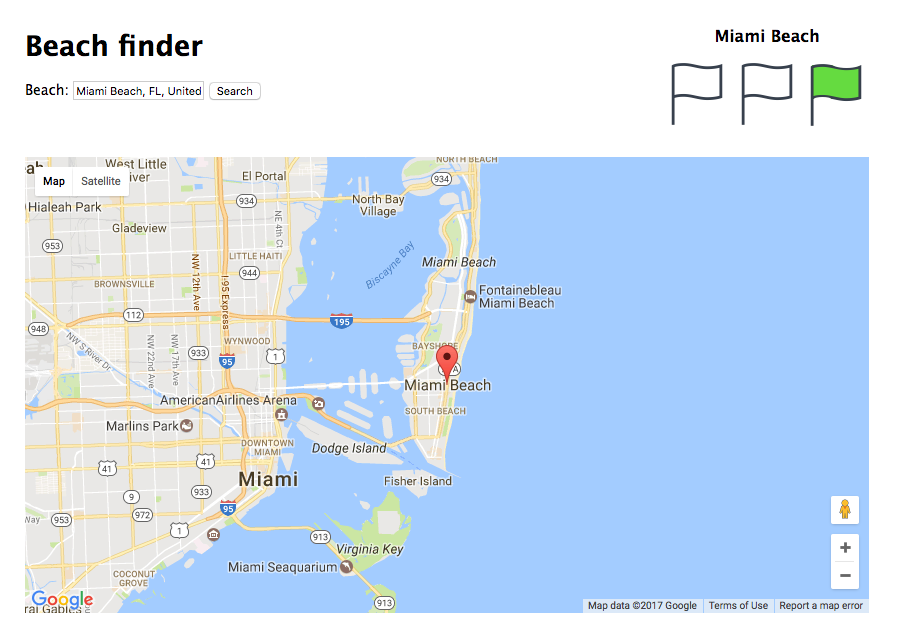
It looks like Miami Beach is a good destination today, you can swim, so go on!
Note that our starter code for this exercise is quite comprehensive. We've already used the Express generator to create the initial project structure. We haven't added any extra file, so you have a plain project with the following folder structure:
starter-code/
├── .gitignore
├── app.js
├── bin
│   └── www
├── package.json
├── public
│   ├── images
│   ├── javascripts
│   └── stylesheets
│       └── style.css
├── routes
│   ├── index.js
└── views
    ├── error.ejs
    └── index.ejs
To be able to complete the project, we recommend you to follow the following steps.
The first thing we are going to do is create the Google Map and add it to the index.ejs view.
To do that, remember you have to access to the Google Developers Console and create an API Key to use Google Places API. It's quite similar to Google Maps, so don't be worried about that.
Once you have created the API Key, add the Map in the view and we will completed the first iteration.
:::info
Remember to give some height and width to the map container. If you don't do that, you will not be able to see your map.
:::
Tasks
- Create an API Key for Google Places API.
- Add the map to the project.
- Remember to give the map container width and height.
Once we have added the map, we need a search box to look for our favorite beach. With Google Places API we can create an <input type="text"> that will have an autocomplete, so it's going to be very helpful for our visitors.
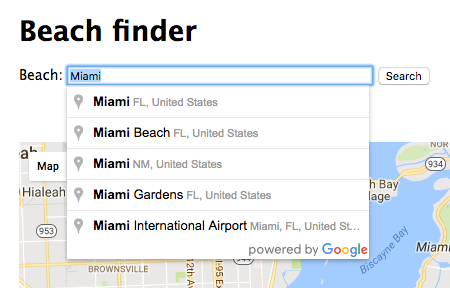
This is why we are using Google Places instead of Google Maps API. You can find how to create this Autocomplete in the Places Autocomplete Documentation. Try to figure it out by yourself before ask for help :)
:::info We can filter the options in the autocomplete by type. Unfortunately, there is no "Beach" type, we don't have to keep the type in mind. It means that the users will be able to indicate that Madrid has a green flag... even if they don't have any beach :P :::
Once you have the autocomplete in your textbox, you have to add a marker in the google map when the visitor indicates a beach. The workflow is the following:
- The user looks for "Miami Beach, Florida".
- The user selects the place and press "Search" button.
- We center the map in Miami Beach, and add a marker on it.
This iteration is finished by adding this feature.
Tasks
- Create a form with an
<input type="text">and a<button>. - Add the autocomplete to the
input. - Once the user selects a place:
- Center the map in the selected place
- Add a marker in the map
- If there is another marker, remove it before add the new one
Now we are going to add the flags container. This container will have three buttons with an image each one, that will allow the users select which is the current status of each beach.
The flags have to appear just when we are showing a beach in the map. By default, the beach has to be empty, and it has to change its color in two moments:
- On button hover.
- When the users clicks on the button.
Once the users clicks on the button, we have to save the beach and its status in the database. First of all we are going to check out if the beach already exists. If it exists, we will update the item in the collection. If it doesn't exist, we will create it.
The beach model in our database will have the following structure:
name: String
flag: String
  -> possible values: "red", "yellow", "green"
:::info Remember that we can force the user to save an specific value by using Mongoose Enums :::
Tasks
- Create a flags container with three buttons, one for each flag.
- Show the flags when a user selects a beach.
- Create an event that will be triggered when the user clicks on the button.
- Create a mongoose model to save the beach in the database.
- If the beach doesn't exist in the database, save its name and status (flag color).
- If the beach already exists in the database, update its status (flag color).
To finish up with this exercise, we need to add one more feature. Show the beach status. To do that we will use the flags, of course.
When a user indicates a beach that is already stored in the database, we will show the user the flag color. We recommend you to create a css class called selected to indicate when a flag is selected.
In this case, if the user wants to know which is the Florida Beach status and we have already its value in the database (being the flag color yellow), we are going to add the selected class to the flag, so the user will see that he/she has to be careful on this beach.
Tasks
- When the user indicates a beach, if we have its value stored in the database, we have to show it in the view.
As an extra iteration, we can add the date to the status. It's the best way for our users to know if the status has been setted up today or before.
To do that, we will have to add the timestamps to the database model. We are going to use the updated_at field to know when has been changed. To show our users a comprehensive date, we will format the date in the server with moment.
Tasks
- Add the timestamps in the
beachmodel. - Add the
updated_atfield in the response from the server, formatted withmoment. - Show the date under the beach flags.
/Happy Coding!