Perform Social Media Sentiment Analysis with Pinpoint and Comprehend
Imagine you are a brand with a large web and mobile presence. You want to monitor the conversation around your brand on social media and message your promoters/influencers and detractors across multiple channels. AWS and Pinpoint provide a great foundation for doing so easily and at massive scale.


- You should have full administrator access to your AWS account. Feel free to use a personal account--you'll be reimbursed with AWS credits after the workshop to cover any costs incurred.
- Install Git by following the instructions here: https://git-scm.com/book/en/v2/Getting-Started-Installing-Git.
- Install NPM and Node.js by following the instructions here: https://www.npmjs.com/get-npm. Choose the latest LTS version (currently 10.13.0).
- Install the Amplify CLI globally with
npm install -g @aws-amplify/cli. If you get permission errors, trysudo npm install -g @aws-amplify/cli. If you are still getting issues installing on your local machine, it may be easier to run this workshop in a fresh Amazon Workspace. - Download Google Chrome if you don't have it already: https://www.google.com/chrome/.
- Clone this repo with
git clone https://github.com/aws-samples/mob314-workshop - Change into your repo directory in the terminal with
cd mob314-workshop. - Install dependencies with
npm install. - Configure the Amplify CLI with
amplify configure. Chooseus-east-1for the region. - Initialize your Amplify project with
amplify init. Follow the prompts and choose the selections shown below. You can substitute in whatever text editor you'll be using: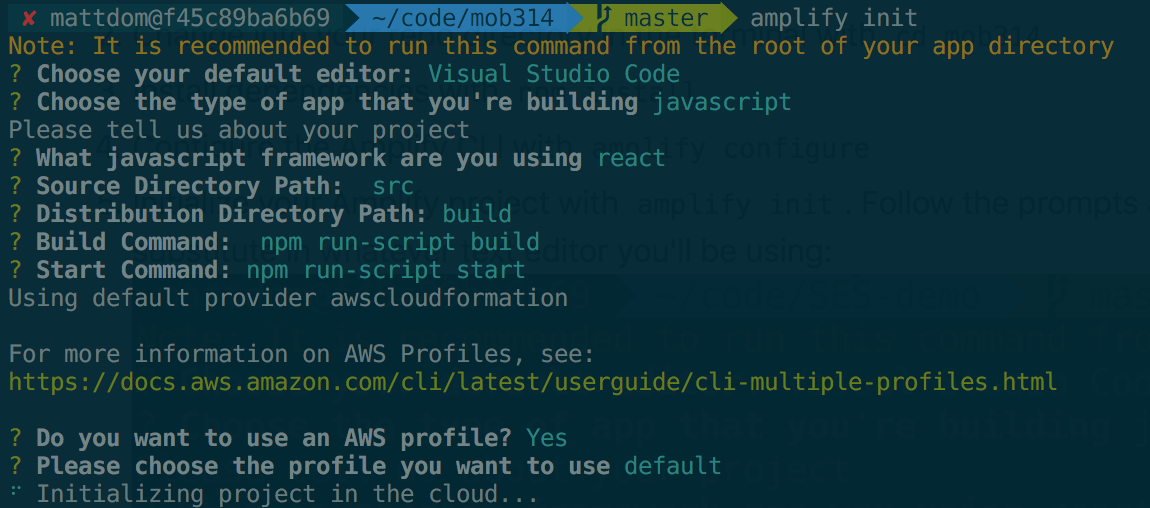
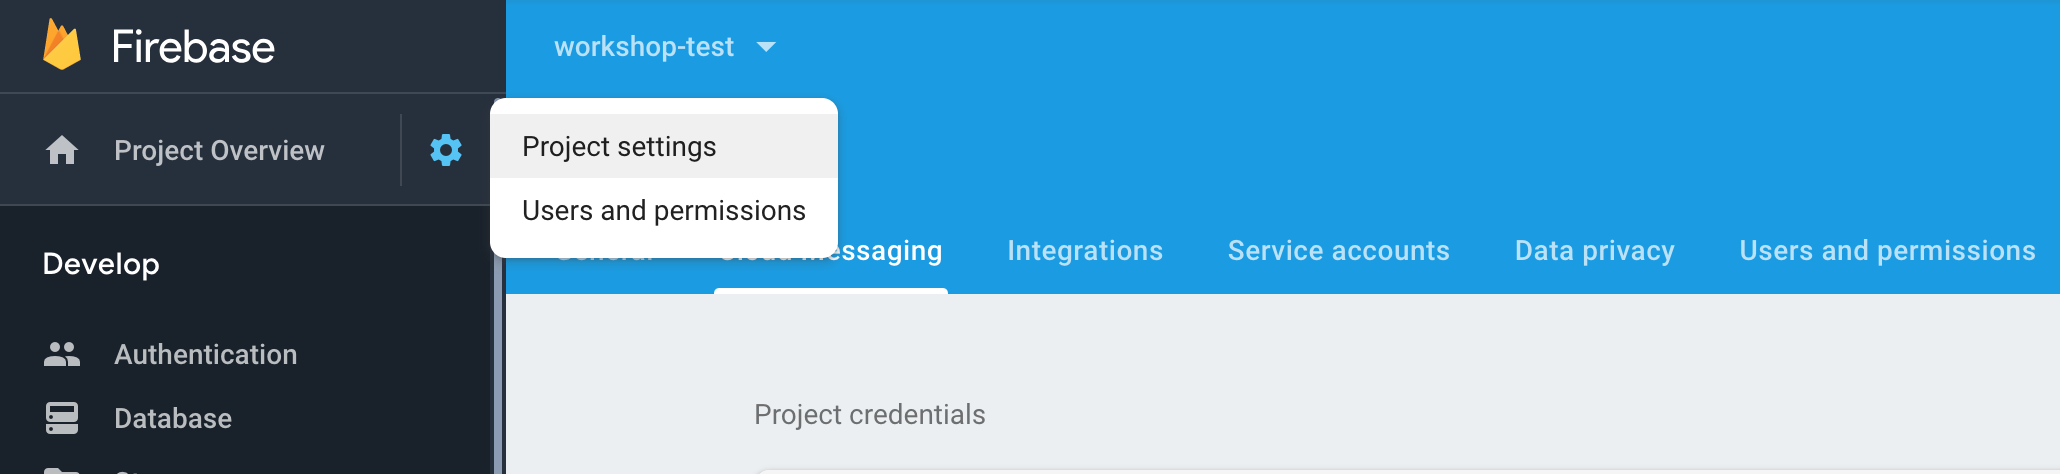
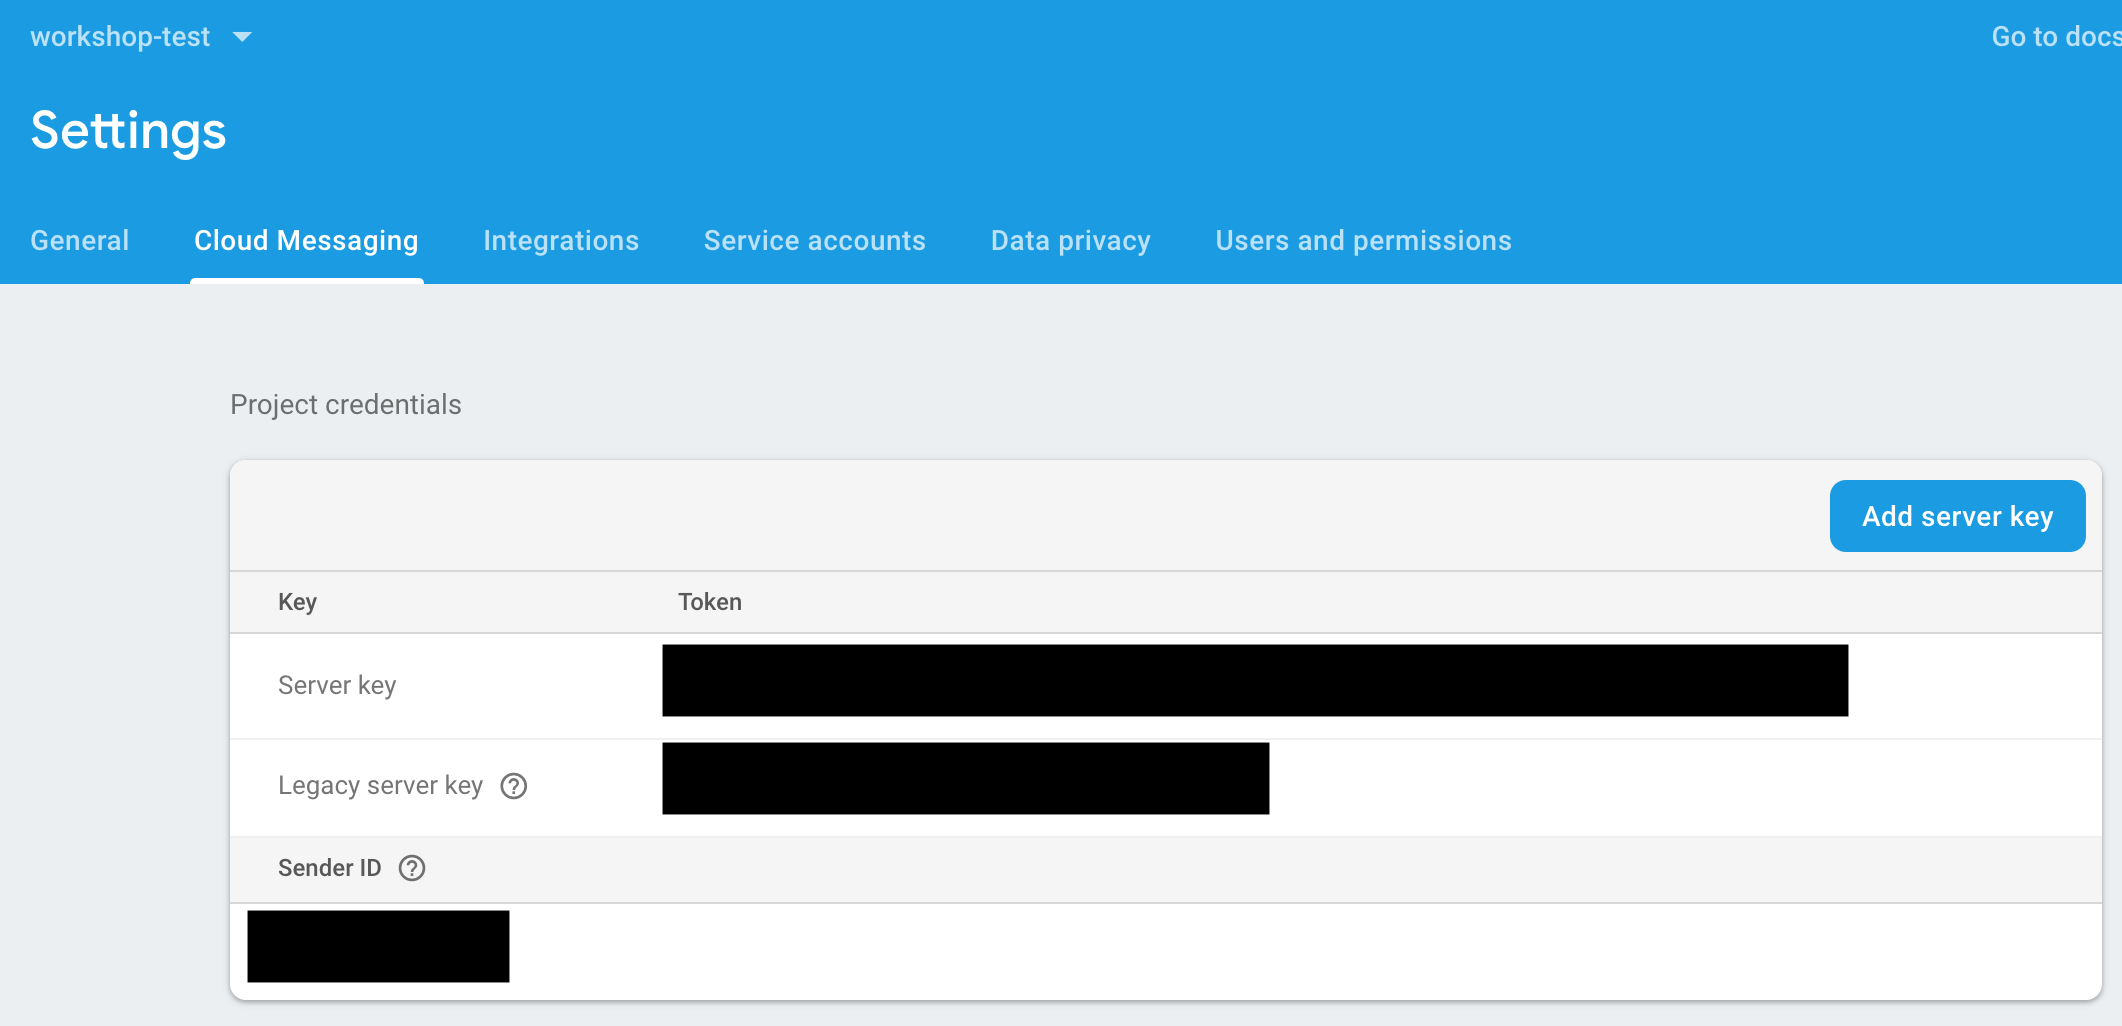
- While your project is initializing, create a Firebase account at https://firebase.google.com/. Add a new project and write down your credentials using the process outlined here: https://firebase.google.com/docs/cloud-messaging/concept-options#credentials. You will need your Sender ID and Server Key, both of which can be found in the Cloud Messaging tab of the Firebase console Settings pane.
- Add notifications with
amplify add notifications, choose FCM, choose the default generated Pinpoint project name, and paste your Firebase Server Key from the previous step. - Push your local changes to the cloud with
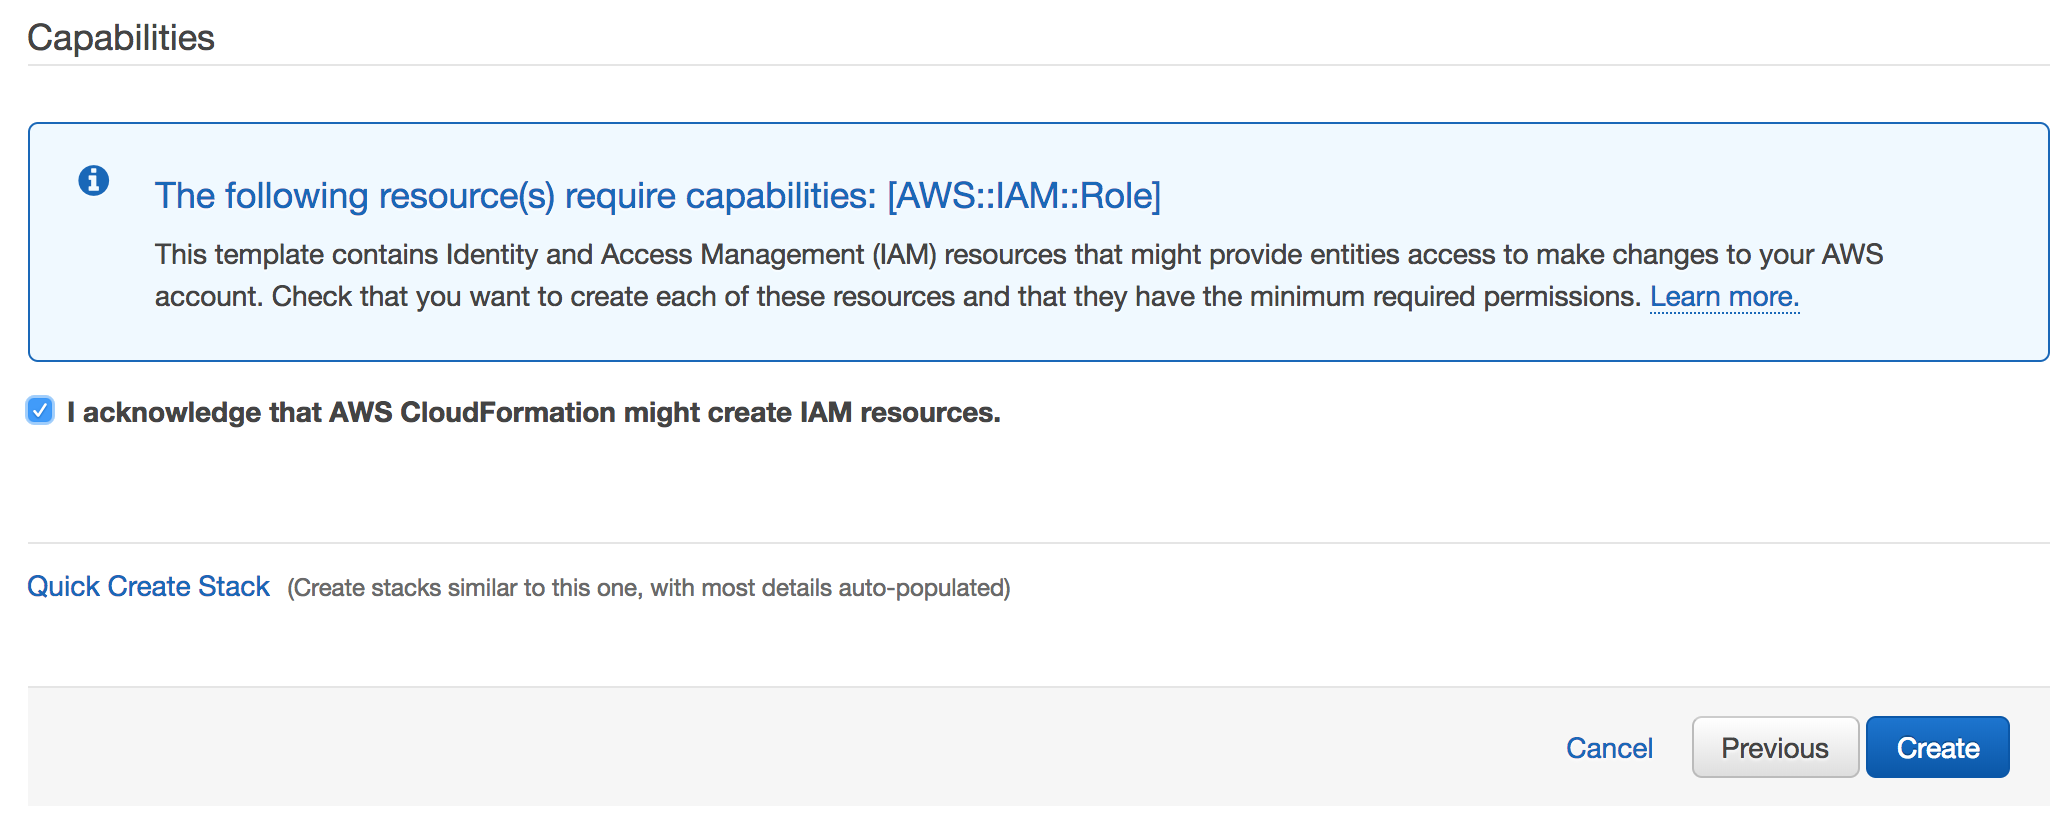
amplify push. A file/src/aws-exports.jswas created in your local project. Open this up and copy theaws_mobile_analytics_app_id. - Launch the backend of the solution with a CloudFormation template using the link here: https://console.aws.amazon.com/cloudformation/home?region=us-east-1#/stacks/create/review?stackName=PinpointStack&templateURL=https://s3.amazonaws.com/mattd-customer-share/mob314.template.yaml. For the parameters, add in your Pinpoint app ID you just copied from Step 8 above. Choose Next to accept defaults, select the checkbox at the bottom to acknowledge that CloudFormation may create IAM resources, then click Create.
 The stack will take about 15 minutes to launch. When complete, note the
 apiGatewayInvokeURLin the Outputs tab of the CloudFormation stack, which we will use later to configure a Facebook Webhook. - Create a Facebook developer account at https://developers.facebook.com/. Create a new application and copy the application ID.
- In
/src/App.jsin your local project, add your Facebook app ID from the previous step to the line that reads:<FacebookLogin appId="your_app_id_here". - In
/public/firebase-messaging-sw.jsin your local project, add your Google sender ID from step 6 above to the line that reads:messagingSenderId: 'your_sender_ID_here'. Do the same again for the file/src/push-notification.js. Make sure you save your changes to the files. - Windows only Modify the start command in your
package.jsonfile to read:


"scripts": {
    "start": "set HTTPS=true&&react-scripts start",
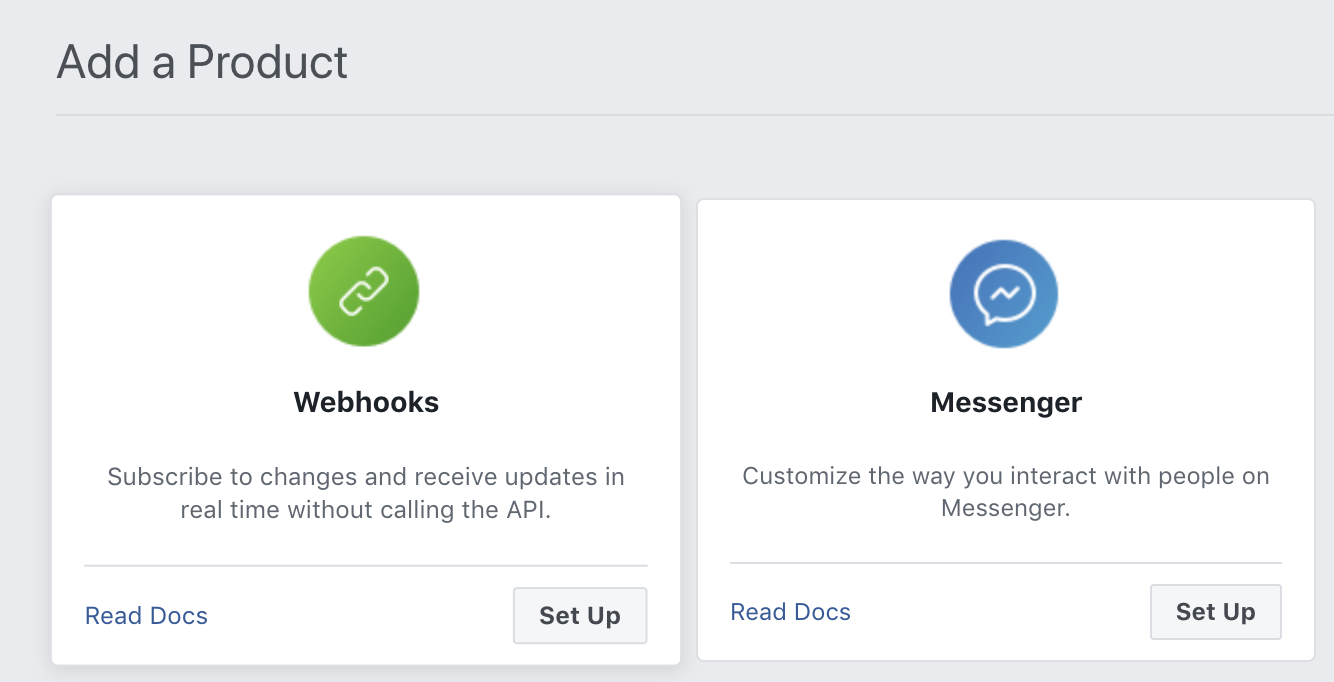
- Add the Facebook Login product to your Facebook app from the app dashboard. For the platform, select Web (WWW). For the Site URL, enter
localhost:3000.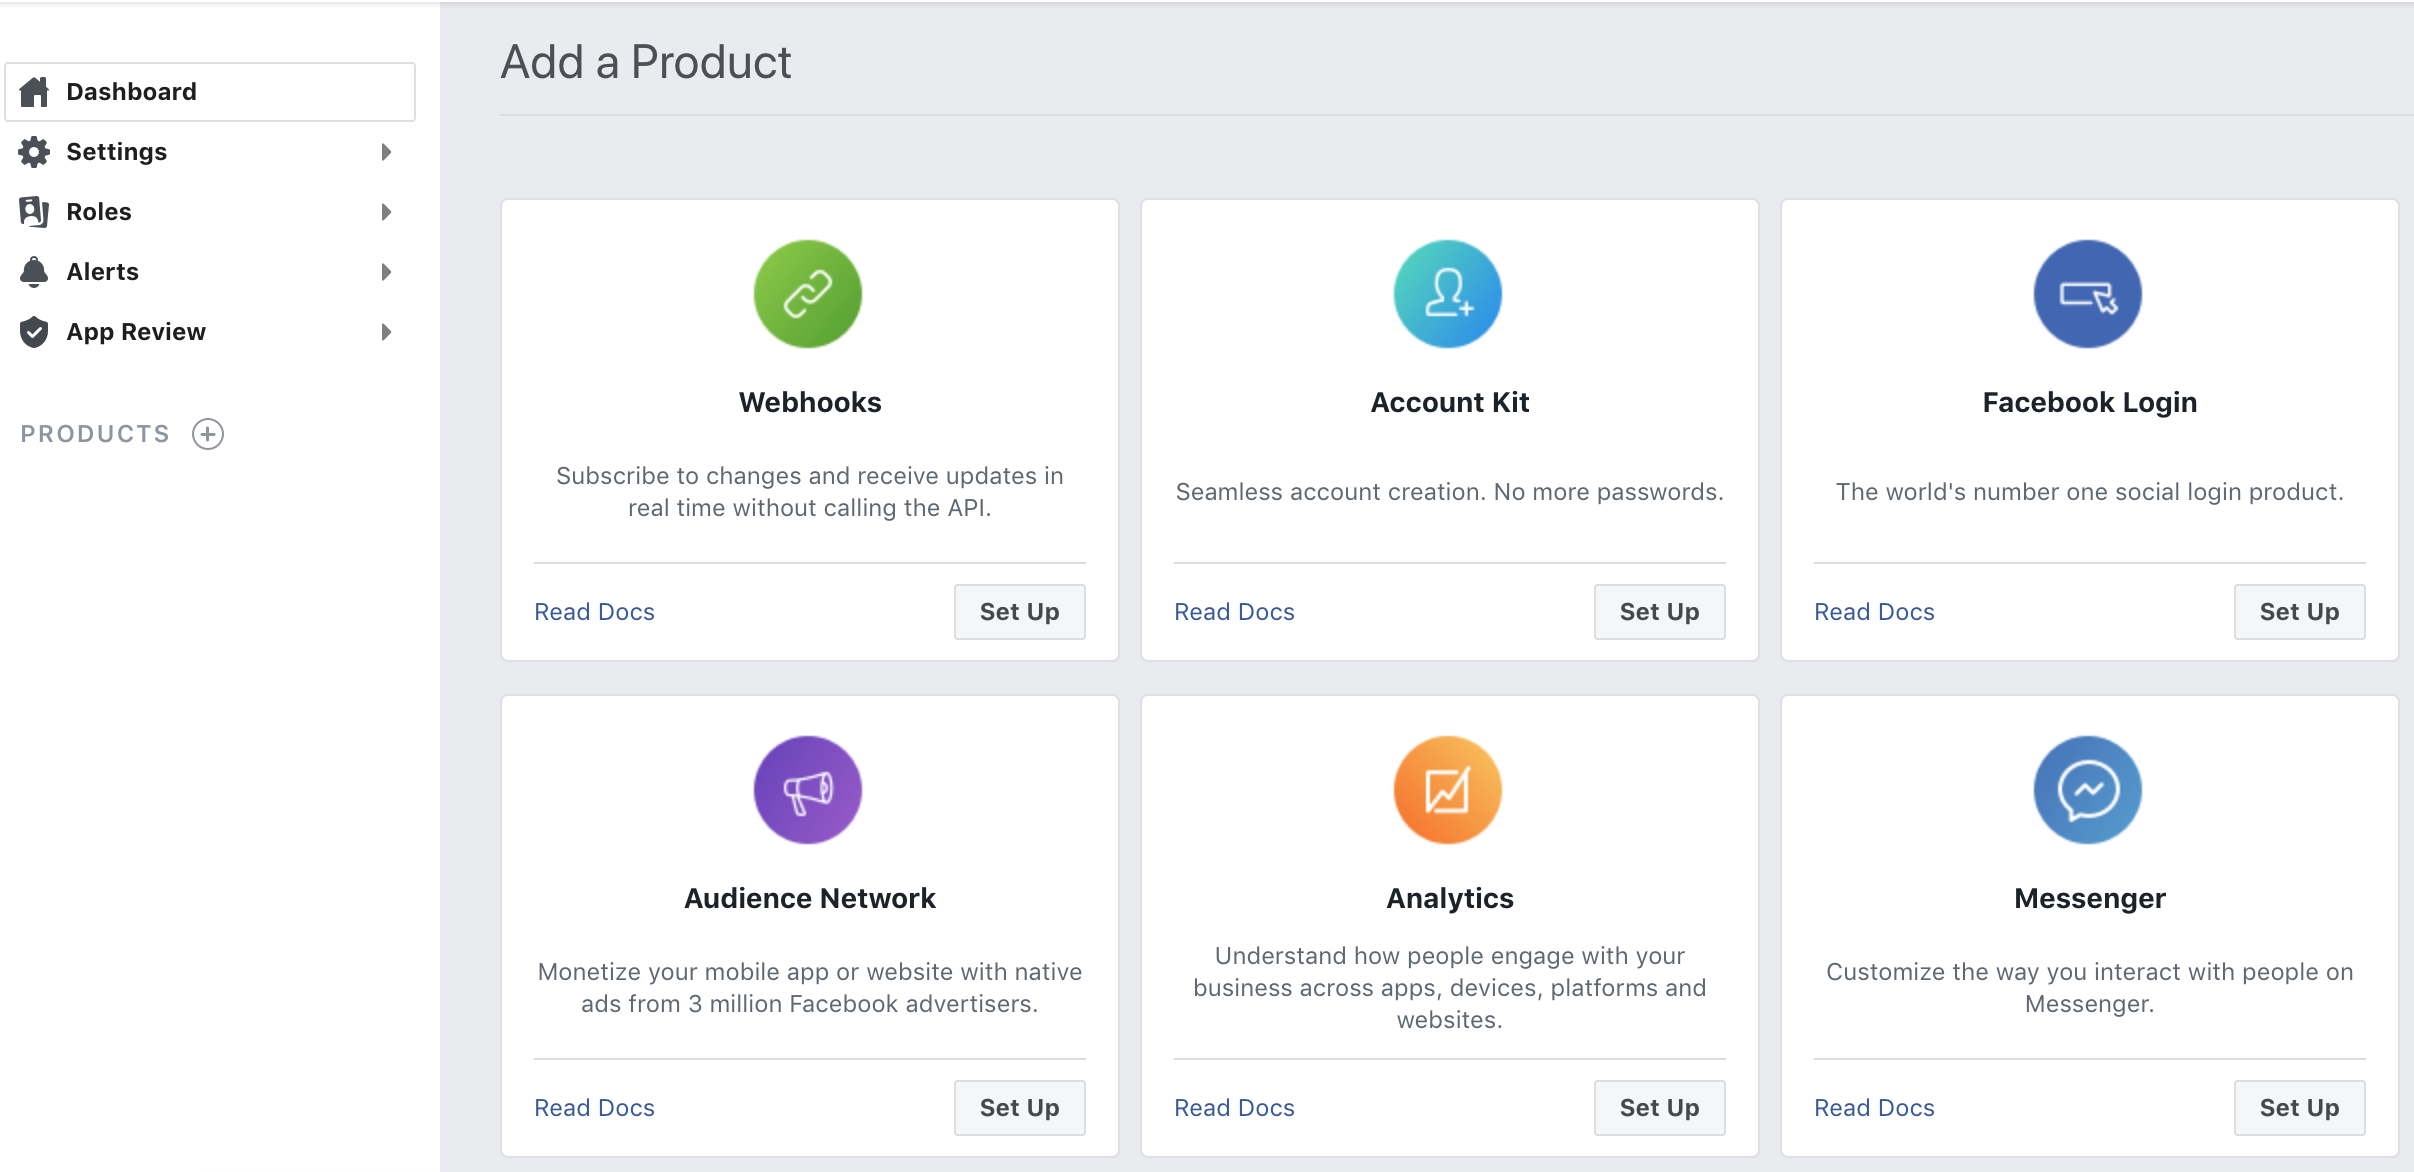
- Add the Webhooks product to your Facebook app:
- In the drop-down menu select Page, then Subscribe to this object:
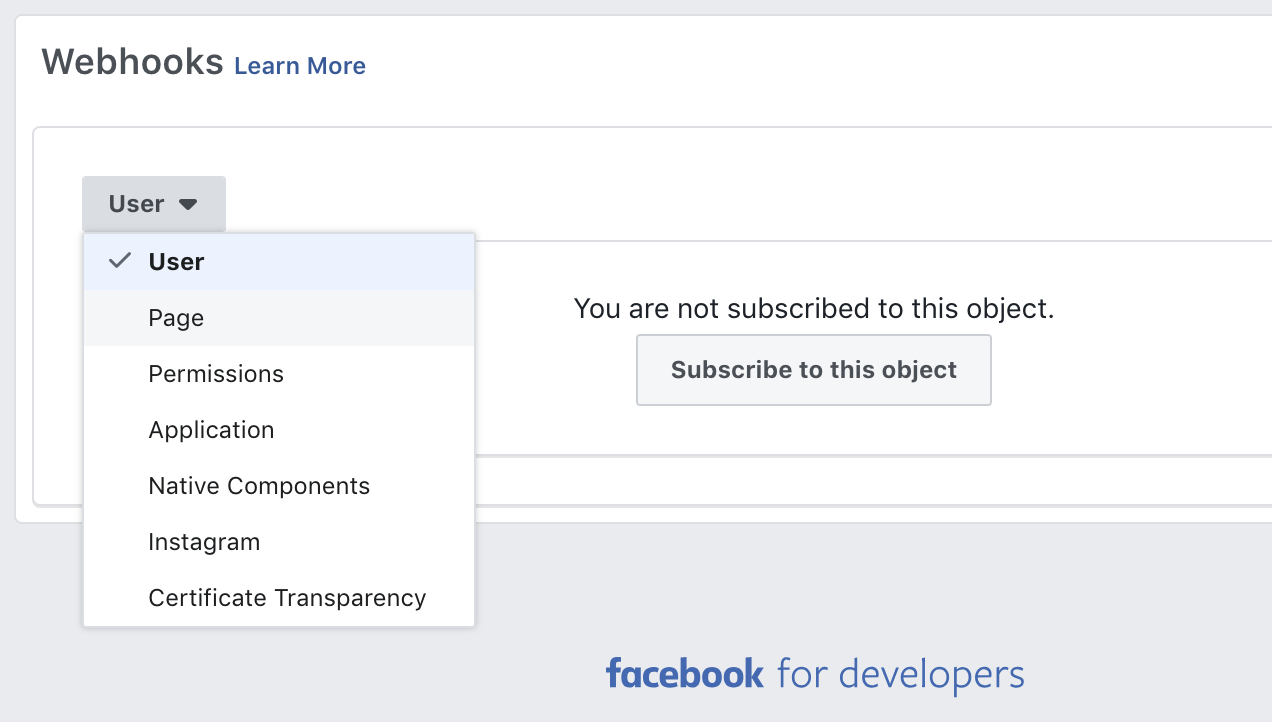 . For Callback URL, paste in the output
 apiGatewayInvokeURLfrom the CloudFormation template in Step 8 above. For Verify Token, paste inThisIsAToken. - Click the Subscribe button under feed. This ensures and feed updates on your Facebook page are subscribed to in real-time via Webhook.
- Take your app public by pressing the big on button in your Facebook app dashboard:
 You'll have to add a privacy policy URL, for now you can just enter
 https://aws.amazon.com/privacy/. You also have to add an App Domain, so enterlocalhost. - Service workers and Facebook login require serving content over HTTPS. To test this locally, we need to launch Chrome with a flag to accept self-signed SSL certificates.


On a Mac, run:
/Applications/Google\ Chrome.app/Contents/MacOS/Google\ Chrome --user-data-dir=/tmp/foo --ignore-certificate-errors --unsafely-treat-insecure-origin-as-secure=https://localhost:3000
For Windows IMPORTANT: you must close any open Chrome instances before running this:
& "C:\Program Files (x86)\Google\Chrome\Application\chrome.exe" '--ignore-certificate-errors' '--unsafely-treat-insecure-origin-as-secure=https://localhost:3000"'
- In your local project, launch the app with
npm start. You should see Chrome open tohttps:localhost:3000. - Login with Facebook with the first button then click the second button to register for push notifications. Allow any pop-ups that your browser might block. You can open the Chrome Javascript console to see the responses from Facebook and Firebase as your authenticate.
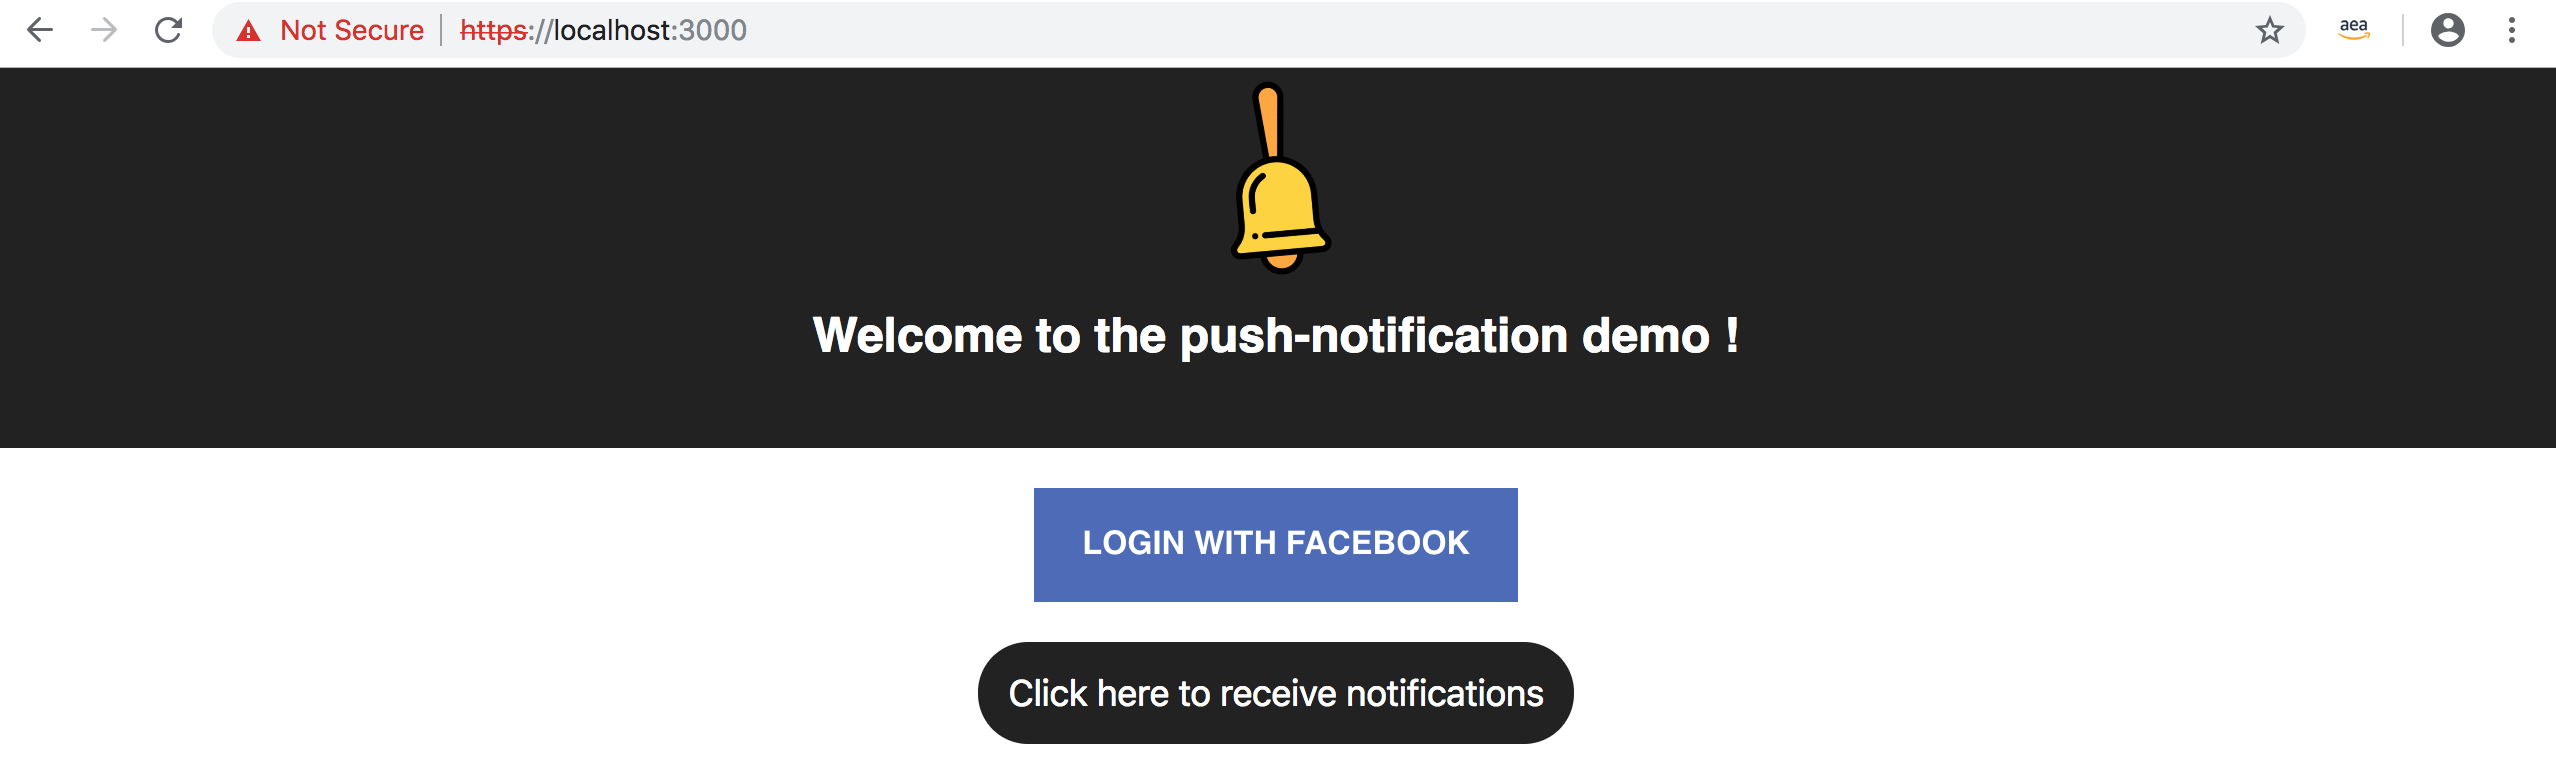 Now minimize the window to ensure you get the push notification while the app is in the background.
 - Test the pipeline by pressing the Test button in your Facebook app's Webhook settings next to the feed . You should get a browser push notification within a few seconds thanking you for feedback and asking if you want to take a survey.

- Follow your Facebook post through the pipeline:


- Navigate to your API Gateway console, then your API and Dashboard to see API calls coming in.
- Navigate to your Lambda function. You should see a Lambda function called
PinpointStack-LambdaFunctionPost-*, which should also be the Last modified. Click on the Monitoring tab, then View Logs in CloudWatch. Drill into the latest Log Stream and review the Lambda execution logs. What was the sentiment score? - Navigate to the Kinesis console and see records being put on the stream.
- Navigate to the S3 console and see the object that was created by your post.
- Navigate to the ElasticSearch console. Click on the
page-updatesdomain and the Kibana endpoint to visualize your page update. Click the Discover tab on the left and look at the documents that were indexed in real-time. To use Kibana, you must configure at least one index pattern. Kibana uses these patterns to identity which indices you want to analyze. For this tutorial, enterpage_updates*and choose Create. - Navigate to the Pinpoint console. Drill into the app you created using the Amplify CLI and click on Segments on the sidebar. Create a segment and add a filter by user. You should see a user attribute for Sentiment appear and if you select it, an estimate of 1 endpoint will be targeted. You can now schedule a recurring push campaign to target users with positive, neutral or negative sentiment!
- How would you add hosting to publish this local site as a static page on S3/CloudFront?
- Review the CloudFormation template to see what backend components were launched.
- Review
App.jsandpush-notification.jsto see how the front end code works. - Review Lambda function code to see sentiment analysis calls.
- Install this PWA on an Android device or emulator and test out push notification and offline capability.
- Post a comment to my test Facebook page. Try to use words with positive sentiment (good, great, love, awesome) and we'll review the sentiment scores live.
- What would this solution look like using Twitter APIs instead of Facebook?
- How would you implement this solution as a native mobile app instead of a PWA?
- Submit your app for Facebook review and configure against a live Facebook page.
- Delete any objects from your S3 bucket.
- Delete stack in CloudFormation console: https://console.aws.amazon.com/cloudformation/home?region=us-east-1#/stacks?filter=active.
- In your mobile project, run
amplify deleteto delete cloud resources for your project.
This sample code is made available under a modified MIT license. See the LICENSE file.