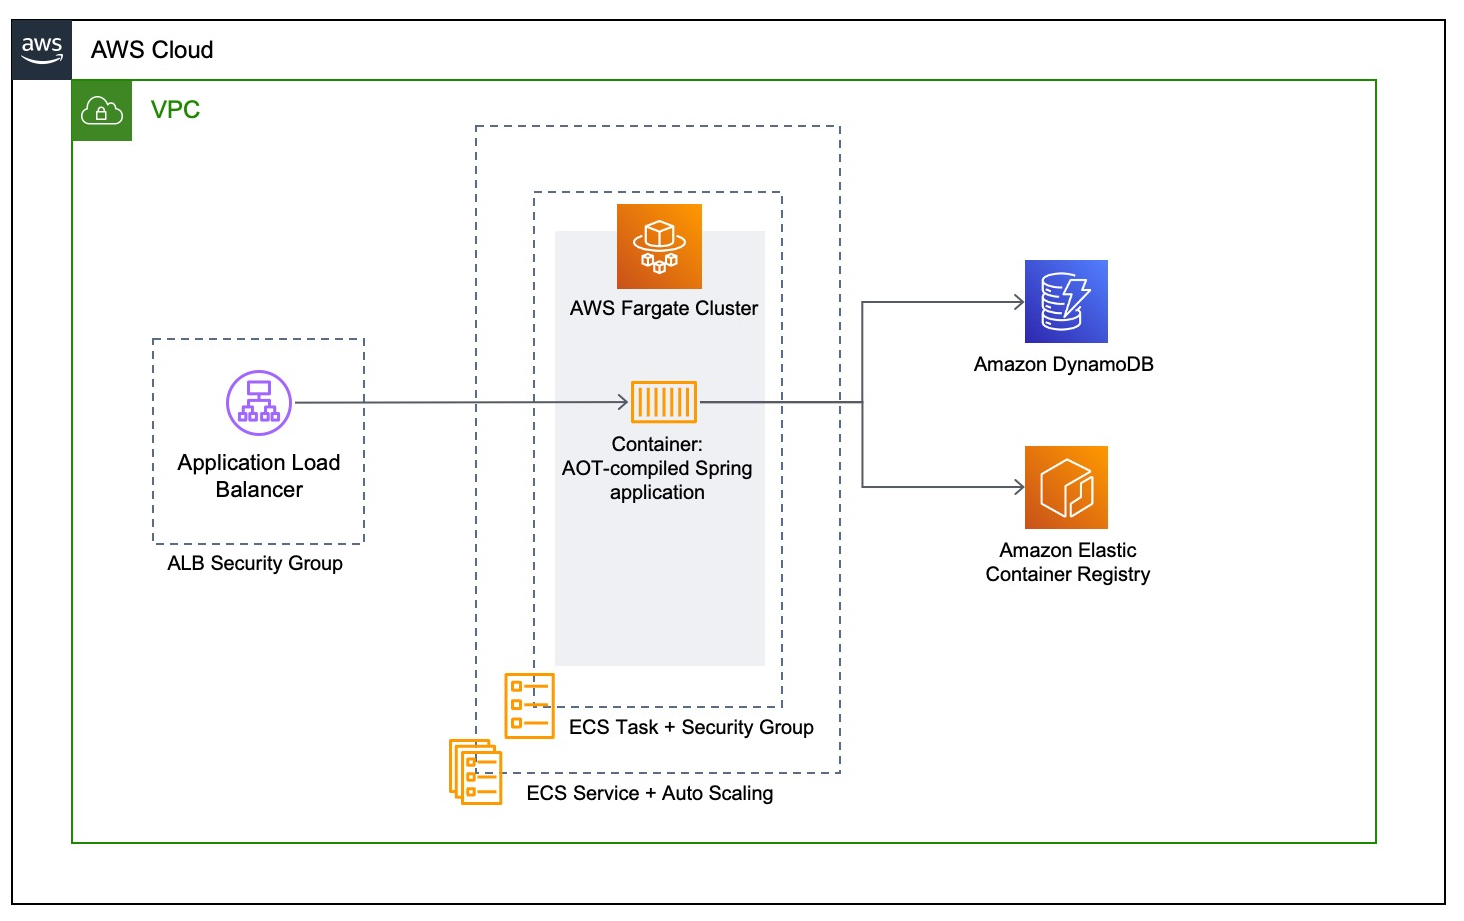
This project contains the supporting code for the "Optimizing Spring Boot Application for AWS Fargate" blog post.
The application is available in six different configurations (version seven isn't working anymore, distroless and GraalVM stopped working):
- version 1, not optimized, running on x86_64
- version 2, not optimized, running on ARM64
- version 3, custom JRE and additional optimizations running on x86_64
- version 4, custom JRE and additional optimizations running on ARM64
- version 5, Spring Native (GraalVM AoT compilation) running on X86_64 with Ubuntu 22 parent image
- version 6, Spring Native (GraalVM AoT compilation) running on ARM64 with Ubuntu 22 parent image
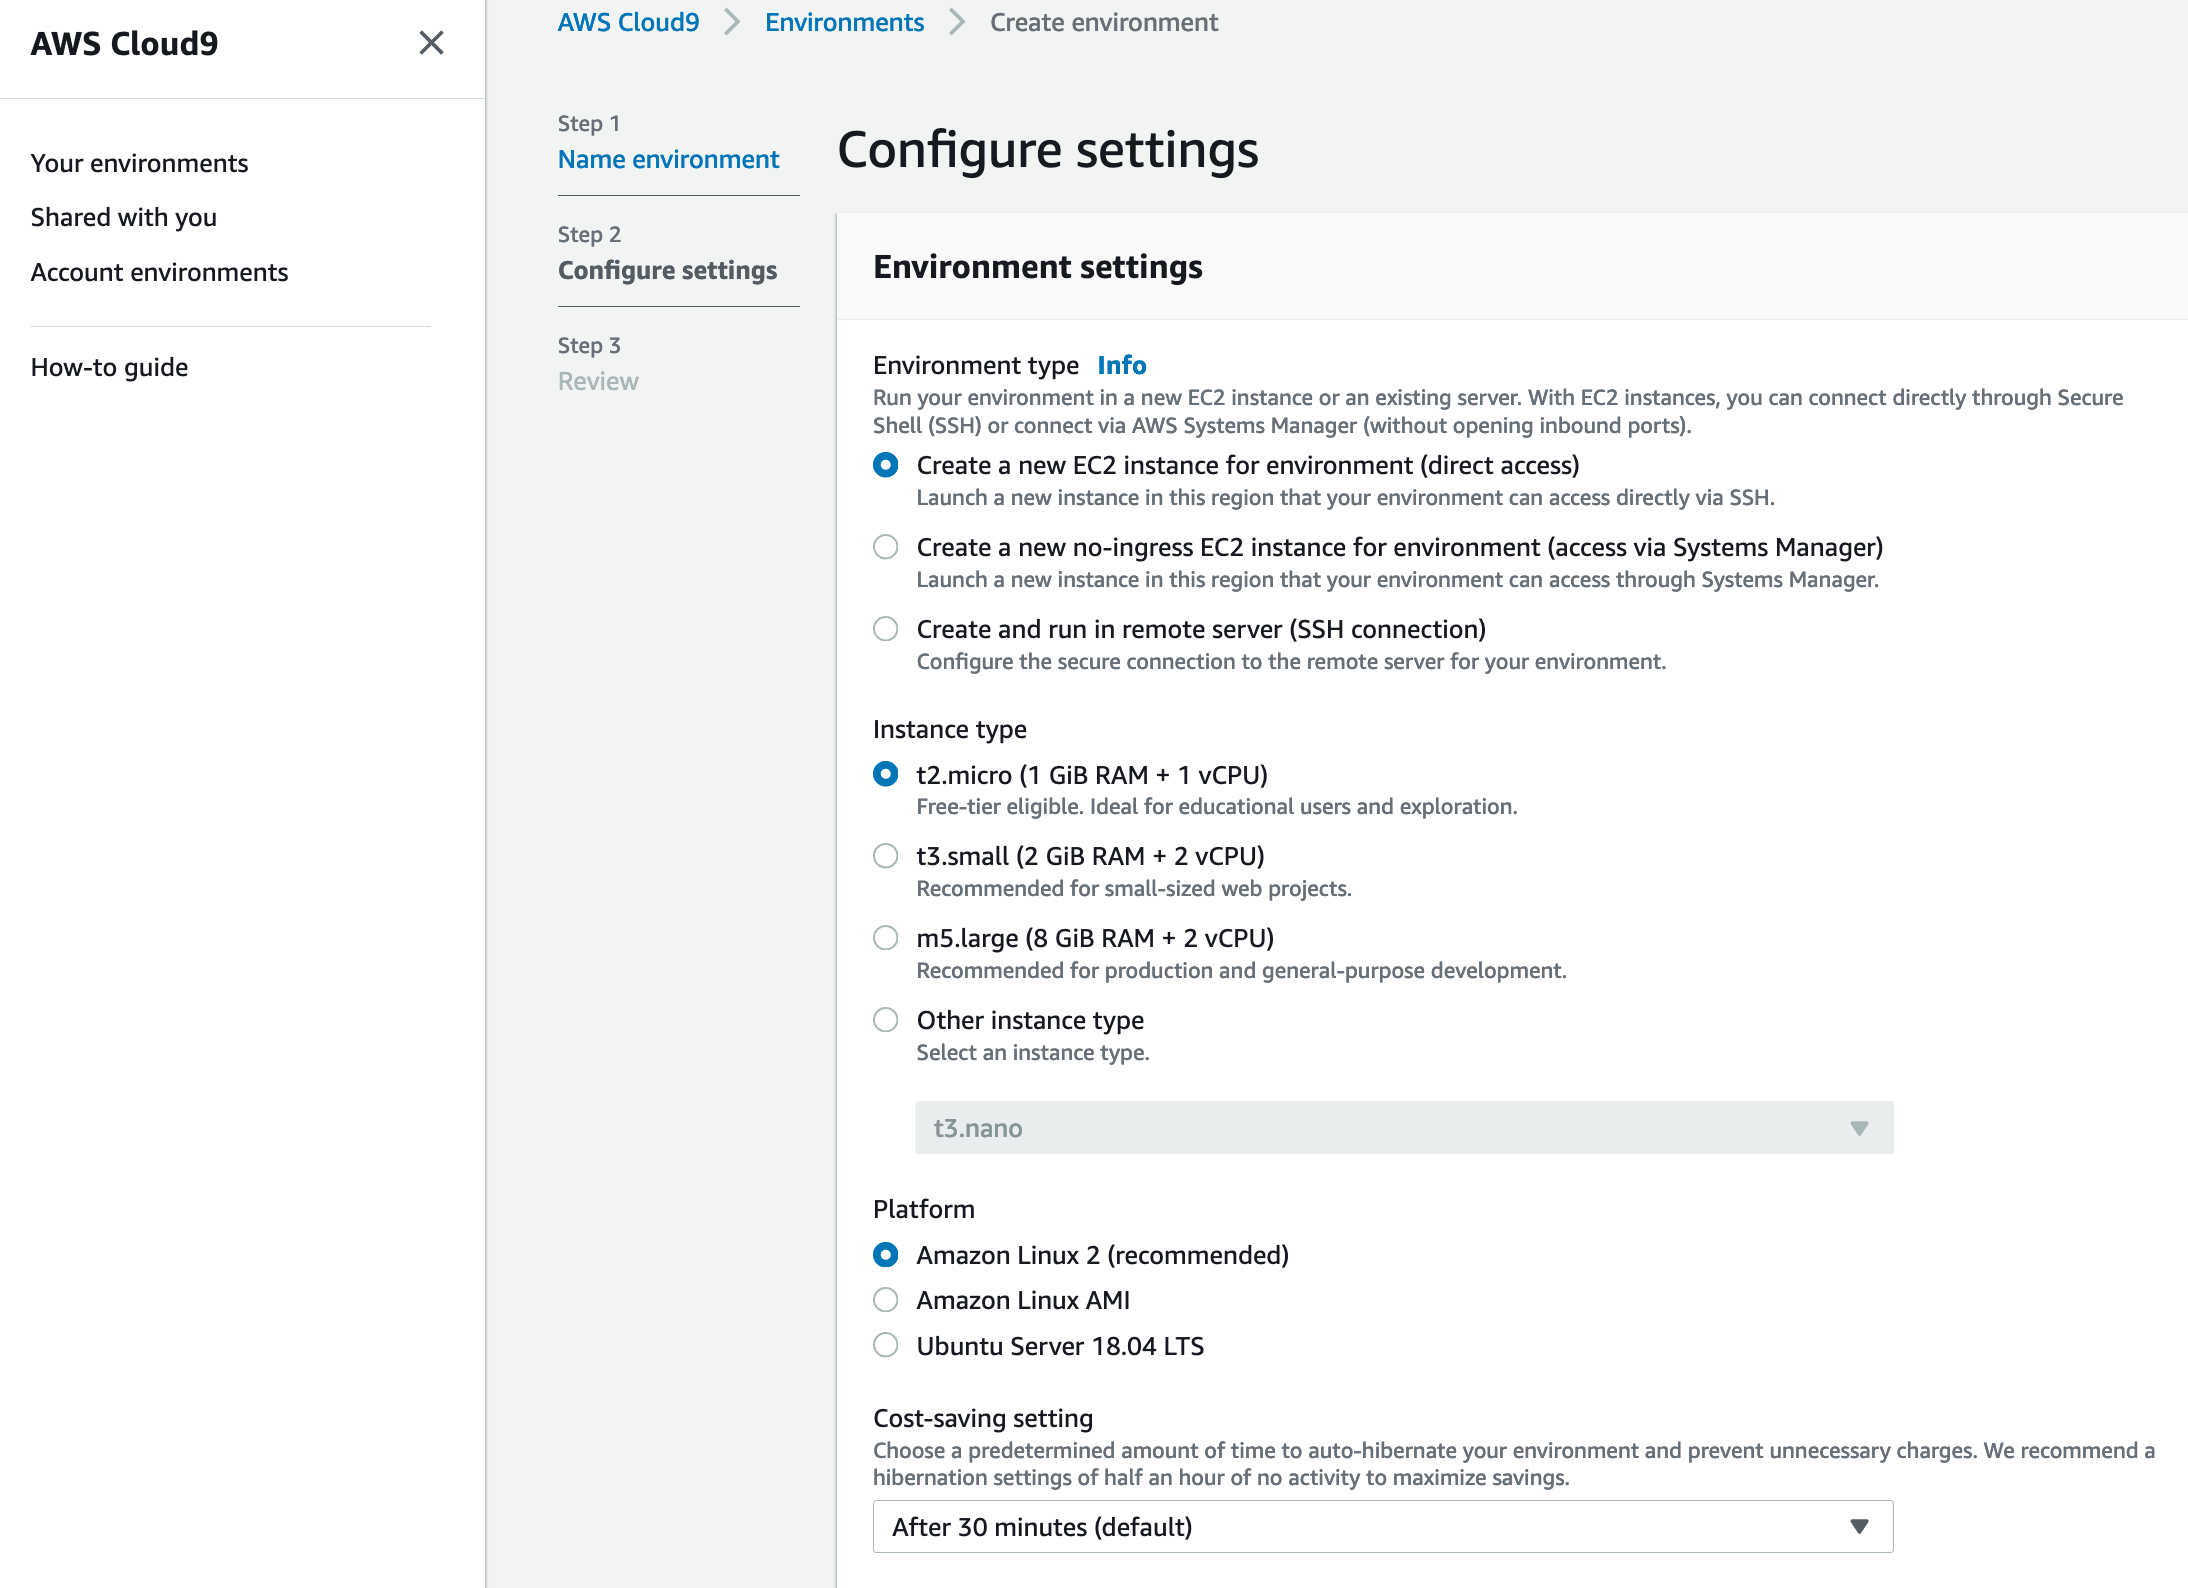
To build and deploy this application, you will need the AWS CLI, the AWS Cloud Development Kit (AWS CDK) V2, Docker, and Docker Buildx. AWS Cloud9 has all dependencies pre-installed so you deploy it with a single command. It is a cloud-based integrated development environment (IDE) that lets you write, run, and debug your code with just a browser. It comes with the AWS tools, Git, and Docker installed. Create a new AWS Cloud9 EC2 environment (https://docs.aws.amazon.com/cloud9/latest/user-guide/create-environment-main.html) based on Amazon Linux. Because the compilation process is very memory intensive, it is recommended to select an instance with at least 8 GiB of RAM (for example, m5.large). For building ARM images, an X86 CPU with QEMU can also be used without any problems, but more about that later.
Launching the AWS Cloud9 environment from the AWS Management Console, you select the instance type. Pick an instance type with at least 8 GiB of RAM.
After creation, you are redirected automatically to your AWS Cloud9 environment’s IDE. You can navigate back to your IDE at any time through the AWS Cloud9 console.
All code blocks in this blog post refer to commands you enter into the terminal provided by the AWS Cloud9 IDE. AWS Cloud9 executes the commands on an underlying EC2 instance. If necessary, you can open a new Terminal in AWS Cloud9 by selecting Window → New Terminal.
Modify the EBS volume of the AWS Cloud9 EC2 instance to at least 20 GB to have enough space for the compilation of your application. Then, reboot the instance using the following command in the AWS Cloud9 IDE terminal, and wait for the AWS Cloud9 IDE to automatically reconnect to your instance.
sudo reboot
Building the application to an Uber-JAR is very simple, the only dependency is Maven
mvn -Dmaven.test.skip=true clean package
However, the Maven build is also part of the multi-stage image build, the next section describes how to perform this build process.
The complete build of the application is encapsulated in a multi-stage container image which means, that no external dependencies are necessary to build the application.
docker build -f Dockerfile -t <account-id>.dkr.ecr.<region>.amazonaws.com/spring-demo:<tag> .
The ARM64 version can be build on a x86_64 CPU using docker buildx as well:
docker buildx build --platform linux/amd64,linux/arm64 -f Dockerfile --tag <account-id>.dkr.ecr.<region>.amazonaws.com/spring-demo:<tag> --push .
After we've built and pushed the Docker image containing the native image of the application, we need to set up the basic infrastructure in eu-west-1
$ npm install -g aws-cdk
$ npm install
$ cdk deploy CdkappStack --parameters containerImage=<your_container_image> --context cpuType=<cpuArch>  // Deploys the CloudFormation template
The parameter cpuType can have either the value X86_64 or ARM64.
After the infrastructure has been created successfully, the output LoadBalancerDNS of the CloudFormation stack is the load balancer URL. You can test the application using the following statements:
$ curl -v http://<lb-url>:8080/api/customers // Get a list of all customers
$ curl -v http://<lb-url>:8080/api/customers/<id> // Get customer by id
$ curl -v -d '{"name":"hmueller", "email":"hm@muelle.com", "accountNumber": "243423"}' -H "Content-Type: application/json" -X POST http://<lb-url>:8080/customers // Add a new customer
$ curl -v -X DELETE http://<lb-url>:8080/customers/<id> // Delete customer by id
For local development, DynamoDB Local can be used. DynamoDB Local is the downloadable version of DynamoDB that lets you write and test applications without accessing the DynamoDB service. Instead, the database is self-contained on your computer. When you are ready to deploy your application in production, you can make a few minor changes to the code so that it uses the DynamoDB service.
Please create a new GitHub issue for any feature requests, bugs, or documentation improvements.
Where possible, please also submit a pull request for the change.

