This project provides a guided walkthrough on how to build a modern omnichannel Mobile and Web application using IBM Bluemix platform and API technologies.
The Application architecture for this application is:

The reference implementation uses Loopback as Node.js framework and run as a Bluemix Clound Foundry app. For simplicity, the data store is implemented as a Loopback in-memory DB.
To run the sample applications you will need to configure your Bluemix enviroment for the API and microservices runtimes. Additionally you will need to configure your system to run the iOS and Web Application tier as well.
To provision API Connect you must have a Bluemix account. Login to your Bluemix account or register for a new account here
Once you have logged in, create a new space for hosting the application. This application will use LoopBack framework as microservices implementation and the API Connect service for managing the API.
In order to complete the rest of this tutorial, many commands will require the Bluemix CLI toolkit to be installed on your local environment. To install it, follow these instructions
This walkthrough uses the cf tool.
- Click on the Bluemix account in the top right corner of the web interface.
- Click Create a new space.
- Enter "mobileweb" for the space name and complete the wizard.
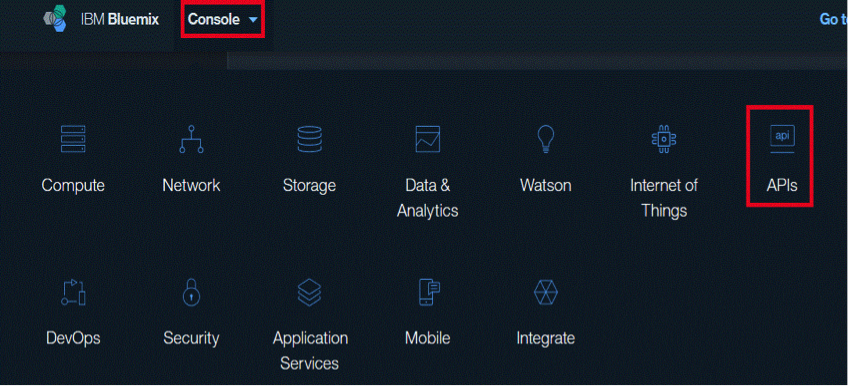
- Click on the Bluemix console and select API as shown in the figure below.
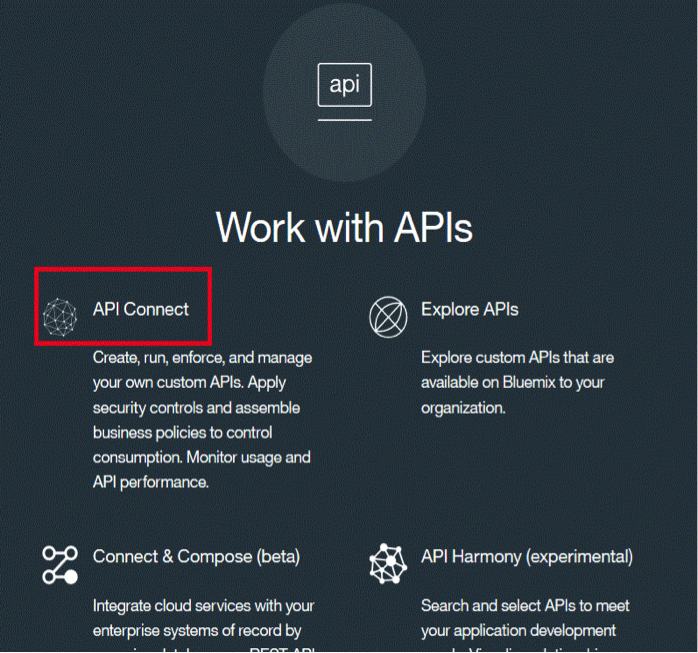
- Select the API Connect service as shown below.
- Click "Create" in the Getting Started with API Connect page. In API Connect creation page, specify the Service name anything you like or keep the default. Then select the free Essentials plan for this walkthrough.
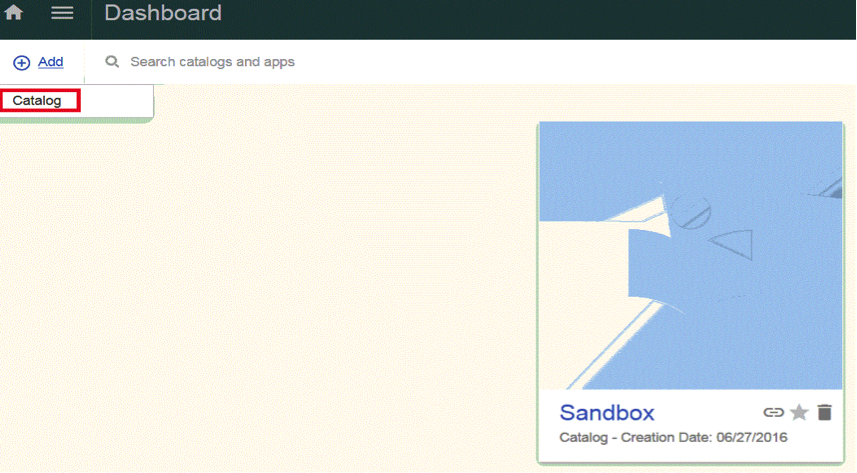
- After the API Connect service is created, click on the Menu icon (the second from the left, to the right of the Home icon) and select "Dashboard" from the pull-down menu.
- In the Dashboard page, select the "+Add" button in the upper-left and select "Catalog" from the pull-down menu. You may notice that a
sandbox has automatically been generated for you.
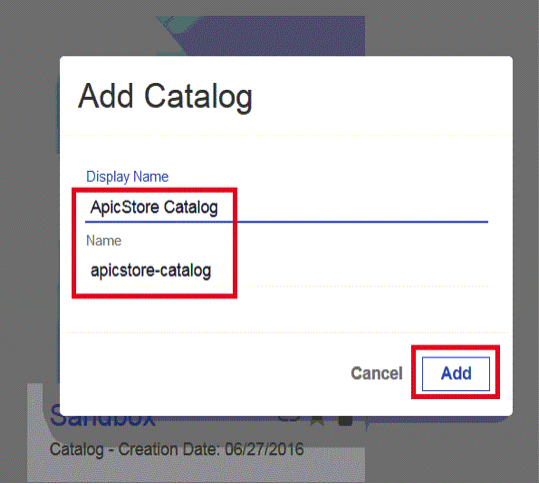
- Name the catalog "ApicStore Catalog" and press "Add".
- Select the catalog and then navigate to the Settings tab and click the Portal sub-tab.
- To setup a Developer Portal that your consumers can use to explore your API, select the IBM Developer Portal radio button. Then click the "Save" button to top right menu section. This will
provision a portal for you. You should receive a message like the one below.

- Once the new Developer Portal has been created, you will receive an email.


The IBM API Connect Developer Toolkit provides both the API Designer UI and a CLI that developers can use to develop APIs and LoopBack applications, as welll as the tools to publish them to the IBM API Connect runtime.
Before getting started, you will need to install Node.js version 0.12 or version 4.x, follow the link below for more information details. https://www.ibm.com/support/knowledgecenter/en/SSFS6T/com.ibm.apic.toolkit.doc/tapim_cli_install.html
To install the APIC Connect CLI:
npm install -g apiconnect
apic -version
That should install the tool and print the version number after the last command.
First clone the GIT repository locally:
git clone git@github.com:ibm-solution-engineering/refarch-omnichannel-api-node.git
There are 5 main folders inside this repository:
inventory
- Has loopback Node.js application for the inventory items as well as the API definition that will be used by the Web and Mobile application. It has an in-memory database included.
socialreview
- Node.js application for the social review function as well as the API definition that will be used by the Web and Mobile application.
OAuth
- Contains artefacts to support OAuth in sample application
ApicStoreApp
- The iOS native application implemented in Swift 2.0
StoreWebApp
- The Web application consuming the same set of API
There are 2 components that need to be deployed on Bluemix for API(backend):
- The LoopBack Node.js application
- The API definition and product
You will use the APIC CLI to do the deployment.
- CD into the inventory directory in the GIT repository.
- install all node.js dependencies
npm install - Login to your Bluemix APIC environment with:
apic login( Server: us.apiconnect.ibmcloud.com, credentials: your IBM ID) - Configure the deployment target with:
apic config:set app=apic-app://us.apiconnect.ibmcloud.com/orgs/{bluemixOrg}-{bluemixSpace}/apps/inventory-loopback-app - Deploy the inventory LoopBack application with:
apic apps:publish - From the response message, note down the API target urls for the inventory app since you will need it next to update the API defination. For example:
apiconnect-12d0327b-003f-420d-9e9e-f8ef635099d5.gangchenusibmcom-apic.apic.mybluemix.net - Open the definations/inventory.yaml file in a text editor, find the section "TARGET_HOST:", after the line "value: >-", after the https://, replace the hostname value to the urls you copied above. Save the file. (This target_host variable tells the API gateway how to connect the API to the actual microservice endpoint) 8.If you login to your Bluemix control panel you will see the new application is currently running:

- CD into the socialreview folder in the GIT repository.
- install all node.js dependencies
npm install - Configure the deployment target with:
apic config:set app=apic-app://us.apiconnect.ibmcloud.com/orgs/{bluemixOrg}-{bluemixSpace}/apps/socialreview-loopback-app - Deploy with:
apic apps:publish - From the response message, note down the API target urls for the socialreview app since you will need it later to update the API defination.
- Open the definations/socialreviews.yaml file in a text editor, find the section "TARGET_HOST:", after the line "value: >-", after the https://, replace the hostname value to the urls you copied above. Save the file.
- Now in the Bluemix control panel you will see both applications running:

With IBM API Connect you publish the APIs to a specific Catalog. Start by visiting the ApicStore catalog endpoint you created earlier.
Logon to Bluemix API manager console, navigate to Dashboard. Click the “link” and copy the url from the popup window. you will need that later.

- cd Into the inventory directory in the GIT repository.
- Set the API publishing endpoint by copying and pasting the catalog endpoint you obtained earlier. It should look something like this:
apic config:set catalog=apic-catalog://us.apiconnect.ibmcloud.com/orgs/gangchenusibm.com-apic/catalogs/apicstore-catalog
- Publish the inventory API product with:
apic publish definitions/inventory-product.yaml - Now publish the socialreview APIs, start by CD'ing to the socialreview directory.
- Set the API publishing endpoint by copying the catalog information again. A sample:
$ apic config:set catalog=apic-catalog://us.apiconnect.ibmcloud.com/orgs/gangchenusibm.com-apic/catalogs/apicstore-catalog - Publish the socialreviews API product with
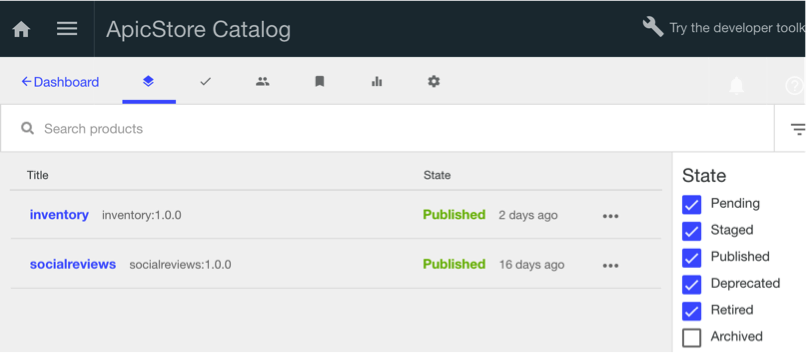
apic publish definitions/socialreviews-product.yaml - Now launch the Bluemix API management console and navigating to "Dashboard" from the top navigation pane. Click "ApicStore Catalog",
you should see both Inventory and SocialReviews products in the state of Published in Bluemix.

(Optional) In the sample application, the API Connect OAuth provider relies on a dummy authenticating application to validate user credentials. We have deployed the authentication application and configured the OAuth provider already. If you would like to deploy your own authentication servivces follow this section. Otherwiswe move to step 5.
- Update the Cloud Foundry definition file locted under the repositories' OAuth/authentication-app/ folder ( manifest.yml ). Update the name and host fields to a unique value. For example {Your bluemix ID}-authenticate.
- In a command line navigate to the OAuth/authenticaiton-app folder.
- Login to your Bluemix account
cf login, select your Bluemix organization and space ( can be found in your User Profile in the web portal.) - Deploy the app with:
cf push
The Developer Portal enables API providers to build a customized consumer portal for their application developers. It also provides the interface for API consumers to discover APIs and subscribe to a consumption plan by which the API is consumed in either the Mobile or traditional Web application.
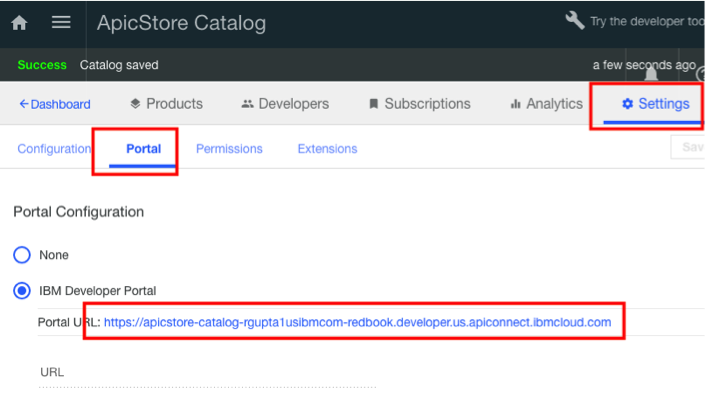
- Open the API Connect Developer Portal. You will need to open your Portal URL. Obtain it by navigating to the ApicStore catalog from the Bluemix API manager console. Click "Settings", then "Portal".
- Open the API Connnect Portal in another browser window. You should see the portal home page with both the inventory and the socialreviews APIs highlighted.
- Click "Create an account" from the upper right menu bar.
- In the create an account wiard, enter the credentials of your Bluemix login ID and MobileWeb-App-Dev as your developer organization. Finally click "Create new account"
- In your developer portal, click "Login".
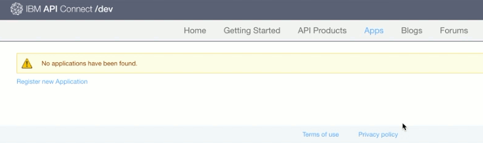
- Click on the menu tab "Apps" on top. Click on the link to "Register a new Application."
- Enter the fields of "Title" and "Description". Enter "org.apic://example.com" for the OAuth URI redirection page as shown below then click submit.
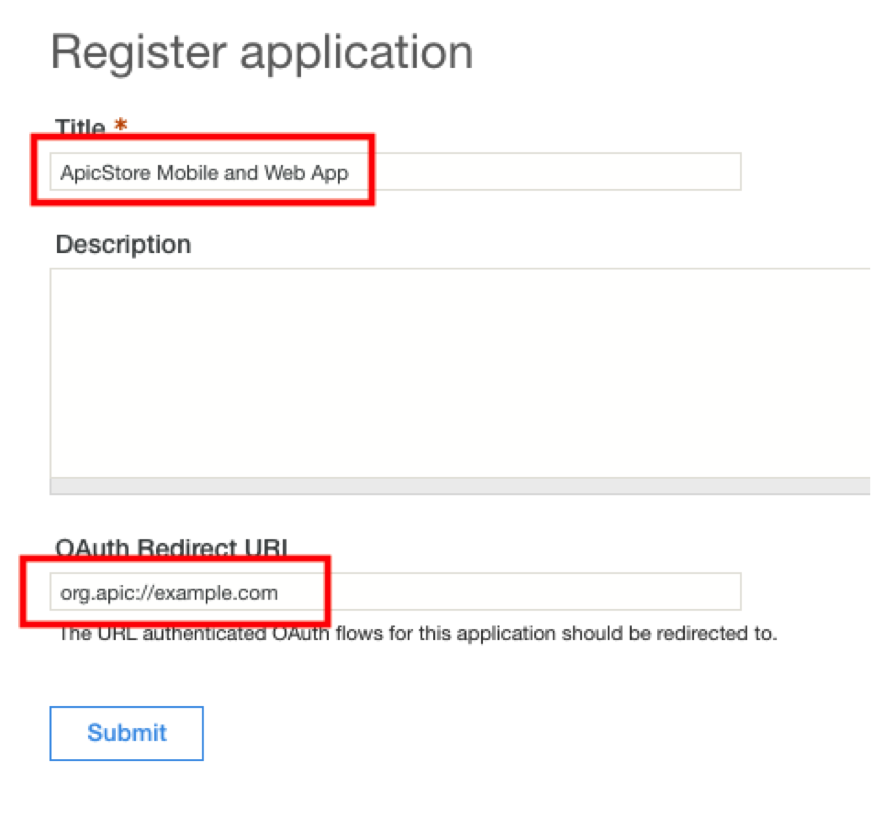 ( Store the client ID, you will need it later)
 - In the developer portal, navigate to Apps -> MobileWeb-App-Dev. Below the application, you will see a link to take you to the currently available APIs. CLick on that.
- Click on the Inventory ( V1.0.0 ) API.
- Click "Subscribe" in the API page.
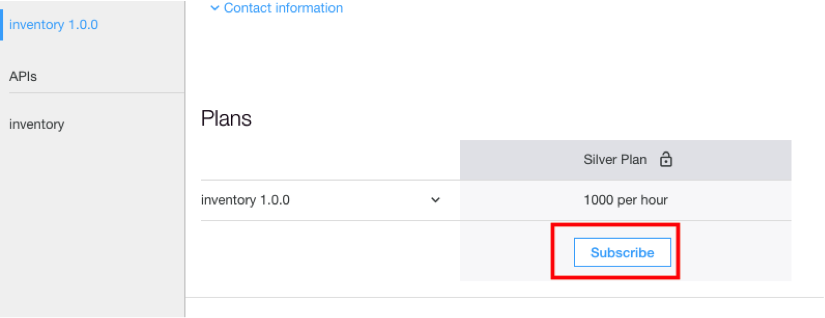
- Subscribe to the social review API as well ( you can choose the silver or gold plan)
- Go back to the Apps -> MobileWeb-App-Dev page, you will see that both APIs are subscriped in your Application page.


Note this section requires an Apple computer running MacOS with Apple Xcode IDE installed.
- In Finder, navigate to the folder ApicStoreApp in the GIT repository.
- Double click the "ApicStoreApp.xcodeproj" file to open the iOS project in Xcode.
- You need to specify the API endpoint configuration for your Bluemix API Connect deployment. Edit the ApiStoreApp / Supporting Files / Config.plist file. The Config.plist file contains all of the API endpoint URLs as well as the clientId registered earlier in Developer Portal.

The following is a description of the endpoints and constants in the Config.plist file: * oAuthRedirectUrl: This is the oAuth Redirect API defined in the earlier section. It should be org.apic://example.com * clientId: This is the client Id that is obtained in the Developer Portal in the earlier section. * ItemRestUrl, reviewRestUrl, oAuthBaseURl: These are the API endpoints from Developer Portal for Inventory API, review API, and OAuth API. In this case, the base URL host for all of these are the same, but in the code the URIs will be different for each call. * oAuthRestUrl: This is the endpoint to trigger the OAuth flow for socialreview API. The base URL is the same as above.
The 4 endpoints should all be the same and is actually your apic-catalog endpoint. For example:
https://api.us.apiconnect.ibmcloud.com/gangchenusibmcom-apic/apicstore-catalog
- Click the "Play" button in the upper left corner to run the application in a simulated iPhone ( be sure to select iphone6 or 6plus).
- The application will display a list of items returned from the inventory API. Click on one of them to see the detail of an item.
- In detail page, you should see item detail as well as existing review comments. Click the "Add Review" Button at lower left corner, this will trigger the OAuth flow.
- In the OAuth login screen, enter "foo" as username and "bar" as password. Upon successful login, grant the access to the Mobile app.
- Click Open back in ApicStore app, here you can add a review comment. Click Add will navigate you back to the item detail page where you should see your comment posted.
Feel free to play around and explore the mobile inventory application.
The consumer Web app provides the basic function to allow user to browse the Inventory items. The sample web app is built as a Node.js application that uses Express framework and Jade templates.
To set it up:
- Navigate to the web app root folder in the git repository (StoreWebApp)
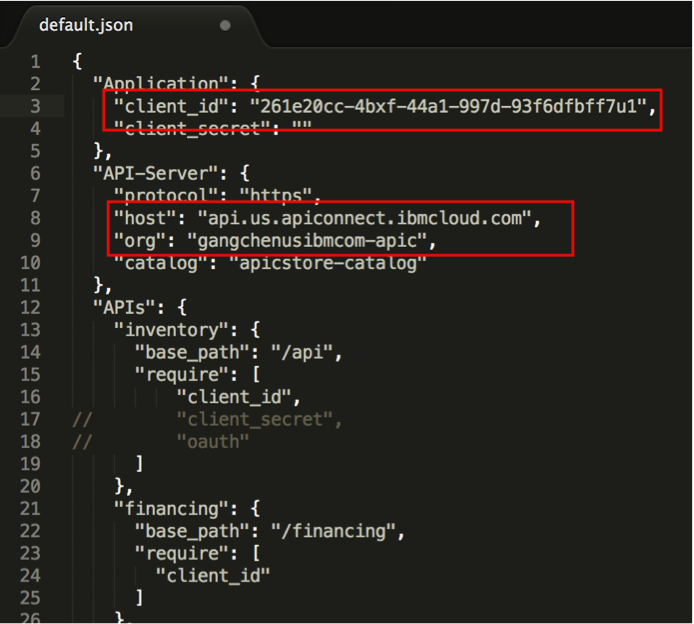
- Edit the config/default.json file to configure the API endpoints
- client_id
- host
- org
- CD to the StoreWebApp directory.
- Install the node modules with
npn install - Run the web app with
npm start

That's it!