Your organization processes sensitive data every day. As a manager, you have an obligation to establish specific security procedures (behavioral, organizational and technical) to protect this data. Moreover, these procedures must address the fundamental principles of necessity and proportionality. Identifying the best measures and defining the level of effectiveness required for each measure is a highly complex task. The CASES Diagnostic supports you in this process.
HOW?
Using the dedicated questionnaire, this tool will help you :
- Identify vulnerabilities
- Evaluate the security level of information systems
- Issue recommendations
Here would you find further Diagnostic related documentation :
- Technical guide: Components installation walkthrough and troubleshoot section
- User guide: Complete Diagnostic available functionalities documentation
-
Download VM_Diagnostic.ova ready-to-use virtual machine file which can be imported directly into a virtualization tool
-
Make use of the installation scripts provided in the Diagnostic repository
The aforementioned virtual machine has already been setup and provisioned with all application component in an Ubuntu Server 17.04 environment.
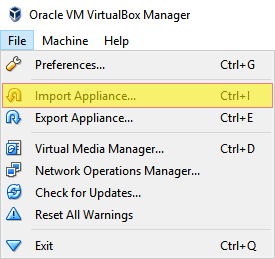
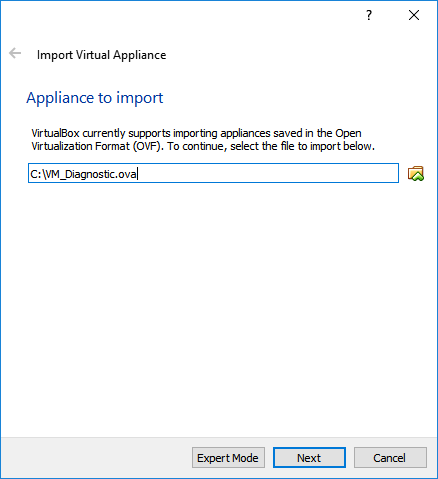
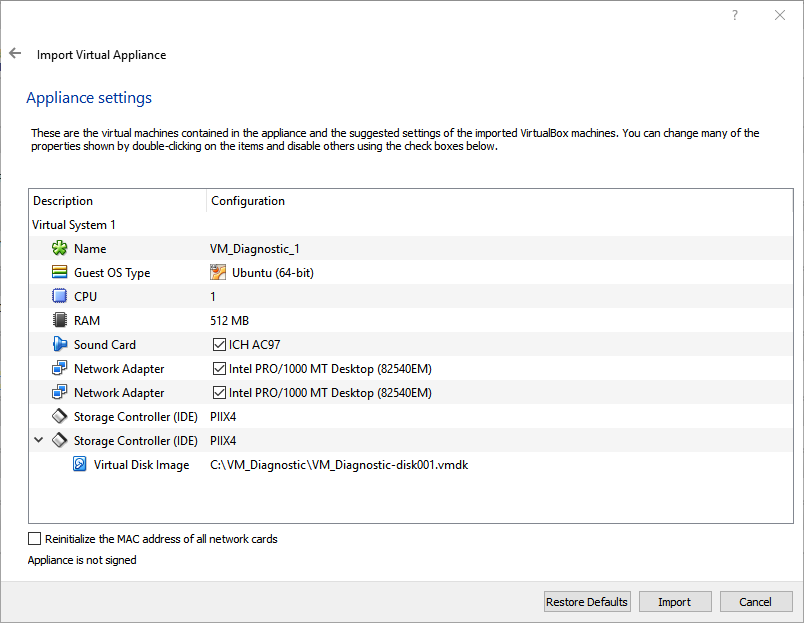
You can then import VM_Diagnostic.ova file in a virtualization tool which in our case will be VirtualBox.
( File → Import Appliance )
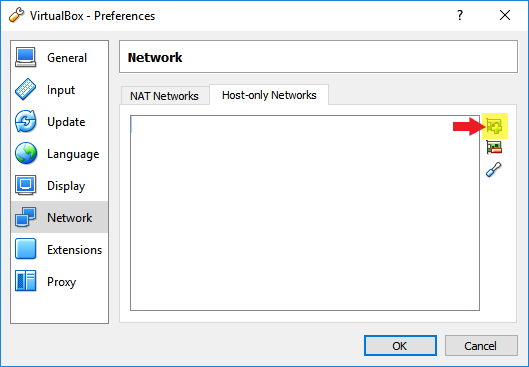
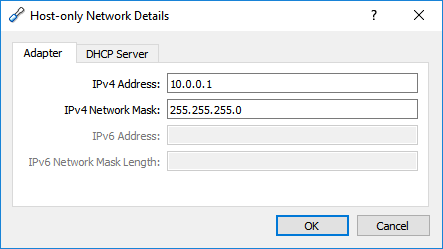
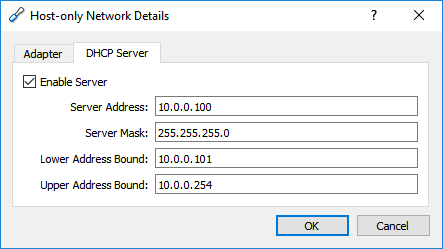
When successfully imported the virtual machine, you now need to setup a Host Only Network Adapter for it in VirtualBox
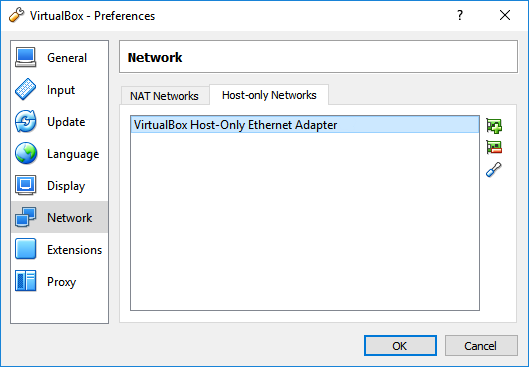
( File → Preferences → Network )
And configure it like the following
Click OK and you should see it in the list
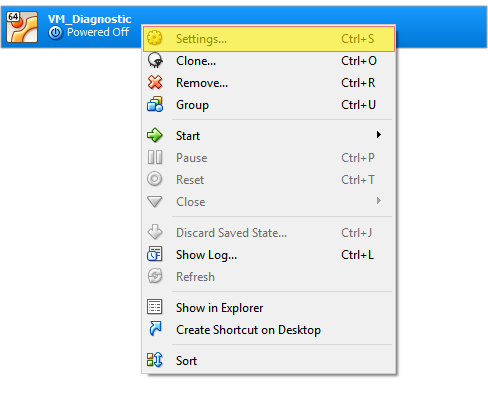
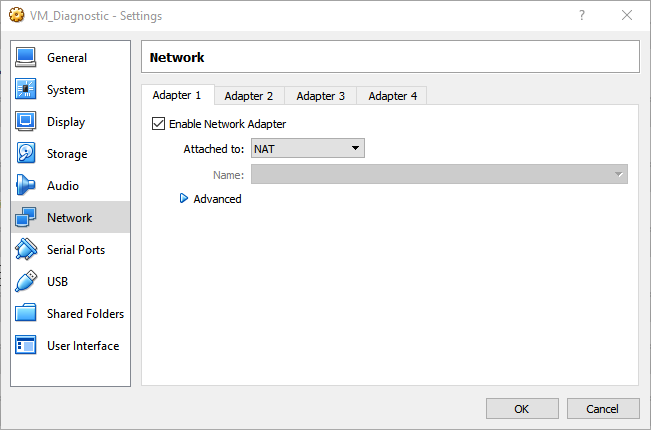
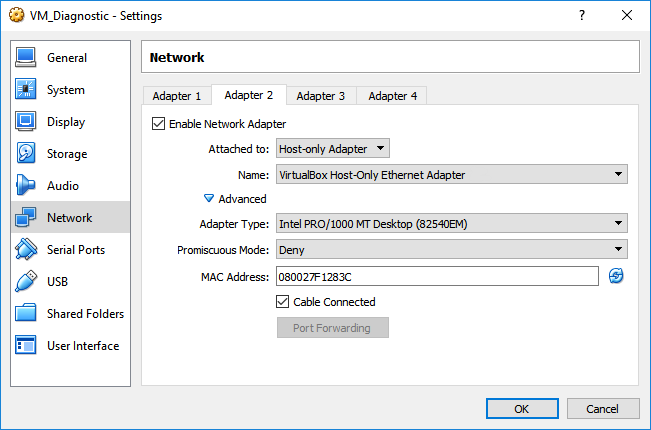
Then you have to tell VirtualBox that the machine you just imported have to use the Host Only Network Adapter
Go to Network tab
And select Adapter 2 and fill like the following
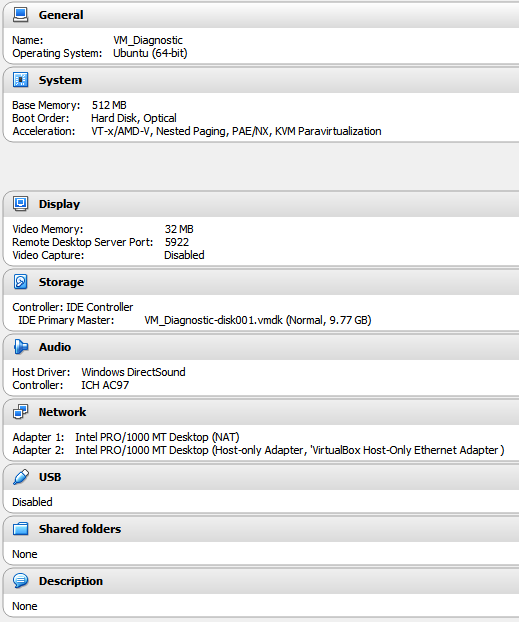
Make sure everything is correctly set
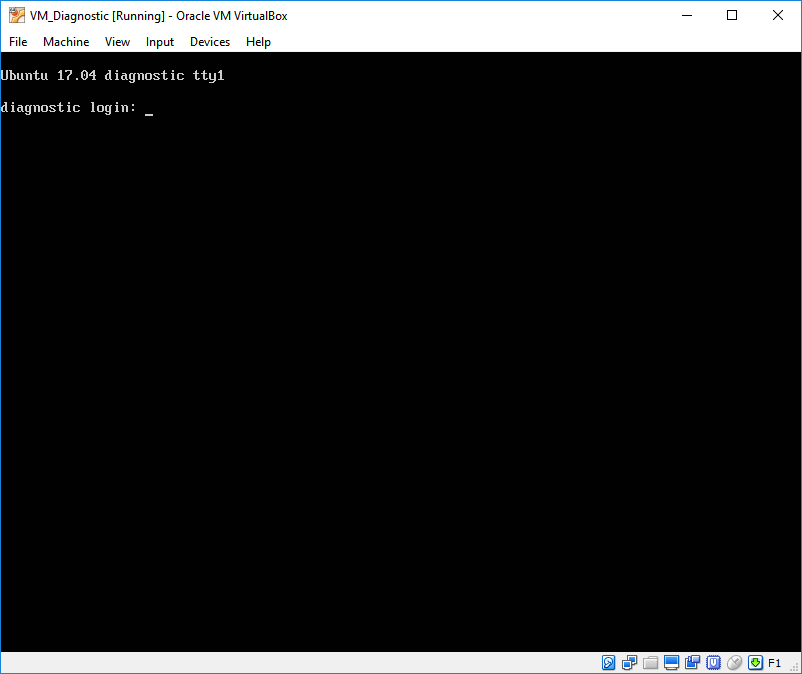
And run the virtual machine. You know you are good to go when seeing that screen:
Open your favorite browser and type in: http://10.0.0.102
-
Diagnostic application: (diagnostic@cases.lu:Diagnostic1!)
-
Virtual machine user: (diagnostic:diagnostic)
-
Mysql root user: (root:GENERATEDPASSWORD)
-
Mysql diagnostic user: (diagnostic:GENERATEDPASSWORD)
In case you want to install the Diagnostic application on a Ubuntu or Debian distribution you may use the provided installation scripts.
Simply run the following commands
git clone gitrepo.git
cd repository
./install.sh
Provide the script the information it needs when it asks (e.g mysql user:password )
You are good to go then !
Copyright (c) 2017, Benjamin Joly, Jerome Lombardi, Fabien Mathey, Juan Rocha - securitymadein.lu - Smile GIE
Copyright (c) 2017, Yacine Khamis - Université de Lorraine
Copyright (c) 2017, Jérôme De Almeida - Vesperia Group
Licensed under Affero GNU GPL v3 - see license.txt for more information
