
-
Active Azure Subscription
-
Install Visual Studio Code
-
Install nodejs 8.11
-
Install Bot Framework Emulator
Note: Creating the web app bot in Azure also creates an AAD App. If you do not have access to create apps in AAD you can ask your administrator to create a Converged Application at apps.dev.microsoft.com and add you as Owner. Once you are added as owner, you can generate a new password and use it while creating the web app bot
- Create a Web App Bot
- Under Bot template select Language Understanding NodeJS.
- Click on
Application Settingsand copy values forMicrosoftAppId,MicrosoftAppPassword,LuisAppIdandLuisAPIKeyand update it in theweb\sample.envfile.
Note: If you have created the Web App Bot the LUIS app will be created for you automatically.
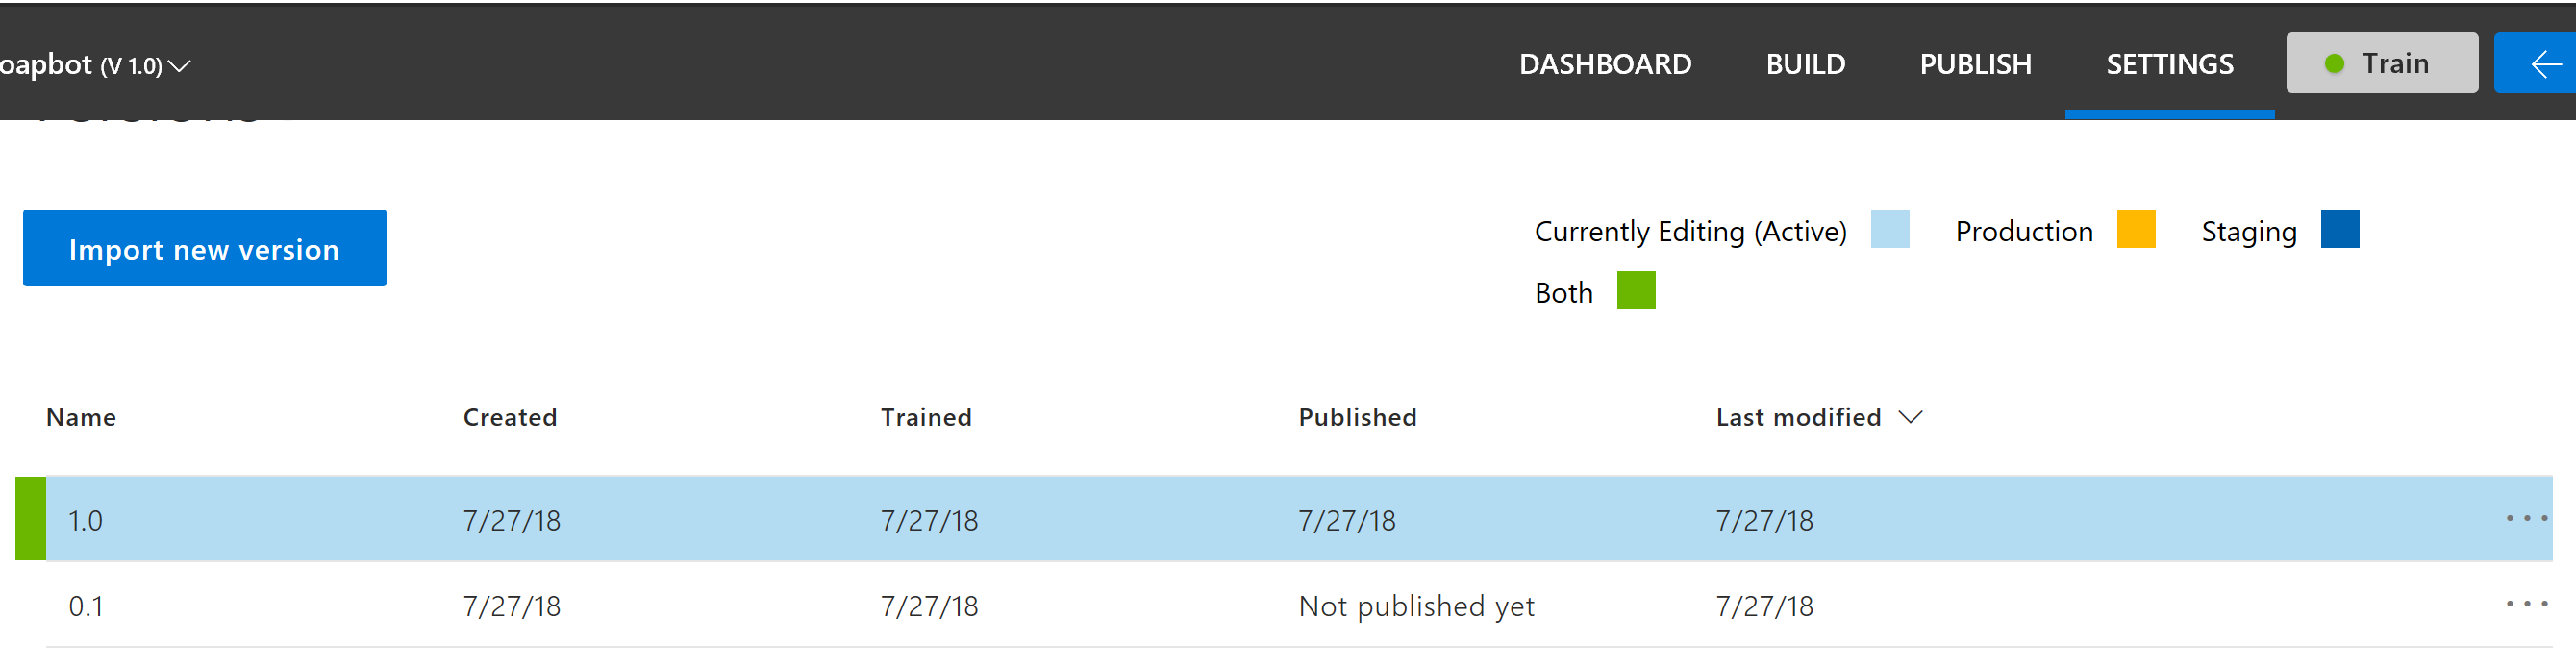
- Log in to www.luis.ai and under
My Appsclick the app that was created. - Copy name of the LUIS App and update it in the
luis-model\contosoapbot.jsonfile. - Under
Settingstab, click onImport new versionand upload theluis-model\contosoapbot.jsonfile. - Click on
Train Buttonto train the updated model. - Under
Publishtab, click onPublishbutton to publish the model to both Production and Staging.
- Create a new Service Bus namespace in Azure
- Under the namespace create a new queue named
requests - Under
Shared access policies, click onRootManageSharedAccessKeyand copy value forPrimary Connection String. - Update the
ServiceBusConnectionStringinweb\sample.envandconsole\sample.envfiles.
-
Analytics DB
- Create a new Azure SQL DB (or a local SQL Server DB).
- Create table in the DB using
web\analytics\dbscript.sql. - Update the
SqlAnalyticsConnectionStringinweb\sample.envfile.
-
Invoice DB
- Create a new DB on your local SQL Server named
ContosoEdw. - Run
console\dbscript\localdb.sql. - Update the
sqledwConnectionStringinconsole\sample.envfile.
- Create a new DB on your local SQL Server named
-
Create a servicenow developer account and create a new dev instance.
-
Login to the dev instance and update the admin password.
-
Copy dev instance
url,passwordand updateServiceNowUrl,ServiceNowPasswordinweb\sample.envfile. -
Note: While testing you can click on
Incidentsto see the new tickets created by the Bot
-
Rename
web\sample.env,console\sample.envto.env -
Start Bot Web App
cd webnpm installnpm start
-
Start Bot Request Processor Job
cd consolenpm installnpm start
-
Start Bot Emulator
Endpoint Url : http://localhost:3978/api/messagesMicrosoft App ID: [Use MicrosoftAppId from .env file]Microsoft App Password: [Use MicrosoftAppPassword from .env file]- Click Connect
-
Type
Hiin the bot emulator, it should return the text from the Greeting Dialog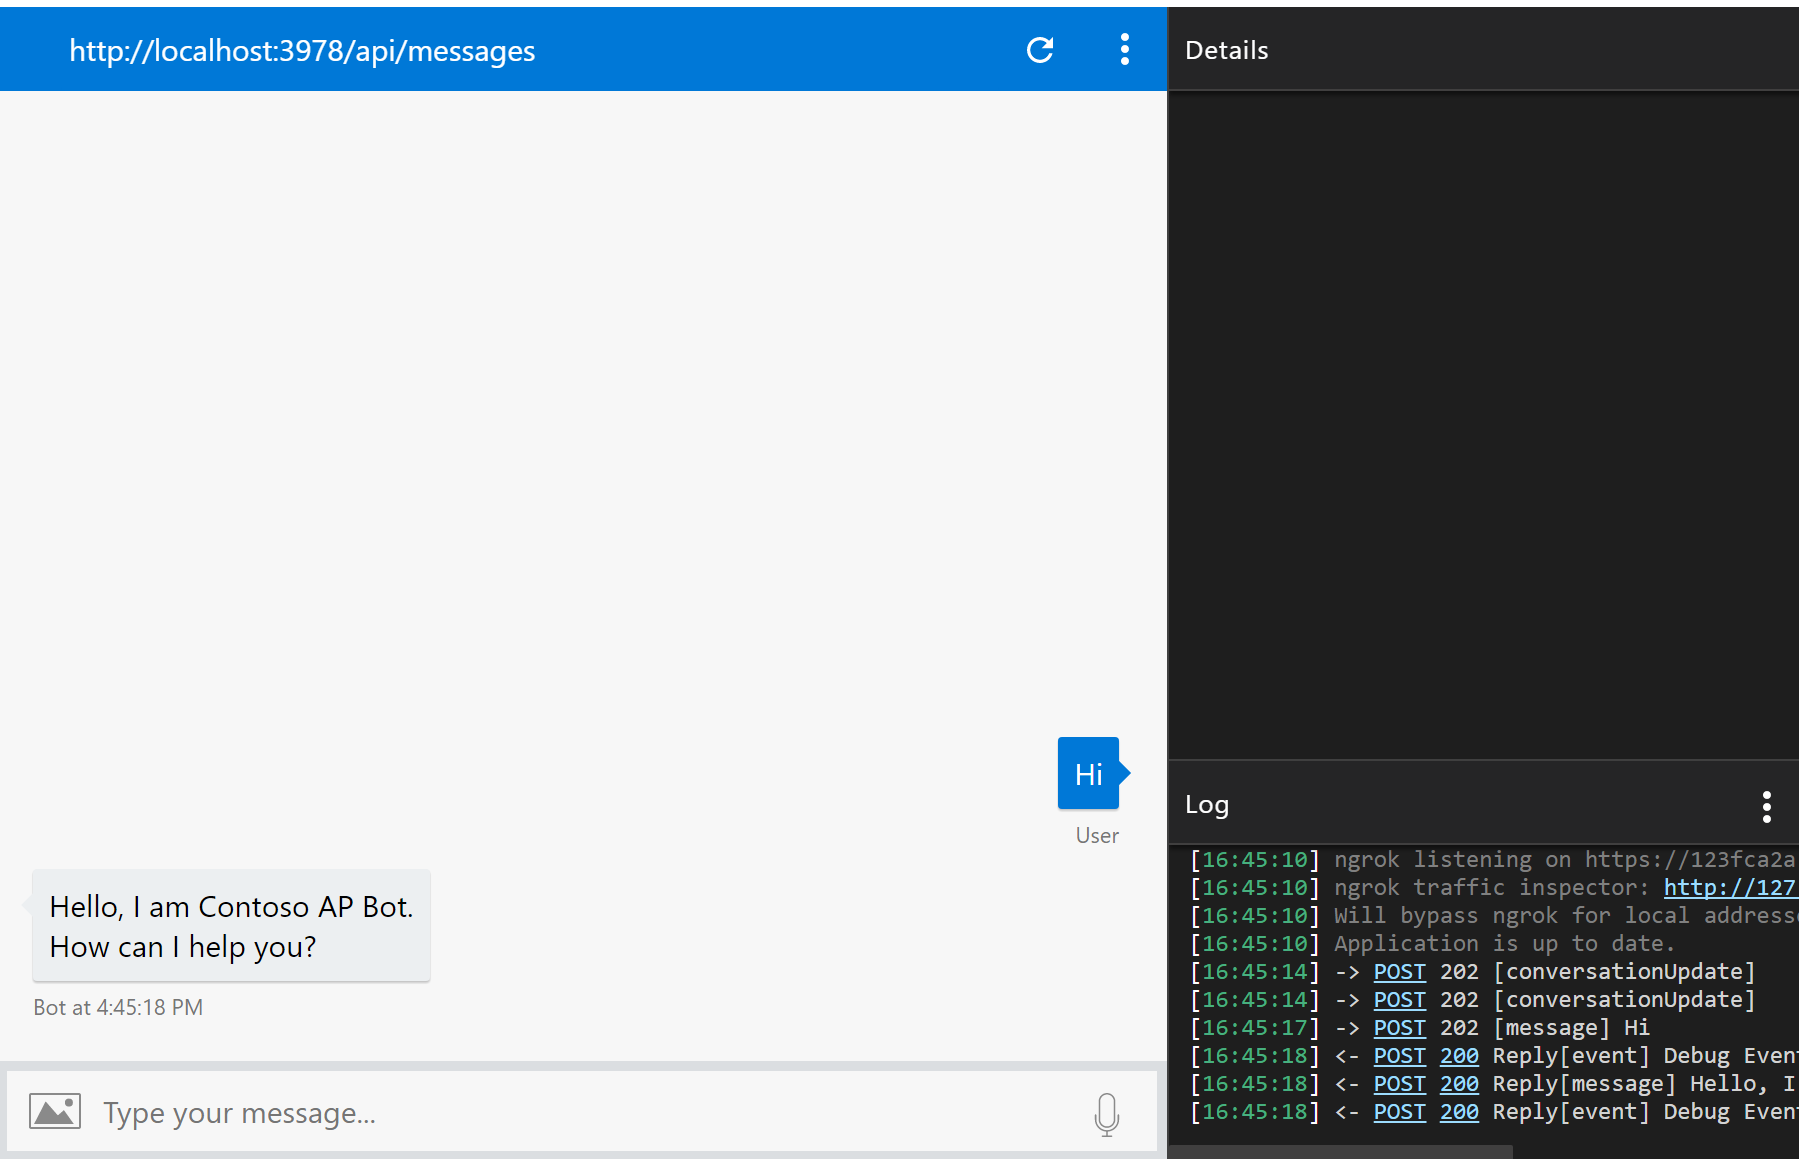
-
Test bot processor job integration using below sentences, you can always type
helpto get more details:- Payment Status -
what is the payment status for invoice number 11001 and vendor Contoso Inc - PO Status -
what is the status for po number 11001 - Invoice Copy -
could I have a copy of invoice 11001 from vendor Contoso Inc

- Payment Status -
-
To Test Servicenow, log in to the dev intance and click on
Incidentsto see the tickets created/updated by the Bot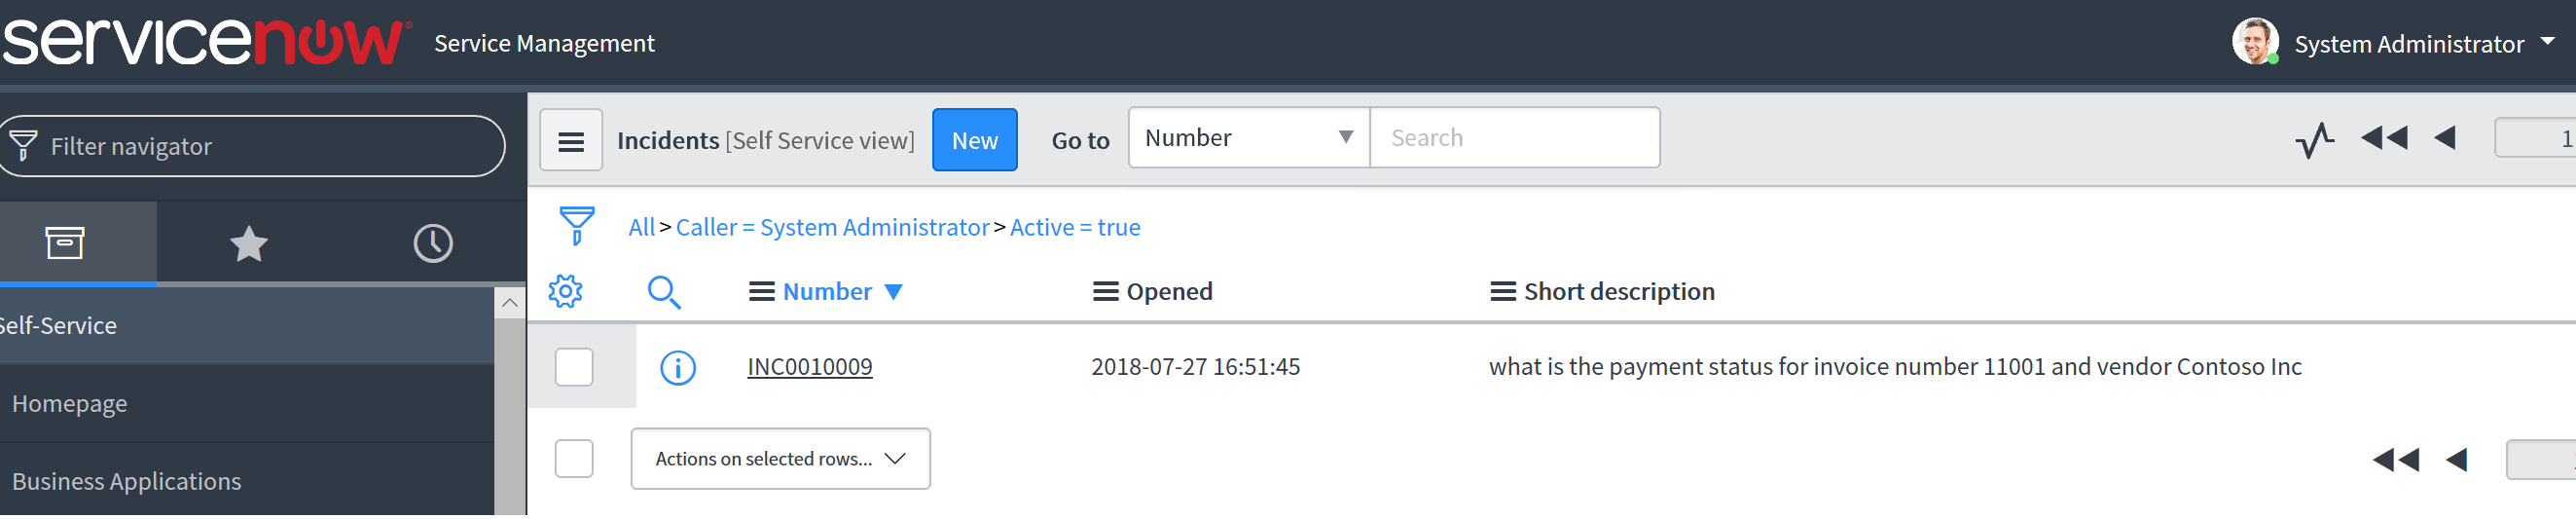
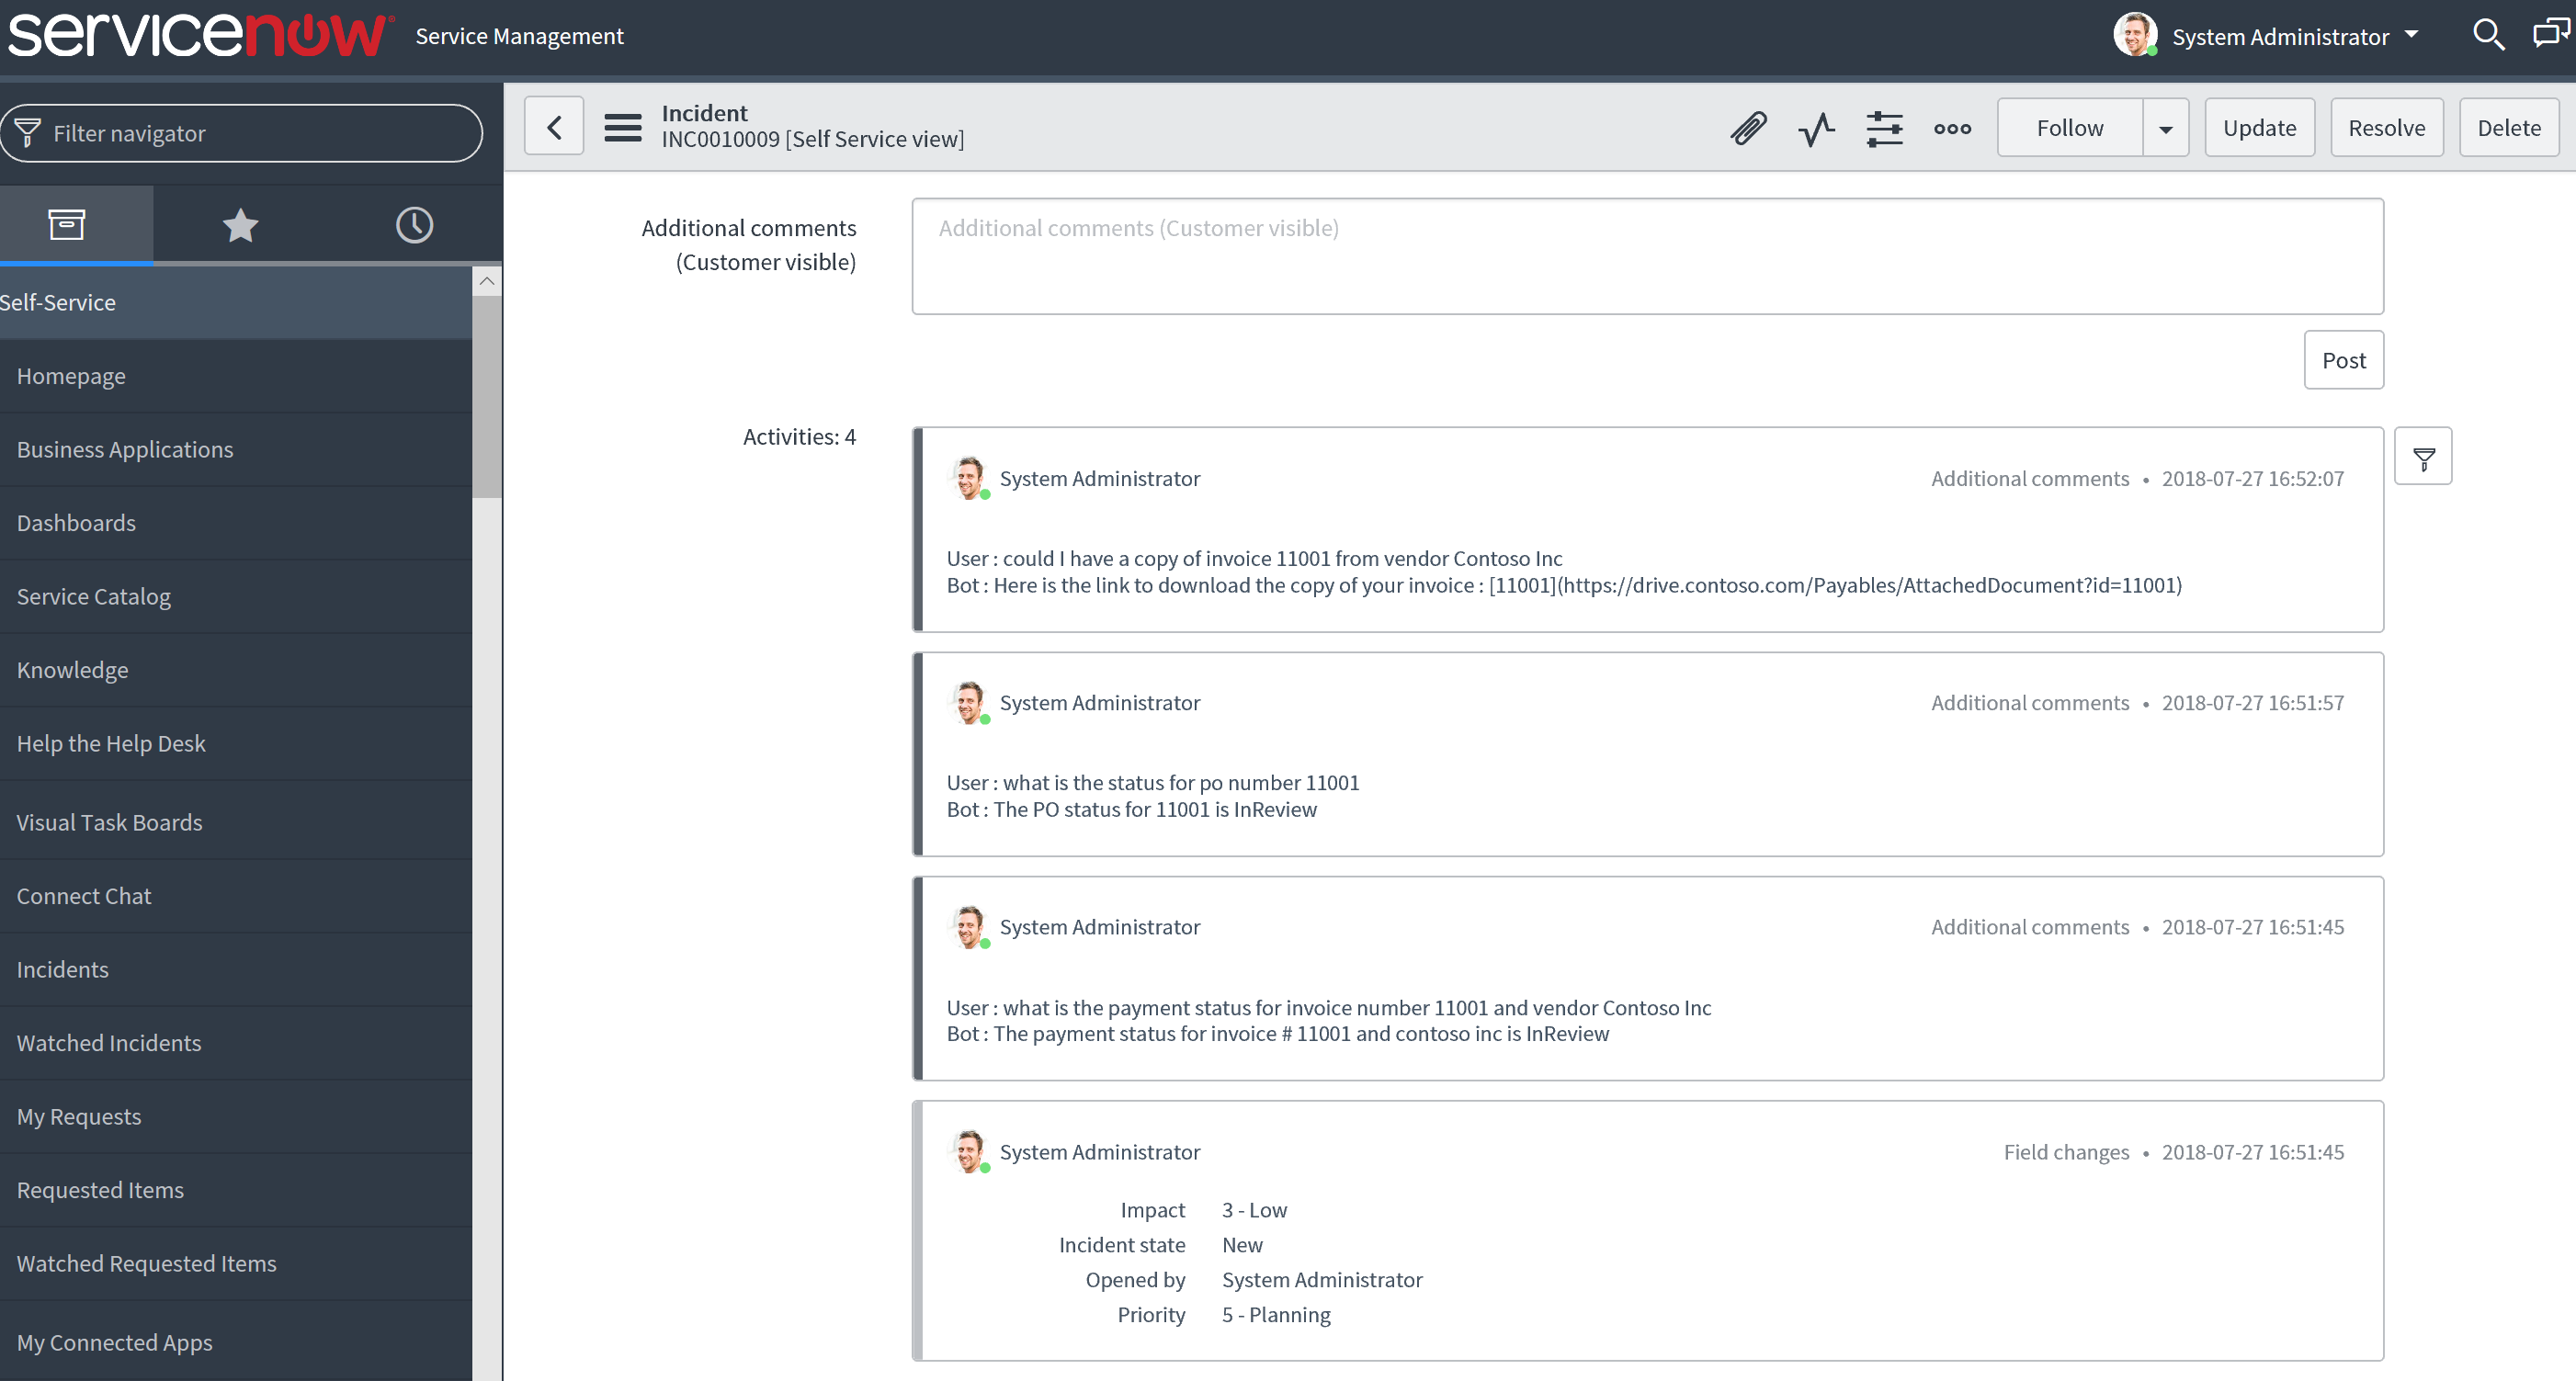
- Servicenow tickets are created for each conversation session and the entire history of the conversation is saved under activities.
- The Ticket ID is updated based on the human handoff response.
- Human handoff is done via ticket assignments. If the user is idle for more than 30 seconds than the Bot will ask user if they need to talk to human and update the ticket in Servicenow and assign to specific group.
-
Update Application Settings
- Click on
Application Settingsunder Bot Service and add all environment variables fromweb\.envfile. - Add a new variable to update nodejs version with name=
WEBSITE_NODE_DEFAULT_VERSIONand value=8.11.1
- Click on
-
Update Nodejs version
- Under
Buildin Bot Service click onOpen online code editor. - Updated the
iisnode.ymlfile to point the nodeProcessCommandLine to 8.11.1 pathnodeProcessCommandLine: "D:\Program Files (x86)\nodejs\6.9.1\node.exe"
- Under
-
Deploy Code
- Copy all the code from
webfolder into thewwwrootfolder on Azure. (Do not copy.envfile andnode_modulesfolder) - Under
Buildin Bot Service click onOpen online code editor. - Click on
Open Consolebutton and runnpm installto install all the dependencies. - Restart the App Service
- Copy all the code from