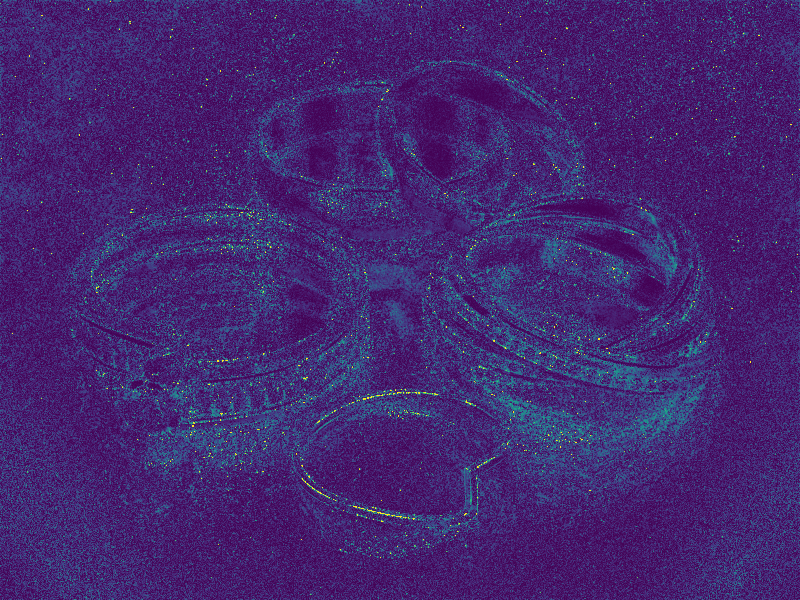
A web comparison tool for rendering research, forked from the online test suite by Disney Research.
- PyEXR (0.3.6)
- OpenCV (4.1.0)
- NumPy (1.14.2)
- Matplotlib (2.2.3)
- Pillow (5.2.0)
- BeautifulSoup (4.7.1)
- Scikit-image (0.15+)
To install the latest version of all packages, run:
python3 -m pip install --user -r tools/requirements.txt
An alternative method to run this tool is to build the docker image:
docker build . -t interactive-viewer
Then, run the image in interactive mode to allow running python commands:
docker run --rm -it interactive-viewer bash
In order to keep everything persistent though, you should mount the repository folder onto the container:
docker run --rm -it -v `pwd`:/interactive-viewer interactive-viewer bash
To add a new scene, simply run:
python3 tools/scene.py --root ./ add --name "Jewelry"
This creates a new scene directory with an index.html template, ready to be populated with data. Here, root represents the top directory. To remove a scene, run
python3 tools/scene.py --root ./ remove --name "Jewelry"
To see all scenes in the HTML index, run
python3 tools/scene.py --root ./ list
Using this script is not necessary as it is possible to copy and paste a scene and change its name manually.
To add a render, you first need to specify a reference and a base algorithm (e.g. path tracing), along with the metrics to be computed. For instance, this can be done by calling the following command:
python3 tools/analyze.py --ref Reference.exr \
                         --tests Path-Tracing.exr \
                         --names "Path Tracing" \
                         --dir scenes/jewelry/ \
                         --metrics mape mrse \
                         --partials pt_partial \
                         --epsilon 1e-2 \
                         --clip 0 1
The above computes the mean absolute percentage error (MAPE) and the mean relative square error (MRSE) between the reference and the test image. Both OpenEXR and HDR formats are supported. Below is a table of all arguments; run with --help for more info.
| Parameter | Description | Requirement |
|---|---|---|
ref |
Reference image | Required |
tests |
Test image(s) | Required |
dir |
Scene viewer directory | Required |
metrics |
Metric(s) to compute | Required (Options: l1, l2, mape, smape, mrse, dssim) |
partials |
Directory of partial renders (for convergence plots) | Optional |
names |
Test image(s) names | Optional (Default: tests without extensions) |
epsilon |
Epsilon when computing metric (avoids divison by zero) | Optional (Default: 1e-2) |
clip |
Pixel range for false color images | Optional (Default: [0,1]) |
automatic |
Scene directory for automatic detection of files | Optional |
negpos |
Add negative/positive SMAPE colormap images | Optional |
By default, the algorithm name is the test file name, with - replaced with spaces. For instance, Path-Tracing.exr gets parsed as "Path Tracing": this is what it is referred to in the interactive viewer. If necessary, use --names to specify a more detailed name.
Behind the curtains, this script creates false color images and saves them as LDR (PNG) images in the scene directory. A thumbnail is also generated for the index. Most importantly, a data.js file is written to disk, which is then used by JS to display all images and metrics in the browser. This file can only be created by tools/analyze.py, which is why it has to be ran first before adding new renders.
The script tools/render.py is used to render a new image with Mitsuba and add it to an existing scene viewer. It provides a way to iterate over a particular algorithm and immediately see how it compares against other previously computed images.
python3 tools/render.py --mitsuba ./mitsuba \
                        --ref scenes/jewelry/Reference.exr \
                        --scene ../mitsuba/scenes/jewelry/scene.xml \
                        --dir scenes/jewelry/ \
                        --name "My Algorithm" \
                        --alg "my-alg" \
                        --timeout 65 \
                        --frequency 60 \
--metrics mape mrse| Parameter | Description | Requirement |
|---|---|---|
mitsuba |
Path to Mitsuba executable | Required (Default: ./mitsuba) |
ref |
Reference image | Required |
scene |
Mitsuba XML scene file | Required |
dir |
Scene viewer directory | Required |
name |
Full name of the algorithm | Required |
alg |
Mitsuba keyword for algorithm | Required |
metrics |
Metric(s) to compute | Required (Options: l1, l2, mape, smape, mrse, dssim) |
options |
Mitsuba options (e.g. -D var=value) |
Optional |
timeout |
Terminate program after N seconds | Optional |
frequency |
Output intermediate image every N seconds | Optional |
epsilon |
Epsilon when computing metric (avoids divison by zero) | Optional (Default: 1e-2) |
clip |
Pixel range for false color images | Optional (Default: [0,1]) |
Note that the scene file is assumed to have the following line in order to use different integrators. This is to ensure that the same geometry and light configuration is being rendered across algorithms.
<integrator type="$integrator">
    ...
</integrator>
If the render name already exists, the script overwrites its false color images and corresponding metrics. If not, it inserts it into the data.js dictionary.
It is possible to manually add a rendered image to the scene viewer. The easiest solution is to add the image to the scene viewer directory and recompute the metrics over all images:
python3 tools/analyze.py --ref Reference.exr \
                         --tests pt.exr bdpt.exr pssmlt.exr \
                         --names "Path Tracing" "Bidirectional PT" "PSSMLT" \
                         --dir scenes/jewelry/ \
                         --metrics mape mrse \
Note that by doing so, you will overwrite previously added scenes rendered with Mitsuba. Run with the --automatic flag to let the script automatically detect partial render directories and reference.
A standalone script is provided to compute various metrics without an integration with JS. This is actually what is being used under the hood of previously discussed scripts.
| Parameter | Description | Requirement |
|---|---|---|
ref |
Reference image | Required |
test |
Test image | Required |
metrics |
Metric to compute | Required (Options: l1, l2, mape, smape, mrse, dssim) |
epsilon |
Epsilon when computing metric (avoids divison by zero) | Optional (Default: 1e-2) |
clip |
Pixel range for false color images | Optional (Default: [0,1]) |
falsecolor |
False color heatmap output file | Optional |
colorbar |
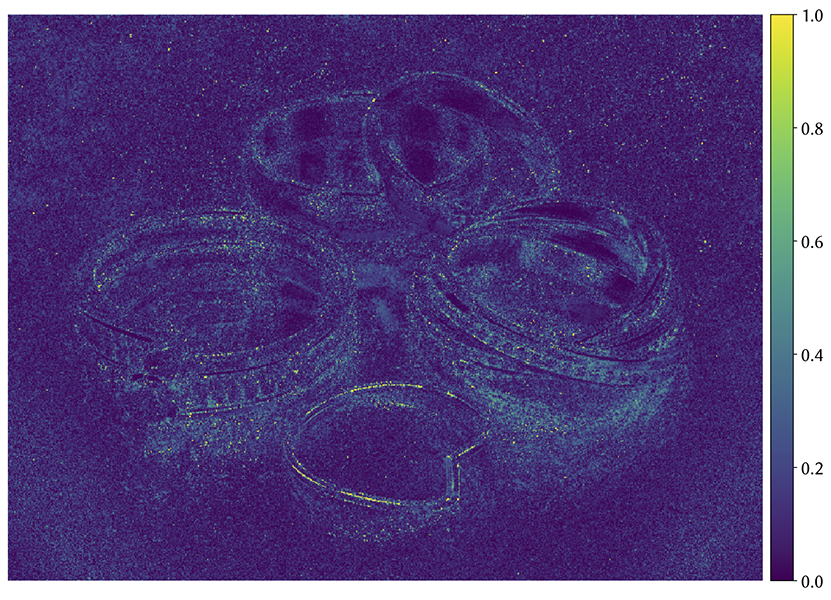
Output heatmap with colorbar for PDF embedding | Optional |
plain |
Only output metric | Optional |
python3 tools/metric.py --ref Reference.exr \
                        --test Render-1.exr \
                        --metric mape \
                        --falsecolor MAPE.png
MAPE = 0.1164 (Min = 0.0000, Max = 9.1742, Var = 0.0141)
False color heatmap written to: MAPE.png
python3 tools/metric.py --ref Reference.exr \
                        --test Render-1.exr \
                        --metric mape \
                        --falsecolor MAPE.png
                        --colorbar
MAPE = 0.1164 (Min = 0.0000, Max = 9.1742, Var = 0.0141)
False color heatmap written to: MAPE.png
False color heatmap (with colorbar) written to: MAPE.pdf
python3 tools/metric.py --ref Reference.exr \
                        --test Render-1.exr \
                        --metric mape \
                        --plain
0.116442
 |
 |
 |
||||||
| Reference | MAPE | MAPE + Colorbar (PDF) |
- Track convergence over time
- Make scripts more robust by handling exceptions
- Handle different length plots and make sure stats are truthful
- JERI's team at Disney Research for providing the interactive viewing tool.
- Jan Novák and Benedikt Bitterli who wrote the Chart/Table JS files.