-
borb in action
1.1 About this book
1.2 About the author
1.3 Who should read this book?
1.4 How to use this book
1.5 What you'll be able to do after reading this book
1.5.1 Creating PDF documents
1.5.2 Manipulate existing PDF documents
1.5.3 Heuristics for PDF documents
1.5.4 Deep-dive
1.5.5 Showcases
1.6 The goal of this book
1.7 Software requirements and downloads
1.7.1 Installation usingpip
1.8 Acknowledgements -
Creating PDF documents from scratch
2.1 Introducingborband PDF
2.2 Steps to creating a PDF usingborb
2.2.1 Creating an emptyDocumentinstance
2.2.2 Creating and adding aPage
2.2.3 Setting aPageLayout
2.2.4 Adding aParagraphto thePageusingPageLayout
2.2.5 Writing theDocumentto disk
2.3 UsingLayoutElementsub-classes to represent various types of content
2.4 Adding text to a PDF
2.4.1 Setting thefontof aParagraph
2.4.2 Setting thefont_colorof aParagraph
2.4.2.1 UsingHSVColorto create a rainbow of text
2.4.2.2 UsingX11Colorto specify color in a more human-legible way
2.4.2.3 UsingPantoneto specify color in a more human-legible way
2.4.2.4 Making the most of theColorclasses
2.4.2.4.1 Generating a triadColorscheme
2.4.2.4.2 Generating a split-complementaryColorscheme
2.4.2.4.3 Generating an analogousColorscheme
2.4.2.4.4 Generating a tetradic squareColorscheme
2.4.2.4.5 Generating a tetradic rectangularColorscheme
2.4.3 Using alignment onParagraphobjects
2.4.3.1horizontal_alignment
2.4.3.2vertical_alignment
2.4.3.3text_alignment
2.4.4 Using borders onParagraphobjects
2.4.5 Using margin and padding onParagraphobjects
2.5 AddingImageobjects to a PDF
2.6 Adding line-art to a PDF usingShapeobjects
2.7 Adding barcodes and qr-codes to a PDF
2.7.1 Adding aBarcodeto aPage
2.7.1.1 Setting thestroke_colorandfill_colorof aBarcode
2.7.2 Adding a QR-code to aPage
2.8 AddingChartobjects to a PDF
2.9 AddingEmojito a PDF
2.10 ContainerLayoutElementobjects
2.10.1 Lists
2.10.1.1 Working withOrderedList
2.10.1.2 Working withRomanNumeralOrderedList
2.10.1.3 Working withUnorderedList
2.10.1.4 NestingListobjects
2.10.2 Tables
2.10.2.1FixedColumnWidthTable
2.10.2.2FlexibleColumnWidthTable
2.10.2.3 Setting layout properties on individual cells of aTable
2.10.2.4 IncompleteTable
2.10.2.5 Settingcolumn_spanandrow_span
2.11 Forms
2.11.1 Acroforms vs XFA
2.11.2 TheFormFieldobject
2.11.3 AddingFormFieldobjects to a PDF
2.11.3.1 Adding aTextFieldto a PDF
2.11.3.2 Customizing aTextFieldobject
2.11.3.3 Pre-filling aTextFieldobject
2.11.3.4 Adding aDropDownListto a PDF
2.11.3.5 Adding aCountryDropDownListto a PDF
2.11.3.6 Adding aCheckBoxto a PDF
2.11.3.7 Adding aRadioButtonto a PDF
2.11.4 Changing the value of aFormFieldin an existing PDF
2.11.5 Getting the value of aFormFieldin an existing PDF
2.11.6 Flattening aFormField
2.12 Conclusion -
Working with existing PDFs
3.1 Extracting meta-information
3.1.1 Extracting the author from a PDF
3.1.2 Extracting the producer from a PDF
3.1.3 Using XMP meta-information
3.2 Extracting text from a PDF
3.3 Extracting text using regular expressions
3.4 Extracting text using its bounding box
3.5 Combining regular expressions and bounding boxes
3.6 Extracting keywords from a PDF
3.6.1 Extracting keywords from a PDF using tf-idf
3.6.2 Extracting keywords from a PDF using textrank
3.7 Extracting color information
3.8 Extracting font information
3.9 Extracting images from a PDF
3.9.1 Modifying images in an existing PDF
3.9.2 Subsampling images in an existing PDF
3.10 Working with embedded files
3.10.1 Embedding files in a PDF
3.10.2 Extracting embedded files from a PDF
3.11 Adding annotations to a PDF
3.11.1 Adding geometric shapes
3.11.2 Adding text annotations
3.11.3 Adding link annotations
3.11.4 Adding rubber stamp annotations
3.12 Adding redaction (annotations)
3.12.1 Adding redaction annotations
3.12.2 Applying redaction annotations
3.13 Merging PDF documents
3.14 Removing pages from PDF documents
3.15 Rotating pages in PDF documents
3.16 Conclusion -
Heuristics for PDF documents
4.1 Extracting tables from a PDF
4.2 Performing OCR on a PDF
4.3 Exporting PDF as a PIL Image
4.4 Exporting PDF as an SVG Image
4.5 Exporting Markdown as PDF
4.6 Exporting HTML as PDF -
Deep dive
5.1 About PDF
5.2 The XREF table
5.3Pagecontent streams
5.4 Postscript syntax
5.5 Creating aDocumentusing low-level syntax
5.6 Fonts in PDF
5.6.1 Simple fonts
5.6.2 Composite fonts
5.7 About structured versus unstructered document formats
5.7.1 Text extraction using heuristics to bridge the gap
5.7.2 paragraph extraction and disjoint set
5.8 Hyphenation
5.8.1 The hyphenation problem
5.8.2 A fast and scalable hyphenation algorithm
5.8.3 Using hyphenation inborb -
Showcases
6.1 Creating an invoice
6.2 Creating a Sudoku puzzle
6.3 Creating a nonogram puzzle
6.4 Creating a tents-and-trees puzzle
6.5 Using multiplePageLayoutinstances on the samePage
6.6 Creating a poem with customPageLayout
6.7 Automatically processing an invoice

This book will take you on an exploratory journey through the PDF format, and the borb Python library. You'll learn, through examples, how to use borb to generate and manipulate PDFs, and extract information from them. The deep-dive chapters will help you gain a thorough understanding of various interesting algorithms, or pieces of the PDF specification. The showcase examples are typically aimed at working out a use-case from start to finish.

I'm Joris Schellekens, the author of both this book and the borb library.
I've been a software engineer/architect for most of my professional career.
I started out working in C++ and Java, and only late in the game did I switch to Python.
I love mathematical optimization, and graph-theory. I never thought I'd be the author of a library for writing PDF documents, but here we are. Working with PDF has offered me many challenges that were often as difficult as they were satisfying to solve.
This book is intended for python developers who'd like to create, or work with (existing) PDF documents. This can be anything from generating reports, invoices, to itemized inventory overviews. This book assumes you have some background in Python programming.
This book includes a lot of small code-snippets that handle a particular facet or problem in a PDF-workflow:
- Adding
Paragraph,List,Table,Imageand more to a PDF document - Adding annotations to an existing document
- Applying OCR to an existing document
- Applying redaction to an existing document
- Creating PDF documents from scratch
- Merging and splitting existing PDF documents
- Retrieving text from a document
- Etc
For the sake of completeness, most of these examples are standalone python scripts. If you want to deploy these examples in a bigger framework (as part of a web application, a document server, etc), you should know how to perform all the needed setup. This book will only explain the PDF-related parts.
No prior knowledge about PDF is needed, as this book will get into the nitty gritty details wherever needed. These sections will be clearly marked, so you can choose whether you'd like to get your head smashed in by the PDF-spec.
I would recommend the PDF-spec (ISO-32000) to anyone craving a particular brand of masochism.
The large sections of this book are meant to stand alone. It is perfectly conceivable that you only wish to create PDF documents, and not work with existing ones, or vice-versa. You can read the book thematically, only touching chapters that are tangent to your requirements.
Of course, in order to gain a deeper understanding of the borb library, and PDF,
I would recommend you read this book in its entirety, even if you only give certain sections a cursory glance.
There is so much information in this book, not just about borb but PDF in general. I have no doubt you'll learn something new in each section.
This book consists of 5 major parts:
- Creating PDF documents from scratch
- Manipulating existing PDF documents
- Heuristics for PDF documents
- Deep dive(s)
- Showcase(s)
In this section you'll learn how to create a PDF from scratch. You'll explore the various LayoutElement objects that borb has to offer (Paragraph, Image, Table, etc). You'll play around with the options for all of them (alignment, fonts, colors, layout, etc) and you'll get a good grasp of the basics of how to add content to a PDF.
This section will start out easy, by creating an empty PDF document and examining the contents therein. From there you'll learn how to add text, how to format that text, and how set various properties like font and color.
Then you'll explore other layout primitives, such as images and shapes (and their various sub-classes, such as QR-codes).
Once you have a firm grasp of the primitives, you'll learn how to aggregate those in more complex layout elements such as lists and tables.
After having read this section you should be able to code up a small proof of concept for any workflow that requires you to generate a PDF document.
In this section you'll explore the things you can do with an existing PDF document.
You'll start with the basics; merging existing documents, extracting and removing pages, making copies. These basics are a great way to learn more about borb and the underlying PDF syntax.
Having mastered these common use-cases, you'll move on to annotations. These provide a way to add content to existing documents. It can be as easy as stamping a page with "APPROVED", to adding a pop-up text note with remarks explaining an invoice-line.
PDF is sometimes said to be "where data goes to die". This is because data extraction from PDF can be a tricky job. In this section you'll learn several ways in which you can (attempt to) do this. Everything from extracting the entire textual content, to matching regular expressions, extracting text at specific locations, or combinations thereof. You'll also see how to extract images, color, and font-information, as well as how to embed files, or retrieve embedded files from a PDF.
You'll explore redaction (the automated removal of content), which (in relation to GDPR) has known a resurgence. Automated redaction makes it easier for you to ensure people's privacy is upheld.
Lastly, you'll also tackle some common questions;
- Can you change the color of this text?
- Can you change this image?
- Can you change the font of this heading?
- Etc
This section talks about some of the more interesting (and difficult) algorithms used when working with PDF. PDF is pretty much a "one way" format, it doesn't really lend itself to easily extracting information, or being modified.
This section provides you with the knowledge of some of the cutting-edge powertools to make PDF work for you and your company.
You'll learn how to extract tabular data from a PDF, and you'll jump under the hood for some common document-conversion dilemma's:
- PDF to JPEG
- PDF to JSON
- Markdown to PDF
- HTML to PDF
You'll also learn how to apply OCR (optical character recognition) to an existing document, so that it can later be processed by borb as if it contained text all along.
This section explores PDF syntax and some of the core concepts in the borb library. Although it isn't a must for the day-to-day usage of borb, this section will certainly help build your appreciation for some of the limitations of PDF (or even PDF libraries).
You'll learn how content is rendered to a page, how the various layout-algorithms in borb work, how hyphenation works, and how you can attempt to reconstitute structural information from postscript syntax.
In this section I want to focus on the beautiful algorithms and data-structures I met along the way while implementing borb.
This section provides end-to-end examples for some of the more common document-generation or document-manipulating use-cases. You should read this section last, as its content assumes you have worked your way through the basics beforehand.
You'll see:
- How to generate a realistic invoice
- How to generate a Sudoku puzzle
- How to extract text from an existing invoice
- Etc
My goal for this book is for it to become a companion along your way in PDF-land.
With this book, you'll have the answers to the most common questions, and an experienced field-guide to help you find the right tools in the borb library.
borb is a free and open source library distributed by Joris Schellekens. You can download it from GitHub or using PyPi. The software is protected by the Affero General Public License (AGPL).
borb requires Python. Although no particular IDE is needed, the examples and code has been developed in PyCharm. So I can imagine there might be some bias towards this.
All examples have been tested in a Linux environment. Most of the examples are based on tests (or have inspired tests), you can download their source-code on GitHub.
Getting started with borb is easy.
-
Create a virtual environment (if you have not done so already)
python3 -m venv venv -
Activate your virtual environment
source venv/bin/activate -
Install
borbusing pippip install borb -
Done 🎉 You are all ready to go.
Try out some of the examples to get to know borb.
Note: if you have used borb in the past, it's best to ensure that pip is not serving
you a version of borb from its cache. Uninstall your previous version using:
pip uninstall borb
and install the latest version using:
pip install --no-cache borb
This book would not have been possible without Bruno Lowagie. A sincere "thank you", to the king of PDF.
I would also like to thank (in no particular order); Daphne, Dietrich, Benoit, Michael, Diane and Aleks. You're all awesome, and you've helped me out tremendously.


borb was born out of frustration at the current state-of-the-art with regards to PDF and Python:
- A complete lack of documentation in existing libraries
- A lack of examples for existing libraries
- PDF functionality being very fragmented over the existing libraries: some libraries can create (basic) PDF document, but can not read PDF documents, or vice versa. Some libraries can only merge/split documents, etc
- Obfuscated, or unclear code (I saw one library being offered as one giant python file, rather than following the accepted object-oriented paradigm)
I wanted a library that was:
- Fully documented
- Fully tested
- Capable of reading, writing, editing PDF documents
- Puts the user first. No need to know the PDF specification, the library will handle all the heavy lifting for you.
Although borb is still a work in progress, and still growing and improving, I think it is clear from the existing code base that the course of the library has been set.
Typically, creating a PDF document using borb follows the same basic steps:
- An empty
Documentobject is created, to represent the entire PDF - A
Pageis created, and added to theDocument - A sub-class of
PageLayoutis created to ensure content is added to thePageat the right position - Content is added to the
Pageusing theaddmethod of thePageLayout - The
Documentis written to disk
I'll explore all these steps in more detail in the coming sections.
borb represents a PDF as a JSON-like object, a collection of nested dictionaries, arrays and primitives. Creating and empty Document amounts to creating an empty dict and filling it with the right keys to ensure the serialization will not hang.
from borb.pdf.document import Document

def main():
    doc: Document = Document()


if __name__ == "__main__":
    main()
If you were to look at the class definition of Document you'd see:
class Document(Dictionary):
    """
    This class represents a PDF document
    """

    ... etc ...
Dictionary is defined in types.py as:
class Dictionary(dict):
    """
    A dictionary object is an associative table containing pairs of objects, known as the dictionary’s entries. The first element of each entry is the key and the second element is the value. The key shall be a name (unlike dictionary keys in PostScript, which may be objects of any type). The value may be any kind of object, including another dictionary. A dictionary entry whose value is null (see 7.3.9, "Null Object") shall be treated the same as if the entry does not exist. (This differs from PostScript, where null behaves like any other object as the value of a dictionary entry.) The number of entries in a dictionary shall be subject to an implementation limit; see Annex C. A dictionary may have zero entries.
    The entries in a dictionary represent an associative table and as such shall be unordered even though an arbitrary order may be imposed upon them when written in a file. That ordering shall be ignored.
    """

    ... etc ...
The constructor of Dictionary does call add_base_methods which enriches the standard dict (or any type it is applied to really) with a few extra methods. These methods mostly deal with being able to build hierarchies (adding children, setting parents, etc) and memory management (setting and checking the reference of an object).
These methods are not something you will typically have to deal with, you can forget about those for now.
The next step in creating a PDF document is adding a Page to the Document object:
from borb.pdf.document import Document
from borb.pdf.page.page import Page

def main():
    doc: Document = Document()
    page: Page = Page()
    doc.append_page(page)


if __name__ == "__main__":
    main()
The default constructor for Page also sets the page size to match that of an A4 paper, in portrait mode.
This can easily be customized by passing a width and height parameter. These parameters must be of type Decimal and must express the page size in so called PDF user space units.
PDF user space units map to roughly 1/72th of an inch.
In order to make life easier, borb offers a convenient enum that holds the most common paper sizes, in landscape and portrait mode.
class PageSize(enum.Enum):
    """
    This Enum provides a convenient way of getting all common paper page sizes
    """
    A0_PORTRAIT = (Decimal(2384), Decimal(3370))
    A0_LANDSCAPE = (Decimal(3370), Decimal(2384))

    A1_PORTRAIT = (Decimal(1684), Decimal(2384))
    A1_LANDSCAPE = (Decimal(2384), Decimal(1684))

    A2_PORTRAIT = (Decimal(1190), Decimal(1684))
    A2_LANDSCAPE = (Decimal(1684), Decimal(1190))

... etc ...Typically, you'd like to be able to just add content, and have borb figure out where to start adding subsequent content. This is made possible by means of a PageLayout instance. Various implementations of PageLayout will help you achieve different styles:
SingleColumnLayout: ThisPageLayoutwill lay out the page with margins on all sides, flowing content as if there is 1 single column of contentMultiColumnLayout: ThisPageLayoutwill lay out the page, with margins on all sides, flowing content as if there are multiple (configurable) columns. The spacing in between columns as well as the number of columns can be configured. This implementation ofPageLayoutalso offers convenience methods to skip to the next column.BrowserLayout: This implementation ofPageLayoutattempts to mimic a browser. It takes into account the type of theLayoutElementbeing added to decide whether an element should be a block or inline element, and lays out the content accordingly.
For this first example, you'll use SingleColumnLayout
from borb.pdf.document import Document
from borb.pdf.page.page import Page
from borb.pdf.canvas.layout.page_layout.multi_column_layout import SingleColumnLayout
from borb.pdf.canvas.layout.page_layout.page_layout import PageLayout


def main():
    doc: Document = Document()
    page: Page = Page()
    doc.append_page(page)
    layout: PageLayout = SingleColumnLayout(page)


if __name__ == "__main__":
    main()
SingleColumnLayout takes the Page being laid out as its parameter, anything you add to the PageLayout using the add method will get added to the Page. When the Page can no longer hold the content, a new Page will be created automatically, and the PageLayout will use the new Page in stead.
Finally, you can add some content to the Page (or rather the PageLayout) and wrap up this example:
from borb.pdf.document import Document
from borb.pdf.page.page import Page
from borb.pdf.canvas.layout.page_layout.multi_column_layout import SingleColumnLayout
from borb.pdf.canvas.layout.page_layout.page_layout import PageLayout
from borb.pdf.canvas.layout.text.paragraph import Paragraph


def main():
    doc: Document = Document()
    page: Page = Page()
    doc.append_page(page)

    layout: PageLayout = SingleColumnLayout(page)
    layout.add(Paragraph("Hello World!"))


if __name__ == "__main__":
    main()
The default constructor for Paragraph accepts a str and nothing more. Of course, in later sections you'll learn how to customize everything from the font down to the color being used.
For now, suffice to say the default parameters are:
font:"Helvetica"font_size:Decimal(12)font_color:HexColor("000000")text_alignment:Alignment.LEFTborder_top,border_right,border_bottom,border_left: all set toFalsepadding_top,padding_right,padding_bottom,padding_left: all set toDecimal(0)hyphenation:None
from borb.pdf.document import Document
from borb.pdf.page.page import Page
from borb.pdf.canvas.layout.page_layout.multi_column_layout import SingleColumnLayout
from borb.pdf.canvas.layout.page_layout.page_layout import PageLayout
from borb.pdf.canvas.layout.text.paragraph import Paragraph
from borb.pdf.pdf import PDF


def main():
    doc: Document = Document()
    page: Page = Page()
    doc.append_page(page)

    layout: PageLayout = SingleColumnLayout(page)
    layout.add(Paragraph("Hello World!"))

    with open("output.pdf", "wb") as out_file_handle:
        PDF.dumps(out_file_handle, doc)


if __name__ == "__main__":
    main()
In the previous example, you learned the bare minimum of adding text to a Document using the Paragraph class. Let's have a more in-depth look at the various options in the borb library.

Figure 1 shows the LayoutElement hierarchy. The abstract base class LayoutElement represents 3 major groups of content:
- Elements that display text (marked in yellow)
- Elements that display images (marked in orange)
- Elements that act as a container, grouping other
LayoutElementimplementations (marked in blue)
You'll explore most of these LayoutElement implementations in the coming examples.
The deep-dive will take you on a journey through the entire process from str to PDF.
The easiest way to add text to a PDF is by using a Paragraph object. Paragraph represents a piece of text where:
- All characters are rendered in the same Font
- All characters are rendered in the same color
Paragraph is typically a block-element (meaning it has a bottom and top padding).
HeterogeneousParagraph represents a Paragraph whose content may not all be rendered the same.
This can be particularly useful if you'd like to have some words in bold in a Paragraph or perhaps even a different color, for emphasis.
HeterogeneousParagraph is made up of smaller pieces of content called ChunkOfText objects.
ChunkOfText is the atomic element as far as text-rendering is considered.
Internally, whenever a Paragraph is rendered, it will divide itself into LineOfText objects, each of which will divide itself in ChunkOfText objects.
One of the things that can really make a document stand out is a custom Font. By default, borb will use Helvetica, but this is not always desired. In this example, you'll learn how to set the Font of a Paragraph.
You'll start with the same boilerplate code you used last time:
from borb.pdf.document import Document
from borb.pdf.page.page import Page
from borb.pdf.canvas.layout.page_layout.multi_column_layout import SingleColumnLayout
from borb.pdf.canvas.layout.page_layout.page_layout import PageLayout
from borb.pdf.canvas.layout.text.paragraph import Paragraph
from borb.pdf.pdf import PDF


def main():
    doc: Document = Document()
    page: Page = Page()
    doc.append_page(page)

    layout: PageLayout = SingleColumnLayout(page)
    layout.add(Paragraph("Hello World!"))

    with open("output.pdf", "wb") as out_file_handle:
        PDF.dumps(out_file_handle, doc)


if __name__ == "__main__":
    main()
Upon closer inspection, you'll find the constructor of Paragraph takes an argument font which can either be of type str or Font.
The PDF standard defines 14 fonts that should be embedded (and thus always present) in a PDF viewer. By using one of these fonts, you are ensuring that the document will open without a hitch.
If you're working with any of these 14 fonts, you can get by with just specifying the name of the font (since they are also embedded in borb).
These 14 fonts are:
- Courier
- Courier-bold
- Courier-bold-oblique
- Courier-oblique
- Helvetica
- Helvetica-bold
- Helvetica-bold-oblique
- Helvetica-oblique
- Times-bold
- Times-bold-oblique
- Times-oblique
- Times-roman
And 2 fonts used for things like list-symbols and the likes:
- Symbol
- Zapfdingbats
Now that you know, you can easily change the (implicit) Helvetica for something like Courier or Helvetica-bold
from borb.pdf.document import Document
from borb.pdf.page.page import Page
from borb.pdf.canvas.layout.page_layout.multi_column_layout import SingleColumnLayout
from borb.pdf.canvas.layout.page_layout.page_layout import PageLayout
from borb.pdf.canvas.layout.text.paragraph import Paragraph
from borb.pdf.pdf import PDF


def main():
    doc: Document = Document()
    page: Page = Page()
    doc.append_page(page)
    layout: PageLayout = SingleColumnLayout(page)
    layout.add(Paragraph("Hello World!", font="Courier"))
    with open("output.pdf", "wb") as out_file_handle:
        PDF.dumps(out_file_handle, doc)


if __name__ == "__main__":
    main()
Alternatively, you can construct a new Font object, based on a TTF file.
from pathlib import Path

from borb.pdf.document import Document
from borb.pdf.page.page import Page
from borb.pdf.canvas.layout.page_layout.multi_column_layout import SingleColumnLayout
from borb.pdf.canvas.layout.page_layout.page_layout import PageLayout
from borb.pdf.canvas.layout.text.paragraph import Paragraph
from borb.pdf.pdf import PDF
from borb.pdf.canvas.font.simple_font.true_type_font import TrueTypeFont
from borb.pdf.canvas.font.font import Font


def main():
    doc: Document = Document()
    page: Page = Page()
    doc.append_page(page)

    layout: PageLayout = SingleColumnLayout(page)

    # construct the Font object
    font_path: Path = Path(__file__).parent / "Jsfont-Regular.ttf"
    font: Font = TrueTypeFont.true_type_font_from_file(font_path)

    layout.add(Paragraph("Hello World!", font=font))
    with open("output.pdf", "wb") as out_file_handle:
        PDF.dumps(out_file_handle, doc)


if __name__ == "__main__":
main() 
Now that you can set the font of a Paragraph, you can turn your attention to the second most obvious feature with regards to personalization and branding; color.
borb offers a myriad of various color models. The easiest of which are:
-
RGBColor: An RGB color space is any additive color space based on the RGB color model. A particular color space that employs RGB primaries for part of its specification is defined by the three chromaticities of the red, green, and blue additive primaries,
and can produce any chromaticity that is the 2D triangle defined by those primary colors (ie. excluding transfer function, white point, etc.). The primary colors are specified in terms of their CIE 1931 color space chromaticity coordinates (x,y), linking them to human-visible color. RGB is an abbreviation for red–green–blue. -
HexColor: A hex triplet is a six-digit, three-byte hexadecimal number used in HTML, CSS, SVG, and other computing applications to represent colors. The bytes represent the red, green, and blue components of the color. One byte represents a number in the range 00 to FF (in hexadecimal notation), or 0 to 255 in decimal notation. This represents the least (0) to the most (255) intensity of each of the color components. -
Pantone: Pantone LLC is a limited liability company headquartered in Carlstadt, New Jersey. The company is best known for its Pantone Matching System (PMS), a proprietary color space used in a variety of industries, notably graphic design, fashion design, product design, printing and manufacturing and supporting the management of color from design to production, in physical and digital formats, among coated and uncoated materials, cotton, polyester, nylon and plastics. -
X11Color: In computing, on the X Window System, X11 color names are represented in a simple text file, which maps certain strings to RGB color values. It was traditionally shipped with every X11 installation, hence the name. The web colors list is descended from it but differs for certain color names. -
CMYKColor: The CMYK color model (also known as process color, or four color) is a subtractive color model, based on the CMY color model,
used in color printing, and is also used to describe the printing process itself.
CMYK refers to the four ink plates used in some color printing: cyan, magenta, yellow, and key (black).The CMYK model works by partially or entirely masking colors on a lighter, usually white, background. The ink reduces the light that would otherwise be reflected.
Such a model is called subtractive because inks "subtract" the colors red, green and blue from white light. White light minus red leaves cyan, white light minus green leaves magenta, and white light minus blue leaves yellow. -
GrayColor: In digital photography, computer-generated imagery, and colorimetry, a grayscale or image is one in which the value of each pixel is a single sample representing only an amount of light; that is, it carries only intensity information. Grayscale images, a kind of black-and-white or gray monochrome, are composed exclusively of shades of gray. The contrast ranges from black at the weakest intensity to white at the strongest. -
HSVColor: HSL (hue, saturation, lightness) and HSV (hue, saturation, value, also known as HSB or hue, saturation, brightness) are alternative representations of the RGB color model, designed in the 1970s by computer graphics researchers to more closely align with the way human vision perceives color-making attributes.In these models, colors of each hue are arranged in a radial slice,
around a central axis of neutral colors which ranges from black at the bottom to white at the top.
But, enough theory, let's put this into practice.
In this example, you're creating the base Hello World, with a different color than the standard black. You'll be doing so by using the HexColor object.
from borb.pdf.document import Document
from borb.pdf.page.page import Page
from borb.pdf.canvas.layout.page_layout.multi_column_layout import SingleColumnLayout
from borb.pdf.canvas.layout.page_layout.page_layout import PageLayout
from borb.pdf.canvas.layout.text.paragraph import Paragraph
from borb.pdf.pdf import PDF
from borb.pdf.canvas.color.color import HexColor


def main():
    doc: Document = Document()
    page: Page = Page()
    doc.append_page(page)

    layout: PageLayout = SingleColumnLayout(page)
    layout.add(Paragraph("Hello World!", font_color=HexColor("#86CD82")))

    with open("output.pdf", "wb") as out_file_handle:
        PDF.dumps(out_file_handle, doc)


if __name__ == "__main__":
    main()
The HSV color model arranges colors on a wheel (rather a cone if you take into account saturation and value). That means you can easily generate a set of colors that divide the color spectrum evenly.
In the next example, you'll start from the boilerplate Hello World example, and tweak it to generate a Document with a rainbow of text.
from decimal import Decimal

from borb.pdf.canvas.layout.text.paragraph import Paragraph
from borb.pdf.document import Document
from borb.pdf.page.page import Page
from borb.pdf.canvas.layout.page_layout.multi_column_layout import SingleColumnLayout
from borb.pdf.canvas.layout.page_layout.page_layout import PageLayout
from borb.pdf.pdf import PDF
from borb.pdf.canvas.color.color import HSVColor


def main():
    doc: Document = Document()
    page: Page = Page()
    doc.append_page(page)

    layout: PageLayout = SingleColumnLayout(page)

    # the following code generates 20 colors, evenly spaced in the HSV spectrum
    colors = [
        HSVColor(Decimal(x / 360), Decimal(1), Decimal(1))
        for x in range(0, 360, int(360 / 20))
    ]

    for c in colors:
        layout.add(Paragraph("Hello World!", font_color=c))

    with open("output.pdf", "wb") as out_file_handle:
        PDF.dumps(out_file_handle, doc)


if __name__ == "__main__":
    main()
In computing, on the X Window System, X11 color names are represented in a simple text file, which maps certain strings to RGB color values. It was traditionally shipped with every X11 installation, hence the name, and is usually located in <X11root>/lib/X11/rgb.txt. The web colors list is descended from it but differs for certain color names.
Color names are not standardized by Xlib or the X11 protocol. The list does not show continuity either in selected color values or in color names, and some color triplets have multiple names. Despite this, graphic designers and others got used to them, making it practically impossible to introduce a different list. In earlier releases of X11 (prior to the introduction of Xcms), server implementors were encouraged to modify the RGB values in the reference color database to account for gamma correction.
As of X.Org Release 7.4 rgb.txt is no longer included in the roll up release, and the list is built directly into the server. The optional module xorg/app/rgb contains the stand-alone rgb.txt file.
The list first shipped with X10 release 3 (X10R3) on 7 June 1986, having been checked into RCS by Jim Gettys in 1985.[5] The same list was in X11R1 on 18 September 1987. Approximately the full list as is available today shipped with X11R4 on 29 January 1989, with substantial additions by Paul Ravelling (who added colors based on Sinclair Paints samples), John C. Thomas (who added colors based on a set of 72 Crayola crayons he had on hand) and Jim Fulton (who reconciled contributions to produce the X11R4 list). The project was running DEC VT240 terminals at the time, so would have worked to that device.
In borb the class X11Color represents all possible X11 colors.
COLOR_DEFINITION = {
    "AliceBlue": "#FFF0F8FF",
    "AntiqueWhite": "#FFFAEBD7",
    "Aqua": "#FF00FFFF",
    "Aquamarine": "#FF7FFFD4",
    "Azure": "#FFF0FFFF",
    "Beige": "#FFF5F5DC",
    "Bisque": "#FFFFE4C4",
    "Black": "#FF000000",
    "BlanchedAlmond": "#FFFFEBCD",
    ... etc ...
In the next example you'll change the Hello World example to use an X11Color
from borb.pdf.document import Document
from borb.pdf.page.page import Page
from borb.pdf.canvas.layout.page_layout.multi_column_layout import SingleColumnLayout
from borb.pdf.canvas.layout.page_layout.page_layout import PageLayout
from borb.pdf.canvas.layout.text.paragraph import Paragraph
from borb.pdf.pdf import PDF
from borb.pdf.canvas.color.color import X11Color


def main():
    doc: Document = Document()
    page: Page = Page()
    doc.append_page(page)

    layout: PageLayout = SingleColumnLayout(page)
    layout.add(Paragraph("Hello World!", font_color=X11Color("SpringGreen")))

    with open("output.pdf", "wb") as out_file_handle:
        PDF.dumps(out_file_handle, doc)


if __name__ == "__main__":
    main()
Pantone is a proprietary color format. It specifies colors by names (or letter/number codes) in such a way that makes it nearly impossible to work well with anything else. Sadly, the format has taken some hold, and a lot of companies have defined their brand-book or color-scheme in terms of Pantone colors.
borb contains the definitions of a large selection (over 2000) of the Pantone gamut. Moreover, borb can also convert these colors to their nearest RGBColor thus allowing greater interoperability.
The (one) advantage of using Pantone however is that you get a human-legible name for your Color although it does require imagination to differentiate between things like candlelight-peach, georgia-peach and honey-peach.
In the next example you'll create the boilerplate Hello World example, using a Pantone.
from borb.pdf.canvas.color.pantone import Pantone
from borb.pdf.canvas.layout.text.paragraph import Paragraph
from borb.pdf.document import Document
from borb.pdf.page.page import Page
from borb.pdf.canvas.layout.page_layout.multi_column_layout import SingleColumnLayout
from borb.pdf.canvas.layout.page_layout.page_layout import PageLayout
from borb.pdf.pdf import PDF


def main():
    doc: Document = Document()
    page: Page = Page()
    doc.append_page(page)

    layout: PageLayout = SingleColumnLayout(page)
    layout.add(Paragraph("Hello World!", font_color=Pantone("agate-green")))

    with open("output.pdf", "wb") as out_file_handle:
        PDF.dumps(out_file_handle, doc)


if __name__ == "__main__":
    main()
If you wanted to, you could also turn any other Color object into its (closest matching) Pantone color by using the find_nearest_pantone method in the Pantone class.
Upon closer inspection, you'll see that the base class Color implements a method to_rgb. This means that regardless of the underlying color model / space, we can get the (nearest) RGBColor object.
You can also verify that HSVColor can be constructed from RGBColor using the from_rgb method.
HSVColor has some interesting methods:
opposite: This function returns theHSVColorwhose hue is the opposite of the givenHSVColordarker: This function returns a darker shade of the givenHSVColor
By converting a Color (first to RGBColor and then to HSVColor) you can do all kinds of chromatic operations, like finding matching colors, opposite colors, and darker/lighter colors. Finally, you can convert those HSVColor objects back to RGBColor once you're done.
In the next examples in this section you'll use the HSVColor methods to generate color-schemes that you can use on your Document.
These examples are quick and fun ways to explore the Color API.

A triadic color scheme uses colors that are evenly spaced around the color wheel.
Triadic color harmonies tend to be quite vibrant, even if you use pale or unsaturated versions of your hues.
To use a triadic harmony successfully, the colors should be carefully balanced - let one color dominate and use the two others for accent.
from decimal import Decimal

import typing
from borb.pdf.canvas.color.color import HSVColor, HexColor, Color
from borb.pdf.canvas.color.pantone import Pantone
from borb.pdf.canvas.geometry.rectangle import Rectangle
from borb.pdf.canvas.layout.shape.shape import Shape
from borb.pdf.canvas.layout.page_layout.multi_column_layout import SingleColumnLayout
from borb.pdf.canvas.layout.page_layout.page_layout import PageLayout
from borb.pdf.canvas.layout.table.fixed_column_width_table import FixedColumnWidthTable
from borb.pdf.canvas.layout.text.paragraph import Paragraph
from borb.pdf.canvas.line_art.line_art_factory import LineArtFactory
from borb.pdf.document import Document
from borb.pdf.page.page import Page
from borb.pdf.pdf import PDF


def generate_triad_color_scheme() -> None:

    d: Document = Document()

    p: Page = Page()
    d.append_page(p)

    l: PageLayout = SingleColumnLayout(p)

    cs: typing.List[Color] = HSVColor.triadic(HexColor("f1cd2e"))

    t: FixedColumnWidthTable = FixedColumnWidthTable(
        number_of_rows=4, number_of_columns=3, margin_top=Decimal(12)
    )
    t.add(Paragraph("Color Sample", font="Helvetica-Bold"))
    t.add(Paragraph("Hex code", font="Helvetica-Bold"))
    t.add(Paragraph("Nearest Pantone", font="Helvetica-Bold"))
    for c in cs:
        t.add(
            Shape(
                LineArtFactory.droplet(
                    Rectangle(Decimal(0), Decimal(0), Decimal(32), Decimal(32))
                ),
                stroke_color=c,
                fill_color=c,
            )
        )
        t.add(Paragraph(c.to_rgb().to_hex_string()))
        t.add(Paragraph(Pantone.find_nearest_pantone_color(c).get_name()))
    t.set_padding_on_all_cells(Decimal(5), Decimal(5), Decimal(5), Decimal(5))
    l.add(t)

    # write
    with open("output.pdf", "wb") as pdf_file_handle:
        PDF.dumps(pdf_file_handle, d)

The split-complementary color scheme is a variation of the complementary color scheme. In addition to the base color, it uses the two colors adjacent to its complement.
This color scheme has the same strong visual contrast as the complementary color scheme, but has less tension.
The split-complimentary color scheme is often a good choice for beginners, because it is difficult to mess up.
from decimal import Decimal

import typing
from borb.pdf.canvas.color.color import HSVColor, HexColor, Color
from borb.pdf.canvas.color.pantone import Pantone
from borb.pdf.canvas.geometry.rectangle import Rectangle
from borb.pdf.canvas.layout.shape.shape import Shape
from borb.pdf.canvas.layout.page_layout.multi_column_layout import SingleColumnLayout
from borb.pdf.canvas.layout.page_layout.page_layout import PageLayout
from borb.pdf.canvas.layout.table.fixed_column_width_table import FixedColumnWidthTable
from borb.pdf.canvas.layout.text.paragraph import Paragraph
from borb.pdf.canvas.line_art.line_art_factory import LineArtFactory
from borb.pdf.document import Document
from borb.pdf.page.page import Page
from borb.pdf.pdf import PDF


def generate_split_complementary_color_scheme() -> None:

    d: Document = Document()

    p: Page = Page()
    d.append_page(p)

    l: PageLayout = SingleColumnLayout(p)

    cs: typing.List[Color] = HSVColor.split_complementary(HexColor("f1cd2e"))

    t: FixedColumnWidthTable = FixedColumnWidthTable(
        number_of_rows=4, number_of_columns=3, margin_top=Decimal(12)
    )
    t.add(Paragraph("Color Sample", font="Helvetica-Bold"))
    t.add(Paragraph("Hex code", font="Helvetica-Bold"))
    t.add(Paragraph("Nearest Pantone", font="Helvetica-Bold"))
    for c in cs:
        t.add(
            Shape(
                LineArtFactory.droplet(
                    Rectangle(Decimal(0), Decimal(0), Decimal(32), Decimal(32))
                ),
                stroke_color=c,
                fill_color=c,
            )
        )
        t.add(Paragraph(c.to_rgb().to_hex_string()))
        t.add(Paragraph(Pantone.find_nearest_pantone_color(c).get_name()))
    t.set_padding_on_all_cells(Decimal(5), Decimal(5), Decimal(5), Decimal(5))
    l.add(t)

    # write
    with open("output.pdf", "wb") as pdf_file_handle:
        PDF.dumps(pdf_file_handle, d)

Analogous color schemes use colors that are next to each other on the color wheel. They usually match well and create serene and comfortable designs.
Analogous color schemes are often found in nature and are harmonious and pleasing to the eye.
Make sure you have enough contrast when choosing an analogous color scheme.
Choose one color to dominate, a second to support. The third color is used (along with black, white or gray) as an accent.
from decimal import Decimal

import typing
from borb.pdf.canvas.color.color import HSVColor, HexColor, Color
from borb.pdf.canvas.color.pantone import Pantone
from borb.pdf.canvas.geometry.rectangle import Rectangle
from borb.pdf.canvas.layout.shape.shape import Shape
from borb.pdf.canvas.layout.page_layout.multi_column_layout import SingleColumnLayout
from borb.pdf.canvas.layout.page_layout.page_layout import PageLayout
from borb.pdf.canvas.layout.table.fixed_column_width_table import FixedColumnWidthTable
from borb.pdf.canvas.layout.text.paragraph import Paragraph
from borb.pdf.canvas.line_art.line_art_factory import LineArtFactory
from borb.pdf.document import Document
from borb.pdf.page.page import Page
from borb.pdf.pdf import PDF


def generate_analogous_color_scheme() -> None:

    d: Document = Document()

    p: Page = Page()
    d.append_page(p)

    l: PageLayout = SingleColumnLayout(p)

    cs: typing.List[Color] = HSVColor.analogous(HexColor("f1cd2e"))

    t: FixedColumnWidthTable = FixedColumnWidthTable(
        number_of_rows=4, number_of_columns=3, margin_top=Decimal(12)
    )
    t.add(Paragraph("Color Sample", font="Helvetica-Bold"))
    t.add(Paragraph("Hex code", font="Helvetica-Bold"))
    t.add(Paragraph("Nearest Pantone", font="Helvetica-Bold"))
    for c in cs:
        t.add(
            Shape(
                LineArtFactory.droplet(
                    Rectangle(Decimal(0), Decimal(0), Decimal(32), Decimal(32))
                ),
                stroke_color=c,
                fill_color=c,
            )
        )
        t.add(Paragraph(c.to_rgb().to_hex_string()))
        t.add(Paragraph(Pantone.find_nearest_pantone_color(c).get_name()))
    t.set_padding_on_all_cells(Decimal(5), Decimal(5), Decimal(5), Decimal(5))
    l.add(t)

    # write
    with open("output.pdf", "wb") as pdf_file_handle:
        PDF.dumps(pdf_file_handle, d)

The square color scheme is similar to the rectangle, but with all four colors spaced evenly around the color circle.
The square color scheme works best if you let one color be dominant.
You should also pay attention to the balance between warm and cool colors in your design.
from decimal import Decimal

import typing
from borb.pdf.canvas.color.color import HSVColor, HexColor, Color
from borb.pdf.canvas.color.pantone import Pantone
from borb.pdf.canvas.geometry.rectangle import Rectangle
from borb.pdf.canvas.layout.shape.shape import Shape
from borb.pdf.canvas.layout.page_layout.multi_column_layout import SingleColumnLayout
from borb.pdf.canvas.layout.page_layout.page_layout import PageLayout
from borb.pdf.canvas.layout.table.fixed_column_width_table import FixedColumnWidthTable
from borb.pdf.canvas.layout.text.paragraph import Paragraph
from borb.pdf.canvas.line_art.line_art_factory import LineArtFactory
from borb.pdf.document import Document
from borb.pdf.page.page import Page
from borb.pdf.pdf import PDF


def generate_tetradic_square_color_scheme() -> None:

    d: Document = Document()

    p: Page = Page()
    d.append_page(p)

    l: PageLayout = SingleColumnLayout(p)

    cs: typing.List[Color] = HSVColor.tetradic_square(HexColor("f1cd2e"))

    t: FixedColumnWidthTable = FixedColumnWidthTable(
        number_of_rows=5, number_of_columns=3, margin_top=Decimal(12)
    )
    t.add(Paragraph("Color Sample", font="Helvetica-Bold"))
    t.add(Paragraph("Hex code", font="Helvetica-Bold"))
    t.add(Paragraph("Nearest Pantone", font="Helvetica-Bold"))
    for c in cs:
        t.add(
            Shape(
                LineArtFactory.droplet(
                    Rectangle(Decimal(0), Decimal(0), Decimal(32), Decimal(32))
                ),
                stroke_color=c,
                fill_color=c,
            )
        )
        t.add(Paragraph(c.to_rgb().to_hex_string()))
        t.add(Paragraph(Pantone.find_nearest_pantone_color(c).get_name()))
    t.set_padding_on_all_cells(Decimal(5), Decimal(5), Decimal(5), Decimal(5))
    l.add(t)

    # write
    with open("output.pdf", "wb") as pdf_file_handle:
        PDF.dumps(pdf_file_handle, d)

The rectangle or tetradic color scheme uses four colors arranged into two complementary pairs.
This rich color scheme offers plenty of possibilities for variation.
The tetradic color scheme works best if you let one color be dominant.
You should also pay attention to the balance between warm and cool colors in your design.
from decimal import Decimal

import typing
from borb.pdf.canvas.color.color import HSVColor, HexColor, Color
from borb.pdf.canvas.color.pantone import Pantone
from borb.pdf.canvas.geometry.rectangle import Rectangle
from borb.pdf.canvas.layout.shape.shape import Shape
from borb.pdf.canvas.layout.page_layout.multi_column_layout import SingleColumnLayout
from borb.pdf.canvas.layout.page_layout.page_layout import PageLayout
from borb.pdf.canvas.layout.table.fixed_column_width_table import FixedColumnWidthTable
from borb.pdf.canvas.layout.text.paragraph import Paragraph
from borb.pdf.canvas.line_art.line_art_factory import LineArtFactory
from borb.pdf.document import Document
from borb.pdf.page.page import Page
from borb.pdf.pdf import PDF


def generate_tetradic_rectangle_color_scheme() -> None:

    d: Document = Document()

    p: Page = Page()
    d.append_page(p)

    l: PageLayout = SingleColumnLayout(p)

    cs: typing.List[Color] = HSVColor.tetradic_rectangle(HexColor("f1cd2e"))

    t: FixedColumnWidthTable = FixedColumnWidthTable(
        number_of_rows=5, number_of_columns=3, margin_top=Decimal(12)
    )
    t.add(Paragraph("Color Sample", font="Helvetica-Bold"))
    t.add(Paragraph("Hex code", font="Helvetica-Bold"))
    t.add(Paragraph("Nearest Pantone", font="Helvetica-Bold"))
    for c in cs:
        t.add(
            Shape(
                LineArtFactory.droplet(
                    Rectangle(Decimal(0), Decimal(0), Decimal(32), Decimal(32))
                ),
                stroke_color=c,
                fill_color=c,
            )
        )
        t.add(Paragraph(c.to_rgb().to_hex_string()))
        t.add(Paragraph(Pantone.find_nearest_pantone_color(c).get_name()))
    t.set_padding_on_all_cells(Decimal(5), Decimal(5), Decimal(5), Decimal(5))
    l.add(t)

    # write
    with open("output.pdf", "wb") as pdf_file_handle:
        PDF.dumps(pdf_file_handle, d)
All Color classes (with the exception of HexColor, Pantone and X11Color) are constructed using values 0..1.
This is consistent with the PDF specification, but may be unexpected for those that are used to working with other image-processing software.
e.g. To represent pure red using RGBColor, you would write RGBColor(Decimal(1), Decimal(0), Decimal(0)).
Failing to remember this little convention will often result in some LayoutElement objects being entirely black or white,
although the constructors of the aforementioned Color classes do have asserts to check whether the arguments that are passed do fall in the 0..1 range.
Alignment is the process of determining where (in the available space) a LayoutElement should be positioned.
For any LayoutElement, there are at least 2 kinds of alignment:
horizontal_alignment: determines whether theLayoutElementshould be positionedLEFT,CENTEREDorRIGHTin the available spacevertical alignment: determines whether theLayoutElementshould be positionedTOP,MIDDLEorBOTTOMin the available space
For LayoutElement implementations containing text, you may also set the text_alignment parameter.
In order to get a better idea of the influence of these parameters, you'll be doing things a little differently now.
You'll be adding content at an exact location, and specifying the bounding box. By doing so, you'll get a better understanding of how the alignment influences the position of the Paragraph inside the bounding box.
from decimal import Decimal

from borb.pdf.canvas.geometry.rectangle import Rectangle
from borb.pdf.canvas.layout.text.paragraph import Paragraph
from borb.pdf.document import Document
from borb.pdf.page.page import Page
from borb.pdf.pdf import PDF


def main():
    doc: Document = Document()
    page: Page = Page()
    doc.append_page(page)

    p: Paragraph = Paragraph("Hello World!")

    # the next line of code uses absolute positioning
    r: Rectangle = Rectangle(Decimal(59),               # x: 0 + page_margin
                             Decimal(848 - 84 - 100),   # y: page_height - page_margin - height_of_textbox
                             Decimal(595 - 59 * 2),     # width: page_width - 2 * page_margin
                             Decimal(100))              # height
    p.layout(page, r)

    with open("output.pdf", "wb") as out_file_handle:
        PDF.dumps(out_file_handle, doc)


if __name__ == "__main__":
    main()
Important to notice here is the PDF coordinate system. borb expects these positions in user-space units, and as Decimal objects.
The origin of the PDF coordinate space is typically at the bottom, left of the page. This might be a bit confusing, as you would typically start adding content at the top left.
Now let's explore!
For the next example, you'll be setting the horizontal_alignment parameter to its 3 allowed values, and checking out the differences between the resulting PDFs.
You'll start by trying out Alignment.LEFT
from decimal import Decimal

from borb.pdf.canvas.color.color import X11Color
from borb.pdf.canvas.geometry.rectangle import Rectangle
from borb.pdf.canvas.layout.layout_element import Alignment
from borb.pdf.canvas.layout.text.paragraph import Paragraph
from borb.pdf.document import Document
from borb.pdf.page.page import Page
from borb.pdf.pdf import PDF


def main():
    doc: Document = Document()
    page: Page = Page()
    doc.append_page(page)

    p: Paragraph = Paragraph("Hello World!", horizontal_alignment=Alignment.LEFT)

    # the next line of code uses absolute positioning
    r: Rectangle = Rectangle(Decimal(59),               # x: 0 + page_margin
                             Decimal(848 - 84 - 100),   # y: page_height - page_margin - height_of_textbox
                             Decimal(595 - 59 * 2),     # width: page_width - 2 * page_margin
                             Decimal(100))              # height

    # this is a quick and dirty way to draw a rectangle on the page
    page.append_square_annotation(r, stroke_color=X11Color("Red"))

    # add the paragraph to the page
    p.layout(page, r)

    with open("output.pdf", "wb") as out_file_handle:
        PDF.dumps(out_file_handle, doc)


if __name__ == "__main__":
    main()
Now you can try Alignment.CENTERED
from decimal import Decimal

from borb.pdf.canvas.color.color import X11Color
from borb.pdf.canvas.geometry.rectangle import Rectangle
from borb.pdf.canvas.layout.layout_element import Alignment
from borb.pdf.canvas.layout.text.paragraph import Paragraph
from borb.pdf.document import Document
from borb.pdf.page.page import Page
from borb.pdf.pdf import PDF


def main():
    doc: Document = Document()
    page: Page = Page()
    doc.append_page(page)

    p: Paragraph = Paragraph("Hello World!", horizontal_alignment=Alignment.CENTERED)

    # the next line of code uses absolute positioning
    r: Rectangle = Rectangle(Decimal(59),               # x: 0 + page_margin
                             Decimal(848 - 84 - 100),   # y: page_height - page_margin - height_of_textbox
                             Decimal(595 - 59 * 2),     # width: page_width - 2 * page_margin
                             Decimal(100))              # height

    # this is a quick and dirty way to draw a rectangle on the page
    page.append_square_annotation(r, stroke_color=X11Color("Red"))

    # add the paragraph to the page
    p.layout(page, r)

    with open("output.pdf", "wb") as out_file_handle:
        PDF.dumps(out_file_handle, doc)


if __name__ == "__main__":
    main()
and finally Alignment.RIGHT
from decimal import Decimal

from borb.pdf.canvas.color.color import X11Color
from borb.pdf.canvas.geometry.rectangle import Rectangle
from borb.pdf.canvas.layout.layout_element import Alignment
from borb.pdf.canvas.layout.text.paragraph import Paragraph
from borb.pdf.document import Document
from borb.pdf.page.page import Page
from borb.pdf.pdf import PDF


def main():
    doc: Document = Document()
    page: Page = Page()
    doc.append_page(page)

    p: Paragraph = Paragraph("Hello World!", horizontal_alignment=Alignment.RIGHT)

    # the next line of code uses absolute positioning
    r: Rectangle = Rectangle(Decimal(59),               # x: 0 + page_margin
                             Decimal(848 - 84 - 100),   # y: page_height - page_margin - height_of_textbox
                             Decimal(595 - 59 * 2),     # width: page_width - 2 * page_margin
                             Decimal(100))              # height

    # this is a quick and dirty way to draw a rectangle on the page
    page.append_square_annotation(r, stroke_color=X11Color("Red"))

    # add the paragraph to the page
    p.layout(page, r)

    with open("output.pdf", "wb") as out_file_handle:
        PDF.dumps(out_file_handle, doc)


if __name__ == "__main__":
    main()
You'll also try setting the horizontal_alignment to an invalid value, just to see how borb reacts.
Now you can try the same for vertical_alignment.
In the next example you'll start by setting the vertical_alignment to Alignment.TOP.
To ensure you can see the difference the various alignment settings make, you'll be adding a red rectangle to the page. This should make it clear where and how the paragraph is being laid out.
from decimal import Decimal

from borb.pdf.canvas.color.color import X11Color
from borb.pdf.canvas.geometry.rectangle import Rectangle
from borb.pdf.canvas.layout.layout_element import Alignment
from borb.pdf.canvas.layout.text.paragraph import Paragraph
from borb.pdf.document import Document
from borb.pdf.page.page import Page
from borb.pdf.pdf import PDF


def main():
    doc: Document = Document()
    page: Page = Page()
    doc.append_page(page)

    p: Paragraph = Paragraph("Hello World!", vertical_alignment=Alignment.TOP)

    # the next line of code uses absolute positioning
    r: Rectangle = Rectangle(Decimal(59),               # x: 0 + page_margin
                             Decimal(848 - 84 - 100),   # y: page_height - page_margin - height_of_textbox
                             Decimal(595 - 59 * 2),     # width: page_width - 2 * page_margin
                             Decimal(100))              # height
     # this is a quick and dirty way to draw a rectangle on the page
    page.append_square_annotation(r, stroke_color=X11Color("Red"))

    # add the paragraph to the page
    p.layout(page, r)

    with open("output.pdf", "wb") as out_file_handle:
        PDF.dumps(out_file_handle, doc)


if __name__ == "__main__":
    main()
Now you'll try the same for Alignment.MIDDLE.
from decimal import Decimal

from borb.pdf.canvas.color.color import X11Color
from borb.pdf.canvas.geometry.rectangle import Rectangle
from borb.pdf.canvas.layout.layout_element import Alignment
from borb.pdf.canvas.layout.text.paragraph import Paragraph
from borb.pdf.document import Document
from borb.pdf.page.page import Page
from borb.pdf.pdf import PDF


def main():
    doc: Document = Document()
    page: Page = Page()
    doc.append_page(page)

    p: Paragraph = Paragraph("Hello World!", vertical_alignment=Alignment.MIDDLE)

    # the next line of code uses absolute positioning
    r: Rectangle = Rectangle(Decimal(59),               # x: 0 + page_margin
                             Decimal(848 - 84 - 100),   # y: page_height - page_margin - height_of_textbox
                             Decimal(595 - 59 * 2),     # width: page_width - 2 * page_margin
                             Decimal(100))              # height

    # this is a quick and dirty way to draw a rectangle on the page
    page.append_square_annotation(r, stroke_color=X11Color("Red"))

    # add the paragraph to the page
    p.layout(page, r)

    with open("output.pdf", "wb") as out_file_handle:
        PDF.dumps(out_file_handle, doc)


if __name__ == "__main__":
    main()
And lastly, you can try setting the alignment to Alignment.BOTTOM.
from decimal import Decimal

from borb.pdf.canvas.color.color import X11Color
from borb.pdf.canvas.geometry.rectangle import Rectangle
from borb.pdf.canvas.layout.layout_element import Alignment
from borb.pdf.canvas.layout.text.paragraph import Paragraph
from borb.pdf.document import Document
from borb.pdf.page.page import Page
from borb.pdf.pdf import PDF


def main():
    doc: Document = Document()
    page: Page = Page()
    doc.append_page(page)

    p: Paragraph = Paragraph("Hello World!", vertical_alignment=Alignment.BOTTOM)

    # the next line of code uses absolute positioning
    r: Rectangle = Rectangle(Decimal(59),               # x: 0 + page_margin
                             Decimal(848 - 84 - 100),   # y: page_height - page_margin - height_of_textbox
                             Decimal(595 - 59 * 2),     # width: page_width - 2 * page_margin
                             Decimal(100))              # height

    # this is a quick and dirty way to draw a rectangle on the page
    page.append_square_annotation(r, stroke_color=X11Color("Red"))

    # add the paragraph to the page
    p.layout(page, r)

    with open("output.pdf", "wb") as out_file_handle:
        PDF.dumps(out_file_handle, doc)


if __name__ == "__main__":
    main()
For text_alignment, you can set the same values as horizontal_alignment, with one exception:
Alignment.LEFTAlignment.CENTEREDAlignment.RIGHTAlignment.JUSTIFIED
Alignment.JUSTIFIED is special, it lays out the Paragraph according to the following pseudo-code:
1. split the text into words, call this ws
2. lines_of_text = []
3. for each w in ws:
4.   if the last line of text (lines_of_text[-1]) + w fits in the bounding box:
5.     append w to lines_of_text[-1]
6.   else:
7.     append a new array to lines_of_text, containing only w
8. for each line_of_text in lines_of_text:
9.     calculate the remaining space in the bounding box
10.    divide the remaining space by the amount of space characters, call this delta
11.    for each chunk of text (not space) in line_of_text:
12.       lay out the chunk, keeping track of the x-position
13.       if you encounter a space, update the x-position by adding delta
The last line of the Paragraph is treated as if it was laid out with text_alignment set to Alignment.LEFT.
Enough theory, let's practice!
In the next example, you'll be creating a Paragraph with text_alignment set to Alignment.JUSTIFIED.
from decimal import Decimal

from borb.pdf.canvas.color.color import X11Color
from borb.pdf.canvas.geometry.rectangle import Rectangle
from borb.pdf.canvas.layout.layout_element import Alignment
from borb.pdf.canvas.layout.text.paragraph import Paragraph
from borb.pdf.document import Document
from borb.pdf.page.page import Page
from borb.pdf.pdf import PDF


def main():
    doc: Document = Document()
    page: Page = Page()
    doc.append_page(page)

    p: Paragraph = Paragraph("""
                            Lorem ipsum dolor sit amet, consectetur adipiscing elit, sed do eiusmod tempor incididunt ut labore et dolore magna aliqua.                            Ut enim ad minim veniam, quis nostrud exercitation ullamco laboris nisi ut aliquip ex ea commodo consequat.
                            Duis aute irure dolor in reprehenderit in voluptate velit esse cillum dolore eu fugiat nulla pariatur.
                            Excepteur sint occaecat cupidatat non proident, sunt in culpa qui officia deserunt mollit anim id est laborum.
                            """, text_alignment=Alignment.JUSTIFIED)

    # the next line of code uses absolute positioning
    r: Rectangle = Rectangle(Decimal(59),               # x: 0 + page_margin
                             Decimal(848 - 84 - 100),   # y: page_height - page_margin - height_of_textbox
                             Decimal(595 - 59 * 2),     # width: page_width - 2 * page_margin
                             Decimal(100))              # height

    # this is a quick and dirty way to draw a rectangle on the page
    page.append_square_annotation(r, stroke_color=X11Color("Red"))

    # add the paragraph to the page
    p.layout(page, r)

    with open("output.pdf", "wb") as out_file_handle:
        PDF.dumps(out_file_handle, doc)


if __name__ == "__main__":
    main()
It can be useful to set borders on LayoutElement objects, for borb this is as easy as passing a couple of bool args.
In the next example, you'll explore how to set borders on a Paragraph;
from decimal import Decimal

from borb.pdf.canvas.color.color import X11Color
from borb.pdf.canvas.geometry.rectangle import Rectangle
from borb.pdf.canvas.layout.text.paragraph import Paragraph
from borb.pdf.document import Document
from borb.pdf.page.page import Page
from borb.pdf.pdf import PDF


def main():
    doc: Document = Document()
    page: Page = Page()
    doc.append_page(page)

    p: Paragraph = Paragraph("Hello World!",
                             border_top=True,
                             border_right=True,
                             border_bottom=True,
                             border_color=X11Color("Green"),
                             border_width=Decimal(0.1))

    # the next line of code uses absolute positioning
    r: Rectangle = Rectangle(Decimal(59),               # x: 0 + page_margin
                             Decimal(848 - 84 - 100),   # y: page_height - page_margin - height_of_textbox
                             Decimal(595 - 59 * 2),     # width: page_width - 2 * page_margin
                             Decimal(100))              # height

    # add the paragraph to the page
    p.layout(page, r)

    with open("output.pdf", "wb") as out_file_handle:
        PDF.dumps(out_file_handle, doc)


if __name__ == "__main__":
    main()
I always mix up margin and padding. Personally, I find this illustration rather helpful:
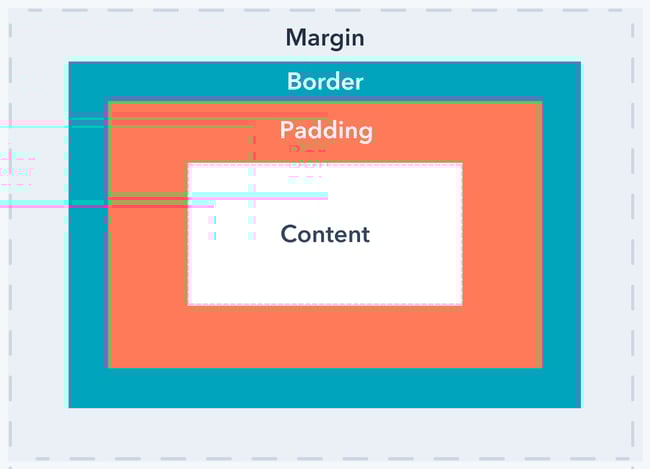
borb allows you to set both margin and padding on LayoutElement instances.
In the next example you'll be doing just that:
from decimal import Decimal

from borb.pdf.canvas.color.color import X11Color
from borb.pdf.canvas.geometry.rectangle import Rectangle
from borb.pdf.canvas.layout.text.paragraph import Paragraph
from borb.pdf.document import Document
from borb.pdf.page.page import Page
from borb.pdf.pdf import PDF


def main():
    doc: Document = Document()
    page: Page = Page()
    doc.append_page(page)

    m: Decimal = Decimal(5)

    p: Paragraph = Paragraph("Hello World!",
                             # margin
                             margin_top=m,
                             margin_left=m,
                             margin_bottom=m,
                             margin_right=m,
                             # padding
                             padding_top=m,
                             padding_left=m,
                             padding_bottom=m,
                             padding_right=m,
                             # border
                             border_top=True,
                             border_right=True,
                             border_bottom=True,
                             border_left=True,
                             border_color=X11Color("Green"),
                             border_width=Decimal(0.1))

    # the next line of code uses absolute positioning
    r: Rectangle = Rectangle(Decimal(59),               # x: 0 + page_margin
                             Decimal(848 - 84 - 100),   # y: page_height - page_margin - height_of_textbox
                             Decimal(595 - 59 * 2),     # width: page_width - 2 * page_margin
                             Decimal(100))              # height

    # add the paragraph to the page
    page.append_square_annotation(r, stroke_color=X11Color("Red"))
    p.layout(page, r)

    with open("output.pdf", "wb") as out_file_handle:
        PDF.dumps(out_file_handle, doc)


if __name__ == "__main__":
    main()
You will have noticed the final PDF does not seem to have any margin on the Paragraph element. This is of course because you explicitly laid out the Paragraph manually. margin is not considered to be part of the element.
After all, think of a browser-based context, where two inline elements have a margin specified. The effective margin that is used will depend on both elements (in fact the horizontal gap between them will typically be the maximum of both their respective margins).
In short, margin is something that needs to be considered at a higher-up level (since it could be a calculation based on multiple LayoutElement instances).
Being able to add images to your PDF is one of the core skills. It can be useful for:
- Adding a logo to an invoice
- Adding a barcode or QR code to a document to link it to a website
- Ensuring the branding and customization of your document is on point
- Etc
borb allows you to create Image objects in a variety of ways:
- By passing a URL (passed as
str) - By passing a
Path - By passing a
PIL.Image
There are convenience classes to enable you to easily add:
- Barcodes
- QR codes
- Charts
- Emoji
In the next example, you'll be adding an Image to a Page, by specifying its URL.
from decimal import Decimal

from borb.pdf.canvas.layout.image.image import Image
from borb.pdf.canvas.layout.page_layout.multi_column_layout import SingleColumnLayout
from borb.pdf.canvas.layout.page_layout.page_layout import PageLayout
from borb.pdf.document import Document
from borb.pdf.page.page import Page
from borb.pdf.pdf import PDF


def main():
    doc: Document = Document()
    page: Page = Page()
    doc.append_page(page)

    layout: PageLayout = SingleColumnLayout(page)
    layout.add(Image("https://images.unsplash.com/photo-1625604029887-45f9c2f7cbc9?ixid=MnwxMjA3fDB8MHxwaG90by1wYWdlfHx8fGVufDB8fHx8",
                     width=Decimal(128),
                     height=Decimal(128)))

    with open("output.pdf", "wb") as out_file_handle:
        PDF.dumps(out_file_handle, doc)


if __name__ == "__main__":
    main()
You'll notice a few things here:
- You used an image from unsplash. I would highly recommend this website for royalty-free photographs.
- You specified the
widthandheightexplicitly. This is needed, sinceImageobjects are not scaled down automatically. This is closely related to laying outImageobjects inTableinstances. Most table-layout algorithms (including the one inborb) calculate the minimum dimensions of each element they contain. IfImageinstances are allowed to be scaled down automatically, their minimum dimensions becomes 0.
You can verify that borb gives you a nice assert if you try to add something that's too large to a Page.
from decimal import Decimal

from borb.pdf.canvas.layout.image.image import Image
from borb.pdf.canvas.layout.page_layout.multi_column_layout import SingleColumnLayout
from borb.pdf.canvas.layout.page_layout.page_layout import PageLayout
from borb.pdf.document import Document
from borb.pdf.page.page import Page
from borb.pdf.pdf import PDF


def main():
    doc: Document = Document()
    page: Page = Page()
    doc.append_page(page)

    layout: PageLayout = SingleColumnLayout(page)
    layout.add(Image("https://images.unsplash.com/photo-1625604029887-45f9c2f7cbc9?ixid=MnwxMjA3fDB8MHxwaG90by1wYWdlfHx8fGVufDB8fHx8"))

    with open("output.pdf", "wb") as out_file_handle:
        PDF.dumps(out_file_handle, doc)


if __name__ == "__main__":
    main()
When you attempt to run this code, you should get the following assert:
AssertionError: Image is too wide to fit inside column / page.
In the next example, you'll insert an Image by using its path (on disk).
from decimal import Decimal
from pathlib import Path

from borb.pdf.canvas.layout.image.image import Image
from borb.pdf.canvas.layout.page_layout.multi_column_layout import SingleColumnLayout
from borb.pdf.canvas.layout.page_layout.page_layout import PageLayout
from borb.pdf.document import Document
from borb.pdf.page.page import Page
from borb.pdf.pdf import PDF


def main():
    doc: Document = Document()
    page: Page = Page()
    doc.append_page(page)

    layout: PageLayout = SingleColumnLayout(page)
    layout.add(Image(Path("my_image.jpg"),
                     width=Decimal(128),
                     height=Decimal(128)))

    with open("output.pdf", "wb") as out_file_handle:
        PDF.dumps(out_file_handle, doc)


if __name__ == "__main__":
    main()
One of the main goals of borb is to put the user first. I would like PDF to become as accessible as other digital document formats (e.g. Microsoft Words).
This goal is reflected in both large and small features in borb. One of these small things is the line-art factory. Rather than forcing the end-user to draw complicated line-art by hand, LineArtFactory contains a ton of methods that enable you to easily draw the most common shapes on the Page.
This is a quick overview (although I would recommend inspecting the code to check out which exact shapes are supported).
- flowchart shapes: decision, process, document, predefined document, multiple documents, data, predefined process, stored data, internal storage, sequential data, direct data, manual input, manual operation, card, paper tape, preparation, loop limit, termination, collate, delay, extract, merge, or, sort, summing junction, database, on page reference, off page reference, process iso9000, transport
- geometric shapes: rectangle, right angled triangle, regular n-gon, isoceles triangle, parallellogram, trapezoid, diamond, pentagon, hexagon, heptagon, octagon, circle, fraction of a circle, half a circle, three quarters of a circle
- stars: four pointed star, five pointed star, six pointed star, n-pointed star
- arrows: arrow left, arrow right, arrow up, arrow down
- misc: droplet, heart, sticky note, cartoon diamond
In the next example, you'll create a PDF with a sticky note shape in it.
from decimal import Decimal

from borb.pdf.canvas.color.color import X11Color
from borb.pdf.canvas.geometry.rectangle import Rectangle
from borb.pdf.canvas.layout.shape.shape import Shape
from borb.pdf.canvas.layout.page_layout.multi_column_layout import SingleColumnLayout
from borb.pdf.canvas.layout.page_layout.page_layout import PageLayout
from borb.pdf.canvas.line_art.line_art_factory import LineArtFactory
from borb.pdf.document import Document
from borb.pdf.page.page import Page
from borb.pdf.pdf import PDF


def main():
    doc: Document = Document()
    page: Page = Page()
    doc.append_page(page)

    layout: PageLayout = SingleColumnLayout(page)

    r: Rectangle = Rectangle(Decimal(0),
                             Decimal(0),
                             Decimal(100),
                             Decimal(100))
    layout.add(Shape(LineArtFactory.sticky_note(r),
                     stroke_color=X11Color("Yellow"),
                     fill_color=X11Color("White"),
                     line_width=Decimal(1)
                     ))

    with open("output.pdf", "wb") as out_file_handle:
        PDF.dumps(out_file_handle, doc)


if __name__ == "__main__":
    main()
The initial bounding box you pass to the LineArtFactory.sticky_note function is only used to determine how wide/tall the `Shape´ should be.
LineArtFactory always returns typing.List[typing.Tuple[Decimal, Decimal]] or, to put it in more legible terms, a list of points (specified by x, y coordinates).
This ensures you can still do things with these points, should you so desire.
A Barcode, or qr-code can really add interactivity to your documents. It ensures you can easily link the printed document to an online resource simply by pointing a smartphone at it.
borb supports a myriad of Barcode types.
In the next example you'll add a Barcode to a Page. In subsequent examples you'll tweak the look and feel of the Barcode (its stroke_color , fill_color as well as its width and height).
In the final example of this section, you'll create and add a QR code to a Page.
In the next example you'll be adding an EAN_14 code to a Page.
The python script is very straightforward:
from decimal import Decimal

from borb.pdf.canvas.layout.image.barcode import Barcode, BarcodeType
from borb.pdf.canvas.layout.page_layout.multi_column_layout import SingleColumnLayout
from borb.pdf.canvas.layout.page_layout.page_layout import PageLayout
from borb.pdf.document import Document
from borb.pdf.page.page import Page
from borb.pdf.pdf import PDF


def main():
    doc: Document = Document()
    page: Page = Page()
    doc.append_page(page)

    layout: PageLayout = SingleColumnLayout(page)
    layout.add(Barcode("1234567896120",
                       width=Decimal(128),
                       height=Decimal(128),
                       type=BarcodeType.EAN_14))

    with open("output.pdf", "wb") as out_file_handle:
        PDF.dumps(out_file_handle, doc)


if __name__ == "__main__":
    main()
Of course, if your company's brand color happens to be something other than black, or you're trying to display a Barcode on a background that's not white, borb has got you covered.
In the next example, you'll be tweaking the stroke_color and fill_color of a Barcode to make sure it pops.
from decimal import Decimal

from borb.pdf.canvas.color.color import HexColor
from borb.pdf.canvas.layout.image.barcode import Barcode, BarcodeType
from borb.pdf.canvas.layout.page_layout.multi_column_layout import SingleColumnLayout
from borb.pdf.canvas.layout.page_layout.page_layout import PageLayout
from borb.pdf.document import Document
from borb.pdf.page.page import Page
from borb.pdf.pdf import PDF


def main():
    doc: Document = Document()
    page: Page = Page()
    doc.append_page(page)

    layout: PageLayout = SingleColumnLayout(page)
    layout.add(Barcode("1234567896120",
                       stroke_color=HexColor("E2C044"),
                       fill_color=HexColor("587B7F"),
                       width=Decimal(128),
                       height=Decimal(128),
                       type=BarcodeType.EAN_14))

    with open("output.pdf", "wb") as out_file_handle:
        PDF.dumps(out_file_handle, doc)


if __name__ == "__main__":
    main()
A QR code (abbreviated from Quick Response code) is a type of matrix barcode (or two-dimensional barcode) invented in 1994 by the Japanese automotive company Denso Wave.
A QR code consists of black squares arranged in a square grid on a white background, which can be read by an imaging device such as a camera, and processed using Reed–Solomon error correction until the image can be appropriately interpreted. The required data is then extracted from patterns that are present in both horizontal and vertical components of the image.
In practice, QR codes often contain data for a locator, identifier, or tracker that points to a website or application.
borb also supports QR-codes.
The code from the previous example doesn't really change that much, other than setting a different type
from decimal import Decimal

from borb.pdf.canvas.layout.image.barcode import Barcode, BarcodeType
from borb.pdf.canvas.layout.page_layout.multi_column_layout import SingleColumnLayout
from borb.pdf.canvas.layout.page_layout.page_layout import PageLayout
from borb.pdf.document import Document
from borb.pdf.page.page import Page
from borb.pdf.pdf import PDF


def main():
    doc: Document = Document()
    page: Page = Page()
    doc.append_page(page)

    layout: PageLayout = SingleColumnLayout(page)
    layout.add(Barcode("1234567896120",
                       width=Decimal(128),
                       height=Decimal(128),
                       type=BarcodeType.QR))

    with open("output.pdf", "wb") as out_file_handle:
        PDF.dumps(out_file_handle, doc)


if __name__ == "__main__":
    main()
borb supports the following barcode formats:
BarcodeType.CODE_128BarcodeType.CODE_39BarcodeType.EANBarcodeType.EAN_13BarcodeType.EAN_14BarcodeType.EAN_8BarcodeType.GS_1BarcodeType.GS_128BarcodeType.GTINBarcodeType.ISBNBarcodeType.ISBN_10BarcodeType.ISBN_13BarcodeType.ISSNBarcodeType.ITFBarcodeType.JANBarcodeType.PZNBarcodeType.QRBarcodeType.UPCBarcodeType.UPC_A
Being able to add Chart objects to a Page can be very useful when creating certain kinds of documents.
Test-reports, or sales/revenue documents can often benefit from being illuminated by charts.
borb supports (almost directly) adding matplotlib charts to a Page.
In the next example you'll create a PDF Document and add a Chart to it.
This example does have some extra dependencies:
pandasnumpymatplotlib
from decimal import Decimal

from borb.pdf.canvas.layout.image.barcode import Barcode, BarcodeType
from borb.pdf.canvas.layout.image.chart import Chart
from borb.pdf.canvas.layout.page_layout.multi_column_layout import SingleColumnLayout
from borb.pdf.canvas.layout.page_layout.page_layout import PageLayout
from borb.pdf.document import Document
from borb.pdf.page.page import Page
from borb.pdf.pdf import PDF

import matplotlib.pyplot as MatPlotLibPlot
import numpy as np
import pandas as pd


def create_plot() -> None:
    # generate dataset
    df = pd.DataFrame(
        {
            "X": range(1, 101),
            "Y": np.random.randn(100) * 15 + range(1, 101),
            "Z": (np.random.randn(100) * 15 + range(1, 101)) * 2,
        }
    )

    # plot
    fig = MatPlotLibPlot.figure()
    ax = fig.add_subplot(111, projection="3d")
    ax.scatter(df["X"], df["Y"], df["Z"], c="skyblue", s=60)
    ax.view_init(30, 185)

    # return
    return MatPlotLibPlot.gcf()


def main():
    doc: Document = Document()
    page: Page = Page()
    doc.append_page(page)

    layout: PageLayout = SingleColumnLayout(page)
    layout.add(Chart(create_plot(),
                     width=Decimal(256),
                     height=Decimal(256)))

    with open("output.pdf", "wb") as out_file_handle:
        PDF.dumps(out_file_handle, doc)


if __name__ == "__main__":
    main()
Emoji are typically a font-related thing, i.e. a font either supports emoji, or it doesn't. As a consequence, you (the end user) may find yourself in a situation where you have a cool font that you'd like to use, but sadly the font doesn't support emoji.
To fix this, borb comes bundled with upwards of 500 emoji.
These can easily be inserted into any Document or Page.
In the next example you'll be using BrowserLayout to make it easy to place Image objects as inline LayoutElement.
Of course, you can achieve the same effect using SingleColumnLayout (or MultiColumnLayout) by adding the Emoji to a HeterogeneousParagraph.
from borb.pdf.canvas.layout.emoji.emoji import Emojis
from borb.pdf.canvas.layout.page_layout.browser_layout import BrowserLayout
from borb.pdf.canvas.layout.text.chunk_of_text import ChunkOfText
from borb.pdf.document import Document
from borb.pdf.page.page import Page
from borb.pdf.pdf import PDF


def main():
    doc: Document = Document()
    page: Page = Page()
    doc.append_page(page)

    layout: BrowserLayout = BrowserLayout(page)
    layout.add(ChunkOfText("Hello"))
    layout.add(Emojis.EARTH_AMERICAS.value)
    layout.add(ChunkOfText("!"))

    with open("output.pdf", "wb") as out_file_handle:
        PDF.dumps(out_file_handle, doc)


if __name__ == "__main__":
    main()
Now that you have a firm grasp on the basic LayoutElement objects, you can start combining them in lists and tables.
Tables especially are almost omnipresent in a corporate setting, so it pays to know the ins and outs of working with Table in borb.
In this section you'll learn:
- How to aggregate the
LayoutElementinstances you've already seen into bigger groups usingListandTable - When to use the different implementations of
List;OrderedList,RomanNumeralOrderedListandUnorderedList - When to use the different implementations of
Table;FlexibleColumnWidthTableandFixedColumnWidthTable - How to use the convenience methods on
TableandListto set properties on all theLayoutElementobjects they contain
There are quite a few deep-dive examples that make use of Table if you're up for the challenge afterwards.
- Creating a realistic invoice
- Creating a Sudoku puzzle
- Creating a tents-and-trees puzzle
- Creating a nonogram
List is the abstract base class that performs the layout of anything resembling a sequence of LayoutElement objects.
Different sub-classes of List can refine this behavior, for instance by adding bullets or numbers in front of each list-item.
In this first list-related example, you'll be creating a list with 3 items. The list will be numbered.
from borb.pdf.canvas.layout.list.ordered_list import OrderedList
from borb.pdf.canvas.layout.page_layout.multi_column_layout import SingleColumnLayout
from borb.pdf.canvas.layout.page_layout.page_layout import PageLayout
from borb.pdf.canvas.layout.text.paragraph import Paragraph
from borb.pdf.document import Document
from borb.pdf.page.page import Page
from borb.pdf.pdf import PDF


def main():
    doc: Document = Document()
    page: Page = Page()
    doc.append_page(page)

    layout: PageLayout = SingleColumnLayout(page)
    layout.add(OrderedList()
               .add(Paragraph("Lorem"))
               .add(Paragraph("Ipsum"))
               .add(Paragraph("Dolor"))
               )

    with open("output.pdf", "wb") as out_file_handle:
        PDF.dumps(out_file_handle, doc)


if __name__ == "__main__":
    main()
Of course, objects inside a List don't all need to look the same.
Try out the next example, where each item in the List has a different color.
from borb.pdf.canvas.color.color import HexColor
from borb.pdf.canvas.layout.list.ordered_list import OrderedList
from borb.pdf.canvas.layout.page_layout.multi_column_layout import SingleColumnLayout
from borb.pdf.canvas.layout.page_layout.page_layout import PageLayout
from borb.pdf.canvas.layout.text.paragraph import Paragraph
from borb.pdf.document import Document
from borb.pdf.page.page import Page
from borb.pdf.pdf import PDF


def main():
    doc: Document = Document()
    page: Page = Page()
    doc.append_page(page)

    layout: PageLayout = SingleColumnLayout(page)
    layout.add(OrderedList()
               .add(Paragraph("Lorem", font_color=HexColor("45CB85")))
               .add(Paragraph("Ipsum", font_color=HexColor("E08DAC")))
               .add(Paragraph("Dolor", font_color=HexColor("6A7FDB")))
               )

    with open("output.pdf", "wb") as out_file_handle:
        PDF.dumps(out_file_handle, doc)


if __name__ == "__main__":
    main()
In fact, the items in a List don't even need to be of the same type.
In the next example you'll create a list containing a Paragraph, Emoji and an Image.
from decimal import Decimal

from borb.pdf.canvas.color.color import HexColor
from borb.pdf.canvas.layout.emoji.emoji import Emojis
from borb.pdf.canvas.layout.image.image import Image
from borb.pdf.canvas.layout.list.ordered_list import OrderedList
from borb.pdf.canvas.layout.page_layout.multi_column_layout import SingleColumnLayout
from borb.pdf.canvas.layout.page_layout.page_layout import PageLayout
from borb.pdf.canvas.layout.text.paragraph import Paragraph
from borb.pdf.document import Document
from borb.pdf.page.page import Page
from borb.pdf.pdf import PDF


def main():
    doc: Document = Document()
    page: Page = Page()
    doc.append_page(page)

    layout: PageLayout = SingleColumnLayout(page)
    layout.add(OrderedList()
               .add(Paragraph("Lorem", font_color=HexColor("45CB85")))
               .add(Image("https://images.unsplash.com/photo-1496637721836-f46d116e6d34?ixid=MnwxMjA3fDB8MHxwaG90by1wYWdlfHx8fGVufDB8fHx8",
                          width=Decimal(64),
                          height=Decimal(64)))
               .add(Emojis.PINEAPPLE.value)
               )

    with open("output.pdf", "wb") as out_file_handle:
        PDF.dumps(out_file_handle, doc)


if __name__ == "__main__":
    main()
borb also supports lists with roman numerals. It works exactly the same as the regular OrderedList.
In the next example you'll be creating a simple Document featuring a RomanNumeralOrderedList:
from borb.pdf.canvas.layout.list.roman_list import RomanNumeralOrderedList
from borb.pdf.canvas.layout.page_layout.multi_column_layout import SingleColumnLayout
from borb.pdf.canvas.layout.page_layout.page_layout import PageLayout
from borb.pdf.canvas.layout.text.paragraph import Paragraph
from borb.pdf.document import Document
from borb.pdf.page.page import Page
from borb.pdf.pdf import PDF


def main():
    doc: Document = Document()
    page: Page = Page()
    doc.append_page(page)

    layout: PageLayout = SingleColumnLayout(page)
    layout.add(RomanNumeralOrderedList()
               .add(Paragraph("Lorem"))
               .add(Paragraph("Ipsum"))
               .add(Paragraph("Dolor"))
               .add(Paragraph("Sit"))
               .add(Paragraph("Amet"))
               )

    with open("output.pdf", "wb") as out_file_handle:
        PDF.dumps(out_file_handle, doc)


if __name__ == "__main__":
    main()
UnorderedList works exactly like OrderedList, the key difference being that in stead of displaying numbers before each list item, bullet-characters are displayed.
from borb.pdf.canvas.layout.list.unordered_list import UnorderedList
from borb.pdf.canvas.layout.page_layout.multi_column_layout import SingleColumnLayout
from borb.pdf.canvas.layout.page_layout.page_layout import PageLayout
from borb.pdf.canvas.layout.text.paragraph import Paragraph
from borb.pdf.document import Document
from borb.pdf.page.page import Page
from borb.pdf.pdf import PDF


def main():
    doc: Document = Document()
    page: Page = Page()
    doc.append_page(page)

    layout: PageLayout = SingleColumnLayout(page)
    layout.add(UnorderedList()
               .add(Paragraph("Lorem"))
               .add(Paragraph("Ipsum"))
               .add(Paragraph("Dolor"))
               .add(Paragraph("Sit"))
               .add(Paragraph("Amet"))
               )

    with open("output.pdf", "wb") as out_file_handle:
        PDF.dumps(out_file_handle, doc)


if __name__ == "__main__":
    main()
Of course, sometimes you'd like to display a List of Lists.
As you already know, the content of a List can be just about anything.
So naturally, borb supports nested Lists.
In the next example you'll be creating a nested unordered list.
from borb.pdf.canvas.layout.list.unordered_list import UnorderedList
from borb.pdf.canvas.layout.page_layout.multi_column_layout import SingleColumnLayout
from borb.pdf.canvas.layout.page_layout.page_layout import PageLayout
from borb.pdf.canvas.layout.text.paragraph import Paragraph
from borb.pdf.document import Document
from borb.pdf.page.page import Page
from borb.pdf.pdf import PDF


def main():
    doc: Document = Document()
    page: Page = Page()
    doc.append_page(page)

    layout: PageLayout = SingleColumnLayout(page)
    layout.add(
        UnorderedList()
        .add(Paragraph("Lorem"))
        .add(Paragraph("Ipsum"))
        .add(
            UnorderedList()
            .add(Paragraph("One"))
            .add(Paragraph("Two"))
            .add(
                UnorderedList()
                .add(Paragraph("1"))
                .add(Paragraph("2"))
                .add(Paragraph("3"))
            )
            .add(Paragraph("Three"))
        )
        .add(Paragraph("Dolor"))
        .add(Paragraph("Sit"))
        .add(Paragraph("Amet"))
    )

    with open("output.pdf", "wb") as out_file_handle:
        PDF.dumps(out_file_handle, doc)


if __name__ == "__main__":
main() 
And now, you may understand why the font Zapfdingbats is required to be embedded. All those wonderful list-bullets are actually characters from the Zapfdingbats font.
Of course, you can do the same for ordered lists as well.
from borb.pdf.canvas.layout.list.ordered_list import OrderedList
from borb.pdf.canvas.layout.page_layout.multi_column_layout import SingleColumnLayout
from borb.pdf.canvas.layout.page_layout.page_layout import PageLayout
from borb.pdf.canvas.layout.text.paragraph import Paragraph
from borb.pdf.document import Document
from borb.pdf.page.page import Page
from borb.pdf.pdf import PDF


def main():
    doc: Document = Document()
    page: Page = Page()
    doc.append_page(page)

    layout: PageLayout = SingleColumnLayout(page)
    layout.add(
        OrderedList()
        .add(Paragraph("Lorem"))
        .add(Paragraph("Ipsum"))
        .add(
            OrderedList()
            .add(Paragraph("One"))
            .add(Paragraph("Two"))
            .add(
                OrderedList()
                .add(Paragraph("1"))
                .add(Paragraph("2"))
                .add(Paragraph("3"))
            )
            .add(Paragraph("Three"))
        )
        .add(Paragraph("Dolor"))
        .add(Paragraph("Sit"))
        .add(Paragraph("Amet"))
    )

    with open("output.pdf", "wb") as out_file_handle:
        PDF.dumps(out_file_handle, doc)


if __name__ == "__main__":
    main()
Finally, you can also mix and match, embedding ordered lists into unordered lists or vice-versa. I'll leave that as an exercise ;-)
Tables offer another opportunity to present data in a format that is easily processed by the reader of your PDF's. You can create tables to represent invoices, itemized bills, forms, Sudoku's and much more.
borb offers two main implementations of the base class Table:
FixedColumnWidthTable: In thisTableall columns have a fixed width, which is (by default) an equal part of whatever container theTableoccupies. E.g. if theTableis placed directly on thePage, and there are 3 columns, each column will have 1/3 of the width of thePage. These ratios can be tweaked of course.FlexibleColumnWidthTable: In this kind ofTablethe width of a column depends on the content the column contains. Unless physically impossible, every column gets at least its minimum width (which requires calculating the minimum width for all content items in all columns). Typically, any remaining space is divided evenly among the columns. ThisTableimplementation is a bit more complex to understand, but yields a layout that resembles the classical HTML layout more closely.
Each Table supports:
- Setting
row_spanandcol_spanon eachTableCell - Setting
border_top,border_right,border_bottomandborder_lefton eachTableCell - Setting
background_coloron eachTableCell - Setting odd/even row-colors
- Convenience methods for setting:
- All outside borders
- All inside borders
padding_top,padding_right,padding_bottomandpadding_lefton allTableCellobjects in theTable- Etc
In the next example, you'll be creating a simple Table with 3 columns and 2 rows.
from borb.pdf.canvas.layout.page_layout.multi_column_layout import SingleColumnLayout
from borb.pdf.canvas.layout.page_layout.page_layout import PageLayout
from borb.pdf.canvas.layout.table.fixed_column_width_table import FixedColumnWidthTable
from borb.pdf.canvas.layout.text.paragraph import Paragraph
from borb.pdf.document import Document
from borb.pdf.page.page import Page
from borb.pdf.pdf import PDF


def main():
    doc: Document = Document()
    page: Page = Page()
    doc.append_page(page)

    layout: PageLayout = SingleColumnLayout(page)
    layout.add(
        FixedColumnWidthTable(number_of_columns=3, number_of_rows=2)
        .add(Paragraph("Lorem"))
        .add(Paragraph("Ipsum"))
        .add(Paragraph("Dolor"))
        .add(Paragraph("Sit"))
        .add(Paragraph("Amet"))
        .add(Paragraph("Consectetur"))
    )

    with open("output.pdf", "wb") as out_file_handle:
        PDF.dumps(out_file_handle, doc)


if __name__ == "__main__":
    main()
This is not exactly the best looking table in the world. Let's add some padding to all cells to ensure the text doesn't stick to the cell borders so much.
from decimal import Decimal

from borb.pdf.canvas.layout.page_layout.multi_column_layout import SingleColumnLayout
from borb.pdf.canvas.layout.page_layout.page_layout import PageLayout
from borb.pdf.canvas.layout.table.fixed_column_width_table import FixedColumnWidthTable
from borb.pdf.canvas.layout.text.paragraph import Paragraph
from borb.pdf.document import Document
from borb.pdf.page.page import Page
from borb.pdf.pdf import PDF


def main():
    doc: Document = Document()
    page: Page = Page()
    doc.append_page(page)

    layout: PageLayout = SingleColumnLayout(page)
    layout.add(
        FixedColumnWidthTable(number_of_columns=3, number_of_rows=2)
        .add(Paragraph("Lorem"))
        .add(Paragraph("Ipsum"))
        .add(Paragraph("Dolor"))
        .add(Paragraph("Sit"))
        .add(Paragraph("Amet"))
        .add(Paragraph("Consectetur"))
        .set_padding_on_all_cells(Decimal(2), Decimal(2), Decimal(2), Decimal(2))
    )

    with open("output.pdf", "wb") as out_file_handle:
        PDF.dumps(out_file_handle, doc)


if __name__ == "__main__":
    main()
That's a lot better already.
As mentioned earlier, the precise ratio of the page_width that each column occupies is something you can configure.
In the next example you'll be setting one column to take up 50% of the page_width,
and divide the remaining space among the other 2.
from decimal import Decimal

from borb.pdf.canvas.layout.page_layout.multi_column_layout import SingleColumnLayout
from borb.pdf.canvas.layout.page_layout.page_layout import PageLayout
from borb.pdf.canvas.layout.table.fixed_column_width_table import FixedColumnWidthTable
from borb.pdf.canvas.layout.text.paragraph import Paragraph
from borb.pdf.document import Document
from borb.pdf.page.page import Page
from borb.pdf.pdf import PDF


def main():
    doc: Document = Document()
    page: Page = Page()
    doc.append_page(page)

    layout: PageLayout = SingleColumnLayout(page)
    layout.add(
        FixedColumnWidthTable(
            number_of_columns=3,
            number_of_rows=2,
            column_widths=[Decimal(2), Decimal(1), Decimal(1)],
        )
        .add(Paragraph("Lorem"))
        .add(Paragraph("Ipsum"))
        .add(Paragraph("Dolor"))
        .add(Paragraph("Sit"))
        .add(Paragraph("Amet"))
        .add(Paragraph("Consectetur"))
        .set_padding_on_all_cells(Decimal(2), Decimal(2), Decimal(2), Decimal(2))
    )

    with open("output.pdf", "wb") as out_file_handle:
        PDF.dumps(out_file_handle, doc)


if __name__ == "__main__":
    main()
There are some other minor tweaks you can apply. To really visualize the next tweak, we should add some more data.
from decimal import Decimal

from borb.pdf.canvas.color.color import X11Color
from borb.pdf.canvas.layout.page_layout.multi_column_layout import SingleColumnLayout
from borb.pdf.canvas.layout.page_layout.page_layout import PageLayout
from borb.pdf.canvas.layout.table.fixed_column_width_table import FixedColumnWidthTable
from borb.pdf.canvas.layout.text.paragraph import Paragraph
from borb.pdf.document import Document
from borb.pdf.page.page import Page
from borb.pdf.pdf import PDF


def main():
    doc: Document = Document()
    page: Page = Page()
    doc.append_page(page)

    layout: PageLayout = SingleColumnLayout(page)
    layout.add(
        FixedColumnWidthTable(number_of_columns=3, number_of_rows=4)
        .add(Paragraph("Lorem"))
        .add(Paragraph("Ipsum"))
        .add(Paragraph("Dolor"))
        .add(Paragraph("Sit"))
        .add(Paragraph("Amet"))
        .add(Paragraph("Consectetur"))
        .add(Paragraph("Adipiscing"))
        .add(Paragraph("Elit"))
        .add(Paragraph("Sed"))
        .add(Paragraph("Do"))
        .add(Paragraph("Eiusmod"))
        .add(Paragraph("Tempor"))
        .set_padding_on_all_cells(Decimal(2), Decimal(2), Decimal(2), Decimal(2))
        .even_odd_row_colors(X11Color("LightGray"), X11Color("White"))
    )

    with open("output.pdf", "wb") as out_file_handle:
        PDF.dumps(out_file_handle, doc)


if __name__ == "__main__":
    main()
In the next example you're going to create a Table similar to the ones you created earlier.
The difference between both kinds of Table will become obvious.
from borb.pdf.canvas.layout.page_layout.multi_column_layout import SingleColumnLayout
from borb.pdf.canvas.layout.page_layout.page_layout import PageLayout
from borb.pdf.canvas.layout.table.flexible_column_width_table import FlexibleColumnWidthTable
from borb.pdf.canvas.layout.text.paragraph import Paragraph
from borb.pdf.document import Document
from borb.pdf.page.page import Page
from borb.pdf.pdf import PDF


def main():
    doc: Document = Document()
    page: Page = Page()
    doc.append_page(page)

    layout: PageLayout = SingleColumnLayout(page)
    layout.add(
        FlexibleColumnWidthTable(number_of_columns=3, number_of_rows=2)
        .add(Paragraph("Lorem"))
        .add(Paragraph("Ipsum"))
        .add(Paragraph("Dolor"))
        .add(Paragraph("Sit"))
        .add(Paragraph("Amet"))
        .add(Paragraph("Consectetur"))
    )

    with open("output.pdf", "wb") as out_file_handle:
        PDF.dumps(out_file_handle, doc)


if __name__ == "__main__":
    main()
Let's set the padding. That'll make this Table look a bit better.
from decimal import Decimal

from borb.pdf.canvas.layout.page_layout.multi_column_layout import SingleColumnLayout
from borb.pdf.canvas.layout.page_layout.page_layout import PageLayout
from borb.pdf.canvas.layout.table.flexible_column_width_table import FlexibleColumnWidthTable
from borb.pdf.canvas.layout.text.paragraph import Paragraph
from borb.pdf.document import Document
from borb.pdf.page.page import Page
from borb.pdf.pdf import PDF


def main():
    doc: Document = Document()
    page: Page = Page()
    doc.append_page(page)

    layout: PageLayout = SingleColumnLayout(page)
    layout.add(
        FlexibleColumnWidthTable(number_of_columns=3, number_of_rows=2)
        .add(Paragraph("Lorem"))
        .add(Paragraph("Ipsum"))
        .add(Paragraph("Dolor"))
        .add(Paragraph("Sit"))
        .add(Paragraph("Amet"))
        .add(Paragraph("Consectetur"))
        .set_padding_on_all_cells(Decimal(2), Decimal(2), Decimal(2), Decimal(2))
    )

    with open("output.pdf", "wb") as out_file_handle:
        PDF.dumps(out_file_handle, doc)


if __name__ == "__main__":
    main()
As you can see, this Table only takes up as much space as is needed to render the content in each TableCell.
This is more in line with the behavior you'd expect from an HTML <table> element.
In the previous examples you've already set some layout properties. You've set padding and applied alternating background colors. Of course, there are use-cases where you'd like to set these properties on individual cell objects.
In order to do that, you'll need to construct a TableCell object and apply the style there. This may feel like a bit of a workaround, but you've already been using this object without knowing it.
Every time you've added anything to a Table that isn't TableCell it was automatically getting wrapped in a TableCell object.
In the next example, you'll be setting the background color of an individual cell to X11Color('Red') and removing two of its borders.
from decimal import Decimal

from borb.pdf.canvas.color.color import X11Color
from borb.pdf.canvas.layout.page_layout.multi_column_layout import SingleColumnLayout
from borb.pdf.canvas.layout.page_layout.page_layout import PageLayout
from borb.pdf.canvas.layout.table.table import TableCell
from borb.pdf.canvas.layout.table.flexible_column_width_table import FlexibleColumnWidthTable
from borb.pdf.canvas.layout.text.paragraph import Paragraph
from borb.pdf.document import Document
from borb.pdf.page.page import Page
from borb.pdf.pdf import PDF


def main():
    doc: Document = Document()
    page: Page = Page()
    doc.append_page(page)

    layout: PageLayout = SingleColumnLayout(page)
    layout.add(
        FlexibleColumnWidthTable(number_of_columns=3, number_of_rows=2)
        .add(TableCell(Paragraph("Lorem"),
                       background_color=X11Color("Red"),
                       border_top=False,
                       border_left=False))
        .add(Paragraph("Ipsum"))
        .add(Paragraph("Dolor"))
        .add(Paragraph("Sit"))
        .add(Paragraph("Amet"))
        .add(Paragraph("Consectetur"))
        .set_padding_on_all_cells(Decimal(2), Decimal(2), Decimal(2), Decimal(2))
    )

    with open("output.pdf", "wb") as out_file_handle:
        PDF.dumps(out_file_handle, doc)


if __name__ == "__main__":
    main()

This is particularly useful when you're building a comparison matrix, and you'd like to remove the TableCell at the top-left corner.
In the next example you'll build a feature-comparison matrix for several mobile tourist guides;
from decimal import Decimal

from borb.pdf.canvas.layout.emoji.emoji import Emojis
from borb.pdf.canvas.layout.layout_element import Alignment
from borb.pdf.canvas.layout.page_layout.multi_column_layout import SingleColumnLayout
from borb.pdf.canvas.layout.page_layout.page_layout import PageLayout
from borb.pdf.canvas.layout.table.table import TableCell
from borb.pdf.canvas.layout.table.flexible_column_width_table import (
    FlexibleColumnWidthTable,
)
from borb.pdf.canvas.layout.text.paragraph import Paragraph
from borb.pdf.document import Document
from borb.pdf.page.page import Page
from borb.pdf.page.page_size import PageSize
from borb.pdf.pdf import PDF


def main():
    doc: Document = Document()
    page: Page = Page(PageSize.A4_LANDSCAPE.value[0], PageSize.A4_LANDSCAPE.value[1])
    doc.append_page(page)

    layout: PageLayout = SingleColumnLayout(page)
    layout.add(
        FlexibleColumnWidthTable(number_of_columns=11, number_of_rows=5)
        # row 1
        .add(
            TableCell(
                Paragraph(" "),
                border_top=False,
                border_left=False,
            )
        )
        .add(Paragraph("View map", text_alignment=Alignment.CENTERED))
        .add(Paragraph("Place marker on a map", text_alignment=Alignment.CENTERED))
        .add(Paragraph("View direction", text_alignment=Alignment.CENTERED))
        .add(Paragraph("Launch Google maps", text_alignment=Alignment.CENTERED))
        .add(Paragraph("Show street view", text_alignment=Alignment.CENTERED))
        .add(Paragraph("Download map from Google", text_alignment=Alignment.CENTERED))
        .add(Paragraph("Show satelite view", text_alignment=Alignment.CENTERED))
        .add(
            Paragraph(
                "Search for nearest attraction", text_alignment=Alignment.CENTERED
            )
        )
        .add(Paragraph("Show next attraction", text_alignment=Alignment.CENTERED))
        .add(Paragraph("Retrieve data", text_alignment=Alignment.CENTERED))
        # row 2
        .add(Paragraph("Mobile Tourist Guide 1"))
        .add(Emojis.HEAVY_CHECK_MARK.value)
        .add(Emojis.HEAVY_CHECK_MARK.value)
        .add(Emojis.HEAVY_CHECK_MARK.value)
        .add(Emojis.HEAVY_CHECK_MARK.value)
        .add(Emojis.HEAVY_CHECK_MARK.value)
        .add(Paragraph(" "))
        .add(Paragraph(" "))
        .add(Paragraph(" "))
        .add(Paragraph(" "))
        .add(Paragraph(" "))
        # row 3
        .add(Paragraph("Mobile Tourist Guide 2"))
        .add(Emojis.HEAVY_CHECK_MARK.value)
        .add(Emojis.HEAVY_CHECK_MARK.value)
        .add(Emojis.HEAVY_CHECK_MARK.value)
        .add(Emojis.HEAVY_CHECK_MARK.value)
        .add(Emojis.HEAVY_CHECK_MARK.value)
        .add(Emojis.HEAVY_CHECK_MARK.value)
        .add(Paragraph(" "))
        .add(Paragraph(" "))
        .add(Paragraph(" "))
        .add(Paragraph(" "))
        # row 4
        .add(Paragraph("Mobile Tourist Guide 3"))
        .add(Emojis.HEAVY_CHECK_MARK.value)
        .add(Emojis.HEAVY_CHECK_MARK.value)
        .add(Emojis.HEAVY_CHECK_MARK.value)
        .add(Emojis.HEAVY_CHECK_MARK.value)
        .add(Emojis.HEAVY_CHECK_MARK.value)
        .add(Paragraph(" "))
        .add(Emojis.HEAVY_CHECK_MARK.value)
        .add(Paragraph(" "))
        .add(Paragraph(" "))
        .add(Paragraph(" "))
        # row 5
        .add(Paragraph("Mobile Tourist Guide 4"))
        .add(Emojis.HEAVY_CHECK_MARK.value)
        .add(Emojis.HEAVY_CHECK_MARK.value)
        .add(Emojis.HEAVY_CHECK_MARK.value)
        .add(Emojis.HEAVY_CHECK_MARK.value)
        .add(Emojis.HEAVY_CHECK_MARK.value)
        .add(Paragraph(" "))
        .add(Paragraph(" "))
        .add(Emojis.HEAVY_CHECK_MARK.value)
        .add(Emojis.HEAVY_CHECK_MARK.value)
        .add(Emojis.HEAVY_CHECK_MARK.value)
        .set_padding_on_all_cells(Decimal(5), Decimal(5), Decimal(5), Decimal(5))
    )

    with open("output.pdf", "wb") as out_file_handle:
        PDF.dumps(out_file_handle, doc)


if __name__ == "__main__":
    main()
Table requires you to specify the number of rows and columns up front. Sometimes however, the amount of data does not really match rows x columns, and the final few cells of your Table are not needed.
In order to avoid having to pass empty TableCell or Paragraph objects, you can rely on the auto-complete feature of the Table implementation.
Whenever a Table does not have rows x columns objects in it, the remaining cells are filled with blank by default. The style (borders, backgrounds, etc) is also copied from the default style.
In the next example you'll create an incomplete Table and watch how the Table is filled by borb.
from decimal import Decimal

from borb.pdf.canvas.layout.page_layout.multi_column_layout import SingleColumnLayout
from borb.pdf.canvas.layout.page_layout.page_layout import PageLayout
from borb.pdf.canvas.layout.table.flexible_column_width_table import FlexibleColumnWidthTable
from borb.pdf.canvas.layout.text.paragraph import Paragraph
from borb.pdf.document import Document
from borb.pdf.page.page import Page
from borb.pdf.pdf import PDF


def main():
    doc: Document = Document()
    page: Page = Page()
    doc.append_page(page)

    layout: PageLayout = SingleColumnLayout(page)
    layout.add(
        FlexibleColumnWidthTable(number_of_columns=3, number_of_rows=2)
        .add(Paragraph("Lorem"))
        .add(Paragraph("Ipsum"))
        .add(Paragraph("Dolor"))
        .add(Paragraph("Sit"))
        .set_padding_on_all_cells(Decimal(2), Decimal(2), Decimal(2), Decimal(2))
    )

    with open("output.pdf", "wb") as out_file_handle:
        PDF.dumps(out_file_handle, doc)


if __name__ == "__main__":
    main()
You'll have noticed that you created a Table that expects 6 pieces of content.
Yet, you added only 4.
The remainder will be dealt with by borb automatically.

Keep in mind the style will be the default style. If that's not what you want, you should add each TableCell individually, or write a convenience method that builds empty cells with the appropriate style.
Sometimes, you'd like to shake things up a bit.
For instance using a TableCell that spans multiple rows or columns.
borb naturally supports concepts such as col_span and row_span
In the next example you'll be using col_span on a TableCell object.
from decimal import Decimal

from borb.pdf.canvas.layout.page_layout.multi_column_layout import SingleColumnLayout
from borb.pdf.canvas.layout.page_layout.page_layout import PageLayout
from borb.pdf.canvas.layout.table.table import TableCell
from borb.pdf.canvas.layout.table.flexible_column_width_table import FlexibleColumnWidthTable
from borb.pdf.canvas.layout.text.paragraph import Paragraph
from borb.pdf.document import Document
from borb.pdf.page.page import Page
from borb.pdf.pdf import PDF


def main():
    doc: Document = Document()
    page: Page = Page()
    doc.append_page(page)

    layout: PageLayout = SingleColumnLayout(page)
    layout.add(
        FlexibleColumnWidthTable(number_of_columns=3, number_of_rows=2)
        .add(Paragraph("Lorem"))
        .add(Paragraph("Ipsum"))
        .add(Paragraph("Dolor"))
        .add(TableCell(Paragraph("Sit"), col_span=2))
        .add(Paragraph("Amet"))
        .set_padding_on_all_cells(Decimal(2), Decimal(2), Decimal(2), Decimal(2))
    )

    with open("output.pdf", "wb") as out_file_handle:
        PDF.dumps(out_file_handle, doc)


if __name__ == "__main__":
    main()
Of course, you can do the same for row_span:
from decimal import Decimal

from borb.pdf.canvas.layout.page_layout.multi_column_layout import SingleColumnLayout
from borb.pdf.canvas.layout.page_layout.page_layout import PageLayout
from borb.pdf.canvas.layout.table.table import TableCell
from borb.pdf.canvas.layout.table.flexible_column_width_table import FlexibleColumnWidthTable
from borb.pdf.canvas.layout.text.paragraph import Paragraph
from borb.pdf.document import Document
from borb.pdf.page.page import Page
from borb.pdf.pdf import PDF


def main():
    doc: Document = Document()
    page: Page = Page()
    doc.append_page(page)

    layout: PageLayout = SingleColumnLayout(page)
    layout.add(
        FlexibleColumnWidthTable(number_of_columns=3, number_of_rows=2)
        .add(TableCell(Paragraph("Lorem"), row_span=2))
        .add(Paragraph("Ipsum"))
        .add(Paragraph("Dolor"))
        .add(Paragraph("Sit"))
        .add(Paragraph("Amet"))
        .set_padding_on_all_cells(Decimal(2), Decimal(2), Decimal(2), Decimal(2))
    )

    with open("output.pdf", "wb") as out_file_handle:
        PDF.dumps(out_file_handle, doc)


if __name__ == "__main__":
    main()
From wikipedia:
XFA (also known as XFA forms) stands for XML Forms Architecture, a family of proprietary XML specifications that was suggested and developed by JetForm to enhance the processing of web forms.
It can be also used in PDF files starting with the PDF 1.5 specification. The XFA specification is referenced as an external specification necessary for full application of the ISO 32000-1 specification (PDF 1.7). The XML Forms Architecture was not standardized as an ISO standard, and has been deprecated in PDF 2.0.
From the PDF specification:
An interactive form (PDF 1.2)—sometimes referred to as an AcroForm—is a collection of fields for gathering information interactively from the user. A PDF document may contain any number of fields appearing on any combination of pages, all of which make up a single, global interactive form spanning the entire document. Arbitrary subsets of these fields can be imported or exported from the document; see 12.7.5, “Form Actions.”
Each field in a document’s interactive form shall be defined by a field dictionary (see 12.7.3, “Field Dictionaries”). For purposes of definition and naming, the fields can be organized hierarchically and can inherit attributes from their ancestors in the field hierarchy.
A field’s children in the hierarchy may also include widget annotations (see 12.5.6.19, “Widget Annotations”) that define its appearance on the page. A field that has children that are fields is called a non-terminal field. A field that does not have children that are fields is called a terminal field.
Interactive forms (see 12.7, “Interactive Forms”) use widget annotations (PDF 1.2) to represent the appearance of fields and to manage user interactions. As a convenience, when a field has only a single associated widget annotation, the contents of the field dictionary (12.7.3, “Field Dictionaries”) and the annotation dictionary may be merged into a single dictionary containing entries that pertain to both a field and an annotation.
borb supports AcroForm technology in a way that is indistinguishable from other LayoutElement implementations.
To the user, the technical side of forms (especially to the level of how the Dictionary objects are structured) is often not that important.
You can add a FormField object to a Page or PageLayout in the same way you'd add a Paragraph and everything will be taken care of.
borb will create the Dictionary objects, add them to the Page, perform all the calculations needed for layout, etc
FormField represents the common base implementation of form fields.
It handles the logic that is common to TextField, CheckBox, DropDownList and other classes.
In the next example you'll be using a Table in conjunction with TextField objects to build a very rudimentary form.
from decimal import Decimal

from borb.pdf.canvas.layout.forms.text_field import TextField
from borb.pdf.canvas.layout.page_layout.multi_column_layout import SingleColumnLayout
from borb.pdf.canvas.layout.page_layout.page_layout import PageLayout
from borb.pdf.canvas.layout.table.fixed_column_width_table import FixedColumnWidthTable
from borb.pdf.canvas.layout.text.paragraph import Paragraph
from borb.pdf.document import Document
from borb.pdf.page.page import Page
from borb.pdf.pdf import PDF


def main():

    # Document
    d: Document = Document()

    # Page
    p: Page = Page()
    d.append_page(p)

    # PageLayout
    l: PageLayout = SingleColumnLayout(p)

    # add fields
    l.add(
        FixedColumnWidthTable(number_of_columns=2, number_of_rows=3)
        .add(Paragraph("Name:"))
        .add(TextField(field_name="name"))
        .add(Paragraph("Firstname:"))
        .add(TextField(field_name="firstname"))
        .add(Paragraph("Country"))
        .add(TextField(field_name="country"))
        .set_padding_on_all_cells(Decimal(2), Decimal(2), Decimal(2), Decimal(2))
        .no_borders()
    )

    # store
    with open("output.pdf", "wb") as pdf_file_handle:
        PDF.dumps(pdf_file_handle, d)


if __name__ == "__main__":
    main()
The output Document should look like this.
Notice the little warning ribbon atop the Document (which may appear differently depending on the PDF reader you are using).

Let's show the forms, and see what you've made:

We can of course fill in values in these textboxes:

And now, when we hide the forms again, the text becomes uneditable:

Your PDF reader may ask you whether you'd like to save the values in the form before closing the Document.
TextField accepts the same arguments as Paragraph when it comes to styling.
For instance, you can also set the font_color.
from decimal import Decimal

from borb.pdf.canvas.color.color import HexColor
from borb.pdf.canvas.layout.forms.text_field import TextField
from borb.pdf.canvas.layout.page_layout.multi_column_layout import SingleColumnLayout
from borb.pdf.canvas.layout.page_layout.page_layout import PageLayout
from borb.pdf.canvas.layout.table.fixed_column_width_table import FixedColumnWidthTable
from borb.pdf.canvas.layout.text.paragraph import Paragraph
from borb.pdf.document import Document
from borb.pdf.page.page import Page
from borb.pdf.pdf import PDF


def main():

    # Document
    d: Document = Document()

    # Page
    p: Page = Page()
    d.append_page(p)

    # PageLayout
    l: PageLayout = SingleColumnLayout(p)

    # add fields
    l.add(
        FixedColumnWidthTable(number_of_columns=2, number_of_rows=3)
        .add(Paragraph("Name:"))
        .add(TextField(field_name="name", font_color=HexColor("f1cd2e")))
        .add(Paragraph("Firstname:"))
        .add(TextField(field_name="firstname", font_color=HexColor("f1cd2e")))
        .add(Paragraph("Country"))
        .add(TextField(field_name="country"))
        .set_padding_on_all_cells(Decimal(2), Decimal(2), Decimal(2), Decimal(2))
        .no_borders()
    )

    # store
    with open("output.pdf", "wb") as pdf_file_handle:
        PDF.dumps(pdf_file_handle, d)


if __name__ == "__main__":
    main()
This does not really have an impact on the form when it's editable:
But it does change the appearance of the form once it's uneditable:

You can of course pre-fill a TextField. This can be quite useful when you already know some of the values,
or when one particular answer occurs most of the time (it might save your reader some time if the most likely answer is pre-filled).
In the next example you'll be updating the code you wrote earlier to generate a simple form, and pre-fill some of its values;
from decimal import Decimal

from borb.pdf.canvas.color.color import HexColor
from borb.pdf.canvas.layout.forms.text_field import TextField
from borb.pdf.canvas.layout.page_layout.multi_column_layout import SingleColumnLayout
from borb.pdf.canvas.layout.page_layout.page_layout import PageLayout
from borb.pdf.canvas.layout.table.fixed_column_width_table import FixedColumnWidthTable
from borb.pdf.canvas.layout.text.paragraph import Paragraph
from borb.pdf.document import Document
from borb.pdf.page.page import Page
from borb.pdf.pdf import PDF


def main():

    # Document
    d: Document = Document()

    # Page
    p: Page = Page()
    d.append_page(p)

    # PageLayout
    l: PageLayout = SingleColumnLayout(p)

    # add fields
    l.add(
        FixedColumnWidthTable(number_of_columns=2, number_of_rows=3)
        .add(Paragraph("Name:"))
        .add(TextField(field_name="name", font_color=HexColor("f1cd2e")))
        .add(Paragraph("Firstname:"))
        .add(TextField(field_name="firstname", font_color=HexColor("f1cd2e")))
        .add(Paragraph("Country"))
        .add(TextField(field_name="country", value="Belgium"))
        .set_padding_on_all_cells(Decimal(2), Decimal(2), Decimal(2), Decimal(2))
        .no_borders()
    )

    # store
    with open("output_form.pdf", "wb") as pdf_file_handle:
        PDF.dumps(pdf_file_handle, d)


if __name__ == "__main__":
    main()
You've seen how to add a TextField, but what if you'd like to restrict the reader to only allow certain inputs.
This is typically where you could also use a DropDownList.
A DropDownList can be constructed with typing.List[str] and will allow the user to select one of the options.
from decimal import Decimal

from borb.pdf.canvas.color.color import HexColor
from borb.pdf.canvas.layout.forms.drop_down_list import DropDownList
from borb.pdf.canvas.layout.forms.text_field import TextField
from borb.pdf.canvas.layout.page_layout.multi_column_layout import SingleColumnLayout
from borb.pdf.canvas.layout.page_layout.page_layout import PageLayout
from borb.pdf.canvas.layout.table.fixed_column_width_table import FixedColumnWidthTable
from borb.pdf.canvas.layout.text.paragraph import Paragraph
from borb.pdf.document import Document
from borb.pdf.page.page import Page
from borb.pdf.pdf import PDF


def main():

    # Document
    d: Document = Document()

    # Page
    p: Page = Page()
    d.append_page(p)

    # PageLayout
    l: PageLayout = SingleColumnLayout(p)

    # add fields
    l.add(
        FixedColumnWidthTable(number_of_columns=2, number_of_rows=3)
        .add(Paragraph("Name:"))
        .add(TextField(field_name="name", font_color=HexColor("f1cd2e")))
        .add(Paragraph("Firstname:"))
        .add(TextField(field_name="firstname", font_color=HexColor("f1cd2e")))
        .add(Paragraph("Country"))
        .add(DropDownList(field_name="country", possible_values=["Belgium", "Canada", "Denmark", "Estonia"]))
        .set_padding_on_all_cells(Decimal(2), Decimal(2), Decimal(2), Decimal(2))
        .no_borders()
    )

    # store
    with open("output_form.pdf", "wb") as pdf_file_handle:
        PDF.dumps(pdf_file_handle, d)


if __name__ == "__main__":
main()It would be rather nonsensical to have every developer that uses borb code up the same DropDownList over and over again.
One of the key usecases of DropDownList is when you're using it to allow the user to select a country from a list of all countries in the world.
borb comes to the resque with its CountryDropDownList, which comes pre-loaded with all the country-names.
from decimal import Decimal

from borb.pdf.canvas.color.color import HexColor
from borb.pdf.canvas.layout.forms.country_drop_down_list import CountryDropDownList
from borb.pdf.canvas.layout.forms.text_field import TextField
from borb.pdf.canvas.layout.page_layout.multi_column_layout import SingleColumnLayout
from borb.pdf.canvas.layout.page_layout.page_layout import PageLayout
from borb.pdf.canvas.layout.table.fixed_column_width_table import FixedColumnWidthTable
from borb.pdf.canvas.layout.text.paragraph import Paragraph
from borb.pdf.document import Document
from borb.pdf.page.page import Page
from borb.pdf.pdf import PDF


def main():

    # Document
    d: Document = Document()

    # Page
    p: Page = Page()
    d.append_page(p)

    # PageLayout
    l: PageLayout = SingleColumnLayout(p)

    # add fields
    l.add(
        FixedColumnWidthTable(number_of_columns=2, number_of_rows=3)
        .add(Paragraph("Name:"))
        .add(TextField(field_name="name", font_color=HexColor("f1cd2e")))
        .add(Paragraph("Firstname:"))
        .add(TextField(field_name="firstname", font_color=HexColor("f1cd2e")))
        .add(Paragraph("Country"))
        .add(CountryDropDownList(field_name="country"))
        .set_padding_on_all_cells(Decimal(2), Decimal(2), Decimal(2), Decimal(2))
        .no_borders()
    )

    # store
    with open("output_form.pdf", "wb") as pdf_file_handle:
        PDF.dumps(pdf_file_handle, d)


if __name__ == "__main__":
main()📣 todo 📣
📣 todo 📣
In this section you'll learn how to retrieve the values that a user filled in from a PDF AcroForm. You'll be using the PDF created earlier. Be sure to open it, fill in some values, and save it in order to get everything ready for this example.
We'll start by creating a PDF with a form in it:
import typing
from decimal import Decimal

from borb.pdf.canvas.color.color import HexColor
from borb.pdf.canvas.layout.forms.country_drop_down_list import CountryDropDownList
from borb.pdf.canvas.layout.forms.text_field import TextField
from borb.pdf.canvas.layout.page_layout.multi_column_layout import SingleColumnLayout
from borb.pdf.canvas.layout.page_layout.page_layout import PageLayout
from borb.pdf.canvas.layout.table.fixed_column_width_table import FixedColumnWidthTable
from borb.pdf.canvas.layout.text.paragraph import Paragraph
from borb.pdf.document import Document
from borb.pdf.page.page import Page
from borb.pdf.pdf import PDF


def build_pdf():

    # Document
    d: Document = Document()

    # Page
    p: Page = Page()
    d.append_page(p)

    # PageLayout
    l: PageLayout = SingleColumnLayout(p)

    # add fields
    l.add(
        FixedColumnWidthTable(number_of_columns=2, number_of_rows=3)
        .add(Paragraph("Name:"))
        .add(TextField(field_name="name", font_color=HexColor("f1cd2e")))
        .add(Paragraph("Firstname:"))
        .add(TextField(field_name="firstname", font_color=HexColor("f1cd2e")))
        .add(Paragraph("Country"))
        .add(CountryDropDownList(field_name="country"))
        .set_padding_on_all_cells(Decimal(2), Decimal(2), Decimal(2), Decimal(2))
        .no_borders()
    )

    # store
    with open("output_form.pdf", "wb") as pdf_file_handle:
        PDF.dumps(pdf_file_handle, d)

def main():
    build_pdf()

if __name__ == "__main__":
    main()
Now we can either set the values in the form by opening the PDF and typing something (make sure to save the PDF when Adobe asks you to do so).
We could also just set the values using borb of course.
Finally, we can get the filled in values in the PDF:
def get_values_from_form():

    # open document
    doc: typing.Optional[Document] = None
    with open("output_form_filled.pdf", "rb") as pdf_file_handle:
        doc = PDF.loads(pdf_file_handle)
    assert doc is not None

    # print all key/value pairs
    for k in ["name", "firstname", "country"]:
        v: str = str(doc.get_page(0).get_form_field_value(k))
        while len(k) < 16:
            k += " "
        print(k + " : " + v)

def main():
    build_pdf()
    set_values()
    get_values_from_form()

if __name__ == "__main__":
    main()
This should print something like:
/usr/bin/python3.8 /home/joris/Code/borb-examples-dev/example/example_053.py
name             : Schellekens
firstname        : Joris
country          : Belgium
of course, the exact values depend on what you filled in (either manually or programmatically).
This is another very common usecase.
You have designed a wonderful PDF, complete with FormField objects (perhaps in another PDF software suite),
and now you'd like to use your work as a template (so to speak) and generate hundreds of Document objects based on this one Document with a form.
I've seen this exact approach used in movie-theaters, where tickets needed to be produced containing seating and movie-information. Or even for a famous circus-act.
In the next example you'll be using an existing PDF (the one you created earlier), and filling in its fields.
Later you'll learn how to remove interactivity by flattening the Document.
def set_values():

    # open document
    doc: typing.Optional[Document] = None
    with open("output_form.pdf", "rb") as pdf_file_handle:
        doc = PDF.loads(pdf_file_handle)
    assert doc is not None

    # set
    doc.get_page(0).set_form_field_value("name", "Schellekens")
    doc.get_page(0).set_form_field_value("firstname", "Joris")
    doc.get_page(0).set_form_field_value("country", "Belgium")

    # store
    with open("output_form_filled.pdf", "wb") as pdf_file_handle:
        PDF.dumps(pdf_file_handle, doc)

def main():
    build_pdf()
    set_values()

if __name__ == "__main__":
main()📣 todo 📣
In this section you've learned the basics of creating a new PDF using borb.
In this section you've learned how various pieces of content are represented by the different LayoutElement implementations in borb.
You've worked with text, images, barcodes, qr-codes, emoji, and geometric shapes.
You've briefly explored classes like; Paragraph, Image, Shape, Emoji, OrderedList, UnorderedList, FlexibleColumnWidthTable and FixedColumnWidthTable.
You've learned how to set various properties like font_color, or background_color
and even used horizontal_alignment , vertical_alignment and text_alignment.
You've briefly explored PageLayout, BrowserLayout and even manual layout.
To see how you can use all of those techniques together, check out some of the deep-dives, where I'll show you how to create an invoice from start to finish.
For some use-cases, you won't be creating the PDF's yourself. Imagine setting up a pipeline that automatically processes PDF invoices. Or even processing order forms.
Most of these workflows can be boiled down to some simple steps that can be handled with borb.
In this section you'll learn the ins and outs of working with existing PDF's.

Suppose you have a PDF document. Did you know it contains meta-information? Try it. Next time you have a PDF open in Adobe, press CTRL+D to open the document properties. You'll find things like:
- Author
- Producer
- Creation date
- Modification date
- Software that created the document
- Etc
It can be very useful to be able to extract these. Processing an invoice for instance might be more accurate if we know "supplier A uses software B to create their invoices, and python script C works best for that" versus "supplier X uses software Y, which is best handled by script Z".
In the next example you'll start by extracting the author from the PDF. This is of course assuming this property was set by whatever software created the PDF.
In order to be able to test these examples and get the same result as the book, I am providing a snippet of code here that will generate a very simple PDF;
from borb.io.read.types import Name, String, Dictionary
from borb.pdf.canvas.layout.page_layout.multi_column_layout import SingleColumnLayout
from borb.pdf.canvas.layout.page_layout.page_layout import PageLayout
from borb.pdf.canvas.layout.text.paragraph import Paragraph
from borb.pdf.document import Document
from borb.pdf.page.page import Page
from borb.pdf.pdf import PDF


def main():
    doc: Document = Document()
    page: Page = Page()
    doc.append_page(page)

    layout: PageLayout = SingleColumnLayout(page)
    layout.add(Paragraph("""
                        Lorem ipsum dolor sit amet, consectetur adipiscing elit, sed do eiusmod tempor incididunt ut labore et dolore magna aliqua.                        Ut enim ad minim veniam, quis nostrud exercitation ullamco laboris nisi ut aliquip ex ea commodo consequat.
                        Duis aute irure dolor in reprehenderit in voluptate velit esse cillum dolore eu fugiat nulla pariatur.
                        Excepteur sint occaecat cupidatat non proident, sunt in culpa qui officia deserunt mollit anim id est laborum.
                        """))

    # set the /Info dictionary
    doc["XRef"]["Trailer"][Name("Info")] = Dictionary()

    # set the /Author
    doc["XRef"]["Trailer"]["Info"][Name("Author")] = String("Joris Schellekens")

    with open("output.pdf", "wb") as out_file_handle:
        PDF.dumps(out_file_handle, doc)


if __name__ == "__main__":
    main()
The PDF doesn't really look all that special when you open it.

But, when you open the properties (the exact shortcut differs depending on which PDF viewer you're using of course), you'll see the meta-data:

Now, let's assume you're getting this PDF (perhaps via email, or some automated process) and you'd like to extract the author from it.
borb allows you to do that in just a few lines of code:
import typing
from borb.pdf.document import Document
from borb.pdf.pdf import PDF


def main():

    doc: typing.Optional[Document] = None
    with open("output.pdf", "rb") as in_file_handle:
        doc = PDF.loads(in_file_handle)

    assert doc is not None
    print(doc.get_document_info().get_author())


if __name__ == "__main__":
    main()
This will print Joris Schellekens to the terminal (in the case of the demo-PDF created by the earlier example of course).
Keep in mind that this property (/Author) is not mandatory.
So the code may simply return (and thus print) None.
This is not a bug, it simply means the /Author property was not explicitly set.
Similarly, you can extract other properties, like the producer. This is typically the name of the piece of software that created the PDF (or last modified the PDF).
This is important. The PDF specification is not always precise or clear-cut. Some PDF software might do things a little differently than others, thus causing potential incompatibility.
You can easily mitigate this by checking the producer property, and separating the problematic files.
import typing
from borb.pdf.document import Document
from borb.pdf.pdf import PDF
from borb.pdf.trailer.document_info import DocumentInfo


def main():

    doc: typing.Optional[Document] = None
    with open("output.pdf", "rb") as in_file_handle:
        doc = PDF.loads(in_file_handle)

    assert doc is not None
    document_info: DocumentInfo = doc.get_document_info()
    print("Producer: %s" % document_info.get_producer())


if __name__ == "__main__":
    main()
Of course, now that you know how to extract the author and the producer,
you can check out the other methods of DocumentInfo and find out even more about any PDF that comes your way.
This is from adobe.com:
Adobe’s Extensible Metadata Platform (XMP) is a file labeling technology that lets you embed metadata into files themselves during the content creation process. With an XMP enabled application, your workgroup can capture meaningful information about a project (such as titles and descriptions, searchable keywords, and up-to-date author and copyright information) in a format that is easily understood by your team as well as by software applications, hardware devices, and even file formats. Best of all, as team members modify files and assets, they can edit and update the metadata in real time during the workflow.>
This next example is similar to the earlier example involving DocumentInfo.
But in stead, we will use XMPDocumentInfo. This class offers even more methods to get information from a PDF Document.
Keep in mind that XMP is not a requirement for a PDF Document to be valid.
So you may find these methods return None when you test them on a Document that does not have embedded XMP data.
import typing
from borb.pdf.document import Document
from borb.pdf.pdf import PDF
from borb.pdf.trailer.document_info import XMPDocumentInfo


def main():
    doc: typing.Optional[Document] = None
    with open("input.pdf", "rb") as in_file_handle:
        doc = PDF.loads(in_file_handle)

    assert doc is not None
    doc_info: XMPDocumentInfo = doc.get_xmp_document_info()
    print(doc_info.get_document_id())


if __name__ == "__main__":
    main()
For the document I tested, this printed:
xmp.id:54e5adca-494c-4c10-983a-daa03cdae65aBeing able to extract text from a PDF is a fundamental skill. In the deep-dive, you'll learn more about PDF syntax, and why text-extraction is a non-trivial thing.
For now, you can start with an easy example where all visible text on the page is extracted.
This extraction process does not take into account any structure that may be present on the page itself.
Hence the name SimpleTextExtraction.
You'll be using the same input PDF as earlier (containing a paragraph of lorem ipsum).
import typing
from borb.pdf.document import Document
from borb.pdf.pdf import PDF
from borb.toolkit.text.simple_text_extraction import SimpleTextExtraction


def main():

    doc: typing.Optional[Document] = None
    l: SimpleTextExtraction = SimpleTextExtraction()
    with open("output.pdf", "rb") as in_file_handle:
        doc = PDF.loads(in_file_handle, [l])

    assert doc is not None
    print(l.get_text_for_page(0))


if __name__ == "__main__":
    main()
Here you've used the alternative method for PDF.loads which takes an array of EventListener objects as its argument.
PDF.loads will open the PDF, and start processing PDF syntax.
Whenever it handles certain commands (rendering text, rendering images, switching to a new page, etc),
it will send out Event objects. These can be handled by the appropriate EventListener implementation.
SimpleTextExtraction is one of those EventListener implementations that listens to:
- The start of a
Page - The end of a
Page - Begin rendering text mode
- Stop rendering text mode
- Render text command(s)
The code above should print out:
Lorem ipsum dolor sit amet, consectetur adipiscing elit, sed do eiusmod tempor incididunt
ut labore et dolore magna aliqua. Ut enim ad minim veniam, quis nostrud exercitation
ullamco laboris nisi ut aliquip ex ea commodo consequat. Duis aute irure dolor in
reprehenderit in voluptate velit esse cillum dolore eu fugiat nulla pariatur. Excepteur sint
occaecat cupidatat non proident, sunt in culpa qui officia deserunt mollit anim id est
laborum.
This is a much more advanced way to extract text from a PDF. By using regular expressions, you can easily look for things like "total amount due" followed by some numbers. And, in doing so, effectively retrieve the useful data from an invoice.
In the next example you'll be doing exactly that. The code is very similar to what you've done earlier.
import typing
from borb.pdf.document import Document
from borb.pdf.pdf import PDF
from borb.toolkit.text.regular_expression_text_extraction import RegularExpressionTextExtraction


def main():

    doc: typing.Optional[Document] = None
    l: RegularExpressionTextExtraction = RegularExpressionTextExtraction("[lL]orem .* [dD]olor")
    with open("output.pdf", "rb") as in_file_handle:
        doc = PDF.loads(in_file_handle, [l])

    assert doc is not None
    for i, m in enumerate(l.get_matches_for_page(0)):
        print("%d %s" % (i, m.group(0)))
        for r in m.get_bounding_boxes():
            print("\t%f %f %f %f" % (r.get_x(), r.get_y(), r.get_width(), r.get_height()))


if __name__ == "__main__":
    main()
Like before, you constructed an implementation of EventListener and passed it to the PDF.loads method.
RegularExpressionTextExtraction takes a regular expression as its single argument.
Once the Document has been parsed, you can retrieve all matches by specifying a page_nr.
Pages are numbered from 0.
You'll get back a typing.List[PDFMatch] which is meant to behave like a re.Match object.
Most of its fields and methods are written to work interchangeably with re.Match.
Of course, because a PDF has a dimensionality to it (content is located on an x/y plane),
there are some extra methods. Such as get_bounding_boxes() which returns a `typing.List[Rectangle]'.
You may be wondering why a single match against a regular expression would return multiple bounding boxes. This happens when content is matched over multiple lines.
In this example however, the output should be:
0 Lorem ipsum dolor
	59.500000 731.316000 99.360000 11.100000
indicating a single match, with text "lorem ipsum dolor",
with bounding box (lower left corner) at [59.5, 731.316] and a width of 99.36 and a height of 11.1.
Another extraction process relies on the rendering of the PDF itself. Perhaps the PDF's you are processing always have some kind of information at a precise location (e.g. an invoice number in the top right corner).
This implementation of EventListener allows you to filter events (i.e. rendering instructions) by providing borb with a bounding box.
In the next example you'll be using the coordinates from the previous example, to build a filter for SimpleTextExtraction.
import typing
from decimal import Decimal

from borb.pdf.canvas.geometry.rectangle import Rectangle
from borb.pdf.document import Document
from borb.pdf.pdf import PDF
from borb.toolkit.location.location_filter import LocationFilter
from borb.toolkit.text.simple_text_extraction import SimpleTextExtraction


def main():

    doc: typing.Optional[Document] = None
    l0: SimpleTextExtraction = SimpleTextExtraction()

    r: Rectangle = Rectangle(Decimal(59),
                             Decimal(731),
                             Decimal(99),
                             Decimal(11))

    l1: LocationFilter = LocationFilter(r)
    l1.add_listener(l0)

    with open("output.pdf", "rb") as in_file_handle:
        doc = PDF.loads(in_file_handle, [l1])

    assert doc is not None
    print(l0.get_text_for_page(0))


if __name__ == "__main__":
    main()
This snippet should print:
Lorem ipsum dolor
Of course, borb is designed to be a library,
so the idea of being able to strap together your own tools using the toolkit is very important to me.
In the next example you'll be combining a regular expression expression extraction technique with a bounding box.
First you'll be looking for the precise location of the text "nisi ut aliquip". Once you have matched this regular expression, you also have its location on the page.
Then you can extend this box, knowing the text you'd really like to extract will be on the right of that piece of text.
import typing
from decimal import Decimal

from borb.pdf.canvas.geometry.rectangle import Rectangle
from borb.pdf.document import Document
from borb.pdf.pdf import PDF
from borb.toolkit.location.location_filter import LocationFilter
from borb.toolkit.text.regular_expression_text_extraction import RegularExpressionTextExtraction, PDFMatch
from borb.toolkit.text.simple_text_extraction import SimpleTextExtraction


def main():

    # 1. set up RegularExpressionTextExtraction
    l0: RegularExpressionTextExtraction = RegularExpressionTextExtraction("[nN]isi .* aliquip")

    # 2. process Document
    doc: typing.Optional[Document] = None
    with open("output.pdf", "rb") as in_file_handle:
        doc = PDF.loads(in_file_handle, [l0])
    assert doc is not None

    # 3. find match
    m: typing.Optional[PDFMatch] = next(iter(l0.get_matches_for_page(0)), None)
    assert m is not None

    # 4. get page width
    w: Decimal = doc.get_page(0).get_page_info().get_width()

    # 5. change rectangle to get more text
    r0: Rectangle = m.get_bounding_boxes()[0]
    r1: Rectangle = Rectangle(r0.get_x() + r0.get_width(),
                              r0.get_y(),
                              w - r0.get_x(),
                              r0.get_height())

    # 6. process document (again) filtering by rectangle
    l1: LocationFilter = LocationFilter(r1)
    l2: SimpleTextExtraction = SimpleTextExtraction()
    l1.add_listener(l2)
    doc: typing.Optional[Document] = None
    with open("output.pdf", "rb") as in_file_handle:
        doc = PDF.loads(in_file_handle, [l1])
    assert doc is not None

    # 7. print text
    print(l2.get_text_for_page(0))


if __name__ == "__main__":
    main()
This example is a lot to take in.
Try it out, read through it carefully.
It's important to understand these basic concepts in borb to really get the most out of it.
This example starts out similar to the earlier example "Extracting text using regular expressions",
it uses the returned PDFMatch to determine the location of the text.
With this location it processes the Document again, filtering a modified bounding box.
This example prints:
ex ea commodo conse uat. Duis aute irure dolor in
This example might seem contrived, but there are definitely use-cases where this exact behavior comes in handy.
Imagine processing a Document, looking for "amount due",
and then modifying the bounding box to retrieve the amount and currency that is typically next to it.
The same strategy can be used to extract addresses from invoices, or anything similar really.
From wikipedia:
In information retrieval, tf–idf, TF*IDF, or TFIDF, short for term frequency–inverse document frequency, is a numerical statistic that is intended to reflect how important a word is to a document in a collection or corpus. It is often used as a weighting factor in searches of information retrieval, text mining, and user modeling. The tf–idf value increases proportionally to the number of times a word appears in the document and is offset by the number of documents in the corpus that contain the word, which helps to adjust for the fact that some words appear more frequently in general. tf–idf is one of the most popular term-weighting schemes today.
From wikipedia:
Suppose we have a set of English text documents and wish to rank them by which document is more relevant to the query, "the brown cow". A simple way to start out is by eliminating documents that do not contain all three words "the", "brown", and "cow", but this still leaves many documents. To further distinguish them, we might count the number of times each term occurs in each document; the number of times a term occurs in a document is called its term frequency. However, in the case where the length of documents varies greatly, adjustments are often made (see definition below).
From wikipedia:
Because the term "the" is so common, term frequency will tend to incorrectly emphasize documents which happen to use the word "the" more frequently, without giving enough weight to the more meaningful terms "brown" and "cow". The term "the" is not a good keyword to distinguish relevant and non-relevant documents and terms, unlike the less-common words "brown" and "cow". Hence, an inverse document frequency factor is incorporated which diminishes the weight of terms that occur very frequently in the document set and increases the weight of terms that occur rarely.
Let's start by creating a Document with a few Paragraph objects in it.
Since you'll be eliminating stop words (which are language-dependent), this Document needs to contain sensible English text.
You'll be creating a Document containing information about "Lorem Ipsum".
This should produce a Document like this:
Now you can unleash `` on the Document you made;
This outputs:
This is perhaps a bit more of a tangent, but I can imagine it may be useful. In this particular example you'll be extracting color-information from a PDF.
Given the previous examples, you can easily adapt this technique to build a filter (similar to the location-based filter).
By doing so, you unlock the possibility of processing a PDF by saying "look for text in the color red" or "look for text in the top right corner, in blue".
In this example, you'll be using ColorSpectrumExtraction to retrieve all the colors on the Page. This is a stepping stone to building bigger and better things. Although in and of itself this can already be useful to determine color-blindness compatibility of a given Document.
In the deep-dive, you'll learn the ins and outs of implementing your own EventListener.
To start this example, you'll be creating a PDF containing multiple colors. You'll be adding 3 Paragraph objects (red, green, blue) and one Image.
from decimal import Decimal

from borb.pdf.canvas.color.color import HexColor
from borb.pdf.canvas.layout.image.image import Image
from borb.pdf.canvas.layout.page_layout.multi_column_layout import SingleColumnLayout
from borb.pdf.canvas.layout.page_layout.page_layout import PageLayout
from borb.pdf.canvas.layout.text.paragraph import Paragraph
from borb.pdf.document import Document
from borb.pdf.page.page import Page
from borb.pdf.pdf import PDF

def main():

    doc: Document = Document()
    page: Page = Page()
    doc.append_page(page)

    layout: PageLayout = SingleColumnLayout(page)

    # the following code adds 3 paragraphs, each in a different color
    layout.add(Paragraph("Hello World!", font_color=HexColor("FF0000")))
    layout.add(Paragraph("Hello World!", font_color=HexColor("00FF00")))
    layout.add(Paragraph("Hello World!", font_color=HexColor("0000FF")))

    # the following code adds 1 image
    layout.add(Image("https://images.unsplash.com/photo-1589606663923-283bbd309229?ixid=MnwxMjA3fDB8MHxwaG90by1wYWdlfHx8fGVufDB8fHx8",
                     width=Decimal(256),
                     height=Decimal(256)))

    with open("output.pdf", "wb") as out_file_handle:
        PDF.dumps(out_file_handle, doc)

if __name__ == "__main__":
    main()
This Document will serve as the input for the extraction example.
Rather than printing the result of the extraction to the command-line, you'll create an output-pdf. I think it's a lot more visual to actually see the colors that were extracted, rather than having their RGB values printed out on the console.
from decimal import Decimal

import typing
from borb.pdf.canvas.color.color import RGBColor
from borb.pdf.canvas.geometry.rectangle import Rectangle
from borb.pdf.canvas.layout.shape.shape import Shape
from borb.pdf.canvas.layout.layout_element import Alignment
from borb.pdf.canvas.layout.page_layout.multi_column_layout import SingleColumnLayout
from borb.pdf.canvas.layout.page_layout.page_layout import PageLayout
from borb.pdf.canvas.layout.table.flexible_column_width_table import FlexibleColumnWidthTable
from borb.pdf.canvas.layout.text.paragraph import Paragraph
from borb.pdf.canvas.line_art.line_art_factory import LineArtFactory
from borb.pdf.document import Document
from borb.pdf.page.page import Page
from borb.pdf.pdf import PDF
from borb.toolkit.color.color_spectrum_extraction import ColorSpectrumExtraction


def main():

    doc: typing.Optional[Document] = None
    l: ColorSpectrumExtraction = ColorSpectrumExtraction()
    with open("output.pdf", "rb") as pdf_file_handle:
        doc = PDF.loads(pdf_file_handle, [l])

    # extract colors
    colors: typing.List[typing.Tuple[RGBColor, Decimal]] = l.get_colors_per_page(0)
    colors = colors[0:32]

    # create output Document
    doc_out: Document = Document()

    # add Page
    p: Page = Page()
    doc_out.append_page(p)

    # add PageLayout
    l: PageLayout = SingleColumnLayout(p)

    # add Paragraph
    l.add(Paragraph("These are the colors used in the input PDF:"))

    # add Table
    t: FlexibleColumnWidthTable = FlexibleColumnWidthTable(number_of_rows=8,
                                                           number_of_columns=4,
                                                           horizontal_alignment=Alignment.CENTERED)
    for c in colors:
        t.add(Shape(LineArtFactory.droplet(Rectangle(Decimal(0),
                                                     Decimal(0),
                                                     Decimal(32),
                                                     Decimal(32))), stroke_color=c[0], fill_color=c[0]))
    t.set_padding_on_all_cells(Decimal(5),
                               Decimal(5),
                               Decimal(5),
                               Decimal(5))
    l.add(t)

    # write
    with open("output.pdf","wb") as pdf_file_handle:
        PDF.dumps(pdf_file_handle, doc_out)

if __name__ == "__main__":
    main()
In this example you'll be extracting font-names from an existing PDF. This may be useful (in later examples) to handle situations in which you know a certain snippet of information is always written in a particular font.
You'll start by creating a PDF with several fonts;
from decimal import Decimal

import typing
from borb.pdf.canvas.color.color import RGBColor
from borb.pdf.canvas.geometry.rectangle import Rectangle
from borb.pdf.canvas.layout.shape.shape import Shape
from borb.pdf.canvas.layout.layout_element import Alignment
from borb.pdf.canvas.layout.page_layout.multi_column_layout import SingleColumnLayout
from borb.pdf.canvas.layout.page_layout.page_layout import PageLayout
from borb.pdf.canvas.layout.table.flexible_column_width_table import FlexibleColumnWidthTable
from borb.pdf.canvas.layout.text.paragraph import Paragraph
from borb.pdf.canvas.line_art.line_art_factory import LineArtFactory
from borb.pdf.document import Document
from borb.pdf.page.page import Page
from borb.pdf.pdf import PDF
from borb.toolkit.color.color_spectrum_extraction import ColorSpectrumExtraction
from borb.toolkit.text.font_extraction import FontExtraction


def create_document():

    # create Document
    doc: Document = Document()

    # create Page
    page: Page = Page()
    doc.append_page(page)

    # create PageLayout
    layout: PageLayout = SingleColumnLayout(page)

    # add Paragraph for each font (name)
    for font_name in ["Helvetica", "Helvetica-Bold", "Courier"]:
        layout.add(Paragraph("Hello World!", font=font_name))

    # write
    with open("output.pdf","wb") as pdf_file_handle:
        PDF.dumps(pdf_file_handle, doc)


if __name__ == "__main__":
    create_document()
And now you can process that PDF and retrieve the fonts;
def extract_fonts():

    doc: typing.Optional[Document] = None
    l: FontExtraction = FontExtraction()
    with open("output.pdf", "rb") as pdf_file_handle:
        doc = PDF.loads(pdf_file_handle, [l])

    assert doc is not None

    print(l.get_font_names_per_page(0))


if __name__ == "__main__":
    create_document()
    extract_fonts()
This prints:
['Helvetica', 'Helvetica-Bold', 'Courier']
You can of course go looking at the code for FontExtraction (I highly encourage you to do so).
This should enable you to write your own filter (similar to LocationFilter) to filter on fonts.
In this example you'll be using FontNameFilter to retrieve all text on a Page that was written in Courier.
First things first though, let's create an example PDF with text in different fonts;
import typing
from borb.pdf.canvas.layout.page_layout.multi_column_layout import SingleColumnLayout
from borb.pdf.canvas.layout.page_layout.page_layout import PageLayout
from borb.pdf.canvas.layout.text.paragraph import Paragraph
from borb.pdf.document import Document
from borb.pdf.page.page import Page
from borb.pdf.pdf import PDF
from borb.toolkit.text.simple_text_extraction import SimpleTextExtraction


def create_document():

    # create Document
    doc: Document = Document()

    # create Page
    page: Page = Page()
    doc.append_page(page)

    # create PageLayout
    layout: PageLayout = SingleColumnLayout(page)

    # add Paragraph for each font (name)
    for font_name in ["Helvetica", "Helvetica-Bold", "Courier"]:
        layout.add(Paragraph("Hello World, from %s!" % font_name, font=font_name))

    # write
    with open("output.pdf", "wb") as pdf_file_handle:
        PDF.dumps(pdf_file_handle, doc)
This generates the following PDF:

Now we can run the code to filter on font_name:
def extract_courier_text():

    doc: typing.Optional[Document] = None
    l0: FontNameFilter = FontNameFilter("Courier")
    l1: SimpleTextExtraction = SimpleTextExtraction()
    l0.add_listener(l1)
    with open("output.pdf", "rb") as pdf_file_handle:
        doc = PDF.loads(pdf_file_handle, [l0])

    assert doc is not None

    print(l1.get_text_for_page(0))


def main():
    create_document()
    extract_courier_text()


if __name__ == "__main__":
    main()
This should print:
Hello World, from Courier!
Being able to filter by font_color allows you to extract text in a much more fine-grained way.
You could filter out only the red text from an invoice,
or combine this particular filter with other filter implementations and do even crazier things.
This implementation of EventListener takes 2 arguments at construction:
color: TheColoryou'd like to keepmaximum_normalized_rgb_distance: This is the maximum allowable distance between theColorin the PDF and thecolorparameter. This allows you to filter on "everything that looks kinda red" rather than "everything that is this exact shade of red".
The distance is defined as ((r0 - r1)² - (g0 - g1)² + (b0 - b1)²) / 3, with r, g, b being the red, green, blue components of theColor.
import typing
from decimal import Decimal

from borb.pdf.canvas.color.color import X11Color
from borb.toolkit.text.font_color_filter import FontColorFilter
from borb.pdf.canvas.layout.page_layout.multi_column_layout import SingleColumnLayout
from borb.pdf.canvas.layout.page_layout.page_layout import PageLayout
from borb.pdf.canvas.layout.text.paragraph import Paragraph
from borb.pdf.document import Document
from borb.pdf.page.page import Page
from borb.pdf.pdf import PDF
from borb.toolkit.text.simple_text_extraction import SimpleTextExtraction


def create_document():

    # create Document
    doc: Document = Document()

    # create Page
    page: Page = Page()
    doc.append_page(page)

    # create PageLayout
    layout: PageLayout = SingleColumnLayout(page)

    # add Paragraph for each font (name)
    for font_color in [X11Color("Red"), X11Color("Green"), X11Color("Blue")]:
        layout.add(Paragraph("Hello World, in %s!" % font_color.get_name(),
                             font_color=font_color))

    # write
    with open("output.pdf", "wb") as pdf_file_handle:
        PDF.dumps(pdf_file_handle, doc)
This generates the following PDF:

Now we can filter the text in the PDF by selecting the red letters:
def extract_red_text():

    doc: typing.Optional[Document] = None
    l0: FontColorFilter = FontColorFilter(X11Color("Red"), Decimal(0.01))
    l1: SimpleTextExtraction = SimpleTextExtraction()
    l0.add_listener(l1)
    with open("output.pdf", "rb") as pdf_file_handle:
        doc = PDF.loads(pdf_file_handle, [l0])

    assert doc is not None

    print(l1.get_text_for_page(0))


def main():
    create_document()
    extract_red_text()


if __name__ == "__main__":
    main()
This should print:
Hello World, in Red!
In this example you'll be extracting images from an existing PDF. Keep in mind the images may be subject to copyright, they may not have been intended for you to be able to extract them.
To get started, let's briefly re-iterate one of the earlier examples about inserting an Image object in a PDF.
from decimal import Decimal

import typing
from borb.pdf.canvas.layout.image.image import Image
from borb.pdf.canvas.layout.page_layout.multi_column_layout import SingleColumnLayout
from borb.pdf.canvas.layout.page_layout.page_layout import PageLayout
from borb.pdf.document import Document
from borb.pdf.page.page import Page
from borb.pdf.pdf import PDF

def main():

    doc: Document = Document()
    page: Page = Page()
    doc.append_page(page)

    layout: PageLayout = SingleColumnLayout(page)

    image_urls: typing.List[str] = ["https://images.unsplash.com/photo-1589606663923-283bbd309229?ixid=MnwxMjA3fDB8MHxwaG90by1wYWdlfHx8fGVufDB8fHx8",
                                    "https://images.unsplash.com/photo-1496637721836-f46d116e6d34?ixid=MnwxMjA3fDB8MHxwaG90by1wYWdlfHx8fGVufDB8fHx8",
                                    "https://images.unsplash.com/photo-1611873101970-dfa544c23494?ixid=MnwxMjA3fDB8MHxwaG90by1wYWdlfHx8fGVufDB8fHx8"
                                    ]

    # the following code adds each image
    for image_url in image_urls:
        layout.add(Image(image_url,
                         width=Decimal(128),
                         height=Decimal(128)))

    with open("output.pdf", "wb") as out_file_handle:
        PDF.dumps(out_file_handle, doc)


if __name__ == "__main__":
    main()
Now that you have an input Document, let's go ahead and extract the Image from it.
import typing
from borb.pdf.document import Document
from borb.pdf.pdf import PDF
from borb.toolkit.image.simple_image_extraction import SimpleImageExtraction


def main():

    doc: typing.Optional[Document] = None
    l: SimpleImageExtraction = SimpleImageExtraction()
    with open("output.pdf", "rb") as pdf_file_handle:
        doc = PDF.loads(pdf_file_handle, [l])

    assert doc is not None
    for img in l.get_images_per_page(0):
        print(img)


if __name__ == "__main__":
    main()
This should print:
<PIL.JpegImagePlugin.JpegImageFile image mode=RGB size=2000x3000 at 0x7F3BE45E5C40>
<PIL.JpegImagePlugin.JpegImageFile image mode=RGB size=4000x6000 at 0x7F3BE43FB760>
<PIL.JpegImagePlugin.JpegImageFile image mode=RGB size=2640x3300 at 0x7F3BE441B580>
What's interesting is that even though you inserted the Image objects and specified a particular size, the extracted Image is actually a lot larger.
This is because PDF simply has its own way of dealing with resizing images.
And there are use-cases where you might actually want this behavior.
You could embed a tiny example of an Image in a Document,
knowing the recipient can extract the full (much richer) Image.
Of course, if you're using this Image as a company logo,
or part of the header/footer of the Document,
you typically want the image to be as small as possible (while remaining legible).
In one of the upcoming examples you'll see how to subsample an Image in a PDF,
and you'll see firsthand how this technique can help reduce your document's memory footprint.
In this example you'll be modifying the images in a PDF. You'll be using the PDF you created earlier (with 3 pineapple images) as a starting point.
First you'll be exploring the PDF, using the JSON-like structure borb has created.
import typing
from borb.pdf.document import Document
from borb.pdf.pdf import PDF

def main():

    doc: typing.Optional[Document] = None
    with open("output.pdf", "rb") as pdf_file_handle:
        doc = PDF.loads(pdf_file_handle)

    assert doc is not None

    for k, v in doc.get_page(0)["Resources"]["XObject"].items():
        print("%s\t%s" % (k, str(v)))


if __name__ == "__main__":
    main()
This code prints:
Im1	<PIL.JpegImagePlugin.JpegImageFile image mode=RGB size=2000x3000 at 0x7F74380D0490>
Im2	<PIL.JpegImagePlugin.JpegImageFile image mode=RGB size=4000x6000 at 0x7F7437F1B970>
Im3	<PIL.JpegImagePlugin.JpegImageFile image mode=RGB size=2640x3300 at 0x7F74367D56D0>
This example shows us that the PDF has stored the Image objects in the Page under Resources\XObject\Im1 (and Im2, Im3 respectively).
You can now modify these and store the Document.
First, you'll write this simple function to convert an Image to its sepia counterpart.
"sepia" is just a fancy way of saying "old timey brown pictures".
from PIL import Image as PILImage

def modify_image(image: PILImage.Image):
    w = image.width
    h = image.height
    pixels = image.load()
    for i in range(0, w):
        for j in range(0, h):
            r, g, b = pixels[i, j]

            # convert to sepia
            new_r = r * 0.393 + g * 0.769 + b * 0.189
            new_g = r * 0.349 + g * 0.686 + b * 0.168
            new_b = r * 0.272 + g * 0.534 + b * 0.131

            # set
            pixels[i, j] = (int(new_r), int(new_g), int(new_b))
With that taken care of, you can now modify the Image objects inside the PDF:
import typing
from borb.pdf.document import Document
from borb.pdf.pdf import PDF
from PIL import Image as PILImage


def modify_image(image: PILImage.Image):
    w = image.width
    h = image.height
    pixels = image.load()
    for i in range(0, w):
        for j in range(0, h):
            r, g, b = pixels[i, j]

            # convert to sepia
            new_r = r * 0.393 + g * 0.769 + b * 0.189
            new_g = r * 0.349 + g * 0.686 + b * 0.168
            new_b = r * 0.272 + g * 0.534 + b * 0.131

            # set
            pixels[i, j] = (int(new_r), int(new_g), int(new_b))


def main():

    doc: typing.Optional[Document] = None
    with open("output.pdf", "rb") as pdf_file_handle:
        doc = PDF.loads(pdf_file_handle)

    assert doc is not None

    # modify each image
    for k, v in doc.get_page(0)["Resources"]["XObject"].items():
        print("%s\t%s" % (k, str(v)))
        modify_image(v)

    # store PDF
    with open("output.pdf", "wb") as out_file_handle:
        PDF.dumps(out_file_handle, doc)


if __name__ == "__main__":
    main()
The result should look like this:

As you've found out in a previous example, sometimes the dimensions at which an Image is displayed are not the same as the dimensions at which it was stored.
This can lead to a rather bulky PDF, if each Image is substantially larger than its display-dimensions.
In the next example, you'll be fixing that.
Luckily borb comes with ImageFormatOptimization which does all the heavy lifting for you.
As a benchmark, you can first have a look at the file-characteristics of the original input PDF.

You can see the file is roughly 5Mb large.
Now you can use the following code to optimize the Image dimensions:
import typing
from borb.pdf.document import Document
from borb.pdf.pdf import PDF
from borb.toolkit.image.image_format_optimization import ImageFormatOptimization


def main():

    doc: typing.Optional[Document] = None
    l: ImageFormatOptimization = ImageFormatOptimization()
    with open("output.pdf", "rb") as pdf_file_handle:
        doc = PDF.loads(pdf_file_handle, [l])

    assert doc is not None

    # store PDF
    with open("output.pdf", "wb") as out_file_handle:
        PDF.dumps(out_file_handle, doc)


if __name__ == "__main__":
    main()
When you check out the file-stats on the output-file, the difference is astonishing:

You'll see that the output file looks the same, although there may have been some quality loss in the images.

PDF is more than just a digital paper-replacement. PDF also has some features that go beyond "imitating paper". For instance PDF allows you embed one or multiple files inside the document. By doing so, you can provide extra resources for whoever reads the document.
In one particular use-case, a german invoicing standard (ZUGFeRD) requires the creator of the invoice to embed an XML representation of the invoice, to ensure the document can be processed automatically.
In this section you'll handle both extraction of embedded files, and appending embedded files to a Document.
In this example, you'll be creating a Document containing one Paragraph, and embed a json-file.
from borb.pdf.canvas.layout.page_layout.multi_column_layout import SingleColumnLayout
from borb.pdf.canvas.layout.page_layout.page_layout import PageLayout
from borb.pdf.canvas.layout.text.paragraph import Paragraph
from borb.pdf.document import Document
from borb.pdf.page.page import Page
from borb.pdf.pdf import PDF


def main():

    # create empty Document
    d: Document = Document()

    # add Page
    p: Page = Page()
    d.append_page(p)

    # create PageLayout
    l: PageLayout = SingleColumnLayout(p)

    # add Paragraph
    l.add(Paragraph("""
                    Lorem ipsum dolor sit amet, consectetur adipiscing elit, sed do eiusmod tempor incididunt ut labore et dolore magna aliqua.
                    Ut enim ad minim veniam, quis nostrud exercitation ullamco laboris nisi ut aliquip ex ea commodo consequat.
                    Duis aute irure dolor in reprehenderit in voluptate velit esse cillum dolore eu fugiat nulla pariatur.
                    Excepteur sint occaecat cupidatat non proident, sunt in culpa qui officia deserunt mollit anim id est laborum.
                    """))

    # create bytes for embedded file
    file_bytes = b"""
    {
        "lorem": "ipsum",
        "dolor": "sit"
    }
    """

    # add embedded file
    d.append_embedded_file("lorem_ipsum.json", file_bytes)

    # store
    with open("output.pdf", "wb") as pdf_file_handle:
        PDF.dumps(pdf_file_handle, d)


if __name__ == "__main__":
    main()
The PDF should look something like this:

Notice the warning you see atop the PDF viewer. This may of course vary depending on the viewer you're using. If you open the embedded file pane (again depending on your editor) you may see something similar to this:

Now that you can embed files in a PDF, let's see how you can retrieve those files again.
import typing
from borb.pdf.document import Document
from borb.pdf.pdf import PDF


def main():

    doc: typing.Optional[Document] = None
    with open("output.pdf", "rb") as pdf_file_handle:
        doc = PDF.loads(pdf_file_handle)

    assert doc is not None

    # retrieve all embedded files and their bytes
    for k,v in doc.get_embedded_files().items():

        # display the file name, and the size
        print("%s, %d bytes" % (k, len(v)))


if __name__ == "__main__":
    main()
This should print:
lorem_ipsum.json, 66 bytes
Of course, rather than just displaying the byte-count you could also write the bytes to a file again.
Or process them directly using the io API in Python.
from the PDF-spec:
An annotation associates an object such as a note, sound, or movie with a location on a page of a PDF document, or provides a way to interact with the user by means of the mouse and keyboard. PDF includes a wide variety of standard annotation types, described in detail in 12.5.6, “Annotation Types.”
For this example, you'll be adding a cartoon-ish diamond shape to a PDF.
You can do this with a PDF that was just created, or with an existing PDF.
borb comes with a rich LineArtFactory enabling you to easily add a shape to your PDF without having to resort to pixel-geometry.
from decimal import Decimal

from borb.pdf.canvas.color.color import HexColor
from borb.pdf.canvas.geometry.rectangle import Rectangle
from borb.pdf.canvas.layout.page_layout.multi_column_layout import SingleColumnLayout
from borb.pdf.canvas.layout.page_layout.page_layout import PageLayout
from borb.pdf.canvas.layout.text.paragraph import Paragraph
from borb.pdf.canvas.line_art.line_art_factory import LineArtFactory
from borb.pdf.document import Document
from borb.pdf.page.page import Page
from borb.pdf.page.page_size import PageSize
from borb.pdf.pdf import PDF


def main():

    doc: Document = Document()
    page: Page = Page()
    doc.append_page(page)

    layout: PageLayout = SingleColumnLayout(page)

    layout.add(Paragraph("""
                        Lorem ipsum dolor sit amet, consectetur adipiscing elit, sed do eiusmod tempor incididunt ut labore et dolore magna aliqua.
                        Ut enim ad minim veniam, quis nostrud exercitation ullamco laboris nisi ut aliquip ex ea commodo consequat.
                        Duis aute irure dolor in reprehenderit in voluptate velit esse cillum dolore eu fugiat nulla pariatur.
                        Excepteur sint occaecat cupidatat non proident, sunt in culpa qui officia deserunt mollit anim id est laborum.
                        """))

    page_width: Decimal = PageSize.A4_PORTRAIT.value[0]
    page_height: Decimal = PageSize.A4_PORTRAIT.value[1]
    s: Decimal = Decimal(100)
    page.append_polygon_annotation(LineArtFactory.cartoon_diamond(Rectangle(page_width / Decimal(2) - s / Decimal(2),
                                                                            page_height / Decimal(2) - s / Decimal(2),
                                                                            s,
                                                                            s)), stroke_color=HexColor("f1cd2e"))

    with open("output.pdf", "wb") as out_file_handle:
        PDF.dumps(out_file_handle, doc)


if __name__ == "__main__":
    main()
You may be wondering why borb did not make it easier on you to add the annotation.
I mean to say, you had to calculate the coordinates yourself, that's unusually unhelpful.
The key thing to take away from this example (and in fact all subsequent examples in this section) is that annotations are typically added after the Document has been generated.
So borb does not offer much convenience methods, because it assumes the precise layout of the Page will have already been baked in to the Document at which point it is too late to attempt to retrieve it.
In this example you'll be creating a text-annotation. This is comparable to adding a pop-up Post-it note to a PDF.
from decimal import Decimal

from borb.pdf.canvas.color.color import HexColor
from borb.pdf.canvas.geometry.rectangle import Rectangle
from borb.pdf.canvas.layout.page_layout.multi_column_layout import SingleColumnLayout
from borb.pdf.canvas.layout.page_layout.page_layout import PageLayout
from borb.pdf.canvas.layout.text.paragraph import Paragraph
from borb.pdf.document import Document
from borb.pdf.page.page import Page, TextAnnotationIconType
from borb.pdf.page.page_size import PageSize
from borb.pdf.pdf import PDF


def main():

    doc: Document = Document()
    page: Page = Page()
    doc.append_page(page)

    layout: PageLayout = SingleColumnLayout(page)

    layout.add(Paragraph("""
                        Lorem ipsum dolor sit amet, consectetur adipiscing elit, sed do eiusmod tempor incididunt ut labore et dolore magna aliqua.
                        Ut enim ad minim veniam, quis nostrud exercitation ullamco laboris nisi ut aliquip ex ea commodo consequat.
                        Duis aute irure dolor in reprehenderit in voluptate velit esse cillum dolore eu fugiat nulla pariatur.
                        Excepteur sint occaecat cupidatat non proident, sunt in culpa qui officia deserunt mollit anim id est laborum.
                        """))

    page_width: Decimal = PageSize.A4_PORTRAIT.value[0]
    page_height: Decimal = PageSize.A4_PORTRAIT.value[1]
    s: Decimal = Decimal(100)
    page.append_text_annotation(Rectangle(page_width / Decimal(2) - s / Decimal(2),
                                          page_height / Decimal(2) - s / Decimal(2),
                                          s,
                                          s),
                                contents="Hello World!",
                                text_annotation_icon=TextAnnotationIconType.COMMENT,
                                color=HexColor("f1cd2e"))

    with open("output.pdf", "wb") as out_file_handle:
        PDF.dumps(out_file_handle, doc)


if __name__ == "__main__":
    main()
You can customize quite a few aspects of this particular annotation:
- The text
- The location at which the icon is displayed
- The icon being displayed (you have the option to select one from a range of pre-defined icons)
- The color of the icon (and the resulting pop-up box)
The PDF you created should end up looking like this:

And when you click on the icon in the middle of the page, you get a little pop-up:

Link annotations provide your readers with an easy way to navigate the PDF document. Clicking a link-annotation can:
- Take the reader to a predefined page (or piece of a page)
- Set the zoom level at which the page is being displayed
- Set the crop box of the PDF reader
In the next example, you'll create a Document with several pages,
and provide each of them with a convenient "back to the beginning" link annotation.
from decimal import Decimal

from borb.pdf.canvas.color.color import HexColor
from borb.pdf.canvas.geometry.rectangle import Rectangle
from borb.pdf.canvas.layout.page_layout.multi_column_layout import SingleColumnLayout
from borb.pdf.canvas.layout.page_layout.page_layout import PageLayout
from borb.pdf.canvas.layout.text.paragraph import Paragraph
from borb.pdf.document import Document
from borb.pdf.page.page import Page, DestinationType
from borb.pdf.page.page_size import PageSize
from borb.pdf.pdf import PDF


def main():

    doc: Document = Document()

    # add 10 pages
    N: int = 10
    for i in range(0, N):
        page: Page = Page()
        doc.append_page(page)

        layout: PageLayout = SingleColumnLayout(page)

        layout.add(Paragraph("page %d of %d" % (i+1, N),
                             font_color=HexColor("f1cd2e"),
                             font_size=Decimal(20),
                             font="Helvetica-Bold"))

        layout.add(Paragraph("""
                        Lorem ipsum dolor sit amet, consectetur adipiscing elit, sed do eiusmod tempor incididunt ut labore et dolore magna aliqua.
                        Ut enim ad minim veniam, quis nostrud exercitation ullamco laboris nisi ut aliquip ex ea commodo consequat.
                        Duis aute irure dolor in reprehenderit in voluptate velit esse cillum dolore eu fugiat nulla pariatur.
                        Excepteur sint occaecat cupidatat non proident, sunt in culpa qui officia deserunt mollit anim id est laborum.
                        """))

        page_width: Decimal = PageSize.A4_PORTRAIT.value[0]
        page_height: Decimal = PageSize.A4_PORTRAIT.value[1]
        s: Decimal = Decimal(100)
        page.append_link_annotation(Rectangle(page_width / Decimal(2) - s / Decimal(2),
                                          page_height / Decimal(2) - s / Decimal(2),
                                          s,
                                          s),
                                    page=Decimal(0),
                                    destination_type=DestinationType.FIT)

    # store
    with open("output.pdf", "wb") as out_file_handle:
        PDF.dumps(out_file_handle, doc)


if __name__ == "__main__":
    main()
Try it! Navigate to any Page of the Document and click the link-annotation.
It should send you straight back to the first Page.
You used DestinationType.FIT in this example, which forces the viewer software to go to a given page (0 in this case),
and ensure the zoom-level is set to fit this page in the viewer. This is the option that requires the least amount of parameters.
You can also set other DestinationType values, for instance to force the viewer to go to a particular y-coordinate of a given page, etc.
-
DestinationType.FIT: Display the page designated by page, with its contents magnified just enough to fit the entire page within the window both horizontally and vertically. If the required horizontal and vertical magnification factors are different, use the smaller of the two, centering the page within the window in the other dimension. -
DestinationType.FIT_B: (PDF 1.1) Display the page designated by page, with its contents magnified just enough to fit its bounding box entirely within the window both horizontally and vertically. If the required horizontal and vertical magnification factors are different, use the smaller of the two, centering the bounding box within the window in the other dimension. -
DestinationType.FIT_B_H: (PDF 1.1) Display the page designated by page, with the vertical coordinate top positioned at the top edge of the window and the contents of the page magnified just enough to fit the entire width of its bounding box within the window. A null value for top specifies that the current value of that parameter shall be retained unchanged. -
DestinationType.FIT_B_V: (PDF 1.1) Display the page designated by page, with the horizontal coordinate left positioned at the left edge of the window and the contents of the page magnified just enough to fit the entire height of its bounding box within the window. A null value for left specifies that the current value of that parameter shall be retained unchanged. -
DestinationType.FIT_H: Display the page designated by page, with the vertical coordinate top positioned at the top edge of the window and the contents of the page magnified just enough to fit the entire width of the page within the window. A null value for top specifies that the current value of that parameter shall be retained unchanged. -
DestinationType.FIT_R: Display the page designated by page, with its contents magnified just enough to fit the rectangle specified by the coordinates left, bottom, right, and top entirely within the window both horizontally and vertically. If the required horizontal and vertical magnification factors are different, use the smaller of the two, centering the rectangle within the window in the other dimension. -
DestinationType.FIT_V: Display the page designated by page, with the horizontal coordinate left positioned at the left edge of the window and the contents of the page magnified just enough to fit the entire height of the page within the window. A null value for left specifies that the current value of that parameter shall be retained unchanged. -
DestinationType.X_Y_Z: Display the page designated by page, with the coordinates (left, top) positioned at the upper-left corner of the window and the contents of the page magnified by the factor zoom. A null value for any of the parameters left, top, or zoom specifies that the current value of that parameter shall be retained unchanged. A zoom value of 0 has the same meaning as a null value.
This example is very minimalistic. You can expand upon it.
Rather than using a simple square, you can draw an Image or Paragraph and have the annotation be on top of it.
I'm just giving you the basic tools you need, what you do with them is limited only by your imagination.
Rubber stamp annotations bring a bit of that classic paper feeling to digital documents. A giant "Confidential" on a page just screams "classy".
In the next example, you'll be adding a rubber stamp annotation to a simple "lorem ipsum" document.
from decimal import Decimal

from borb.pdf.canvas.geometry.rectangle import Rectangle
from borb.pdf.canvas.layout.page_layout.multi_column_layout import SingleColumnLayout
from borb.pdf.canvas.layout.page_layout.page_layout import PageLayout
from borb.pdf.canvas.layout.text.paragraph import Paragraph
from borb.pdf.document import Document
from borb.pdf.page.page import Page, RubberStampAnnotationIconType
from borb.pdf.page.page_size import PageSize
from borb.pdf.pdf import PDF

def main():

    doc: Document = Document()

    page: Page = Page()
    doc.append_page(page)

    layout: PageLayout = SingleColumnLayout(page)

    layout.add(Paragraph("""
                        Lorem ipsum dolor sit amet, consectetur adipiscing elit, sed do eiusmod tempor incididunt ut labore et dolore magna aliqua.
                        Ut enim ad minim veniam, quis nostrud exercitation ullamco laboris nisi ut aliquip ex ea commodo consequat.
                        Duis aute irure dolor in reprehenderit in voluptate velit esse cillum dolore eu fugiat nulla pariatur.
                        Excepteur sint occaecat cupidatat non proident, sunt in culpa qui officia deserunt mollit anim id est laborum.
                        """))

    page_width: Decimal = PageSize.A4_PORTRAIT.value[0]
    page_height: Decimal = PageSize.A4_PORTRAIT.value[1]
    s: Decimal = Decimal(100)
    page.append_stamp_annotation(Rectangle(page_width / Decimal(2) - s / Decimal(2),
                                          page_height / Decimal(2) - s / Decimal(2),
                                          s,
                                          s),
                                 name=RubberStampAnnotationIconType.CONFIDENTIAL
                                 )

    # store
    with open("output.pdf", "wb") as out_file_handle:
        PDF.dumps(out_file_handle, doc)


if __name__ == "__main__":
    main()
The different types of rubber stamps are limited (the PDF spec only defines a handful of them);
RubberStampAnnotationIconType.APPROVEDRubberStampAnnotationIconType.AS_ISRubberStampAnnotationIconType.CONFIDENTIALRubberStampAnnotationIconType.DRAFTRubberStampAnnotationIconType.EXPERIMENTALRubberStampAnnotationIconType.EXPIREDRubberStampAnnotationIconType.FINALRubberStampAnnotationIconType.FOR_COMMENTRubberStampAnnotationIconType.FOR_PUBLIC_RELEASERubberStampAnnotationIconType.NOT_APPROVEDRubberStampAnnotationIconType.NOT_FOR_PUBLIC_RELEASERubberStampAnnotationIconType.SOLDRubberStampAnnotationIconType.TOP_SECRET
And the rendering of the stamp is entirely up to the reader software. So this example may look entirely different on your device.
from the PDF spec:
A redaction annotation (PDF 1.7) identifies content that is intended to be removed from the document. The intent of redaction annotations is to enable the following process:
a) Content identification. A user applies redact annotations that specify the pieces or regions of content that should be removed. Up until the next step is performed, the user can see, move and redefine these annotations.
b) Content removal. The user instructs the viewer application to apply the redact annotations, after which the content in the area specified by the redact annotations is removed. In the removed content’s place, some marking appears to indicate the area has been redacted. Also, the redact annotations are removed from the PDF document.
Redaction annotations provide a mechanism for the first step in the redaction process (content identification). This allows content to be marked for redaction in a non-destructive way, thus enabling a review process for evaluating potential redactions prior to removing the specified content. Redaction annotations shall provide enough information to be used in the second phase of the redaction process (content removal). This phase is application-specific and requires the conforming reader to remove all content identified by the redaction annotation, as well as the annotation itself.
In the next example, you'll be adding a redaction annotation. In a subsequent example you'll be using borb to apply all redaction annotations (thus removing the content).
Redaction annotations are simply another kind of annotation, so all the methods and tools you've seen so far can of course be used again.
from decimal import Decimal

from borb.pdf.canvas.geometry.rectangle import Rectangle
from borb.pdf.canvas.layout.page_layout.multi_column_layout import SingleColumnLayout
from borb.pdf.canvas.layout.page_layout.page_layout import PageLayout
from borb.pdf.canvas.layout.text.paragraph import Paragraph
from borb.pdf.document import Document
from borb.pdf.page.page import Page
from borb.pdf.pdf import PDF


def main():

    doc: Document = Document()

    page: Page = Page()
    doc.append_page(page)

    layout: PageLayout = SingleColumnLayout(page)

    layout.add(Paragraph("""
                        Lorem ipsum dolor sit amet, consectetur adipiscing elit, sed do eiusmod tempor incididunt ut labore et dolore magna aliqua.
                        Ut enim ad minim veniam, quis nostrud exercitation ullamco laboris nisi ut aliquip ex ea commodo consequat.
                        Duis aute irure dolor in reprehenderit in voluptate velit esse cillum dolore eu fugiat nulla pariatur.
                        Excepteur sint occaecat cupidatat non proident, sunt in culpa qui officia deserunt mollit anim id est laborum.
                        """))

    page.append_redact_annotation(Rectangle(Decimal(405),
                                            Decimal(721),
                                            Decimal(40),
                                            Decimal(8)).grow(Decimal(2)))

    # store
    with open("output.pdf", "wb") as out_file_handle:
        PDF.dumps(out_file_handle, doc)


if __name__ == "__main__":
    main()
Of course, rather than passing a Rectangle, you can also use some of the logic you've applied in previous examples.
For instance, you can use RegularExpressionTextExtraction to look for a regular expression and then redact it.
This is particularly useful if you're trying to remove structured information such as:
- A bank account number
- A social security number
- A phone number
- An email address
- Etc
borb comes with a small library of useful (common) regular expressions.
These can be found in CommonRegularExpression;
BITCOIN_ADDRESSCREDIT_CARDDATEDOLLAR_PRICEEMAILHEX_COLORIPV4IPV6PHONEPHONE_WITH_EXTENSIONPO_BOXROMAN_NUMERALSOCIAL_SECURITY_NUMBERSTREET_ADDRESSTIMEURLZIP_CODE
The document you produced should still have the "marked for redaction" - content. You could (at this point) ask a PDF reader (e.g. "Adobe") to apply the redaction annotations. Although this feature may not be supported.
In this example you'll be applying the redaction annotations you added to the Document earlier.
import typing
from borb.pdf.document import Document
from borb.pdf.pdf import PDF


def main():

    doc: typing.Optional[Document] = None
    with open("output.pdf", "rb") as pdf_file_handle:
        doc = PDF.loads(pdf_file_handle)

    # apply redaction annotations
    doc.get_page(0).apply_redact_annotations()

    # store
    with open("output.pdf", "wb") as out_file_handle:
        PDF.dumps(out_file_handle, doc)


if __name__ == "__main__":
    main()
If you now try to select the content in the Document, you'll see the text is gone.
This is one of the most common usecases in working with PDF. In the next example you'll be merging multiple existing PDF documents.
You'll start by creating two methods that each create (and write) a PDF document.
import typing

from borb.pdf.canvas.color.color import HexColor
from borb.pdf.canvas.layout.page_layout.multi_column_layout import SingleColumnLayout
from borb.pdf.canvas.layout.page_layout.page_layout import PageLayout
from borb.pdf.canvas.layout.text.paragraph import Paragraph
from borb.pdf.document import Document
from borb.pdf.page.page import Page
from borb.pdf.pdf import PDF


def create_document_001():

    d: Document = Document()
    p: Page = Page()
    d.append_page(p)

    l: PageLayout = SingleColumnLayout(p)
    l.add(Paragraph("""
                    Lorem Ipsum is simply dummy text of the printing and typesetting industry.
                    Lorem Ipsum has been the industry's standard dummy text ever since the 1500s,
                    when an unknown printer took a galley of type and scrambled it to make a type specimen book.
                    It has survived not only five centuries, but also the leap into electronic typesetting, remaining essentially unchanged.
                    It was popularised in the 1960s with the release of Letraset sheets containing Lorem Ipsum passages,
                    and more recently with desktop publishing software like Aldus PageMaker including versions of Lorem Ipsum.
                    """,
                    font_color=HexColor("de6449")))

    with open("output_001.pdf", "wb") as pdf_out_handle:
        PDF.dumps(pdf_out_handle, d)
That should take care of the first PDF. Now you can write a second (similar) PDF document:
def create_document_002():

    d: Document = Document()
    p: Page = Page()
    d.append_page(p)

    l: PageLayout = SingleColumnLayout(p)
    l.add(Paragraph("""
                    Lorem ipsum dolor sit amet, consectetur adipiscing elit, sed do eiusmod tempor incididunt ut labore et dolore magna aliqua.
                    Ut enim ad minim veniam, quis nostrud exercitation ullamco laboris nisi ut aliquip ex ea commodo consequat.
                    Duis aute irure dolor in reprehenderit in voluptate velit esse cillum dolore eu fugiat nulla pariatur.
                    Excepteur sint occaecat cupidatat non proident, sunt in culpa qui officia deserunt mollit anim id est laborum.
                    """,
                    font_color=HexColor("f1cd2e")))

    with open("output_002.pdf", "wb") as pdf_out_handle:
        PDF.dumps(pdf_out_handle, d)
Finally, you can write the main method, which will create both documents, read them, and merge them.
def main():

    # create both documents
    create_document_001()
    create_document_002()

    # open doc_001
    doc_001: typing.Optional[Document] = Document()
    with open("output_001.pdf", "rb") as pdf_file_handle:
        doc_001 = PDF.loads(pdf_file_handle)

    # open doc_002
    doc_002: typing.Optional[Document] = Document()
    with open("output_002.pdf", "rb") as pdf_file_handle:
        doc_002 = PDF.loads(pdf_file_handle)

    # merge
    doc_001.append_document(doc_002)

    # write
    with open("output_003.pdf", "wb") as pdf_file_handle:
        PDF.dumps(pdf_file_handle, doc_001)


if __name__ == "__main__":
    main()
You don't have to fully merge both Document objects, you can just copy a couple of Page objects from one Document to another.
In the next example you'll be selecting one Page from each Document and building a new PDF with them.
You'll start by creating a slightly modified version of the first document from the previous example. This document has 10 pages.
import typing
from decimal import Decimal

from borb.pdf.canvas.color.color import HexColor
from borb.pdf.canvas.layout.page_layout.multi_column_layout import SingleColumnLayout
from borb.pdf.canvas.layout.page_layout.page_layout import PageLayout
from borb.pdf.canvas.layout.text.paragraph import Paragraph
from borb.pdf.document import Document
from borb.pdf.page.page import Page
from borb.pdf.pdf import PDF


def create_document_001():

    d: Document = Document()

    N: int = 10
    for i in range(0, N):
        p: Page = Page()
        d.append_page(p)
        l: PageLayout = SingleColumnLayout(p)
        l.add(Paragraph("Page %d of %d" % (i+1, N),
                        font_color=HexColor("0b3954"),
                        font_size=Decimal(24)))
        l.add(Paragraph("""
                        Lorem Ipsum is simply dummy text of the printing and typesetting industry.
                        Lorem Ipsum has been the industry's standard dummy text ever since the 1500s,
                        when an unknown printer took a galley of type and scrambled it to make a type specimen book.
                        It has survived not only five centuries, but also the leap into electronic typesetting, remaining essentially unchanged.
                        It was popularised in the 1960s with the release of Letraset sheets containing Lorem Ipsum passages,
                        and more recently with desktop publishing software like Aldus PageMaker including versions of Lorem Ipsum.
                        """,
                        font_color=HexColor("de6449")))

    with open("output_001.pdf", "wb") as pdf_out_handle:
        PDF.dumps(pdf_out_handle, d)
The page number is printed atop each page, to make it easier to identify them later.

The second document will also have 10 pages. The page number will also be displayed atop each page:
def create_document_002():

    d: Document = Document()

    N: int = 10
    for i in range(0, N):
        p: Page = Page()
        d.append_page(p)
        l: PageLayout = SingleColumnLayout(p)
        l.add(Paragraph("Page %d of %d" % (i+1, N),
                        font_color=HexColor("56cbf9"),
                        font_size=Decimal(24)))
        l.add(Paragraph("""
                        Lorem ipsum dolor sit amet, consectetur adipiscing elit, sed do eiusmod tempor incididunt ut labore et dolore magna aliqua.
                        Ut enim ad minim veniam, quis nostrud exercitation ullamco laboris nisi ut aliquip ex ea commodo consequat.
                        Duis aute irure dolor in reprehenderit in voluptate velit esse cillum dolore eu fugiat nulla pariatur.
                        Excepteur sint occaecat cupidatat non proident, sunt in culpa qui officia deserunt mollit anim id est laborum.
                        """,
                        font_color=HexColor("f1cd2e")))

    with open("output_002.pdf", "wb") as pdf_out_handle:
        PDF.dumps(pdf_out_handle, d)
To build the merged document you'll be selecting a page from each input document in turn, until the merged document has 10 pages.
def main():

    # create both documents
    create_document_001()
    create_document_002()

    # open doc_001
    doc_001: typing.Optional[Document] = Document()
    with open("output_001.pdf", "rb") as pdf_file_handle:
        doc_001 = PDF.loads(pdf_file_handle)

    # open doc_002
    doc_002: typing.Optional[Document] = Document()
    with open("output_002.pdf", "rb") as pdf_file_handle:
        doc_002 = PDF.loads(pdf_file_handle)

    # create new document
    d: Document = Document()
    for i in range(0, 10):
        p: typing.Optional[Page] = None
        if i % 2 == 0:
            p = doc_001.get_page(i)
        else:
            p = doc_002.get_page(i)
        d.append_page(p)

    # write
    with open("output_003.pdf", "wb") as pdf_file_handle:
        PDF.dumps(pdf_file_handle, d)


if __name__ == "__main__":
    main()
The final document alternates pages between both input documents (which is obvious from the color and page numbers).

Sometimes you may want to remove a Page from a PDF.
e.g. removing a cover-page before text-extraction may speed things up (one less page to process)
In the next example you'll be removing the first Page from a Document.
First of course, we need to create a Document to start with;
from decimal import Decimal

import typing
from borb.pdf.canvas.color.color import HexColor
from borb.pdf.canvas.layout.page_layout.multi_column_layout import MultiColumnLayout
from borb.pdf.canvas.layout.page_layout.page_layout import PageLayout
from borb.pdf.canvas.layout.text.paragraph import Paragraph
from borb.pdf.document import Document
from borb.pdf.page.page import Page
from borb.pdf.pdf import PDF


def create_document():

    # create empty Document
    d: Document = Document()

    # add Page
    p: Page = Page()
    d.append_page(p)
    page_number: int = 1

    # create PageLayout
    l: PageLayout = MultiColumnLayout(p)

    for _ in range(0, 20):
        if l.get_page() != p or page_number == 1:
            l.add(Paragraph("Page %d" % page_number, font_color=HexColor("f1cd2e"), font_size=Decimal(20), font="Courier-Bold"))
            p = l.get_page()
            page_number += 1

        l.add(Paragraph("""
                        Lorem ipsum dolor sit amet, consectetur adipiscing elit, sed do eiusmod tempor incididunt ut labore et dolore magna aliqua.
                        Ut enim ad minim veniam, quis nostrud exercitation ullamco laboris nisi ut aliquip ex ea commodo consequat.
                        Duis aute irure dolor in reprehenderit in voluptate velit esse cillum dolore eu fugiat nulla pariatur.
                        Excepteur sint occaecat cupidatat non proident, sunt in culpa qui officia deserunt mollit anim id est laborum.
                        """))

    # store
    with open("output.pdf", "wb") as pdf_file_handle:
        PDF.dumps(pdf_file_handle, d)
Now that we have a substantial Document, we can remove a Page from it;
def remove_page_from_document():

    doc: typing.Optional[Document] = None
    with open("output.pdf", "rb") as pdf_file_handle:
        doc = PDF.loads(pdf_file_handle)

    assert doc is not None

    # remove Page
    doc.pop_page(1)

    # store Document
    with open("output.pdf", "wb") as pdf_file_handle:
        PDF.dumps(pdf_file_handle, doc)


def main():
    create_document()
    remove_page_from_document()


if __name__ == "__main__":
    main()
You can see (in the thumbnail panel on the left side) that the second page was removed.
In this example you'll be rotating a Page 90 degrees clockwise.
You can rotate a Page any multiple of 90 degrees.
import typing
from decimal import Decimal

from borb.pdf.canvas.color.color import HexColor
from borb.pdf.canvas.layout.page_layout.multi_column_layout import MultiColumnLayout
from borb.pdf.canvas.layout.page_layout.page_layout import PageLayout
from borb.pdf.canvas.layout.text.paragraph import Paragraph
from borb.pdf.document import Document
from borb.pdf.page.page import Page
from borb.pdf.pdf import PDF


def create_document():

    # create empty Document
    d: Document = Document()

    # add Page
    p: Page = Page()
    d.append_page(p)
    page_number: int = 1

    # create PageLayout
    l: PageLayout = MultiColumnLayout(p)

    for _ in range(0, 20):
        if l.get_page() != p or page_number == 1:
            l.add(Paragraph("Page %d" % page_number, font_color=HexColor("f1cd2e"), font_size=Decimal(20), font="Courier-Bold"))
            p = l.get_page()
            page_number += 1

        l.add(Paragraph("""
                        Lorem ipsum dolor sit amet, consectetur adipiscing elit, sed do eiusmod tempor incididunt ut labore et dolore magna aliqua.
                        Ut enim ad minim veniam, quis nostrud exercitation ullamco laboris nisi ut aliquip ex ea commodo consequat.
                        Duis aute irure dolor in reprehenderit in voluptate velit esse cillum dolore eu fugiat nulla pariatur.
                        Excepteur sint occaecat cupidatat non proident, sunt in culpa qui officia deserunt mollit anim id est laborum.
                        """))

    # store
    with open("output.pdf", "wb") as pdf_file_handle:
        PDF.dumps(pdf_file_handle, d)
You already know this PDF, it's the same from the previous examples.
Now let's rotate a Page:
def rotate_page_in_document():

    doc: typing.Optional[Document] = None
    with open("output.pdf", "rb") as pdf_file_handle:
        doc = PDF.loads(pdf_file_handle)

    assert doc is not None

    # rotate Page
    doc.get_page(0).rotate_right()

    # store Document
    with open("output.pdf", "wb") as pdf_file_handle:
        PDF.dumps(pdf_file_handle, doc)


def main():
    create_document()
    rotate_page_in_document()


if __name__ == "__main__":
    main()
In this section you've learned the basics of working with existing PDF documents. You've seen how to extract text, regular expressions, images, font-information and color-information.
You've played around with annotations, and redaction. And you've seen the basics of merging PDF's and removing one or more pages from a PDF.
This section, together with the previous wraps up the basics of what you can do with borb.
I would encourage you to continue reading, and more importantly to continue exploring borb.
There are many more options and algorithms that you may find useful.
As a developer, expanding your toolkit with more knowledge is never a bad thing.
Most of what you've done so far is exact. There is an exact algorithm for retrieving the bytes of an embedded file. There are algorithms for retrieving text that have been proven to work (for many years, in many libraries).
This section deals with some of the more "guesswork"-based algorithms for PDF.
One of these (and perhaps the most useful even) is extracting structured content: tables.
In this section you'll learn how to:
- Extract tables from a PDF
- Apply OCR to a PDF (and extracting text from the subsequent
Document) - Export a PDF to various image formats
- Export certain formats (HTML, Markdown) to PDF

For the next example you'll first need to create a Document with a Table.
In order to provide borb with a challenge, let's create a Table with:
row_spancol_spanfont_colortext_alignment
from decimal import Decimal

import typing
from borb.pdf.canvas.color.color import HexColor, X11Color
from borb.pdf.canvas.layout.layout_element import Alignment
from borb.pdf.canvas.layout.page_layout.multi_column_layout import SingleColumnLayout
from borb.pdf.canvas.layout.page_layout.page_layout import PageLayout
from borb.pdf.canvas.layout.table.table import TableCell
from borb.pdf.canvas.layout.table.flexible_column_width_table import FlexibleColumnWidthTable
from borb.pdf.canvas.layout.table.table import Table
from borb.pdf.canvas.layout.text.paragraph import Paragraph
from borb.pdf.document import Document
from borb.pdf.page.page import Page
from borb.pdf.pdf import PDF
from borb.toolkit.table.table_detection_by_lines import TableDetectionByLines


def create_document():

    # create empty Document
    d: Document = Document()

    # add Page
    p: Page = Page()
    d.append_page(p)

    # create PageLayout
    l: PageLayout = SingleColumnLayout(p)

    # create Table
    l.add(FlexibleColumnWidthTable(number_of_rows=3, number_of_columns=3)
          .add(TableCell(Paragraph("1", font_color=HexColor("f1cd2e"), horizontal_alignment=Alignment.RIGHT),
                         row_span=3,
                         preferred_width=Decimal(64)))
          .add(TableCell(Paragraph("2")))
          .add(TableCell(Paragraph("3")))
          .add(TableCell(Paragraph("4", font_color=HexColor("56cbf9"), horizontal_alignment=Alignment.LEFT),
                         row_span=2,
                         preferred_width=Decimal(32)))
          .add(TableCell(Paragraph("5")))
          .add(TableCell(Paragraph("6", font_color=HexColor("de6449"))))
          .set_padding_on_all_cells(Decimal(5), Decimal(5), Decimal(5), Decimal(5))
          )

    # store
    with open("output.pdf", "wb") as pdf_file_handle:
        PDF.dumps(pdf_file_handle, d)
Now you can use the TableDetectionByLines implementation of EventListener to get the job done.
In this example, you'll be adding rectangular annotations to display the detected Table and TableCell objects.
This is something I do a lot, adding annotations is a quick and easy way to debug a PDF workflow.
def recognize_table():

    doc: typing.Optional[Document] = None
    l: TableDetectionByLines = TableDetectionByLines()
    with open("output.pdf", "rb") as pdf_file_handle:
        doc = PDF.loads(pdf_file_handle, [l])

    assert doc is not None

    # get page
    p: Page = doc.get_page(0)

    # get Table(s)
    tables: typing.List[Table] = l.get_tables_for_page(0)
    assert len(tables) > 0

    for r in l.get_table_bounding_boxes_for_page(0):
        r = r.grow(Decimal(5))
        p.append_square_annotation(r,
                                   stroke_color=X11Color("Green"))

    for t in tables:

        # add one annotation around each cell
        for c in t._content:
            r = c.get_bounding_box()
            r = r.shrink(Decimal(5))
            p.append_square_annotation(r, stroke_color=X11Color("Red"))

    # write
    with open("output.pdf", "wb") as pdf_file_handle:
        PDF.dumps(pdf_file_handle, doc)


def main():
    create_document()
    recognize_table()


if __name__ == "__main__":
    main()
As you can see, borb was able to find the Table and retrieve its TableCell objects.
Now that you have their coordinates, you can easily use some of the earlier examples (filtering text by location for instance) to retrieve the contents of each cell.
This is by far one of the most classic questions on any programming-forum, or helpdesk: "My document does not seem to have text in it. Help?" or "Your text-extraction code sample does not work for my document. How come?"
The answer is often as straightforward as "your scanner hates you".
Most of the documents for which this doesn't work are PDF documents that are essentially glorified images. They contain all the meta-data needed to constitute a PDF, but their pages are just large (often low-quality) images.
As a consequence, there are no text-rendering instructions in these documents. And most PDF libraries will not be able to handle them.
borb however is different, borb just loves to help.
In this section you'll be using a special EventListener implementation called OCRAsOptionalContentGroup.
This class uses tesseract (or rather pytesseract) to perform OCR (optical character recognition) on the Document.
Once finished, the recognized text is re-inserted in each Page as a special "layer" (in PDF this is called an "optional content group").
With the content now restored, the usual tricks (SimpleTextExtraction) yield the expected results.
You'll start by creating a method that builds a PIL Image with some text in it.
This Image will then be inserted in a PDF.
import typing
from pathlib import Path

from borb.pdf.canvas.layout.image.image import Image
from borb.pdf.canvas.layout.page_layout.multi_column_layout import SingleColumnLayout
from borb.pdf.canvas.layout.page_layout.page_layout import PageLayout
from borb.pdf.canvas.layout.text.paragraph import Paragraph
from borb.pdf.document import Document
from borb.pdf.page.page import Page
from borb.pdf.pdf import PDF
from PIL import Image as PILImage  # type: ignore [import]
from PIL import ImageDraw, ImageFont
from borb.toolkit.ocr.ocr_as_optional_content_group import OCRAsOptionalContentGroup
from borb.toolkit.text.simple_text_extraction import SimpleTextExtraction


def create_image() -> PILImage:

    # create new Image
    img = PILImage.new("RGB", (256, 256), color=(255, 255, 255))

    # create ImageFont
    # CAUTION: you may need to adjust the path to your particular font directory
    font = ImageFont.truetype("/usr/share/fonts/truetype/ubuntu/UbuntuMono-B.ttf", 24)

    # draw text
    draw = ImageDraw.Draw(img)
    draw.text((10, 10),
              "Hello World!",
              fill=(0, 0, 0),
              font=font)

    # return
    return img
Now you can build a Document with this Image
def create_document():

    # create Document
    d: Document = Document()

    # create/add Page
    p: Page = Page()
    d.append_page(p)

    # set PageLayout
    l: PageLayout = SingleColumnLayout(p)

    # add Paragraph
    l.add(Paragraph("Lorem Ipsum"))

    # add Image
    l.add(Image(create_image()))

    # write
    with open("output_001.pdf", "wb") as pdf_file_handle:
        PDF.dumps(pdf_file_handle, d)
The document should look something like this:

When you select the text in this document, you'll see immediately that only the top line is actually text.
The rest is an Image with text (the Image you created).

Now you can apply OCR to this Document:
def apply_ocr_to_document():

    # set up everything for OCR
    tesseract_data_dir: Path = Path("/home/joris/Downloads/tessdata-master/")
    assert tesseract_data_dir.exists()
    l: OCRAsOptionalContentGroup = OCRAsOptionalContentGroup(tesseract_data_dir)

    # read Document
    doc: typing.Optional[Document] = None
    with open("output_001.pdf", "rb") as pdf_file_handle:
        doc = PDF.loads(pdf_file_handle, [l])

    assert doc is not None

    # store Document
    with open("output_002.pdf", "wb") as pdf_file_handle:
        PDF.dumps(pdf_file_handle, doc)
You can see this created an extra layer in the PDF.
This layer is named "OCR by borb", and contains the rendering instructions borb re-inserted in the Document.
You can toggle the visibility of this layer (this can be handy when debugging).

You can see borb re-inserted the postscript rendering command to ensure "Hello World!" is in the `Document.
Let's hide this layer again.
Now (even with the layer hidden), you can select the text:

And if you apply SimpleTextExtraction now, you should be able to retrieve all the text in the Document.
def read_modified_document():

    doc: typing.Optional[Document] = None
    l: SimpleTextExtraction = SimpleTextExtraction()
    with open("output_002.pdf", "rb") as pdf_file_handle:
        doc = PDF.loads(pdf_file_handle, [l])

    print(l.get_text_for_page(0))


def main():
    create_document()
    apply_ocr_to_document()
    read_modified_document()


if __name__ == "__main__":
    main()
This prints:
Lorem Ipsum
Hello World!
📣 todo 📣
📣 todo 📣
Markdown is a very convenient format (for developers and non-technical people) to provide a quick and legible lightweight formatted document.
You'll be using the following input markdown:
# Headings
To create a heading, add number signs (#) in front of a word or phrase. The number of number signs you use should correspond to the heading level. For example, to create a heading level three (<h3>), use three number signs (e.g., ### My Header).# Heading level 1
## Heading level 2
### Heading level 3
#### Heading level 4
##### Heading level 5
###### Heading level 6## Alternate Syntax Alternatively, on the line below the text, add any number of == characters for heading level 1 or -- characters for heading level 2.
Heading level 1
===============Heading level 2
---------------## Heading Best Practices
Markdown applications don’t agree on how to handle a missing space between the number signs (#) and the heading name. For compatibility, always put a space between the number signs and the heading name.You should also put blank lines before and after a heading for compatibility.
Using borb, you can transform Markdown to PDF;
from borb.pdf.document import Document
from borb.pdf.pdf import PDF
from borb.toolkit.export.markdown_to_pdf.markdown_to_pdf import MarkdownToPDF


def main():

    markdown_str: str = """
# Headings
To create a heading, add number signs (#) in front of a word or phrase. The number of number signs you use should correspond to the heading level. For example, to create a heading level three (\<h3\>), use three number signs (e.g., ### My Header).

# Heading level 1
## Heading level 2
### Heading level 3
#### Heading level 4
##### Heading level 5
###### Heading level 6

## Alternate Syntax
Alternatively, on the line below the text, add any number of == characters for heading level 1 or -- characters for heading level 2.

Heading level 1
===============

Heading level 2
---------------

## Heading Best Practices
Markdown applications don’t agree on how to handle a missing space between the number signs (#) and the heading name. For compatibility, always put a space between the number signs and the heading name.

You should also put blank lines before and after a heading for compatibility.
    """

    # convert
    doc: Document = MarkdownToPDF.convert_markdown_to_pdf(markdown_str)
    assert doc is not None

    # write
    with open("output.pdf", "wb") as pdf_file_handle:
        PDF.dumps(pdf_file_handle, doc)


if __name__ == "__main__":
    main()
This produces the following PDF;

Another wonderful format for content is HTML.
borb supports basic HTML to PDF conversion.
Keep an eye out for this functionality in the future, as new features, tags and support will be added gradually.
For this example, you'll be using the following HTML snippet:
<html>
<head>
<title>Lorem Ipsum</title>
</head>
<p>
Hello World!
</p>
</html>
from borb.pdf.document import Document
from borb.pdf.pdf import PDF
from borb.toolkit.export.html_to_pdf.html_to_pdf import HTMLToPDF


def main():

    html_str: str = """
    <html>
        <head>
            <title>Lorem Ipsum</title>
        </head>
        <p>
            Hello World!
        </p>
    </html>
    """

    # convert
    doc: Document = HTMLToPDF.convert_html_to_pdf(html_str)
    assert doc is not None

    # write
    with open("output.pdf", "wb") as pdf_file_handle:
        PDF.dumps(pdf_file_handle, doc)


if __name__ == "__main__":
    main()
Which ends up producing the following PDF:

You'll also notice (if you open this PDF in your preferred viewer) that the title of the Document was set to "lorem ipsum".
So borb also processed the meta-information.
Check out the examples in the GitHub repository and the tests to find out more supported HTML.

If we consider PDF as a programming language, then these would be its primitive data-types:
- Strings (either as plaintext, or hexadecimal)
- Numbers
- Booleans
- Name objects (think of these as "reserved strings")
From which the bigger objects are built:
- Dictionaries (maps name objects to any value, delimited by
<<and>>) - Arrays (delimited by
[and]) - Streams (these typically represent binary compressed data)
- References
This is an example dictionary object:
<<  /Root 1 0 R
    /Info 2 0 R
    /Size 18
    /ID [<02c1677f2c452985480d6a68b2cdfe96> <02c1677f2c452985480d6a68b2cdfe96>]
    >>
The keys are name objects:
/Root/InfoSizeID
Objects such as 1 0 R are references. They need to be resolved by the XREF (more on that later).
[<02c1677f2c452985480d6a68b2cdfe96> <02c1677f2c452985480d6a68b2cdfe96>]
is an array containing two hexadecimal string objects.
The cross-reference table in a PDF is one of many tricks designed to speed up a reader. A cross-reference table (further abbreviated as XREF) contains a mapping of all PDF objects and their byte offset.
A conforming reader will start reading a PDF backwards, reading the startxref keyword.
This is an example XREF:
xref
0 18
0000000000 00000 f
0000000015 00000 n
0000381959 00000 n
0000000064 00000 n
0000381716 00000 n
0000000121 00000 n
0000000273 00000 n
0000052510 00000 n
0000052542 00000 n
0000052583 00000 n
0000381619 00000 n
0000052752 00000 n
0000055981 00000 n
0000371339 00000 n
0000056194 00000 n
0000371411 00000 n
0000381788 00000 n
0000381888 00000 n
trailer
<</Root 1 0 R /Info 2 0 R /Size 18 /ID [<02c1677f2c452985480d6a68b2cdfe96> <02c1677f2c452985480d6a68b2cdfe96>]>>
startxref
382063
%%EOF
Just after the startxref keyword you'll find a number representing the byte offset at which the start of the XREF can be found.
The start of the XREF table is delimited with the xref keyword.
Just after it you'll find two numbers (0 18). This means the first object of the PDF starts at number 0, and this XREF table contains 18 objects.
Each is responsible for a line like:
0000000273 00000 n
This is the 7th line of the XREF, so this line relates to object number 7. It says object 7 can be found at byte offset 0000000273.
The second number on that line represents the generation.
PDF allows you to revise a document.
So each object has a generation to signify whether it belongs to a particular revision of the PDF.
The last part of each line is n or f. n means the object is currently is use. Objects marked with f should be considered as non-content.
The XREF also contains the trailer dictionary. This dictionary is the starting point of the PDF object tree.
<</Root 1 0 R /Info 2 0 R /Size 18 /ID [<02c1677f2c452985480d6a68b2cdfe96> <02c1677f2c452985480d6a68b2cdfe96>]>>
/Rootis where the actual content objects of the PDF begin. In this trailer, the/Rootentry points to object1 (generation 0)./Infopoints to the info-dictionary, which is where you'll find the meta-data such as author, producer, modification date, etc. In this trailer, the/Infoentry points to object2 (generation 0).
If you follow the /Root entry, you'll find something like:
1 0 obj
<</Type /Catalog /Pages 3 0 R /Outlines 4 0 R>>
endobj
The /Pages entry points to an array (one element per page), which form the beginning of the page-content.
3 0 obj
<</Count 1 /Kids [5 0 R] /Type /Pages>>
endobj
Each entry in the /Kids array represents a single Page.
5 0 obj
<</Type /Page /MediaBox [0 0 595 842] /Parent 3 0 R /Contents 6 0 R /Resources 7 0 R>>
endobj
/Contents points to the Page content stream. This is a string of postfix instructions (usually compressed using deflate).
In the previous section you explored the top-level objects of a PDF.
You got all the way down to the Page object.
Now you can look under the hood and see the instructions in the content stream.
6 0 obj
<</Length 52185>>
stream

            q
            BT
            0.521569 0.780392 0.870588 rg
            /F1 1.000000 Tf
            24.000000 0 0 24.000000 59.500000 725.760000 Tm
            (Hello World!) Tj
            ET
            Q

            q
            ... etc ...
This is the (inflated) page content stream. It contains the raw instructions for rendering content on the Page.
Operators are prefix operators, meaning the arguments come before the operator.
q: pushes a new graphics environment on the stackBT: begin text0.521569 0.780392 0.870588 rg: set the color (using RGB color mode)/F1 1.000000 Tf: use the font specified in/Resources/Font/F1, at size124.000000 0 0 24.000000 59.500000 725.760000 Tm: sets the font-transformation matrix (essentially setting the font size to 24, and setting the text position)(Hello World!) Tj: render the text "Hello World!"ET: end textQ: pop the last element from the graphics environment stack
This section provides you with a quick overview of the most common PDF operators. This is meant to enable you to debug PDF documents.
For a more detailed explanation I would advise you to check out the PDF-specification. A free copy of which can be found:
- In the
borbGitHub repository - On the Adobe website
| Operator | Number of arguments | Type of arguments | Description |
|---|---|---|---|
| b | |||
| B | |||
| b* | |||
| B* | |||
| BDC | |||
| BI | |||
| BMC | |||
| BT | |||
| BX | |||
| c | |||
| cm | |||
| CS | |||
| cs | |||
| d | |||
| d0 | |||
| d1 | |||
| Do | |||
| DP | |||
| EI | |||
| EMC | |||
| ET | |||
| EX | |||
| f | |||
| F | |||
| f* | |||
| G | |||
| g | |||
| gs | |||
| h | |||
| i | |||
| ID | |||
| j | |||
| J | |||
| K | |||
| k | |||
| l | |||
| m | |||
| M | |||
| MP | |||
| n | |||
| q | |||
| Q | |||
| re | |||
| RG | |||
| rg | |||
| ri | |||
| s | |||
| S | |||
| SC | |||
| sc | |||
| SCN | |||
| scn | |||
| sh | |||
| T* | |||
| Tc | |||
| Td | |||
| TD | |||
| Tf | |||
| Tj | |||
| TJ | |||
| TL | |||
| Tm | |||
| Tr | |||
| Ts | |||
| Tw | |||
| Tz | |||
| v | |||
| w | |||
| W | |||
| W* | |||
| y | |||
| ' | |||
| " |
In this subsection I'll take you through all of the relevant pieces of borb when rendering a small piece of text to a PDF.
This is a bit like having someone sit next to you, explaining the code while you're stepping through it with a debugger.
I hope this subsection teaches you some of the internal workings of borb and helps you gain a better understanding of where to look should you encounter any problems.
Now that you have some knowledge of the low-level syntax of PDF, you can try to build a PDF document.
In this example, you're going to create a PDF with the text "Hello World!".
This time, you'll be using only the low-level syntax. Later, you'll see how the LayoutElement objects end up writing this content to the PDF.
Although this is not very practical it will do several things:
- Give you a deeper appreciation for PDF libraries
- Grant you to power to specify the document exactly as you want, now that you understand PDF at its finest
- Enable you to write your own
LayoutElementimplementations (if needed)
In this example, you'll be creating a PDF from scratch, containing "Hello World!", using only the low-level syntax.
📣 todo 📣
📣 todo 📣
📣 todo 📣
Typically, at one point or another when you're working with PDF, someone will come along that would like to convert the PDF to some other format. Most libraries or software-tools offer all kinds of wacky conversions. Some more successful than others. The reason for the varying degrees of success is not just to do with the diligence of the creator, but rather the chasm between structured and unstructured document formats;
- structured document format: every piece of content is typically provided with
- coordinates (or coordinates can be derived using a layout algorithm)
- a logical structure
In
HTMLfor instance, a<p>element is rendered on a browser (it has coordinates), and all the text inside that element knows it is part of that paragraph. The paragraph itself may be part of some other element (a<table>or<li>, etc).
- unstructured document format: no logical structure (or no such structure is mandatory)
PDF is an unstructured format.
You've explored the rendering instructions that make up a Page, and you will have noticed there is no indicator to say "all these instructions belong to one paragraph", or "this paragraph belongs to a table".
You can of course do this (the PDF standard provides so called "tagged" PDF), but is rare to see such PDFs in the wild.
So, when extracting text from a PDF borb is faced with several issues:
- text rendering instructions do not make it clear where a paragraph begins/ends
- the
spacecharacter can either be encoded in the rendering instructions, but it can also be omitted (you can simply move the drawing cursor a few dots to the right) - text rendering instructions do not need to appear in any particular order
In order to be able to extract text, borb has to do a lot of work. Let's have a look behind the scenes to see what goes on.
In borb, the easiest way of accessing the text on a page is by using SimpleTextExtraction.
Let's have a look at how it works.
First, there is ChunkOfTextRenderEvent:
class ChunkOfTextRenderEvent(Event, ChunkOfText):
    """
    This implementation of Event is triggered right after the Canvas has processed a text-rendering instruction
    """

    def __init__(self, graphics_state: CanvasGraphicsState, raw_bytes: String):
        ... etc ...
This class represents the call-back information that is passed to EventListener objects.
Whenever borb processes the page content-stream, every operator has the opportunity to send out these Event objects to EventListener implementations.
This is the ShowText operator (the Tj operator in postscript);
class ShowText(CanvasOperator):
    """
    Show a text string.
    """

    def __init__(self):
        super().__init__("Tj", 1)

    def invoke(self, canvas_stream_processor: "CanvasStreamProcessor", operands: List[AnyPDFType] = []) -> None:  # type: ignore [name-defined]
        """
        Invoke the Tj operator
        """
        ... etc ...
In its invoke method, you'll find the call that sends out one of these ChunkOfTextRenderEvent objects:
        tri = ChunkOfTextRenderEvent(canvas.graphics_state, operands[0])

        # render
        canvas._event_occurred(tri)
So now we know which information is being passed, and when. Let's have a look at SimpleTextExtraction to see how that information is processed;
    def _event_occurred(self, event: Event) -> None:
        if isinstance(event, ChunkOfTextRenderEvent):
            self._render_text(event)
        if isinstance(event, BeginPageEvent):
            self._begin_page(event.get_page())
        if isinstance(event, EndPageEvent):
            self._end_page(event.get_page())
All implementations of EventListener have this _event_occurred method, which passes the Event objects it receives.
You can see SimpleTextExtraction only cares about the start and end of a Page and ChunkOfTextRenderEvent.
Of course, the instructions for rendering text may not be in (reading) order. So they need to be stored (until the end of a Page) before they can be sorted.
    def _render_text(self, text_render_info: ChunkOfTextRenderEvent):

        # init if needed
        if self._current_page not in self._text_render_info_per_page:
            self._text_render_info_per_page[self._current_page] = []

        # append TextRenderInfo
        self._text_render_info_per_page[self._current_page].append(text_render_info)
Once the end of a Page is reached, the list is sorted (and any instructions that do not render text are thrown out):
    def _end_page(self, page: Page):

        # get TextRenderInfo objects on page
        tris = (
            self._text_render_info_per_page[self._current_page]
            if self._current_page in self._text_render_info_per_page
            else []
        )

        # remove no-op
        tris = [x for x in tris if x._text is not None]
        tris = [x for x in tris if len(x._text.replace(" ", "")) != 0]

        # skip empty
        if len(tris) == 0:
            return

        # sort according to comparator
        sorted(tris, key=cmp_to_key(LeftToRightComparator.cmp))
The comparator being used sorts the ChunkOfTextRenderEvent objects in the expected (western) paradigm of top-to-bottom, left-to-right.
Then we need to loop over these objects and insert the space and newline character and when needed;
        # iterate over the TextRenderInfo objects to get the text
        last_baseline_bottom = tris[0].get_baseline().y
        last_baseline_right = tris[0].get_baseline().x
        text = ""
        for t in tris:

            # add newline if needed
            if abs(t.get_baseline().y - last_baseline_bottom) > 10 and len(text) > 0:
                if text.endswith(" "):
                    text = text[0:-1]
                text += "\n"
                text += t._text
                last_baseline_right = t.get_baseline().x + t.get_baseline().width
                last_baseline_bottom = t.get_baseline().y
                continue

            # check text
            if t._text.startswith(" ") or text.endswith(" "):
                text += t._text
                last_baseline_right = t.get_baseline().x + t.get_baseline().width
                continue

            # add space if needed
            delta = abs(last_baseline_right - t.get_baseline().x)
            space_width = round(t.get_space_character_width_estimate_in_user_space(), 1)
            text += " " if (space_width * Decimal(0.90) < delta) else ""

            # normal append
            text += t._text
            last_baseline_right = t.get_baseline().x + t.get_baseline().width
            continue
finally, SimpleTextExtraction stores the reconstituted text (to ensure fast lookup);
        # store text
self._text_per_page[self._current_page] = text📣 todo 📣
from wikipedia.org
Syllabification (/sɪˌlæbɪfɪˈkeɪʃən/) or syllabication (/sɪˌlæbɪˈkeɪʃən/), also known as hyphenation, is the separation of a word into syllables, whether spoken, written or signed.
The written separation into syllables is usually marked by a hyphen when using English orthography (e.g., syl-la-ble) and with a period when transcribing the actually spoken syllables in the International Phonetic Alphabet (IPA) (e.g., [ˈsɪ.lə.bᵊɫ]).
For presentation purposes, typographers may use an interpunct (Unicode character U+00B7, e.g., syl·la·ble), a special-purpose "hyphenation point" (U+2027, e.g., syl‧la‧ble), or a space (e.g., syl la ble).
At the end of a line, a word is separated in writing into parts, conventionally called "syllables", if it does not fit the line and if moving it to the next line would make the first line much shorter than the others. This can be a particular problem with very long words, and with narrow columns in newspapers.
from wikipedia.org
A hyphenation algorithm is a set of rules, especially one codified for implementation in a computer program, that decides at which points a word can be broken over two lines with a hyphen. For example, a hyphenation algorithm might decide that impeachment can be broken as impeach-ment or im-peachment but not impe-achment.
One of the reasons for the complexity of the rules of word-breaking is that different "dialects" of English tend to differ on hyphenation[citation needed]: American English tends to work on sound, but British English tends to look to the origins of the word and then to sound. There are also a large number of exceptions, which further complicates matters.
And that's not even mentioning hyphenation in other languages.
borb hyphenates text (on a Paragraph) if you pass it a Hyphenation object.
This object represents an instantiation of the aforementioned hyphenation algorithm.
The hyphenation algorithm is based on the work of Franklin mark Liang, and works roughly as follows:
0.  input: the word 'w' to be hyphenated
1.  iterate over all possible split-positions (i) in the word w:
2.      prefix = w[0:i]
3.      suffix = w[i:]
4.      iterate over all possible suffixes of the prefix, and prefixes of the suffix:
5.          if a rule prefix-number-suffix matches:
6.              update that split position if the number is higher
7.  iterate over all split-positions (i) in the word w:
8.      if the value of the split-position is ODD:
9.          a hyphen is allowed at this position
The rules in aforementioned algorithm are language dependent, and are typically several thousands of rules poured into one file (e.g. JSON) which is loaded into a special datastructure (trie) which is optimized for this kind of lookup.
As an example, let's look at the word "birmingham".
| b | . | i | . | r | . | m | . | i | . | n | . | g | . | h | . | a | . | m |
|---|---|---|---|---|---|---|---|---|---|---|---|---|---|---|---|---|---|---|
| b | i | r | 4 | |||||||||||||||
| r | m | 3 | ||||||||||||||||
| 4 | n | g | ||||||||||||||||
| 2 | g | h | ||||||||||||||||
| i | n | g | 5 | h | a | |||||||||||||
| n | g | h | 4 | |||||||||||||||
| h | a | 2 | ||||||||||||||||
| 0 | 0 | 4 | 3 | 4 | 2 | 5 | 4 | 2 |
After having run this algorithm, we know that "Birmingham" can be hyphenated as "Birm-ing-ham", since those positions yield an odd max value.
This algorithm is rather labour-intensive, so rather than running it on every word (and inserting soft-hyphens for instance), the algorithm is only run when needed.
Whenever the Paragraph is performing layout, it will do the following:
1. Split the text into words (call this ws)
2. keep track of all lines of text that make up the paragraph, call this lines_of_text
3. for each word (w) in ws:
4.      last_line_of_text = lines_of_text[-1] + <space> + w
5.      calculate the dimensions of last_line_of_text (r)
6.      if r would fall outside the bounding box given to the paragraph:
7.          if hyphenation is enabled for this paragraph:
8.              attempt to split w
9.              if prefix of w + "-" fits:
10.                 hyphenate the word there, switch to the next line, next line starts with suffix of w
11.             else:
12.                 switch to next line, next line start with w
13.         else:
14.             switch to next line, next line starts with w
This ensures hyphenation is only called when needed (rather than on every word in the sentence).
In the next example you'll be creating a Document with two Paragraph instances.
One Paragraph will have hyphenation enabled, the other will not.
from decimal import Decimal

from borb.pdf.canvas.layout.hyphenation.hyphenation import Hyphenation
from borb.pdf.canvas.layout.page_layout.multi_column_layout import SingleColumnLayout
from borb.pdf.canvas.layout.page_layout.page_layout import PageLayout
from borb.pdf.canvas.layout.text.paragraph import Paragraph
from borb.pdf.document import Document
from borb.pdf.page.page import Page
from borb.pdf.pdf import PDF


def main():

    # Document
    d: Document = Document()

    # Page
    p: Page = Page()
    d.append_page(p)

    # PageLayout
    l: PageLayout = SingleColumnLayout(p)

    # Paragraph 1
    l.add(Paragraph("Without hyphenation", font="Helvetica-bold", font_size=Decimal(20)))
    l.add(Paragraph("""
                    Lorem Ipsum is simply dummy text of the printing and typesetting industry.
                    Lorem Ipsum has been the industry's standard dummy text ever since the 1500s,
                    when an unknown printer took a galley of type and scrambled it to make a type specimen book.
                    It has survived not only five centuries, but also the leap into electronic typesetting, remaining essentially unchanged.
                    It was popularised in the 1960s with the release of Letraset sheets containing Lorem Ipsum passages,
                    and more recently with desktop publishing software like Aldus PageMaker including versions of Lorem Ipsum.
                    """))

    # Paragraph 2
    l.add(Paragraph("With en-us hyphenation", font="Helvetica-bold", font_size=Decimal(20)))
    l.add(Paragraph("""
                    Lorem Ipsum is simply dummy text of the printing and typesetting industry.
                    Lorem Ipsum has been the industry's standard dummy text ever since the 1500s,
                    when an unknown printer took a galley of type and scrambled it to make a type specimen book.
                    It has survived not only five centuries, but also the leap into electronic typesetting, remaining essentially unchanged.
                    It was popularised in the 1960s with the release of Letraset sheets containing Lorem Ipsum passages,
                    and more recently with desktop publishing software like Aldus PageMaker including versions of Lorem Ipsum.
                    """, hyphenation=Hyphenation("en-us")))

    # write
    with open("output.pdf", "wb") as pdf_file_handle:
        PDF.dumps(pdf_file_handle, d)


if __name__ == "__main__":
    main()
In the final PDF you can see the word "survived" was hyphenated as well as the word "essentially".


In this example you'll learn how to build a (realistic) invoice using borb.
This is a great little project to review all the LayoutElement objects you've seen in previous sections.
And a chance to experiment with colors and style, to make sure this invoice really matches your company style.
Let's create a Document() and Page() as a blank canvas that we can add the invoice to:
from borb.pdf.document import Document
from borb.pdf.page.page import Page

# Create document
pdf = Document()

# Add page
page = Page()
pdf.append_page(page)
Since we don't want to deal with calculating coordinates - we can delegate this to a PageLayout which manages all of the content and its positions:
# New imports
from borb.pdf.canvas.layout.page_layout.multi_column_layout import SingleColumnLayout
from decimal import Decimal

page_layout = SingleColumnLayout(page)
page_layout.vertical_margin = page.get_page_info().get_height() * Decimal(0.02)
Here, we're using a SingleColumnLayout since all of the content should be in a single column - we won't have a left and right side of the invoice.
We're also making the vertical margin smaller here. The default value is to trim the top 10% of the page height as the margin,
and we're reducing it down to 2%, since we'll want to use this space for the company logo/name.
Speaking of which, let's add the company logo to the layout:
# New import
from borb.pdf.canvas.layout.image.image import Image

page_layout.add(
        Image(
        "https://github.com/jorisschellekens/borb/blob/master/readme_img/logo/borb_64.png?raw=true",
        width=Decimal(128),
        height=Decimal(128),
        ))
Here, we're adding an element to the layout - an Image.
Through its constructor, we're adding a URL pointing to the image resource and setting its width and height.
Beneath the image, we'll want to add our imaginary company info (name, address, website, phone) as well as the invoice information (invoice number, date, due date). A common format for brevity (which incidentally also makes the code cleaner) is to use a table to store invoice data. Let's create a separate helper method to build the invoice information in a table, which we can then use to simply add a table to the invoice in our main method:
# New imports
from borb.pdf.canvas.layout.table.fixed_column_width_table import FixedColumnWidthTable
from borb.pdf.canvas.layout.text.paragraph import Paragraph
from borb.pdf.canvas.layout.layout_element import Alignment
from datetime import datetime
import random

def _build_invoice_information():
    table_001 = FixedColumnWidthTable(number_of_rows=5, number_of_columns=3)

    table_001.add(Paragraph("[Street Address]"))
    table_001.add(Paragraph("Date", font="Helvetica-Bold", horizontal_alignment=Alignment.RIGHT))
    now = datetime.now()
    table_001.add(Paragraph("%d/%d/%d" % (now.day, now.month, now.year)))

    table_001.add(Paragraph("[City, State, ZIP Code]"))
    table_001.add(Paragraph("Invoice #", font="Helvetica-Bold", horizontal_alignment=Alignment.RIGHT))
    table_001.add(Paragraph("%d" % random.randint(1000, 10000)))

    table_001.add(Paragraph("[Phone]"))
    table_001.add(Paragraph("Due Date", font="Helvetica-Bold", horizontal_alignment=Alignment.RIGHT))
    table_001.add(Paragraph("%d/%d/%d" % (now.day, now.month, now.year)))

    table_001.add(Paragraph("[Email Address]"))
    table_001.add(Paragraph(" "))
    table_001.add(Paragraph(" "))

    table_001.add(Paragraph("[Company Website]"))
    table_001.add(Paragraph(" "))
    table_001.add(Paragraph(" "))

    table_001.set_padding_on_all_cells(Decimal(2), Decimal(2), Decimal(2), Decimal(2))
    table_001.no_borders()
    return table_001
Here, we're making a simple Table with 5 rows and 3 columns.
The rows correspond to the street address, city/state, phone, email address and company website.
Each row will have 0..3 values (columns). Each text element is added as a Paragraph, which we've aligned to the right via Alignment.RIGHT, and accept styling arguments such as font.
Finally, we've added padding to all the cells to make sure we don't place the text awkwardly near the confounds of the cells.
Now, back in our main method, we can call _build_invoice_information() to populate a table and add it to our layout:
page_layout = SingleColumnLayout(page)
page_layout.vertical_margin = page.get_page_info().get_height() * Decimal(0.02)
page_layout.add(
    Image(
        "https://github.com/jorisschellekens/borb/blob/master/readme_img/logo/borb_64.png?raw=true",
        width=Decimal(128),
        height=Decimal(128),
        ))

# Invoice information table
page_layout.add(_build_invoice_information())

# Empty paragraph for spacing
page_layout.add(Paragraph(" "))
Now, let's build this PDF document real quick to see what it looks like. For this, we'll use the PDF module:

# New import
from borb.pdf.pdf import PDF

with open("showcase_001.pdf", "wb") as pdf_file_handle:
    PDF.dumps(pdf_file_handle, pdf)
Great! Now we'll want to add the billing and shipping information as well. It'll conveniently be placed in a table, just like the company information. For brevity's sake, we'll also opt to make a separate helper function to build this info, and then we can simply add it in our main method:
# New imports
from borb.pdf.canvas.color.color import HexColor, X11Color

def _build_billing_and_shipping_information():
    table_001 = Table(number_of_rows=6, number_of_columns=2)
    table_001.add(
        Paragraph(
            "BILL TO",
            background_color=HexColor("263238"),
            font_color=X11Color("White"),
        )
    )
    table_001.add(
        Paragraph(
            "SHIP TO",
            background_color=HexColor("263238"),
            font_color=X11Color("White"),
        )
    )
    table_001.add(Paragraph("[Recipient Name]"))        # BILLING
    table_001.add(Paragraph("[Recipient Name]"))        # SHIPPING
    table_001.add(Paragraph("[Company Name]"))          # BILLING
    table_001.add(Paragraph("[Company Name]"))          # SHIPPING
    table_001.add(Paragraph("[Street Address]"))        # BILLING
    table_001.add(Paragraph("[Street Address]"))        # SHIPPING
    table_001.add(Paragraph("[City, State, ZIP Code]")) # BILLING
    table_001.add(Paragraph("[City, State, ZIP Code]")) # SHIPPING
    table_001.add(Paragraph("[Phone]"))                 # BILLING
    table_001.add(Paragraph("[Phone]"))                 # SHIPPING
    table_001.set_padding_on_all_cells(Decimal(2), Decimal(2), Decimal(2), Decimal(2))
    table_001.no_borders()
    return table_001
We've set the background_color of the initial paragraphs to #263238 (grey-blue) to match the color of the logo, and the font_color to White.
Let's call this in the main method as well:
# Invoice information table
page_layout.add(_build_invoice_information())

# Empty paragraph for spacing
page_layout.add(Paragraph(" "))

# Billing and shipping information table
page_layout.add(_build_billing_and_shipping_information())
Once we run the script again, this results in a new PDF file that contains more information:

With our basic information sorted out (company info and billing/shipping info) - we'll want to add an itemized description. These will be the goods/services that our supposed company offered to someone and are also typically done in a table-like fashion beneath the information we've already added.
Again, let's create a helper function that generates a table and populates it with data, which we can simply add to our layout later on:
We'll start by defining a Product class to represent a sold product.
In practice, you'd substitute the hard-coded strings related to the subtotal,
taxes and total prices with calculations of the actual prices - though,
this heavily depends on the underlying implementation of your Product models,
so we've added a stand-in for abstraction.
class Product:
    """
    This class represents a purchased product
    """
    def __init__(self, name: str, quantity: int, price_per_sku: float):
        self.name: str = name
        assert quantity >= 0
        self.quantity: int = quantity
        assert price_per_sku >= 0
        self.price_per_sku: float = price_per_sku
Now we can build a method _build_itemized_description_table that will render these products and their prices to the PDF:
def _build_itemized_description_table(products: typing.List[Product] = []):
    """
    This function builds a Table containing itemized billing information
    :param:     products
    :return:    a Table containing itemized billing information
    """
    table_001 = FixedColumnWidthTable(number_of_rows=15, number_of_columns=4)
    for h in ["DESCRIPTION", "QTY", "UNIT PRICE", "AMOUNT"]:
        table_001.add(
            TableCell(
                Paragraph(h, font_color=X11Color("White")),
                background_color=HexColor("0b3954"),
            )
        )

    odd_color = HexColor("BBBBBB")
    even_color = HexColor("FFFFFF")
    for row_number, item in enumerate(products):
        c = even_color if row_number % 2 == 0 else odd_color
        table_001.add(TableCell(Paragraph(item.name), background_color=c))
        table_001.add(TableCell(Paragraph(str(item.quantity)), background_color=c))
        table_001.add(TableCell(Paragraph("$ " + str(item.price_per_sku)), background_color=c))
        table_001.add(TableCell(Paragraph("$ " + str(item.quantity * item.price_per_sku)), background_color=c))

    # Optionally add some empty rows to have a fixed number of rows for styling purposes
    for row_number in range(len(products), 10):
        c = even_color if row_number % 2 == 0 else odd_color
        for _ in range(0, 4):
            table_001.add(TableCell(Paragraph(" "), background_color=c))

    # subtotal
    subtotal: float = sum([x.price_per_sku * x.quantity for x in products])
    table_001.add(TableCell(Paragraph("Subtotal", font="Helvetica-Bold", horizontal_alignment=Alignment.RIGHT, ), col_span=3, ))
    table_001.add(TableCell(Paragraph("$ 1,180.00", horizontal_alignment=Alignment.RIGHT)))

    # discounts
    table_001.add(TableCell(Paragraph("Discounts", font="Helvetica-Bold", horizontal_alignment=Alignment.RIGHT, ), col_span=3, ))
    table_001.add(TableCell(Paragraph("$ 0.00", horizontal_alignment=Alignment.RIGHT)))

    # taxes
    taxes: float = subtotal * 0.06
    table_001.add(TableCell(Paragraph("Taxes", font="Helvetica-Bold", horizontal_alignment=Alignment.RIGHT), col_span=3, ))
    table_001.add(TableCell(Paragraph("$ " + str(taxes), horizontal_alignment=Alignment.RIGHT)))

    # total
    total: float = subtotal + taxes
    table_001.add(TableCell(Paragraph("Total", font="Helvetica-Bold", horizontal_alignment=Alignment.RIGHT), col_span=3, ))
    table_001.add(TableCell(Paragraph("$ " + str(total), horizontal_alignment=Alignment.RIGHT)))
    table_001.set_padding_on_all_cells(Decimal(2), Decimal(2), Decimal(2), Decimal(2))
    table_001.no_borders()
    return table_001
This is the final code for this example:
import datetime
import random
from decimal import Decimal

import typing
from borb.pdf.canvas.color.color import HexColor, X11Color
from borb.pdf.canvas.layout.image.image import Image
from borb.pdf.canvas.layout.layout_element import Alignment
from borb.pdf.canvas.layout.page_layout.multi_column_layout import SingleColumnLayout
from borb.pdf.canvas.layout.page_layout.page_layout import PageLayout
from borb.pdf.canvas.layout.table.fixed_column_width_table import FixedColumnWidthTable
from borb.pdf.canvas.layout.table.table import Table, TableCell
from borb.pdf.canvas.layout.text.paragraph import Paragraph
from borb.pdf.document import Document
from borb.pdf.page.page import Page
from borb.pdf.pdf import PDF


def _build_invoice_information() -> Table:
    """
    This function builds a Table containing invoice information
    :return:    a Table containing invoice information
    """
    table_001 = FixedColumnWidthTable(number_of_rows=5, number_of_columns=3)

    table_001.add(Paragraph("[Street Address]"))
    table_001.add(Paragraph("Date", font="Helvetica-Bold", horizontal_alignment=Alignment.RIGHT))
    now = datetime.datetime.now()
    table_001.add(Paragraph("%d/%d/%d" % (now.day, now.month, now.year)))

    table_001.add(Paragraph("[City, State, ZIP Code]"))
    table_001.add(Paragraph("Invoice #", font="Helvetica-Bold", horizontal_alignment=Alignment.RIGHT))
    table_001.add(Paragraph("%d" % random.randint(1000, 10000)))

    table_001.add(Paragraph("[Phone]"))
    table_001.add(Paragraph("Due Date", font="Helvetica-Bold", horizontal_alignment=Alignment.RIGHT))
    table_001.add(Paragraph("%d/%d/%d" % (now.day, now.month, now.year)))

    table_001.add(Paragraph("[Email Address]"))
    table_001.add(Paragraph(" "))
    table_001.add(Paragraph(" "))

    table_001.add(Paragraph("[Company Website]"))
    table_001.add(Paragraph(" "))
    table_001.add(Paragraph(" "))

    table_001.set_padding_on_all_cells(Decimal(2), Decimal(2), Decimal(2), Decimal(2))
    table_001.no_borders()
    return table_001


def _build_billing_and_shipping_information() -> Table:
    """
    This function builds a Table containing billing and shipping information
    :return:    a Table containing shipping and billing information
    """
    table_001 = FixedColumnWidthTable(number_of_rows=6, number_of_columns=2)
    table_001.add(
        Paragraph(
            "BILL TO",
            background_color=HexColor("263238"),
            font_color=X11Color("White"),
        )
    )
    table_001.add(
        Paragraph(
            "SHIP TO",
            background_color=HexColor("263238"),
            font_color=X11Color("White"),
        )
    )
    table_001.add(Paragraph("[Recipient Name]"))        # BILLING
    table_001.add(Paragraph("[Recipient Name]"))        # SHIPPING
    table_001.add(Paragraph("[Company Name]"))          # BILLING
    table_001.add(Paragraph("[Company Name]"))          # SHIPPING
    table_001.add(Paragraph("[Street Address]"))        # BILLING
    table_001.add(Paragraph("[Street Address]"))        # SHIPPING
    table_001.add(Paragraph("[City, State, ZIP Code]")) # BILLING
    table_001.add(Paragraph("[City, State, ZIP Code]")) # SHIPPING
    table_001.add(Paragraph("[Phone]"))                 # BILLING
    table_001.add(Paragraph("[Phone]"))                 # SHIPPING
    table_001.set_padding_on_all_cells(Decimal(2), Decimal(2), Decimal(2), Decimal(2))
    table_001.no_borders()
    return table_001


class Product:
    """
    This class represents a purchased product
    """
    def __init__(self, name: str, quantity: int, price_per_sku: float):
        self.name: str = name
        assert quantity >= 0
        self.quantity: int = quantity
        assert price_per_sku >= 0
        self.price_per_sku: float = price_per_sku


def _build_itemized_description_table(products: typing.List[Product] = []):
    """
    This function builds a Table containing itemized billing information
    :param:     products
    :return:    a Table containing itemized billing information
    """
    table_001 = FixedColumnWidthTable(number_of_rows=15, number_of_columns=4)
    for h in ["DESCRIPTION", "QTY", "UNIT PRICE", "AMOUNT"]:
        table_001.add(
            TableCell(
                Paragraph(h, font_color=X11Color("White")),
                background_color=HexColor("0b3954"),
            )
        )

    odd_color = HexColor("BBBBBB")
    even_color = HexColor("FFFFFF")
    for row_number, item in enumerate(products):
        c = even_color if row_number % 2 == 0 else odd_color
        table_001.add(TableCell(Paragraph(item.name), background_color=c))
        table_001.add(TableCell(Paragraph(str(item.quantity)), background_color=c))
        table_001.add(TableCell(Paragraph("$ " + str(item.price_per_sku)), background_color=c))
        table_001.add(TableCell(Paragraph("$ " + str(item.quantity * item.price_per_sku)), background_color=c))

    # Optionally add some empty rows to have a fixed number of rows for styling purposes
    for row_number in range(len(products), 10):
        c = even_color if row_number % 2 == 0 else odd_color
        for _ in range(0, 4):
            table_001.add(TableCell(Paragraph(" "), background_color=c))

    # subtotal
    subtotal: float = sum([x.price_per_sku * x.quantity for x in products])
    table_001.add(TableCell(Paragraph("Subtotal", font="Helvetica-Bold", horizontal_alignment=Alignment.RIGHT, ), col_span=3, ))
    table_001.add(TableCell(Paragraph("$ 1,180.00", horizontal_alignment=Alignment.RIGHT)))

    # discounts
    table_001.add(TableCell(Paragraph("Discounts", font="Helvetica-Bold", horizontal_alignment=Alignment.RIGHT, ), col_span=3, ))
    table_001.add(TableCell(Paragraph("$ 0.00", horizontal_alignment=Alignment.RIGHT)))

    # taxes
    taxes: float = subtotal * 0.06
    table_001.add(TableCell(Paragraph("Taxes", font="Helvetica-Bold", horizontal_alignment=Alignment.RIGHT), col_span=3, ))
    table_001.add(TableCell(Paragraph("$ " + str(taxes), horizontal_alignment=Alignment.RIGHT)))

    # total
    total: float = subtotal + taxes
    table_001.add(TableCell(Paragraph("Total", font="Helvetica-Bold", horizontal_alignment=Alignment.RIGHT), col_span=3, ))
    table_001.add(TableCell(Paragraph("$ " + str(total), horizontal_alignment=Alignment.RIGHT)))
    table_001.set_padding_on_all_cells(Decimal(2), Decimal(2), Decimal(2), Decimal(2))
    table_001.no_borders()
    return table_001


def main():

    # create Document
    pdf: Document = Document()

    # add Page
    page: Page = Page()
    pdf.append_page(page)

    # set PageLayout
    page_layout: PageLayout = SingleColumnLayout(page,
                                                 vertical_margin=page.get_page_info().get_height() * Decimal(0.02))

    # add corporate logo
    page_layout.add(
        Image(
            "https://github.com/jorisschellekens/borb/blob/master/readme_img/logo/borb_64.png?raw=true",
            width=Decimal(64),
            height=Decimal(64),
        ))

    # Invoice information table
    page_layout.add(_build_invoice_information())

    # Empty paragraph for spacing
    page_layout.add(Paragraph(" "))

    # Billing and shipping information table
    page_layout.add(_build_billing_and_shipping_information())

    # Empty paragraph for spacing
    page_layout.add(Paragraph(" "))

    # Itemized description
    page_layout.add(_build_itemized_description_table([
        Product("Product 1", 2, 50),
        Product("Product 2", 4, 60),
        Product("Labor", 14, 60)
    ]))

    # store
    with open("showcase_001.pdf", "wb") as out_file_handle:
        PDF.dumps(out_file_handle, pdf)


if __name__ == "__main__":
    main()
Which outputs this PDF:

This example originated from my love of Sudoku puzzles, and a desire to showcase the FlexibleColumnWidthTable I'd been working on.
FlexibleColumnWidthTable allows you to specify preferred_width and preferred_height, enabling you to create square TableCell objects.
In the next example you'll be creating a Sudoku, with background colors for each 3x3 block.
from decimal import Decimal
from pathlib import Path

from borb.pdf.canvas.color.color import Color, HexColor
from borb.pdf.canvas.font.font import Font
from borb.pdf.canvas.font.simple_font.true_type_font import TrueTypeFont
from borb.pdf.canvas.layout.layout_element import Alignment
from borb.pdf.canvas.layout.page_layout.multi_column_layout import SingleColumnLayout
from borb.pdf.canvas.layout.page_layout.page_layout import PageLayout
from borb.pdf.canvas.layout.table.flexible_column_width_table import FlexibleColumnWidthTable
from borb.pdf.canvas.layout.table.table import Table, TableCell
from borb.pdf.canvas.layout.text.paragraph import Paragraph
from borb.pdf.document import Document
from borb.pdf.page.page import Page
from borb.pdf.pdf import PDF


def main():

    # represent the sudoku as a plaintext str
    # this is easier to debug/change
    sudoku_str: str = """
    3.9...4..
    2..7.9...
    .87......
    75..6.23.
    6..9.4..8
    .28.5..41
    ......59.
    ...1.6..7
    ..6...1.4
    """
    sudoku_str = sudoku_str \
        .replace("\t","")   \
        .replace(" ","")    \
        .replace("\n","")

    # create empty Document
    doc: Document = Document()

    # create empty Page
    p: Page = Page()
    doc.append_page(p)

    # create PageLayout
    l: PageLayout = SingleColumnLayout(p)

    # add Title
    pacifico: Font = TrueTypeFont.true_type_font_from_file(Path(__file__).parent / "Pacifico-Regular.ttf")
    l.add(Paragraph("Sudoku", font_size=Decimal(24), font_color=HexColor("0b3954"), font=pacifico))

    # add explanation
    l.add(Paragraph("""
                    Sudoku is a logic-based, combinatorial number-placement puzzle.
                    In classic sudoku, the objective is to fill a 9×9 grid with digits so that each column, each row,
                    and each of the nine 3×3 subgrids that compose the grid contains all of the digits from 1 to 9.
                    The puzzle setter provides a partially completed grid, which for a well-posed puzzle has a single solution.
                    """, font="Helvetica-Oblique"))

    # add Table
    s: Decimal = Decimal(20)
    t: Table = FlexibleColumnWidthTable(number_of_rows=9, number_of_columns=9)
    for i in range(0, 81):
        r: int = int(i / 9)
        c: int = i % 9
        background_color: Color = HexColor("ffffff")
        if r in [0,1,2,6,7,8] and c in [0,1,2,6,7,8]:
            background_color = HexColor("f1cd2e")
        if r in [3,4,5] and c in [3,4,5]:
            background_color = HexColor("f1cd2e")
        if sudoku_str[i] == ".":
            t.add(TableCell(Paragraph(" "), preferred_width=s, preferred_height=s, background_color=background_color))
        else:
            t.add(TableCell(Paragraph(sudoku_str[i], text_alignment=Alignment.CENTERED), preferred_width=s, preferred_height=s, background_color=background_color))
    t.set_padding_on_all_cells(Decimal(5), Decimal(5), Decimal(5), Decimal(5))
    l.add(t)

    # store
    with open("showcase_001.pdf", "wb") as out_file_handle:
        PDF.dumps(out_file_handle, doc)


if __name__ == "__main__":
    main()
This is another example of creating a Table and setting custom properties:
border_top,border_right,border_bottom,border_leftpreferred_widthpreferred_height
Doing these examples allows you to build a sort of muscle-memory for using Table objects in borb.
They also create fun little PDF's that you can share with colleagues during the coffee breaks.
from pathlib import Path

import typing
from borb.io.read.types import Decimal
from borb.pdf.canvas.color.color import HexColor
from borb.pdf.canvas.font.font import Font
from borb.pdf.canvas.font.simple_font.true_type_font import TrueTypeFont
from borb.pdf.canvas.layout.layout_element import Alignment
from borb.pdf.canvas.layout.page_layout.multi_column_layout import SingleColumnLayout
from borb.pdf.canvas.layout.table.table import TableCell
from borb.pdf.canvas.layout.table.flexible_column_width_table import FlexibleColumnWidthTable
from borb.pdf.canvas.layout.text.paragraph import Paragraph
from borb.pdf.document import Document
from borb.pdf.page.page import Page
from borb.pdf.page.page_size import PageSize
from borb.pdf.pdf import PDF


def main():

    # create document
    pdf = Document()

    # add page
    page = Page(PageSize.A4_LANDSCAPE.value[0], PageSize.A4_LANDSCAPE.value[1])
    pdf.append_page(page)

    layout = SingleColumnLayout(page)

    # write puzzle title
    font: Font = TrueTypeFont.true_type_font_from_file(
        Path(__file__).parent / "Pacifico-Regular.ttf"
    )
    layout.add(
        Paragraph(
            "Nonogram",
            font_color=HexColor("#f1cd2e"),
            font=font,
            font_size=Decimal(23),
        )
    )

    # write puzzle information
    layout.add(
        Paragraph(
            """
            Nonograms, also known as Paint by Numbers, Picross, Griddlers, Pic-a-Pix, and various other names,
            are picture logic puzzles in which cells in a grid must be colored or left blank according to numbers at the side of the grid to reveal a hidden picture.
            In this puzzle type, the numbers are a form of discrete tomography that measures how many unbroken lines of filled-in squares there are in any given row or column.
            For example, a clue of "4 8 3" would mean there are sets of four, eight, and three filled squares, in that order,
            with at least one blank square between successive sets.
            """
        )
    )

    # write grid
    w = Decimal(20)
    grid = FlexibleColumnWidthTable(
        number_of_rows=9,
        number_of_columns=25,
        margin_top=Decimal(12),
        horizontal_alignment=Alignment.CENTERED,
    )

    def insert_clues(cs: typing.List[int]):
        """
        This function inserts an array of clues into the table representing the nonogram.
        A clue of "0" renders an empty cell
        :param cs:  the clues to be inserted
        :return:    None
        """
        for c in cs:
            if c == 0:
                grid.add(
                    TableCell(
                        Paragraph(" "),
                        preferred_width=w,
                        preferred_height=w,
                        border_top=False,
                        border_right=False,
                        border_bottom=False,
                        border_left=False,
                    )
                )
            else:
                grid.add(
                    TableCell(
                        Paragraph(str(c), text_alignment=Alignment.CENTERED),
                        preferred_width=w,
                        preferred_height=w,
                        border_top=False,
                        border_right=False,
                        border_bottom=False,
                        border_left=False,
                    )
                )

    def insert_blanks(n: int):
        for _ in range(0, n):
            grid.add(TableCell(Paragraph(" "), preferred_width=w, preferred_height=w))

    insert_clues([0, 0, 0, 0, 0, 0, 0, 0, 1, 1, 0, 0, 0, 1, 1, 0, 0, 0, 0, 0, 0, 0, 1, 1, 0])
    insert_clues([0, 0, 0, 0, 0, 0, 0, 7, 1, 1, 2, 0, 2, 1, 1, 2, 0, 3, 1, 1, 0, 7, 1, 1, 2])
    insert_clues([0, 0, 0, 0, 0, 1, 1])
    insert_blanks(18)
    insert_clues([0, 0, 0, 0, 0, 1, 1])
    insert_blanks(18)
    insert_clues([0, 0, 0, 0, 0, 1, 1])
    insert_blanks(18)
    insert_clues([0, 0, 0, 3, 2, 2, 3])
    insert_blanks(18)
    insert_clues([1, 1, 1, 1, 1, 1, 1])
    insert_blanks(18)
    insert_clues([1, 1, 1, 1, 1, 1, 1])
    insert_blanks(18)
    insert_clues([0, 0, 0, 3, 2, 1, 3])
    insert_blanks(18)

    grid.set_padding_on_all_cells(Decimal(3), Decimal(3), Decimal(3), Decimal(3))
    layout.add(grid)

    # attempt to store PDF
    with open("output.pdf", "wb") as in_file_handle:
        PDF.dumps(in_file_handle, pdf)


if __name__ == "__main__":
    main()
This code creates the following PDF:

Since I started writing this library, I've been on the lookout for fun ways to display new features. When I added support for Emoji, I was at a loss to find an interesting and engaging way to show them.
And then I came across tents-and-trees puzzles. And it immediately provided me with a way to showcase both:
FlexibleColumnWidthTableEmojiTrueTypeFont
In this example you'll be creating a one-page puzzle:
import random
from pathlib import Path

from borb.io.read.types import Decimal
from borb.pdf.canvas.color.color import HexColor
from borb.pdf.canvas.font.font import Font
from borb.pdf.canvas.font.simple_font.true_type_font import TrueTypeFont
from borb.pdf.canvas.layout.emoji.emoji import Emojis
from borb.pdf.canvas.layout.layout_element import Alignment
from borb.pdf.canvas.layout.list.unordered_list import UnorderedList
from borb.pdf.canvas.layout.page_layout.multi_column_layout import SingleColumnLayout
from borb.pdf.canvas.layout.table.table import TableCell
from borb.pdf.canvas.layout.table.flexible_column_width_table import FlexibleColumnWidthTable
from borb.pdf.canvas.layout.text.paragraph import Paragraph
from borb.pdf.document import Document
from borb.pdf.page.page import Page
from borb.pdf.pdf import PDF

def main():

    # create document
    pdf = Document()

    # add page
    page = Page()
    pdf.append_page(page)

    layout = SingleColumnLayout(page)

    # write puzzle title
    font: Font = TrueTypeFont.true_type_font_from_file(
        Path(__file__).parent / "Pacifico-Regular.ttf"
    )
    layout.add(
        Paragraph(
            "Tents and Trees",
            font_color=HexColor("#f1cd2e"),
            font=font,
            font_size=Decimal(23),
        )
    )

    # write puzzle information
    layout.add(
        Paragraph(
            """
            You get a grid that represents a campsite.
            There are a number of trees on the campsite.
            You as a campsite manager must find a spot for the tent of each visitor that meets the following requirements:
            """
        )
    )
    layout.add(
        UnorderedList()
            .add(Paragraph("A tree must be immediately next to each tent (diagonal is not allowed)."))
            .add(Paragraph("In total there are as many tents as trees. So every tent has its own tree."))
            .add(Paragraph("The numbers outside the grid indicate how many tents there are in the relevant row or column."))
            .add(Paragraph("Tents never touch each other: neither horizontally nor vertically nor diagonally."))
            .add(Paragraph("A tent can make contact with multiple trees, but is only connected to one."))
    )

    # write grid
    w = Decimal(20)
    grid = FlexibleColumnWidthTable(
        number_of_rows=11,
        number_of_columns=11,
        margin_top=Decimal(5),
        horizontal_alignment=Alignment.CENTERED,
    )
    h_clues = [3, 2, 2, 1, 2, 2, 1, 2, 2, 3]
    v_clues = [3, 1, 1, 3, 1, 3, 2, 2, 0, 4]
    tree_layout = """
    __________
    x_____x__x
    ____x_____
    _x____x___
    ____x____x
    xx___x__x_
    ___x___x__
    _x_______x
    __x_____x_
    _x____x___
    """
    tree_layout = tree_layout.replace("\n", "").replace(" ", "")
    grid.add(TableCell(Paragraph(" "), preferred_height=w, preferred_width=w, border_top=False, border_left=False))
    for i in h_clues:
        grid.add(
            TableCell(Paragraph(str(i)), preferred_height=w, preferred_width=w)
        )
    for i in range(0, 10):
        grid.add(
            TableCell(
                Paragraph(str(v_clues[i])), preferred_height=w, preferred_width=w
            )
        )
        for j in range(0, 10):
            if tree_layout[i * 10 + j] == "_":
                grid.add(
                    TableCell(Paragraph(" "), preferred_height=w, preferred_width=w)
                )
            else:
                grid.add(
                    TableCell(
                        random.choice(
                            [
                                Emojis.DECIDUOUS_TREE.value,
                                Emojis.EVERGREEN_TREE.value,
                            ]
                        ),
                        preferred_height=w,
                        preferred_width=w,
                    )
                )

    grid.set_padding_on_all_cells(Decimal(3), Decimal(3), Decimal(3), Decimal(3))
    layout.add(grid)

    # attempt to store PDF
    with open("showcase_002.pdf", "wb") as in_file_handle:
        PDF.dumps(in_file_handle, pdf)

if __name__ == '__main__':
    main()
The output PDF should look like this (except for the tree-emoji, which are random):

In previous examples you've always used one PageLayout instance per Page.
And although this is the most common scenario, you can easily use multiple PageLayout instances.
This has the advantage of offering you even greater flexibility.
In this example you'll be adding some content to a Page using SingleColumnLayout, and then switch to MultiColumnLayout to finish the Page.
You'll be recreating a classic newspaper look-and-feel.
from borb.io.read.types import Decimal
from borb.pdf.canvas.layout.horizontal_rule import HorizontalRule
from borb.pdf.canvas.layout.layout_element import Alignment
from borb.pdf.canvas.layout.page_layout.multi_column_layout import SingleColumnLayout, MultiColumnLayout
from borb.pdf.canvas.layout.page_layout.page_layout import PageLayout
from borb.pdf.canvas.layout.table.fixed_column_width_table import FixedColumnWidthTable
from borb.pdf.canvas.layout.text.paragraph import Paragraph
from borb.pdf.document import Document
from borb.pdf.page.page import Page
from borb.pdf.page.page_size import PageSize
from borb.pdf.pdf import PDF


def main():

    # create document
    pdf = Document()

    # add page
    page = Page()
    pdf.append_page(page)

    # write title
    layout_001 = SingleColumnLayout(page)
    title_table: FixedColumnWidthTable = FixedColumnWidthTable(number_of_rows=1, number_of_columns=3, column_widths=[Decimal(1), Decimal(4), Decimal(1)])
    title_table.add(Paragraph("\"All the News That's Fit to Print.\""))
    title_table.add(Paragraph("The New York Times", font="Helvetica-Bold", font_size=Decimal(30), text_alignment=Alignment.CENTERED))
    title_table.add(Paragraph("""
                                Today, morning clouds give way to sunshine by the afternoon high 65.
                                Tonight, cloudy low 54.
                                Tomorrow clouds giving way to sunshine, high 70.
                                """, font_size=Decimal(8)))
    title_table.no_borders()
    layout_001.add(title_table)

    layout_001.add(HorizontalRule())
    layout_001.add(Paragraph("VOL. CLXIX", text_alignment=Alignment.CENTERED))
    layout_001.add(HorizontalRule())

    # switch to MultiColumnLayout
    layout_002: PageLayout = MultiColumnLayout(page, 4)
The next part is a bit tricky. We need to convince MultiColumnLayout to not render content at the top of the Page.
In order to do that, we're going to do 2 things:
- After
MultiColumnLayouthas been constructed, we're going to change itspage_heightparameter. By doing so we're telling the layout mechanism that it needs to render content (and jump to the next column) in the limited remainingRectangle. Because PDF has its origin in the lower-left corner of thepage, setting thepage_heightparameter will also limit the maximum y-coordinate at whichLayoutElementobjects are allowed to render. - We are also going to change the
_previous_element_yvariable. This variable keeps track of where the previousLayoutElementwas rendered, and is default initialized to thepage_heightminus thevertical_margin. By tweaking this variable we ensure the next (that is to say first)LayoutElementto be added inMultiColumnLayoutwill be placed at the right y-coordinate.
    # mark the top section as off limits
    max_y: Decimal = Decimal(PageSize.A4_PORTRAIT.value[1] - 120)
    layout_002._page_height = max_y
    layout_002._previous_element_y = max_y - layout_002._vertical_margin
With that taken care of, we can now add content to the PageLayout manager as we would normally do.
    # add content
    for _ in range(0, 10):
        layout_002.add(Paragraph("""
                                Lorem ipsum dolor sit amet, consectetur adipiscing elit, sed do eiusmod tempor incididunt ut labore et dolore magna aliqua.
                                Ut enim ad minim veniam, quis nostrud exercitation ullamco laboris nisi ut aliquip ex ea commodo consequat.
                                Duis aute irure dolor in reprehenderit in voluptate velit esse cillum dolore eu fugiat nulla pariatur.
                                Excepteur sint occaecat cupidatat non proident, sunt in culpa qui officia deserunt mollit anim id est laborum.
                                """, font_size=Decimal(10)))

    # attempt to store PDF
    with open("output.pdf", "wb") as in_file_handle:
        PDF.dumps(in_file_handle, pdf)


if __name__ == "__main__":
    main()
In this example you'll see how to write your own PageLayout.
We'll be making a PageLayout implementation that attempts to write text in a circular shape.
This will give you more insight into how PageLayout (and in fact the whole layout-mechanism) works in borb.
For this example, you'll be working with the invoice you created earlier. In this example you'll learn how to process its content automatically. You'll also learn how to debug such a workflow.
To start, let's just read the PDF into a Document object:
import typing
from borb.pdf.document import Document
from borb.pdf.pdf import PDF


def main():

    d: typing.Optional[Document] = None
    with open("output.pdf", "rb") as pdf_in_handle:
        d = PDF.loads(pdf_in_handle)

    assert d is not None


if __name__ == "__main__":
    main()
Now we can extract the shipping information by specifying a rectangular area. Since I don't know the exact coordinates, I'm going to be starting out at a pretty random location, and drawing a square (annotation) on the page. That way I can get an idea of where the information is that I'd like to extract.
import typing
from decimal import Decimal

from borb.pdf.canvas.color.color import X11Color
from borb.pdf.canvas.geometry.rectangle import Rectangle
from borb.pdf.document import Document
from borb.pdf.pdf import PDF


def main():

    d: typing.Optional[Document] = None
    with open("output.pdf", "rb") as pdf_file_handle:
        d = PDF.loads(pdf_file_handle)

    assert d is not None

    # add annotation
    d.get_page(0).append_square_annotation(Rectangle(Decimal(300), Decimal(600), Decimal(100), Decimal(100)),
                                           stroke_color=X11Color("Red"))

    # Write
    with open("output_001.pdf", "wb") as pdf_file_handle:
        PDF.dumps(pdf_file_handle, d)

if __name__ == "__main__":
    main()
After some fiddling around, I found these coordinates to work best:
    # add annotation
    d.get_page(0).append_square_annotation(Rectangle(Decimal(280), Decimal(510), Decimal(200), Decimal(130)),
                                           stroke_color=X11Color("Red"))
Now you can extract the text-content in the invoice, by using a LocationFilter and SimpleTextExtraction.
import typing
from decimal import Decimal

from borb.pdf.canvas.geometry.rectangle import Rectangle
from borb.pdf.document import Document
from borb.pdf.pdf import PDF
from borb.toolkit.location.location_filter import LocationFilter
from borb.toolkit.text.simple_text_extraction import SimpleTextExtraction


def main():

    r: Rectangle = Rectangle(Decimal(280), Decimal(510), Decimal(200), Decimal(130))
    l0: LocationFilter = LocationFilter(r)
    l1: SimpleTextExtraction = SimpleTextExtraction()
    l0.add_listener(l1)

    d: typing.Optional[Document] = None
    with open("output.pdf", "rb") as pdf_file_handle:
        d = PDF.loads(pdf_file_handle, [l0])

    assert d is not None

    print(l1.get_text_for_page(0))


if __name__ == "__main__":
    main()
This prints:
SHIP TO
[Recipient Name]
[Company Name]
[Street Address]
[City, State, ZIP Code]
[Phone]
Of course, this process can be rather error-prone. Ideally, you'd like to specify something like "find the address underneath the words SHIP TO". Let's make that happen;
To round up this exercise, let's find the subtotal/total/discount/price information.
Again, we'll be making use of RegularExpressionTextExtraction;
In this section you've coded up some challenging PDF documents.
You've worked with Table and PageLayout (even making your own) and you've learned how to create and process an invoice.
You should be ready to take on the world with your new PDF-processing skills.