ceph-ansible
Ansible playbook for Ceph!
Clone me:
git clone https://github.com/ceph/ceph-ansible.gitWhat does it do?
General support for:
- Monitors
- OSDs
- MDSs
- RGW
More details:
- Authentication (cephx), this can be disabled.
- Supports cluster public and private network.
- Monitors deployment. You can easily start with one monitor and then progressively add new nodes. So can deploy one monitor for testing purpose. For production, I recommend to always use an odd number of monitors, 3 tends to be the standard.
- Object Storage Daemons. Like the monitors you can start with a certain amount of nodes and then grow this number. The playbook either supports a dedicated device for storing the journal or both journal and OSD data on the same device (using a tiny partition at the beginning of the device).
- Metadata daemons.
- Collocation. The playbook supports collocating Monitors, OSDs and MDSs on the same machine.
- The playbook was validated on Debian Wheezy, Ubuntu 12.04 LTS and CentOS 6.4.
- Tested on Ceph Dumpling and Emperor.
- A rolling upgrade playbook was written, an upgrade from Dumpling to Emperor was performed and worked.
Configuring Ceph
The supported method for defining your ceph.conf is to use the ceph_conf_overrides variable. This allows you to specify configuration options using
an INI format. This variable can be used to override sections already defined in ceph.conf (see: roles/ceph-common/templates/ceph.conf.j2) or to provide
new configuration options. The following sections in ceph.conf are supported: [global], [mon], [osd], [mds] and [rgw].
An example:
ceph_conf_overrides:
   global:
     foo: 1234
     bar: 5678
   osd:
     osd mkfs type: ext4
Note: we will no longer accept pull requests that modify the ceph.conf template unless it helps the deployment. For simple configuration tweaks
please use the ceph_conf_overrides variable.
Special notes
If you are looking at deploying a Ceph version older than Jewel.
It is highly recommended that you apply the following settings to your group_vars/all file on the ceph_conf_overrides variable:
ceph_conf_overrides:
  osd:
    osd recovery max active: 5
    osd max backfills: 2
    osd recovery op priority: 2
    osd recovery threads: 1
ceph#694 removed all the default options that were part of the repo. The goal is to keep the default from Ceph. Below you will find the configuration that was applied prior to the PR in case you want to keep using them:
| Setting | ceph-ansible | ceph |
|---|---|---|
| cephx require signatures | true | false |
| cephx cluster require signatures | true | false |
| osd pool default pg num | 128 | 8 |
| osd pool default pgp num | 128 | 8 |
| rbd concurrent management ops | 20 | 10 |
| rbd default map options | rw | '' |
| rbd default format | 2 | 1 |
| mon osd down out interval | 600 | 300 |
| mon osd min down reporters | 7 | 1 |
| mon clock drift allowed | 0.15 | 0.5 |
| mon clock drift warn backoff | 30 | 5 |
| mon osd report timeout | 900 | 300 |
| mon pg warn max per osd | 0 | 300 |
| mon osd allow primary affinity | true | false |
| filestore merge threshold | 40 | 10 |
| filestore split multiple | 8 | 2 |
| osd op threads | 8 | 2 |
| filestore op threads | 8 | 2 |
| osd recovery max active | 5 | 15 |
| osd max backfills | 2 | 10 |
| osd recovery op priority | 2 | 63 |
| osd recovery max chunk | 1048576 | 8 << 20 |
| osd scrub sleep | 0.1 | 0 |
| osd disk thread ioprio class | idle | '' |
| osd disk thread ioprio priority | 0 | -1 |
| osd deep scrub stride | 1048576 | 524288 |
| osd scrub chunk max | 5 | 25 |
If you want to use them, just use the ceph_conf_overrides variable as explained above.
Setup with Vagrant using virtualbox provider
- Create vagrant_variables.yml
$ cp vagrant_variables.yml.sample vagrant_variables.yml
- Create site.yml
$ cp site.yml.sample site.yml
- Create VMs
$ vagrant up --no-provision --provider=virtualbox
$ vagrant provision
...
...
...
 ____________
< PLAY RECAP >
 ------------
        \   ^__^
         \  (oo)\_______
            (__)\       )\/\
                ||----w |
                ||     ||


mon0                       : ok=16   changed=11   unreachable=0    failed=0
mon1                       : ok=16   changed=10   unreachable=0    failed=0
mon2                       : ok=16   changed=11   unreachable=0    failed=0
osd0                       : ok=19   changed=7    unreachable=0    failed=0
osd1                       : ok=19   changed=7    unreachable=0    failed=0
osd2                       : ok=19   changed=7    unreachable=0    failed=0
rgw                        : ok=20   changed=17   unreachable=0    failed=0
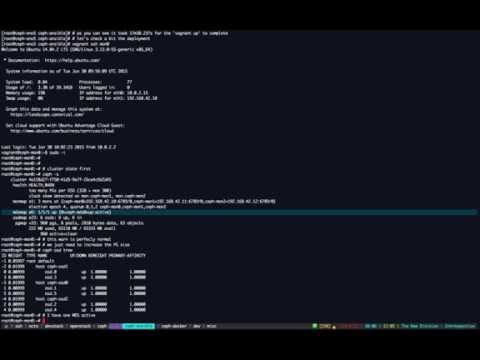
Check the status:
$ vagrant ssh mon0 -c "sudo ceph -s"
    cluster 4a158d27-f750-41d5-9e7f-26ce4c9d2d45
     health HEALTH_OK
     monmap e3: 3 mons at {ceph-mon0=192.168.0.10:6789/0,ceph-mon1=192.168.0.11:6789/0,ceph-mon2=192.168.0.12:6789/0}, election epoch 6, quorum 0,1,2 ceph-mon0,ceph-mon1,ceph-mon
     mdsmap e6: 1/1/1 up {0=ceph-osd0=up:active}, 2 up:standby
     osdmap e10: 6 osds: 6 up, 6 in
      pgmap v17: 192 pgs, 3 pools, 9470 bytes data, 21 objects
            205 MB used, 29728 MB / 29933 MB avail
                 192 active+clean
To re-run the Ansible provisioning scripts:
$ vagrant provisionSpecifying fsid and secret key in production
The Vagrantfile specifies an fsid for the cluster and a secret key for the
monitor. If using these playbooks in production, you must generate your own fsid
in group_vars/all and monitor_secret in group_vars/mons. Those files contain
information about how to generate appropriate values for these variables.
Specifying package origin
By default, ceph-common installs from Ceph repository. However, you
can set ceph_origin to "distro" to install Ceph from your default repository.
Moreover for people looking to install any version of Ceph prior to the Jewel release on a Red Hat based system you would have to set use_server_package_split: false.
Setup for Vagrant using libvirt provider
- Create vagrant_variables.yml
$ cp vagrant_variables.yml.sample vagrant_variables.yml
- Edit
vagrant_variables.ymland setup the following variables:
memory: 1024
disks: "[ '/dev/vdb', '/dev/vdc' ]"
vagrant_box: centos/7- Create site.yml
$ cp site.yml.sample site.yml
- Create VMs
$ sudo vagrant up --no-provision --provider=libvirt
$ sudo vagrant provision
Setup for Vagrant using parallels provider
- Create vagrant_variables.yml
$ cp vagrant_variables.yml.sample vagrant_variables.yml
- Edit
vagrant_variables.ymland setup the following variables:
vagrant_box: parallels/ubuntu-14.04- Create site.yml
$ cp site.yml.sample site.yml
- Create VMs
$ vagrant up --no-provision --provider=parallels
$ vagrant provision
For Debian based systems
If you want to use "backports", you can set "true" to ceph_use_distro_backports.
Attention, ceph-common doesn't manage backports repository, you must add it yourself.
For Atomic systems
If you want to run containerized deployment on Atomic systems (RHEL/CentOS Atomic), please copy
vagrant.yml.atomic to vagrant_variables.yml, and copy group_vars/all.docker to group_vars/all.
Since centos/atomic-host doesn't have spare storage controller to attach more disks, it is likely the first time vagrant up --provider=virtualbox runs, it will fail to attach to a storage controller. In such case, run the following command:
VBoxManage storagectl `VBoxManage list vms |grep ceph-ansible_osd0|awk '{print $1}'|tr \" ' '` --name "SATA" --add satathen run vagrant up --provider=virtualbox again.
Setup for Vagrant using OpenStack provider
Install the Vagrant plugin for the openstack provider: vagrant plugin install vagrant-openstack-provider.
$ cp site.yml.sample site.yml
$ cp group_vars/all.docker.sample group_vars/all
$ cp vagrant_variables.yml.openstack vagrant_variables.yml- Edit
vagrant_variables.yml: Setmon_vmsandosd_vmsto the numbers you want. If you are using an Atomic image, un-comment out theskip_tagsline. Un-comment theos_lines. Setos_ssh_usernameto 'centos' for Centos and 'cloud-user' for RHEL images. Setos_ssh_private_key_pathto '~/.ssh/id_rsa' Setos_openstack_auth_urlto the auth url of your Open Stack cloud Setos_usernameandos_passwordto what you provided for Open Stack registration or leave them as ENV vars if you have set the corresponding env vars for your user. Setos_tenant_nameto your Open Stack cloud project name. Setos_regionto your Open Stack cloud region name. Setos_flavorto 'm3.medium'. This size has ephemeral storage that will be used by the OSD for the /dev/vdb disk Set theos_imageto an image found in the Images list in the Open Stack cloud Dashboard (i.e. 'centos-atomic-host'). Set theos_keypair_nameto the keypair name you used when you did the Open Stack registration.
$ vagrant up --provider=openstack
Once the playbook is finished, you should be able to do vagrant ssh mon0 or
vagrant ssh osd0 to get to the VMs.
sudo docker ps should show the running containers
When you are done, use vagrant destroy to get rid of the VMs. You should
also remove the associated entries in .ssh/known_hosts so that if the IP
addresses get reused by future Open Stack Cloud instances there will not be
old known_hosts entries.
Want to contribute?
Read this carefully then :). The repository centralises all the Ansible roles. The roles are all part of the Galaxy. We love contribution and we love giving visibility to our contributors, this is why all the commits must be signed-off.
Submit a patch
To start contributing just do:
$ git checkout -b my-working-branch
$ # do your changes #
$ git add -p
One more step, before pushing your code you should run a syntax check:
$ ansible-playbook -i dummy-ansible-hosts test.yml --syntax-check
If your change impacts a variable file in a role such as roles/ceph-common/defaults/main.yml, you need to generate a group_vars file:
$ ./generate_group_vars_sample.sh
You are finally ready to push your changes on Github:
$ git commit -s
$ git push origin my-working-branch
Worked on a change and you don't want to resend a commit for a syntax fix?
$ # do your syntax change #
$ git commit --amend
$ git push -f origin my-working-branch
Testing PR
Go on the github interface and submit a PR.
Now we have 2 online CIs:
- Travis, simply does a syntax check
- Jenkins Ceph: bootstraps one monitor, one OSD, one RGW
If Jenkins detects that your commit broke something it will turn red. You can then check the logs of the Jenkins by clicking on "Testing Playbooks" button in your PR and go to "Console Output". You can now submit a new commit/change that will update the CI system to run a new play.
It might happen that the CI does not get reloaded so you can simply leave a comment on your PR with "test this please" and it will trigger a new CI build.
Vagrant Demo
Bare metal demo
Deployment from scratch on bare metal machines: