Laboratory Appointment Booking System (L.A.B.S), was the fourth project undertaken on my immersive course. The overall goal of the project was to create a full-stack application, using react for the front end and a Python Django back end. The project was undertaken as a team of four.
The origin story of the project was to build an MVP demo of booking platform for an existing business, which would provide them with a working demo that they could take and build on to create a fully-fledged product.
The project was an opportunity for the team to cement our learnings over from the course as a whole with regards to React and also to add the new technology of Django for the back end of the application.
The finished product can be found on Heroku here.
- Build a full-stack application by making the backend and the front-end
- Use a Python Django API using Django REST Framework to serve data from a Postgres database
- Consume the API with a separate front-end built with React
- Be a complete product which most likely means multiple relationships and CRUD functionality for at least a couple of models
- Implement thoughtful user stories/wireframes that are significant enough to help you know which features are core MVP and which you can cut
- Have a visually impressive design to kick your portfolio up a notch and have something to wow future clients & employers. ALLOW time for this
- Django
- React.js
- Bulma
- CSS3
- JSON
- Babel
- Google Fonts
- SASS
- Heroku
- Webpack
- Git and GitHub
- JavaScript (ES6+)
- LoaderSpinner
- HTML5
The starting point for the project was to define the data models for the back end.
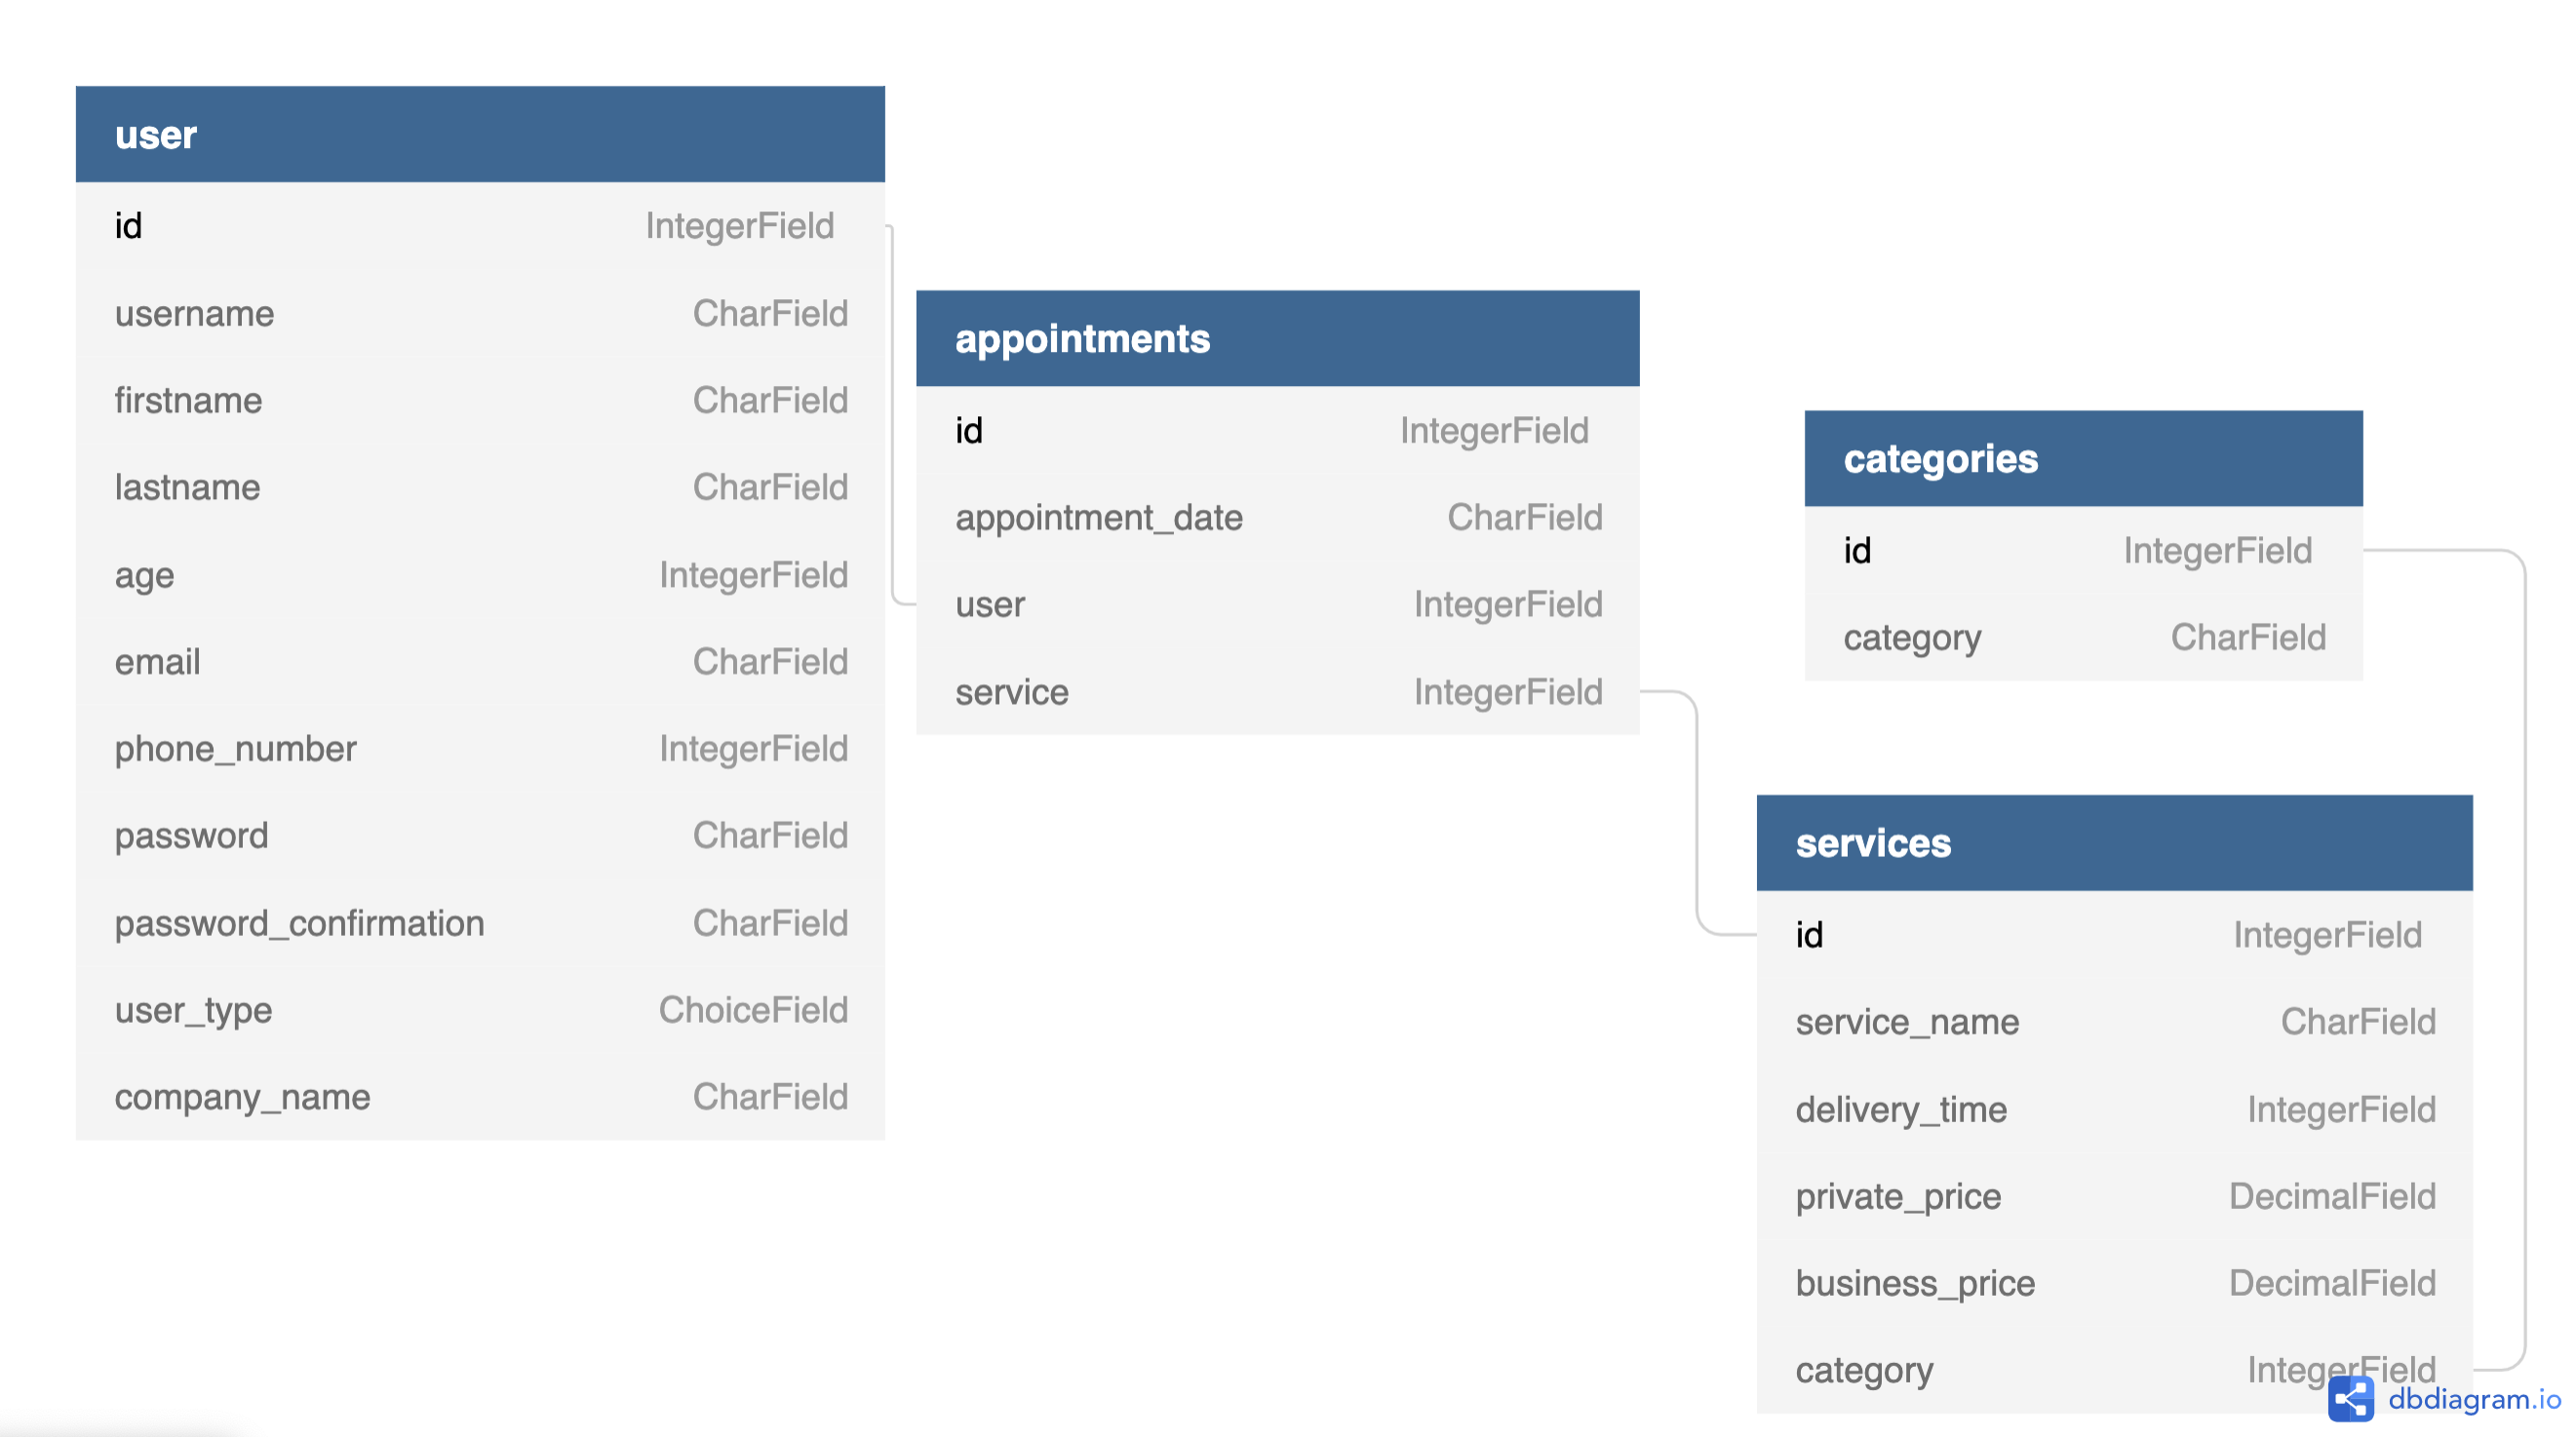
The graphic below outlines the four models we settled on and the relationships between the models.
The categories, services and appointment models can be found in the appointments app and the user model is located in the jwt_auth app.
The Relationships
User ID -----> Appointments User (one to many)
Appointments services ------> Services ID (many to many)
Categories ID -----> Services category (one to many)
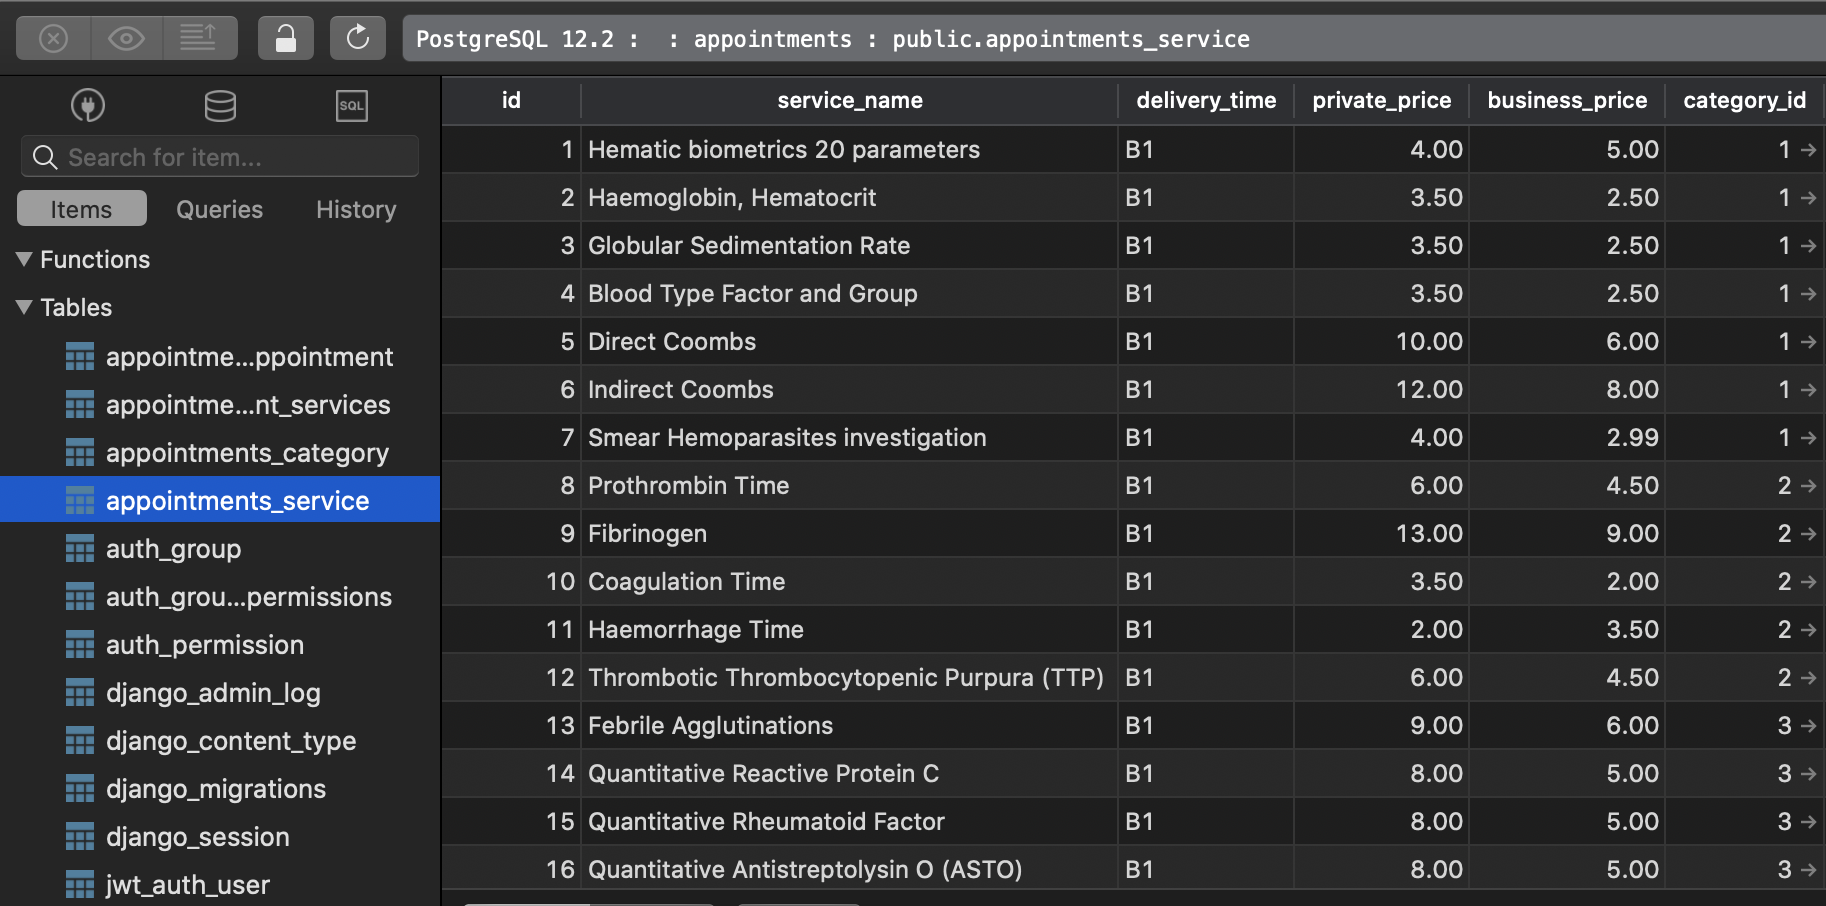
As the data for our project was provided for us on a spreadsheet, by the healthcare provider, we didn’t need to use an external API, but instead created our own fixture.json file using the data provided on the original spreadsheet and used this information to populate our services model, which was in turn stored in a PostgreSQL database.
The screenshot below, is part of the services table as viewed in Tableplus.
Models
Although Django gives you a user model as standard, as we required some additional fields, we extended the provided model with the following custom fields:
agephone-number
In addition to the standard Django user model fields:
emailidusernamefirst namelast namepasswordpassword confirmation
class User(AbstractUser):
    age = models.IntegerField(null=True)
    phone_number = models.IntegerField(null=True)
    BUSINESS = 'BA'
    INDIVIDUAL = 'IN'
    USER_TYPE_CHOICES = [
        (BUSINESS, 'Business'),
        (INDIVIDUAL, 'Individual'),
    ]
    user_type = models.CharField(
        max_length=2,
        choices=USER_TYPE_CHOICES,
        default=INDIVIDUAL,
    )

    def __str__(self):
        return self.username
N.B. Although we defined an additional field called User_type, in the end we did not get the chance to implement its usage into the final application.
Serializers
For each model, we created a serializer:
AppointmentSerializerCategorySerializerServiceSerializerUserSerializer
An example of one can be seen below.
class AppointmentSerializer(serializers.ModelSerializer):

    class Meta:
        model = Appointment
        fields = ('id', 'appointment_date', 'services', 'user')
        extra_kwargs = {
            'services': {'required': False}
        }
For some of our end-points, we required a combination of models and for that reason we created a number of nested serializers:
PopulateServiceSerializerPopulateCategorySerializerPopulateAppointmentSerializer
Below is an example of such a serilizer.
class PopulateAppointmentSerializer(serializers.ModelSerializer):
    services = ServiceSerializer(many=True)
    user = UserSerializer()

    class Meta:
        model = Appointment
        fields = ('id', 'appointment_date', 'user', 'services')
Views
We created a number of different views across our different apps, in order to get the information passed from our serializers.
These views consisted of both Classical based and Django’s Generic based views. In using the Generic based views, we were able to easily obtain the standard REST functionality of INDEX, CREATE, SHOW, UPDATE and DELETE.
Below is an example as used for the services model.
 # Services
class ServiceListView(ListCreateAPIView):
    queryset = Service.objects.all()
    serializer_class = ServiceSerializer

    def get(self, _request):
        service = Service.objects.all()
        serializer = PopulateServiceSerializer(service, many=True)

        return Response(serializer.data)


class ServiceDetailView(RetrieveUpdateDestroyAPIView):
    queryset = Service.objects.all()
    serializer_class = ServiceSerializer

    def get(self, _request, pk):
        service = Service.objects.get(pk=pk)
        serializer = PopulateServiceSerializer(service)

        return Response(serializer.data)
The Endpoints
The final application consisted of eight endpoints, as can be seen in the screenshot below.
    path('', ListView.as_view()),
    path('appointments/', ListView.as_view()),
    path('<int:pk>/', DetailView.as_view()),
    path('services/', ServiceListView.as_view()),
    path('services/<int:pk>/', ServiceDetailView.as_view()),
    path('category/', CategoryListView.as_view()),
    path('category/<int:pk>/', CategoryDetailView.as_view()),
    path('user/<int:pk>/', UserDetailView.as_view()),
The front end of the application was built using a combination of React Classes and Hooks. Hooks being a new React technique we had only just learnt. In total we had 11 components, below I will discuss some of the key ones.
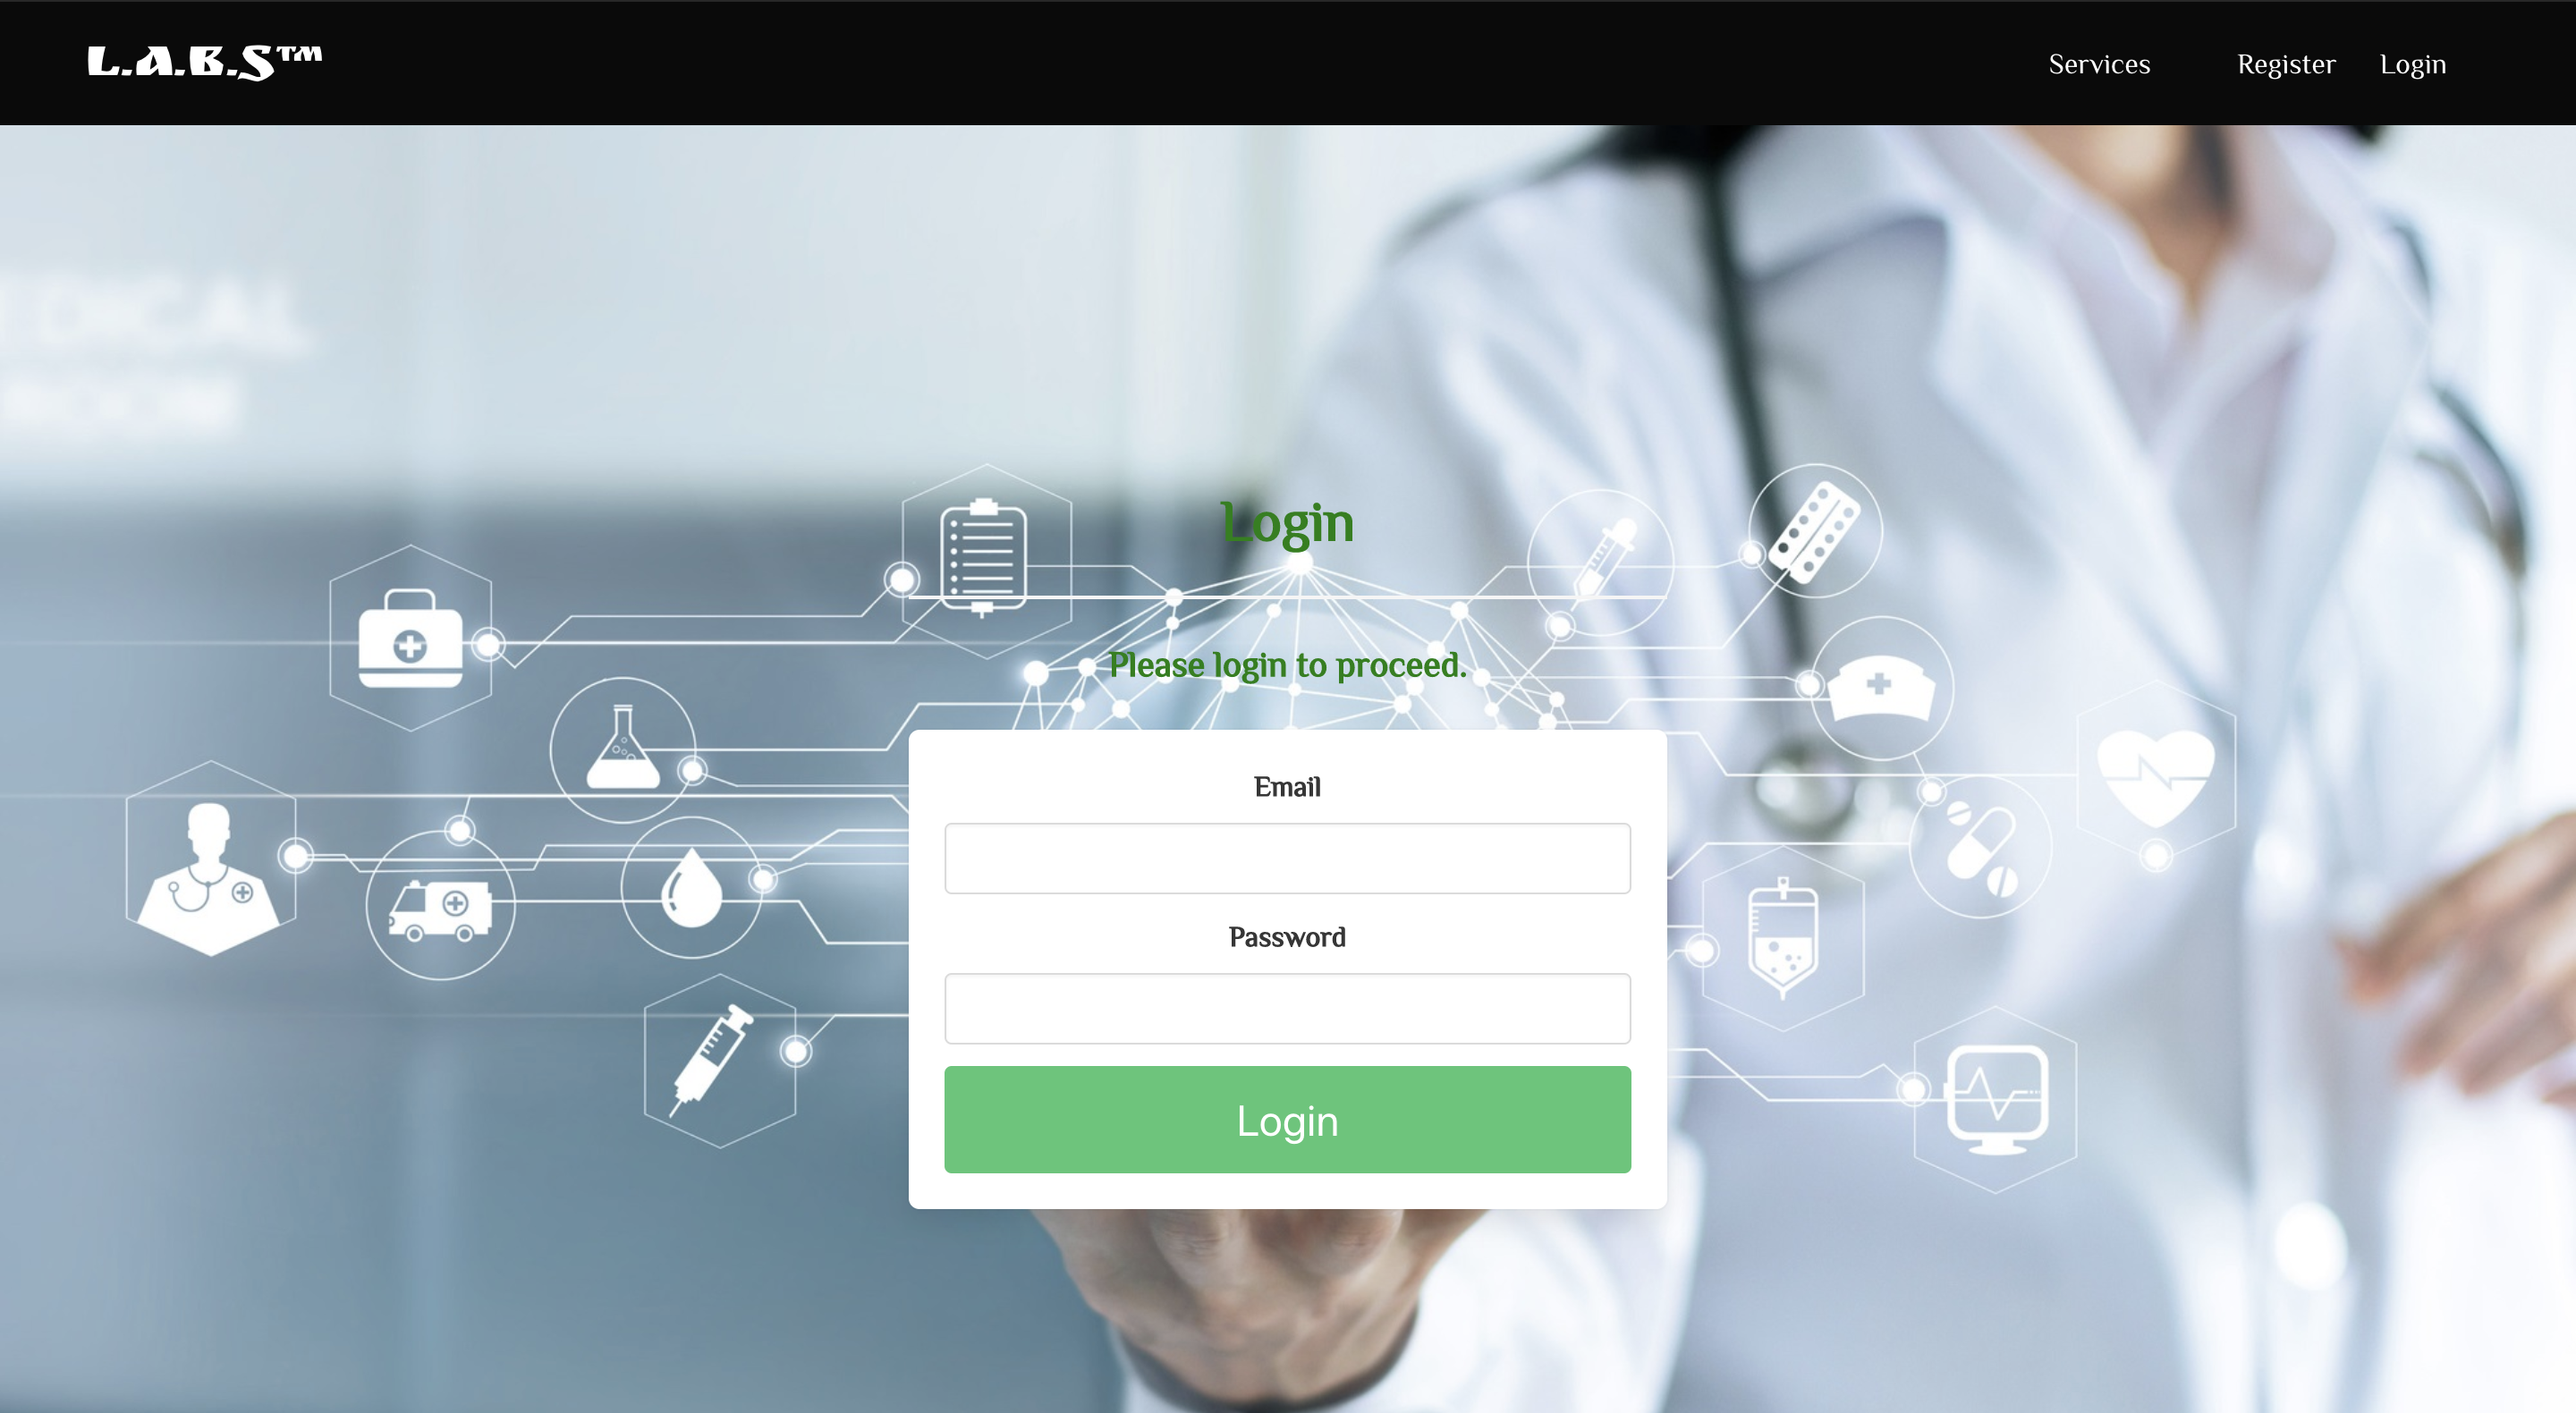
Register.js and Login.js
Standard Register and Login components where built, where we used token validation.
The information entered by the user in the registration and login forms is set as state and then posted to our backed endpoints through /api/register and /api/login.
Service.js, ServiceCard.js and Dropbox.js
To enable filtering of the list of services, we created a Dropbox.js component. The component contained a list of categories that each service belonged to. Using a hadleDropDown() function in the services page, we were then able to filter the services by category selected or list all with a ‘search all' category.
  componentDidMount() {
    axios
      .get('/api/appointments/category/')
      .then((res) => {
        this.setState({
          category: res.data,
          filteredCategories: res.data
        })
      })
      .catch((error) => console.error(error))
  }

  handleDropdown(event) {
    this.setState({ dropDownOption: event.target.value })

    if (event.target.value === 'Search All') {
      this.setState({ filteredCategories: this.state.category })
    } else {
      const onlyDropdownSelected = this.state.category.filter((service) => {
        if (
          service.category.toLowerCase() === event.target.value.toLowerCase()
        ) {
          return event.target.value
        }
      })
      this.setState({ filteredCategories: onlyDropdownSelected })
    }
  }

  handleChange(event) {
    const choices = this.state.choices

    if (event.target.checked === true) {
      choices.push(event.target.value)
      console.log(choices)
      this.setState({ choices })
    } else {
      const newchoices = choices.filter((choice) => {
        return choice !== event.target.value
      })
      this.setState({ choices: newchoices })
    }
  }
Booking.js
Using state, we then pass the selected services from ServiceCard.js to Booking.js.
              <Link
                to={{
                  pathname: '/bookings',
                  state: this.state.choices
                }}
In order to use the information passed in state, we had to transform the data from an array, back into an object. In doing so, we were able to use all of the information that we required.
componentDidMount() {
    const testArray = this.props.location.state.map((serviceObject) => {
      return JSON.parse(serviceObject)
    })
In order to use the data passed through to create a booking total, the data was mapped through. Using a reduce function, we were able to create a total sum for the services that had been selected.
              {mappedAppointments.reduce((acc, element) => {
                return acc + parseFloat(element.private_price)
              }, 0)}
The final, step in the booking process was the selection of a time and date. This is then posted to our backend endpoint /api/appointments/.
  handleSubmit(event) {
    event.preventDefault()

    axios
      .post('/api/appointments/', this.state.data, {
        headers: { Authorization: `Bearer ${auth.getToken()}` }
      })
      .then(console.log('POST IS DONE'))
      .then((res) => {
        this.props.history.push('/profile')
      })
      .catch((error) => console.error(error))
  }
Profile.js
The final part of the customer journey ends with the appointment details confirmed on the user profile page.
For this component React Hooks rather than classes were used. We had only recently been taught how to use Hooks and so this was an opportunity to test out this functionality.
Tokenisation was used to ensure that only the details of the logged in user would be returned in the profile page.
  useEffect(() => {
    axios
      .get('/api/profile', {
        headers: { Authorization: `Bearer ${auth.getToken()}` }
      })
      .then((resp) => {
        setData(resp.data)
        // console.log(data)
      })
      .catch((error) => console.error(error))
  }, [])
An example of the profile page, showing the appointments for a particular user.
-
Correct time estimation regarding how long it would take to build certain features. Although we had originally planned to include features such user type, health care provider location and email confirmation. However, as we moved into the project and hit issues, we realised that we would not have enough time to implement all of these features.
-
Trying to create the Populate serializers for some of the views was a challenge. As our models didn’t always have the information required for some of the views that we wanted to create, we had to create populated serializers that would allow us to display the information in the format that we needed. Getting this correct was not a simple, given the relationships between the between some of the models.
-
When passing the state from
ServiceCard.jstoBooking.jsthe conversion of an abject to a string and then back to an object was something of a challenge. We eventually figured out that this could be done using theJSON.stingifyandJSON.parsemethods, but this was a challenge that held us up somewhat.
- Having a clear idea at the beginning of the project of what the MVP should be helped with the initial modelling and construction of the backend. Spending time upfront on that meant we didn’t have to do too much re-work in the area of modelling as we progressed.
- Although created in the data model, we never got around to actually implementing a user type in the final application. The original idea was that depending on the type of user, they would be shown different information, i.e. different prices.
- A second feature that I would also have liked to implement was an email appointment confirmation. The idea would have been to send an email to a user, using Django’s mail capabilities once a user a completed the booking process.
- Spend time on data modelling for your back end up front. If time isn’t spent on this at the beginning, it can cause a lot of issues as you move through the project. Also try and make this as simple as is required and is possible.


