Need a tool to edit S3 objects and manage their tags? Working on a machine learning project and you are thinking of using S3 for storage and want a easy way to add annotation to your objects in your bucket? Amazon's S3 is great and a very versatile storage service, however it is harder for non-developers to use to manage their objects (such as image files like JPG, PNG, etc.). It can be difficult to navigate an S3 bucket when there are no thumbnails for the images present and no predefined values for tags to be used for objects.
Bucket Buddy is a simple and lightweight React application used to be a tool for users to better manage their S3 bucket objects.
This application can be used to:
- Navigate an existing bucket
- Upload and delete files
- See the thumbnails of image files
- Edit and add tags to an object
- Create a schema which will be used to add predefined tags to objects
- Search for objects by tags and filename
- And more as seen below :)
This project uses React which is a Javascript library. You will need to have some things installed before being able to download and run the project locally.
Ensure to install npm which is a tool used to install all the Javascript modules you will need to run the project. If you are not sure if you have it installed, open your terminal (you can use PowerShell on Windows) and copy paste the following command npm -v. If there is an error running the command it means you need to download npm. The simplest way of installing it is downloading it with NodeJS here
AWS uses IAM Roles for all their services to handle security and user permissions. Ask you AWS Administrator to give the account crednetials you will use with Bucket Buddy the following permissions
{
    "Version": "2012-10-17",
    "Statement": [
        {
            "Sid": "VisualEditor0",
            "Effect": "Allow",
            "Action": [
                "s3:PutObject",
                "s3:GetObject",
                "s3:GetObjectTagging",
                "s3:PutObjectTagging",
                "s3:DeleteObject"
            ],
            "Resource": "arn:aws:s3:::*/*"
        },
        {
            "Sid": "VisualEditor1",
            "Effect": "Allow",
            "Action": "s3:ListBucket",
            "Resource": "arn:aws:s3:::*"
        },
        {
            "Sid": "VisualEditor2",
            "Effect": "Allow",
            "Action": "s3:HeadBucket",
            "Resource": "*"
        }
    ]
}
Ensure also to set your S3 bucket's signature version to be V4.
- Download a ZIP of the project by clicking here
- Unzip the file wherever you wish (ex: on your Desktop)
- Open a terminal in the folder you unzipped the files in and type the following command to install everything you need in the project:
npm install
- After everything has sucessfully installed, you are ready to start the application by cpy pasting and running the following command in your terminal:
npm start
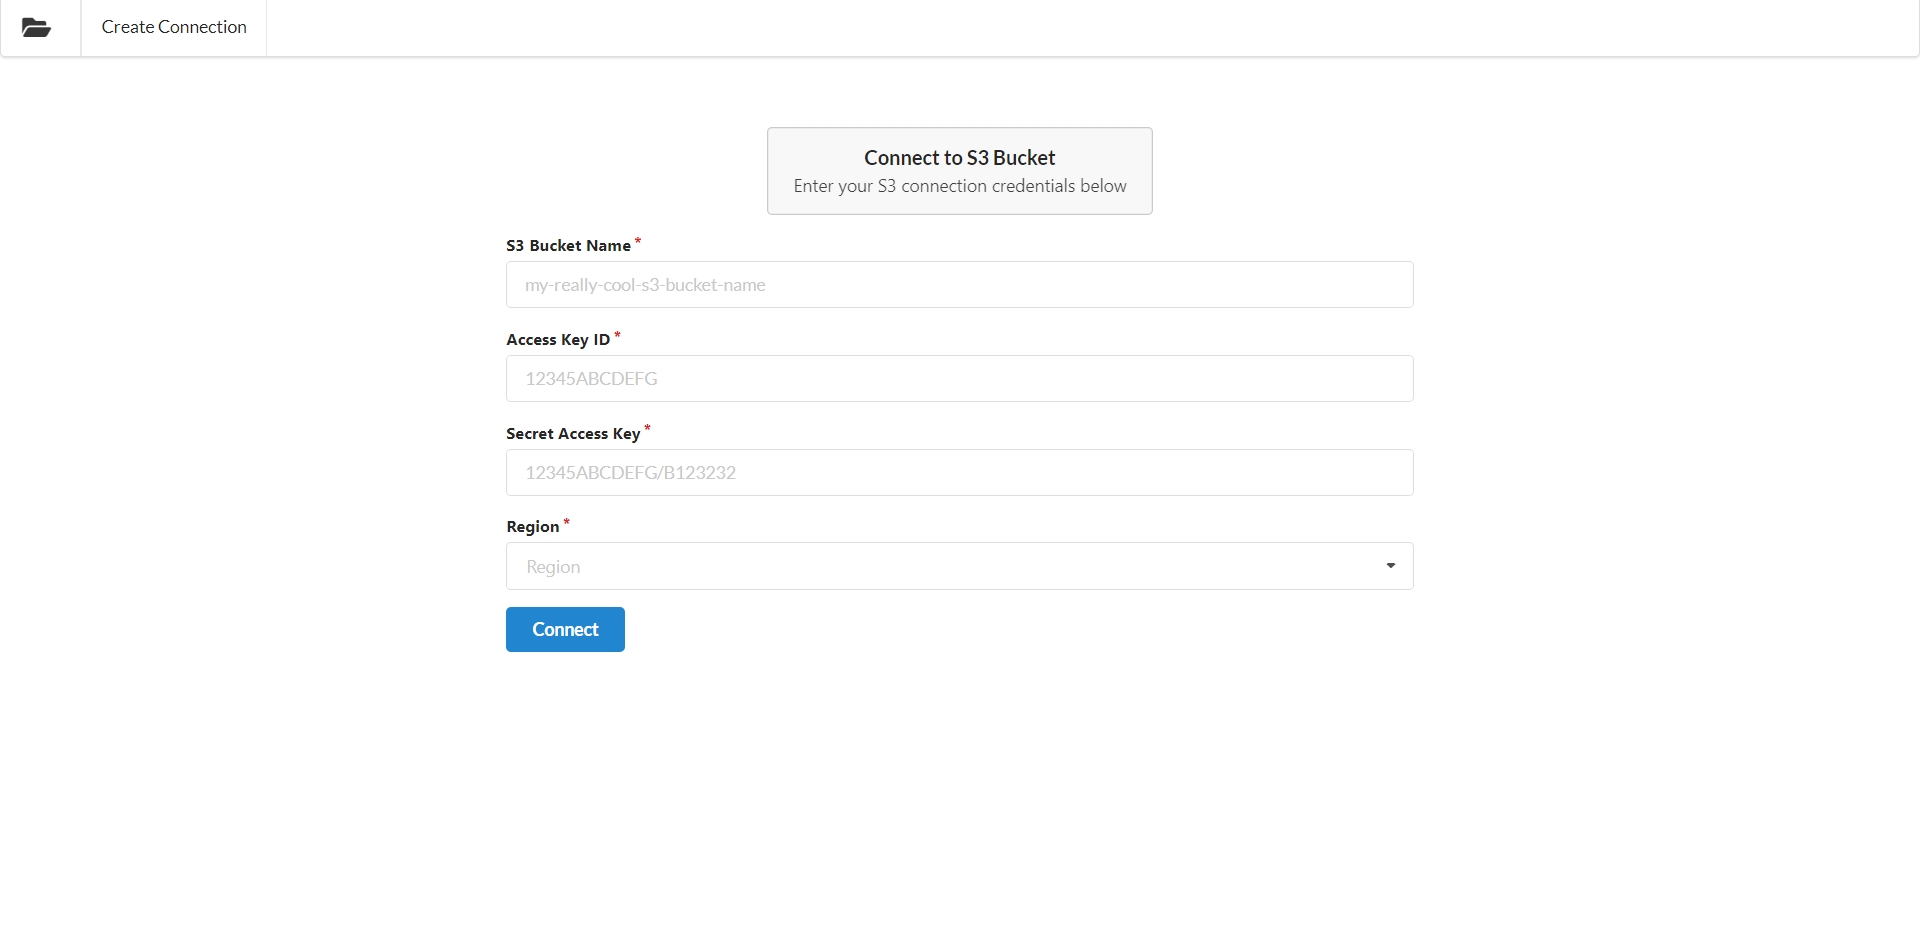
- If run successfully you should see the application start in your default browser and be greeted with the following screen asking you to connect to your bucket.
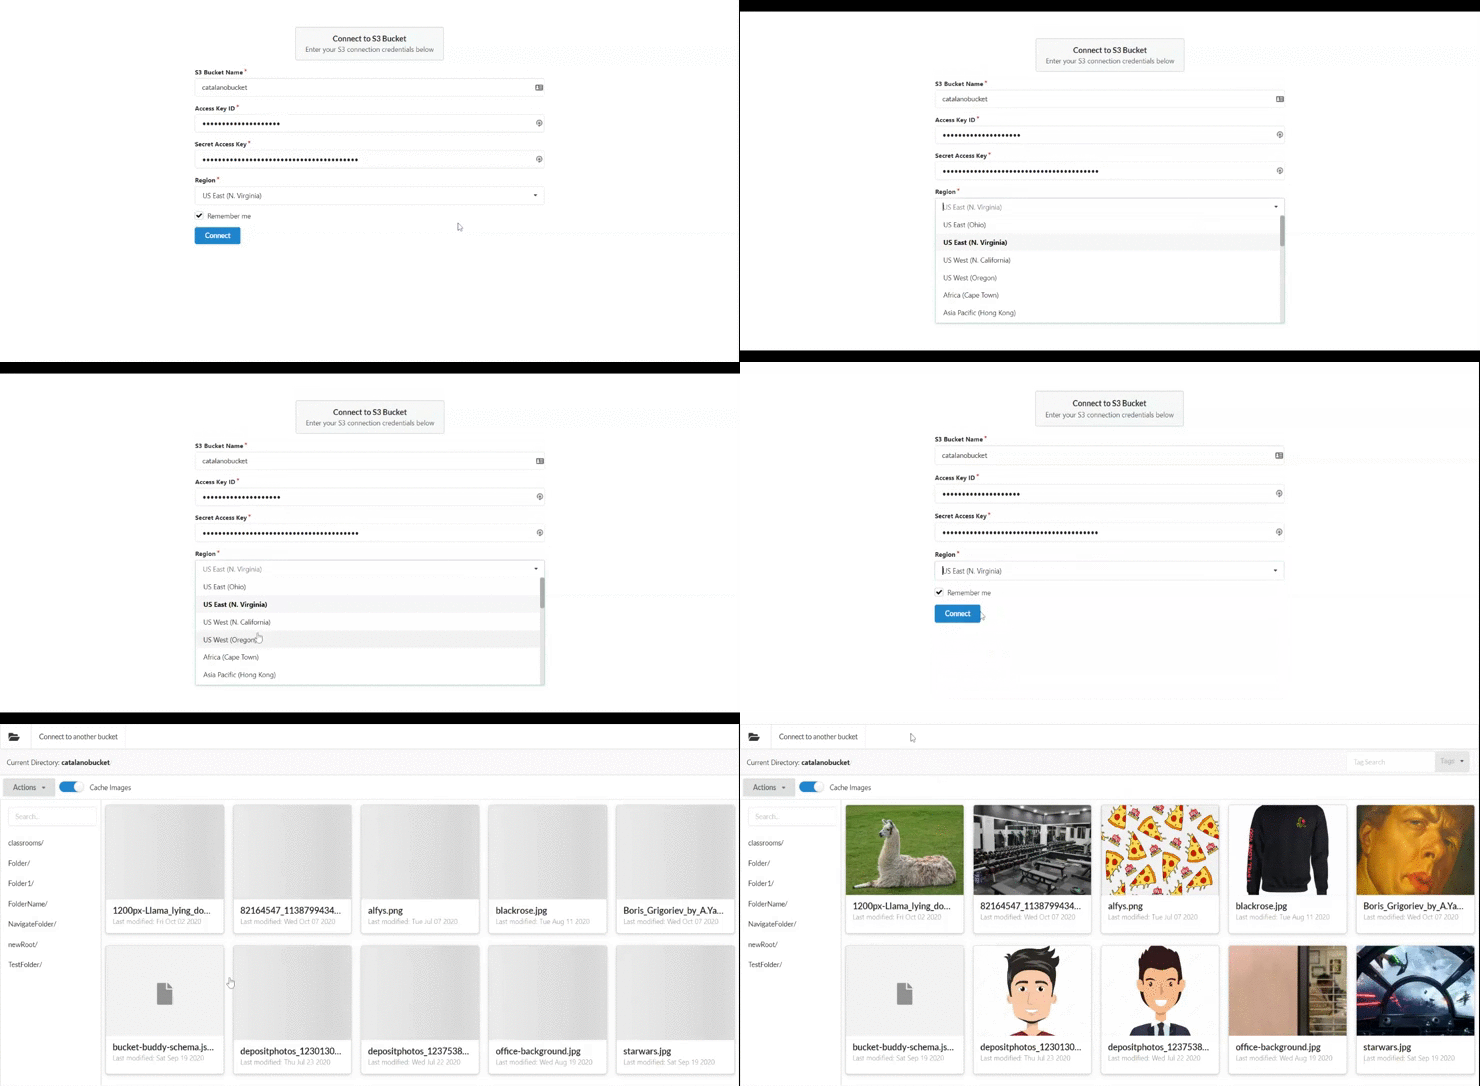
Bucket Buddy follows the ideology that a user can connect to their bucket by entering the bucket's name, the user's access key and secret access key, and the bucket's region. By going to the main page you will be created with the connection screen above where you can enter all the details to connect to your bucket. If you are unsure ask you AWS adminstrator for the needed details.
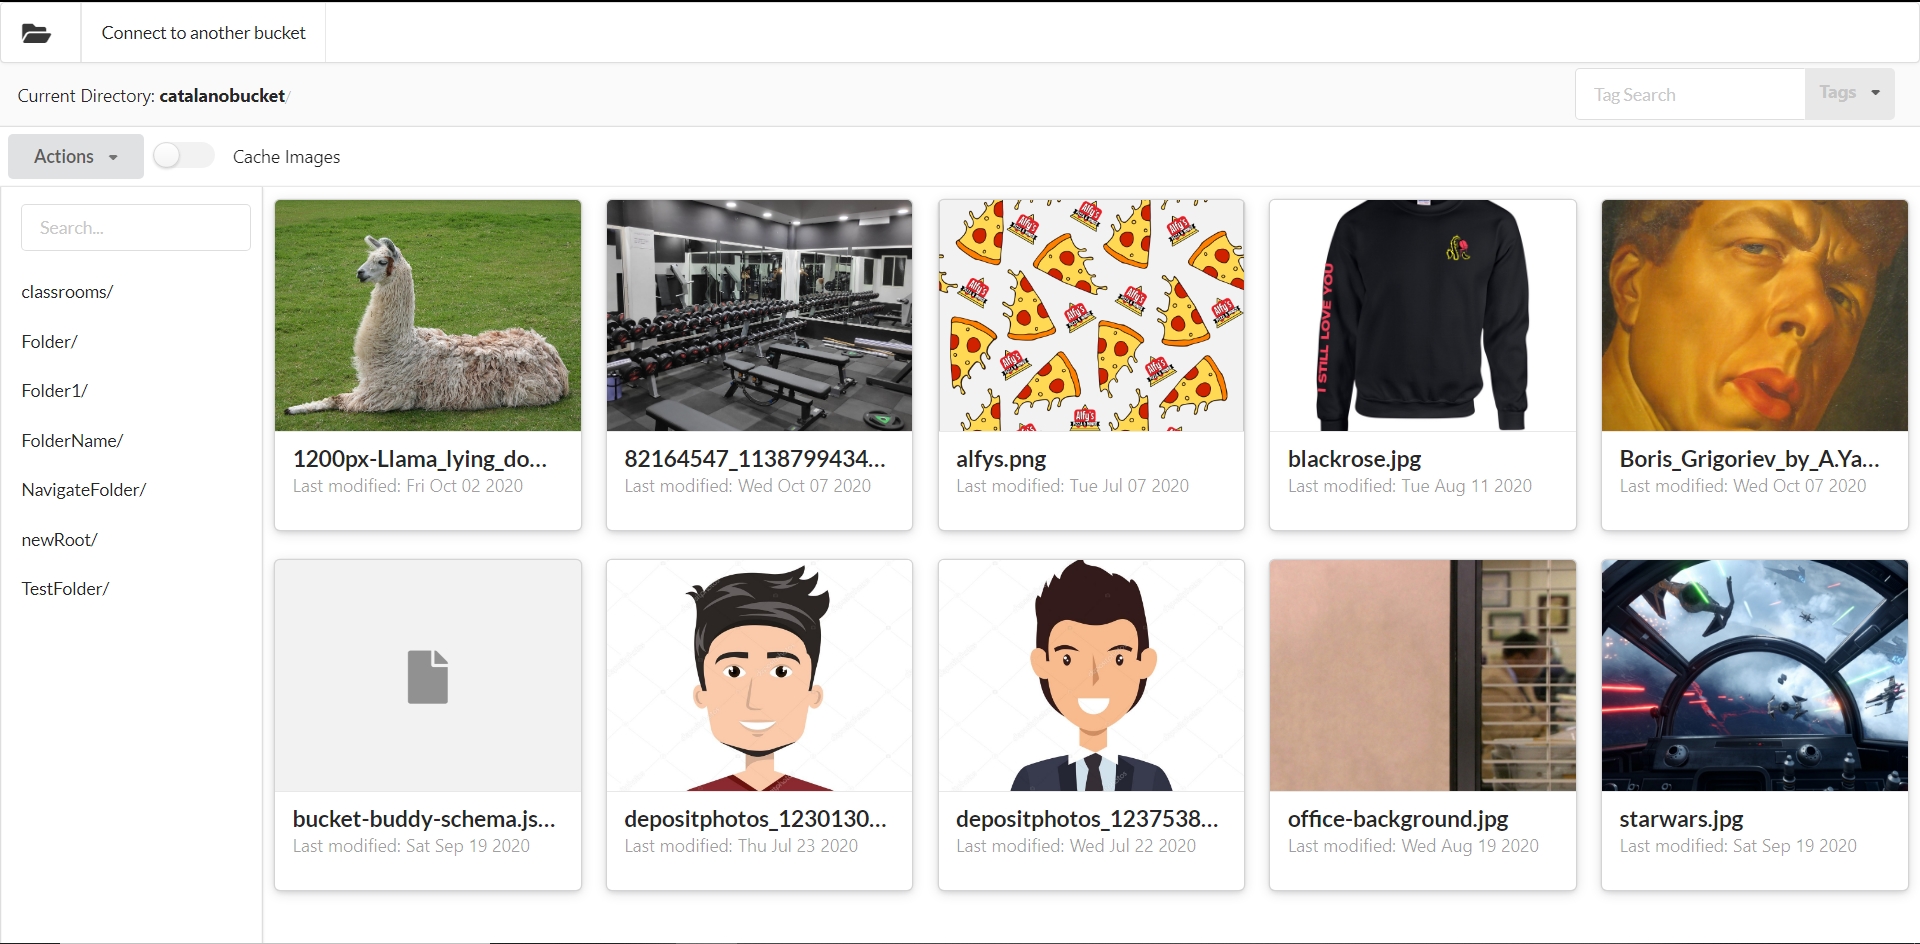
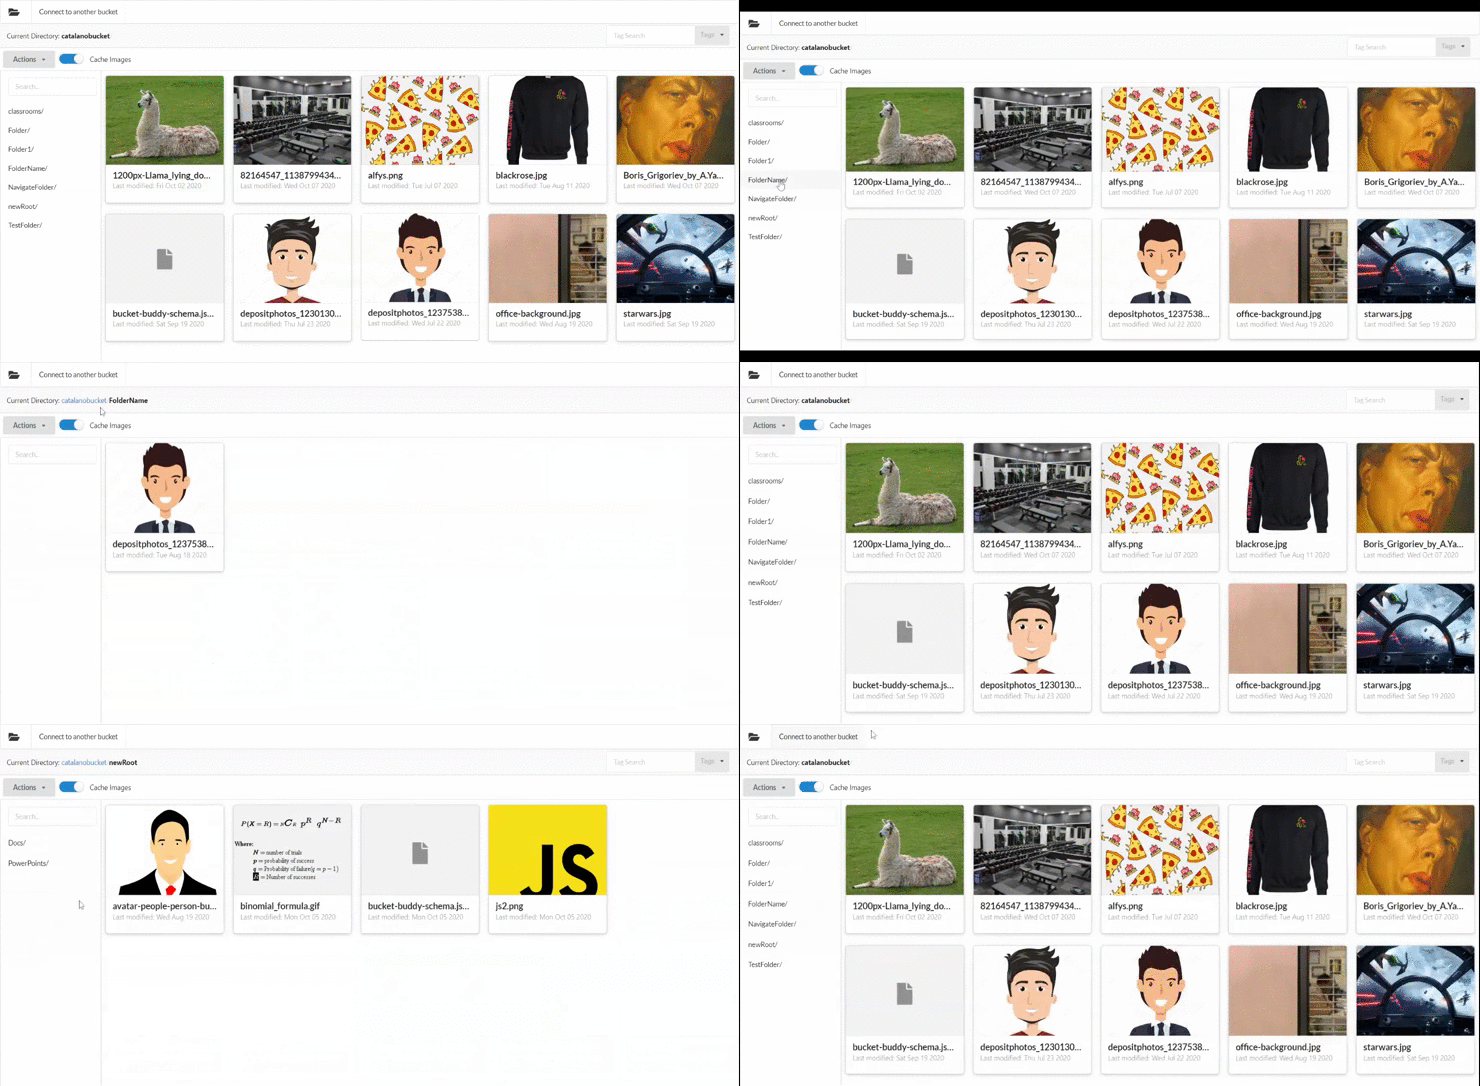
Navigating through the bucket is similar to a file explorer (folders and files are group together). You can always go back by simply selecting the folder you wish to view in the breadcrumb path above the men buttons
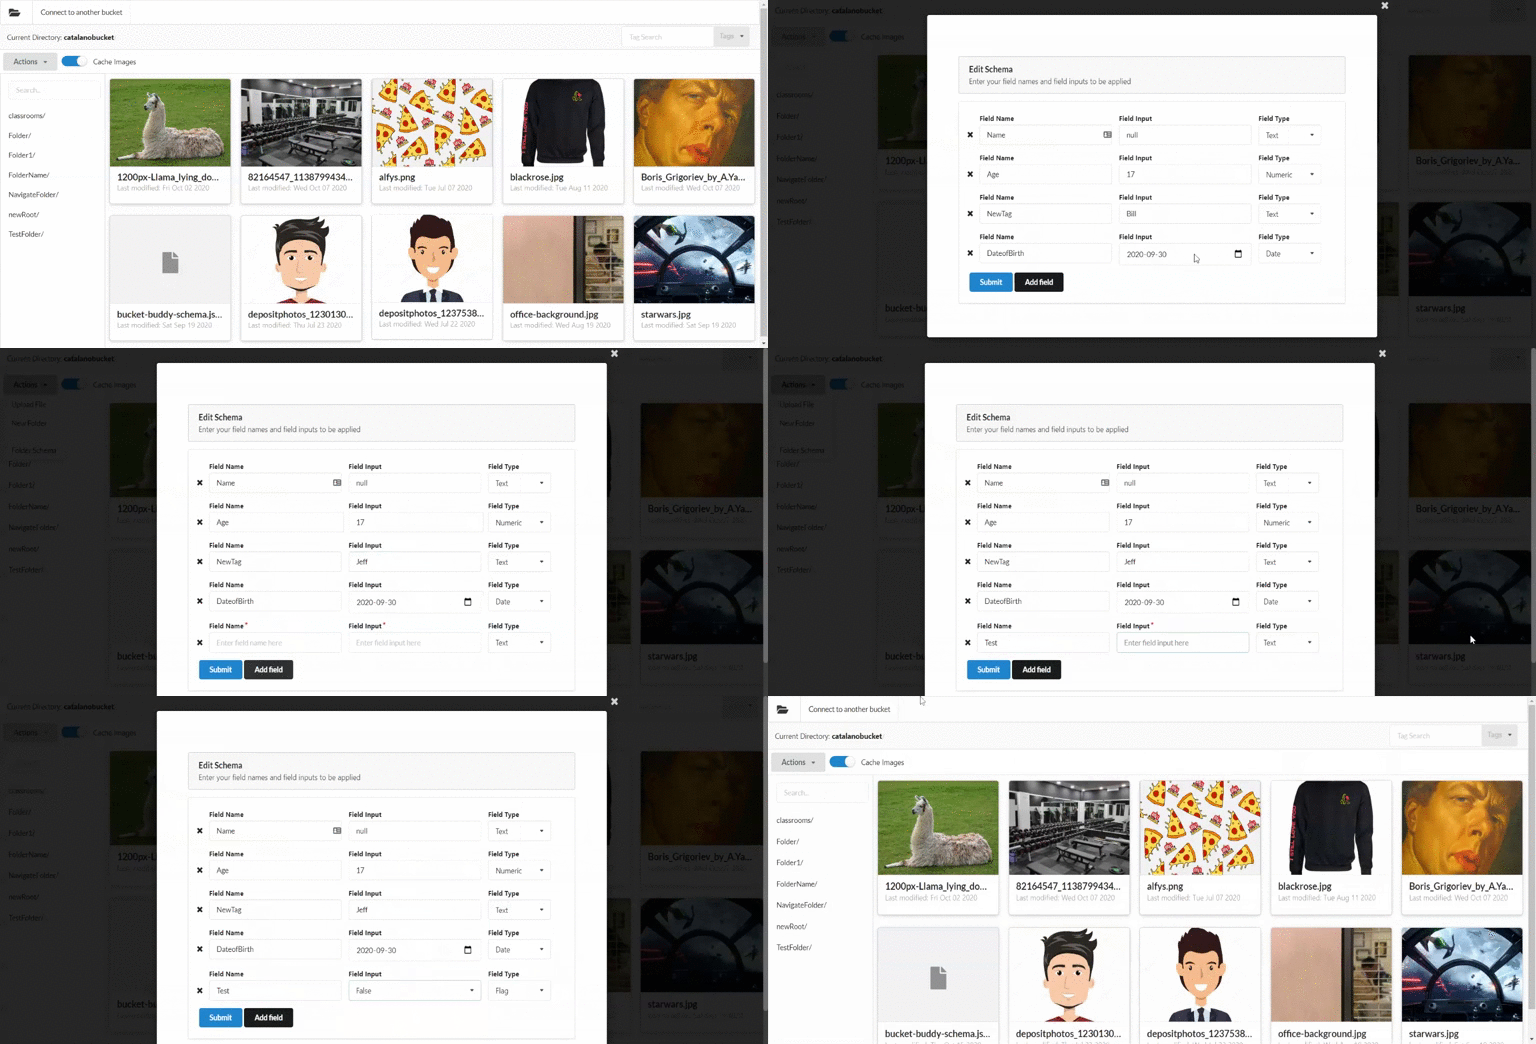
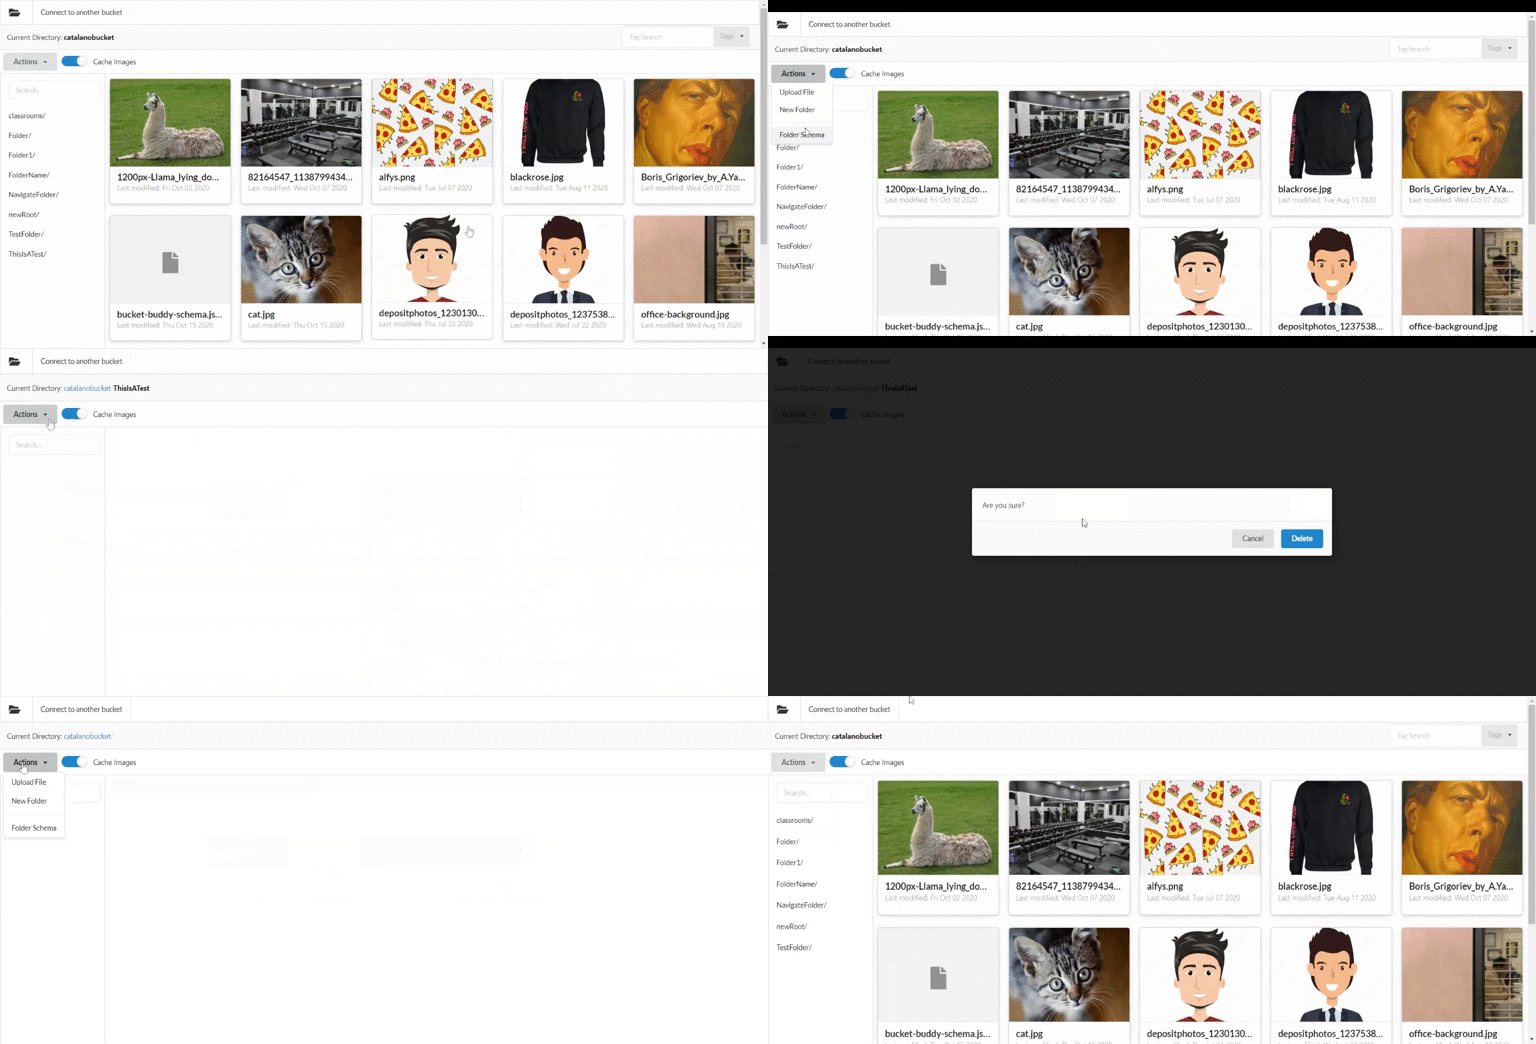
A folder's tag schema is how bucket buddy knows what tags should be always appied to the objects in the folder. You can create one by clicking on the "Folder Schema" button in the "Actions" dropdown and you will be prompted to create your field names and default values for them. You will also be able to set the types. The field types work as follows:
- Text: Any text values such as
hello world - Numeric: Any numeric values such as integers like 1, 3, or 6. You can also specify decimals such as 123.11 (not text is allowed)
- Date: The value should be a date such as 2020-03-09 (year-month-day)
- Flag: The value should either be True or False.
Don't worry if you have pre-existing objects, a tag is displayed to let you know they are missing the schema tags and you will be able to add them. You can always go back and edit the schema as you wish and if you wish to no longer have the schema simply deleting the bucket-buddy-schema.json file.
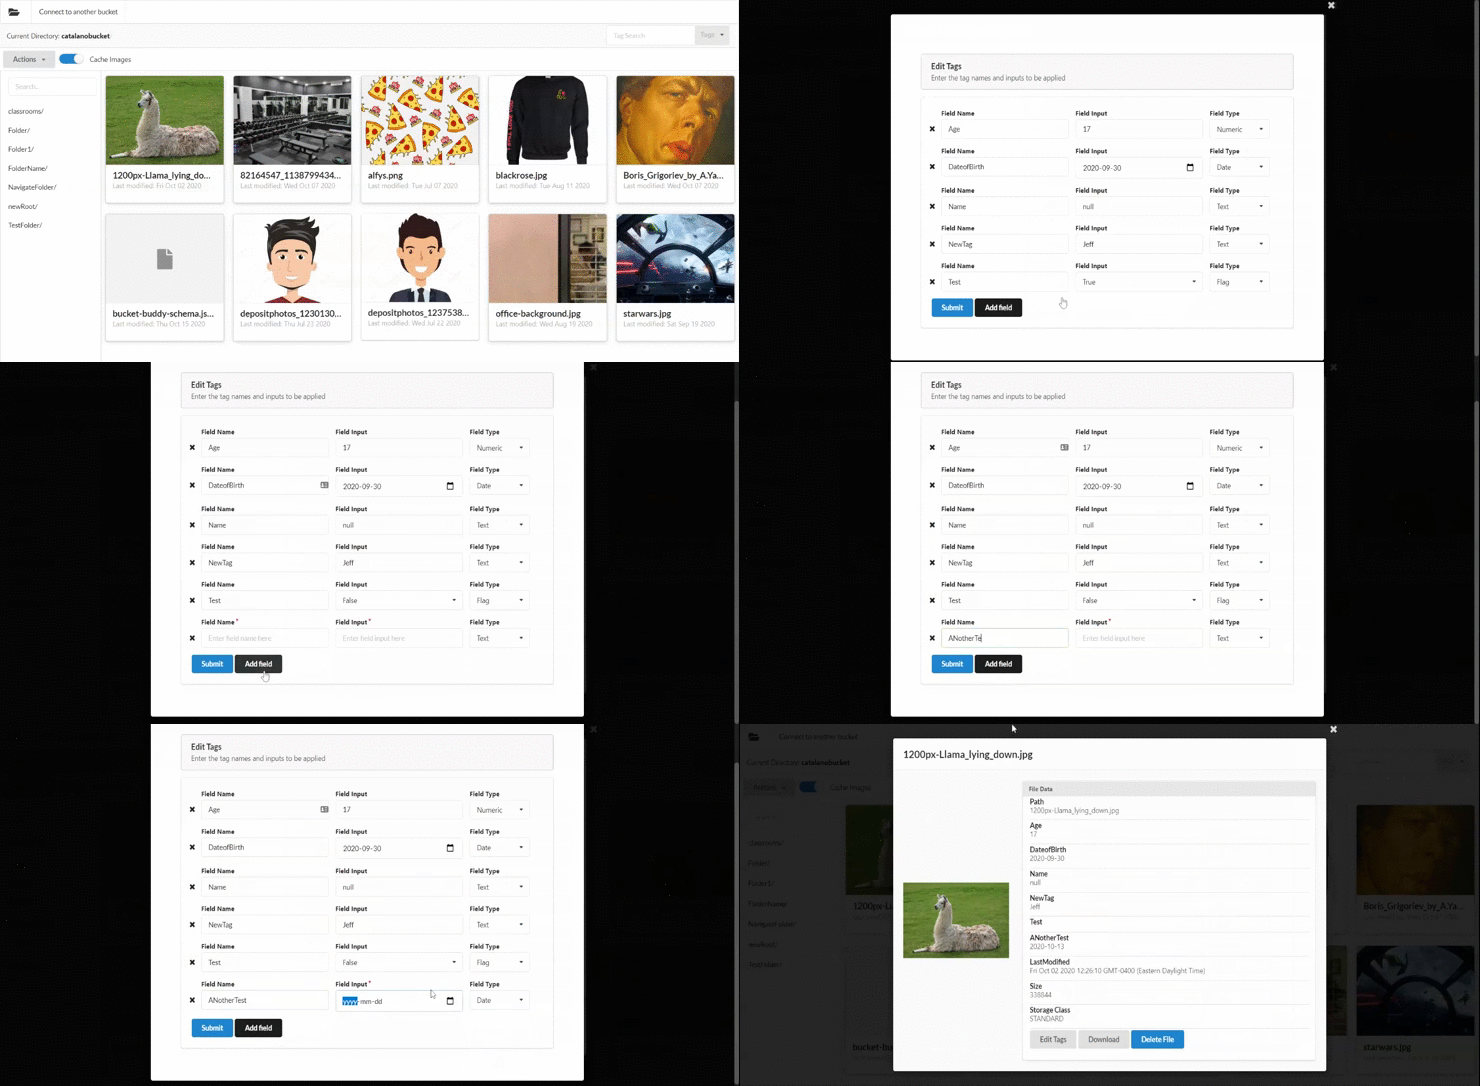
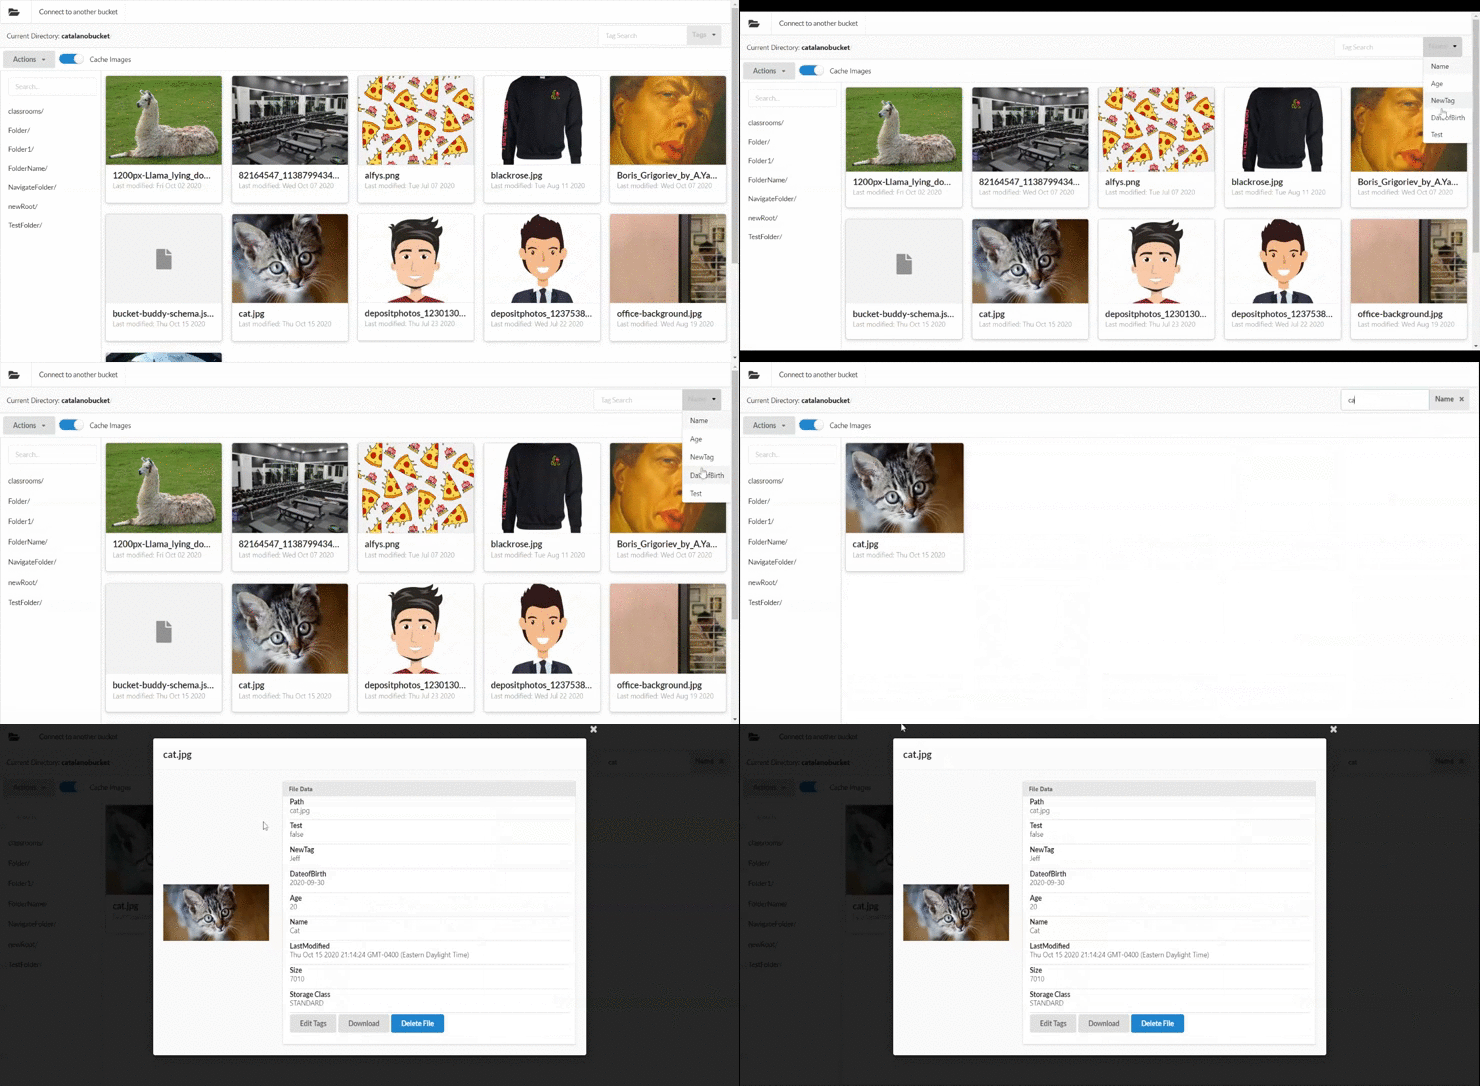
Viewing and editing an object is simply with bucket buddy. Simply click on the object you wish to view. You will then be prompted with the object's details and with two buttons. One will be to edit the object's tags and the other is to delete the file.
To edit the object's tags simply click on the "Edit Tags" button and you will be prompted with a screen similar to when you created your schema. Here you can edit the object's tags and once you are done simply click on the "Submit" button to save the changes.
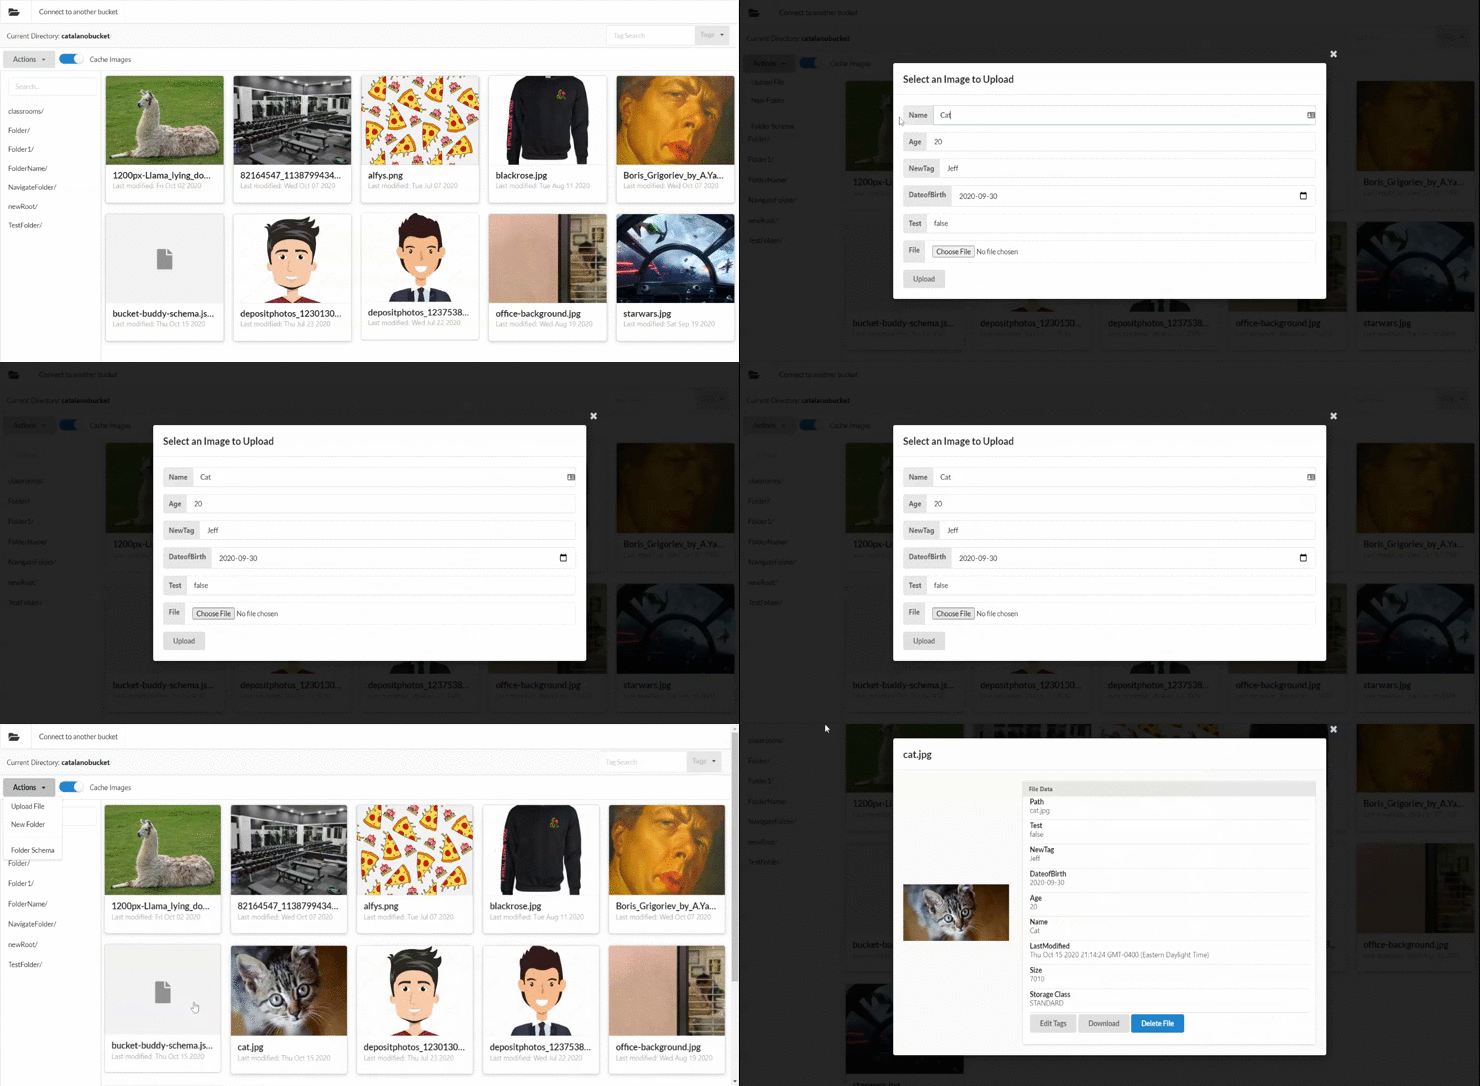
Uploading objects to your S3 bucket is simple with Bucket Buddy. If you created the schema before attempting to upload an object you will be prompted with the fields and asked to fill them out accordingly. If you did not create a schema you can still upload objects.
To upload an object simply click on the "Upload" button in the "Actions" dropdown in the top left corner. There you will be able to upload a file from your computer.
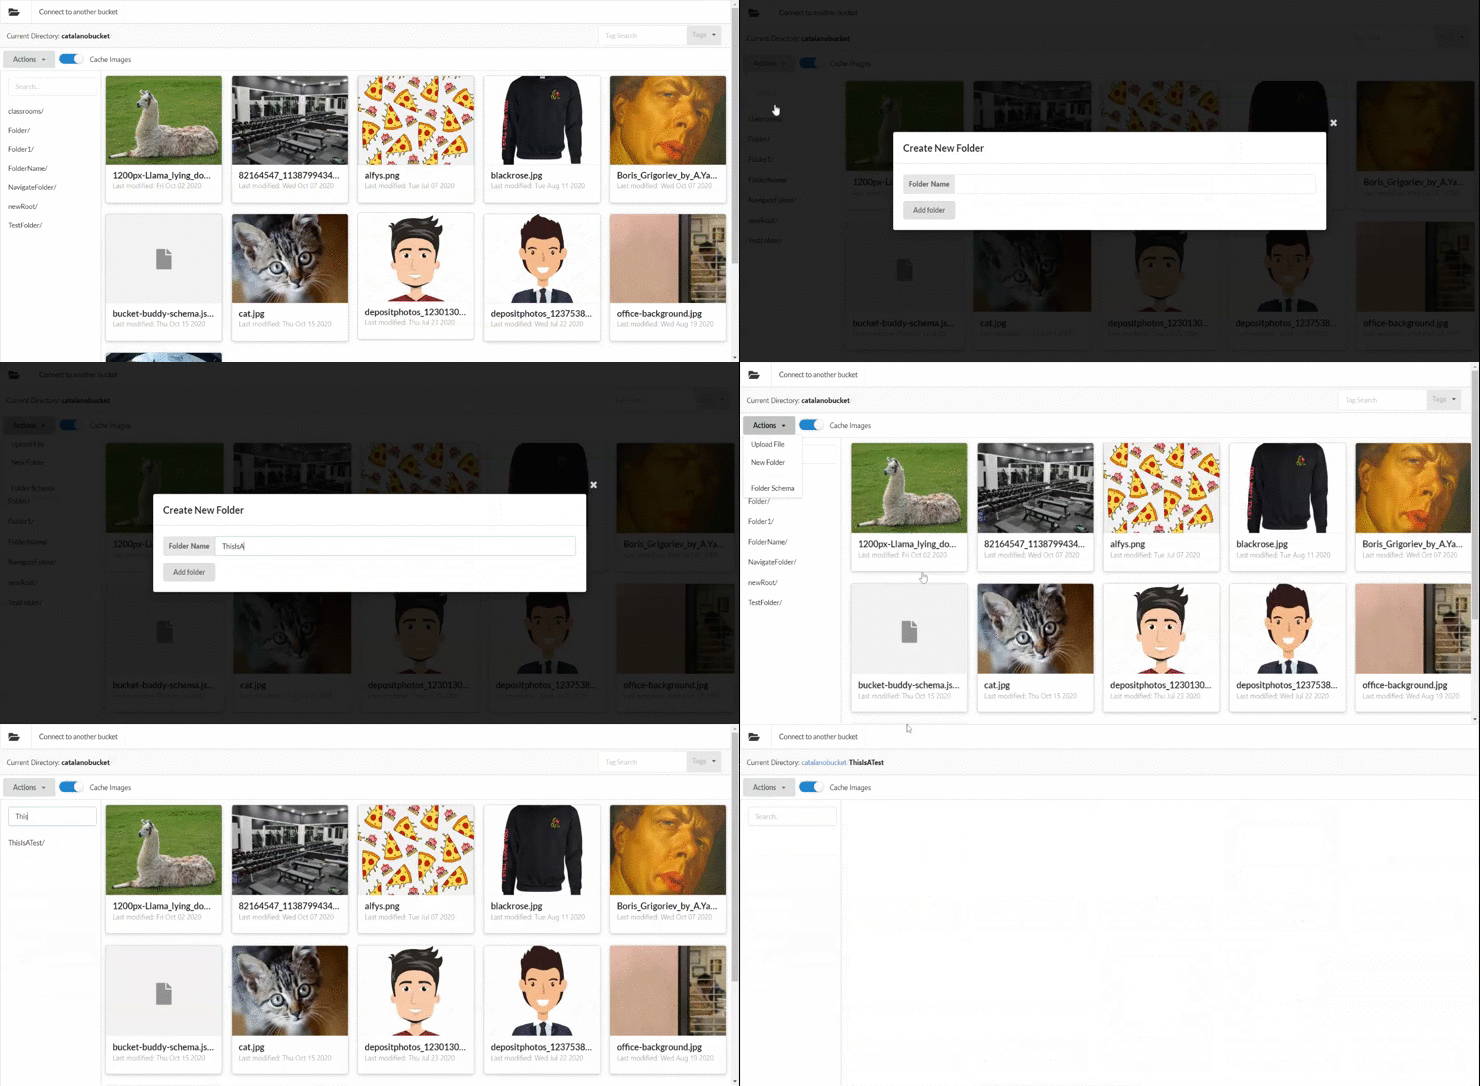
Like most file systems S3 supports folders too! Creating a folder in bucket buddy is easy. Simple click on "New Folder" in the "Actions" dropdown in the top left corner of the screen and there you will be able to enter the name of your new folder.
Please be careful because if you write a name of a folder that already exists it will replace the other one!
You can delete any folder except the root folder. Simply navigate to the folder you wish to delete and open the "Actions" dropdown and select "Delete Folder" to delete it. Be very careful doing this since this action cannot be undone! You also cannot delete the root of the bucket (aka the main folder). You can only delete lower folders.
You can search for objects that have a specific tag value in a folder. Simpply select the tag in the top right corner you wish to to search by and then type in the text.
Downloading images everytime you wish to view the bucket can be very time consuming (even more so when you have a lot of objects in your bucket). We added a toggle which when enabled will cache the images on your machine so you will not have to download it next time you view your bucket. It will redownload the image if there are any changes. You can turn this feature on and off by simply clicking on the toggle labled "Cache images" next to the "Actions" dropdown.
This project developed by the team at Rasion d'Art a non-profit organization and is made available for anyone who will find use in making managing their S3 bucket easier. The team's mission was not to just make a tool helpful for themselves but for others too.
Special thanks to the team:
We hope this project helps you do something great!
We would love to know if you are having any issues using the app or have any suggestions. Please enter a ticket here with details about the issue.
