Astra DB TikTok Clone Workshop


50 minutes, Intermediate, Start Building
A simple Tik-Tok clone running on Astra DB that leverages the Document API.

Objectives
- Deploy a TikTok clone "locally" and to production
- Learn how to use the @astrajs document API to quickly and easily interact with JSON documents
- Leverage Netlify and DataStax AstraDB
ℹ️ Frequently asked questions ℹ️
- Can I run the workshop on my computer?
There is nothing preventing you from running the workshop on your own machine. If you do so, you will need
- git installed on your local system
- node 15 and npm 7 or later
You will have to adapt commands and paths based on your environment and install the dependencies by yourself. We won't provide support to keep on track with schedule. However, we will do our best to give you the info you need to be successful.
- What other prerequisites are there?
- You will need a github account
- You will also need Netlify and Astra DB accounts, but we'll work through that in the exercises
- Use Chrome or Firefox for the best experience. Other browsers are great, but don't work well with the GitPod integration we use a bit later.
- Do I need to pay for anything for this workshop?
- No. All tools and services we provide here are FREE.
Materials for the Session
It doesn't matter if you join our workshop live or you prefer to do at your own pace, we have you covered. In this repository, you'll find everything you need for this workshop:
Homework
![]()
Don't forget to complete your upgrade and get your verified skill badge! Finish and submit your homework!
- Complete the practice steps from this repository as described below. Make screenshots alongside the steps and show us your deployed production TikTok clone up in Netlify.
- (Optional extra credit) Watch the 2 hour Ania video HERE, build the app yourself, and show us the completed app.
- Submit your homework here
That's it, you are done! Expect an email next week!
Let's start
Table of contents
Part I - Run and Deploy
- Create Astra DB Instance
- Deploy to Netlify
- Access YOUR GitHub repository
- Launch GitPod
- Install the Netlify CLI
- Generate application token to securely connect to the database
- Configure and connect database
- Launch your app
- Connect Netlify to your site
- Deploy to production
Part 2 - Working with Astra DB and the document API
Part 3 - Serverless Functions, how they work
Extra resources
Video tutorial with Ania Kubow
Part 1 - Run and Deploy
1. Login or Register to Astra DB and create database
Click the button to login or register with Datastax

-
Show me!


Use the following values when creating the database
| Field | Value |
|---|---|
| database name | tiktok_workshop_db |
| keypace | tiktok_keyspace |
| Cloud Provider | Use the one you like, click a cloud provider logo, pick an Area in the list and finally pick a region. |
2. Deploy to Netlify
-
What does the netlify deploy button do?
The Netlify deploy button will:- Create a new repository for you on Github
- Create a site on Netlify
- Link the two together.
-
Click the button to deploy

-
Show me!

This will take a few minutes.
-
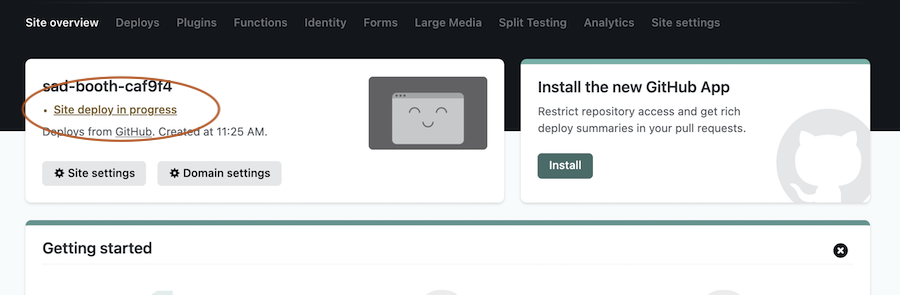
Click on
Site deploy in progresswithin the Netlify UI,Show me!
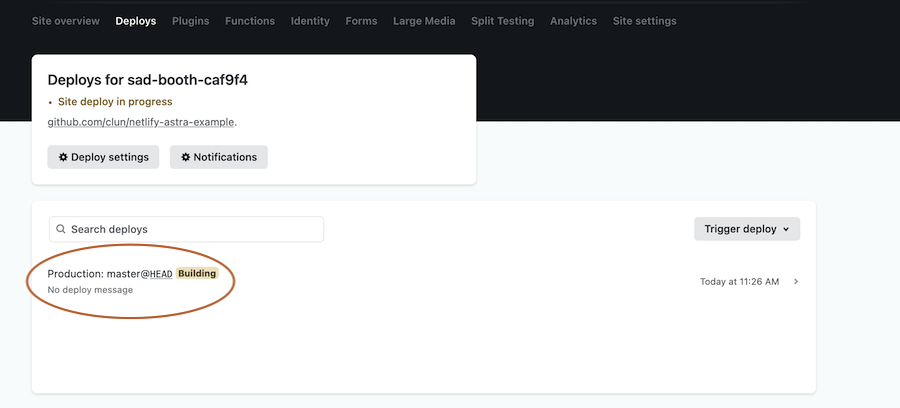
-
Click the top deploy link to see the build process.
Show me!
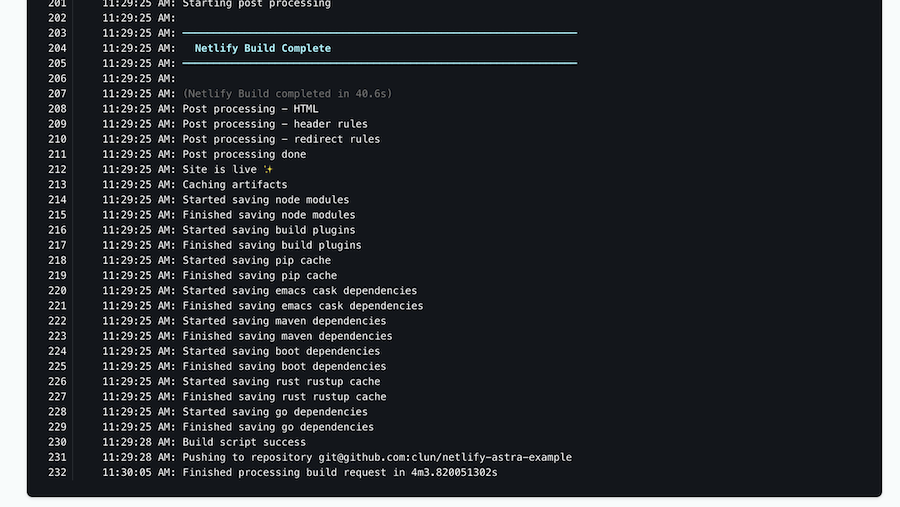
-
Wait until the build complete
Netlify Build Complete, When you see Pushing to repository you're ready to move on.Show me!
-
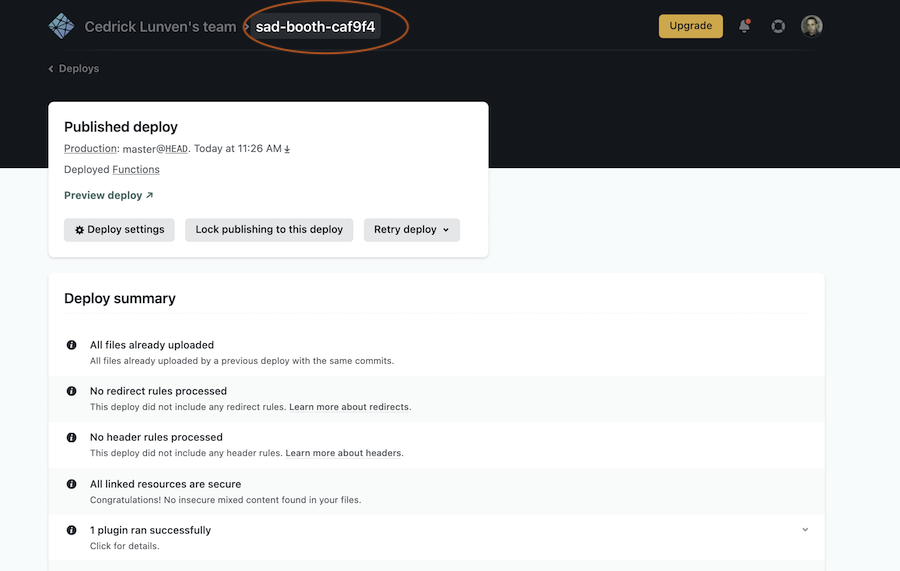
Scroll up to the top and click on the site name (it'll be after {yourlogin}'s Team next to the Netlify button).
Show me!


3. Access YOUR GitHub repository
- Click on the
GitHubinDeploys from GitHubto get back to your new repository. Scroll to where you were in the README.Show me!


4. Launch GitPod IDE
- Click the button to launch the GitPod IDE from YOUR repository.
- Supported by
 Chrome and
  Firefox
WAIT! Before moving on ensure you are working out of YOUR repository, not the datastaxdevs repository.

If you are still using the datastaxdevs repo please ensure to follow the previous step, step3 to get to your repo.
-
Ok, I've got it, just give me the button already
-
CLICK HERE to launch GitPod

WAIT! Before moving on ensure you are working out of YOUR repository, not the datastaxdevs repository.
- From your GitPod terminal execute the following command
git remote -v
If the result returned from the command displays datastaxdevs then you are not in the correct repository. If this is the case please repeat step 3 above, otherwise just move on to the next step.
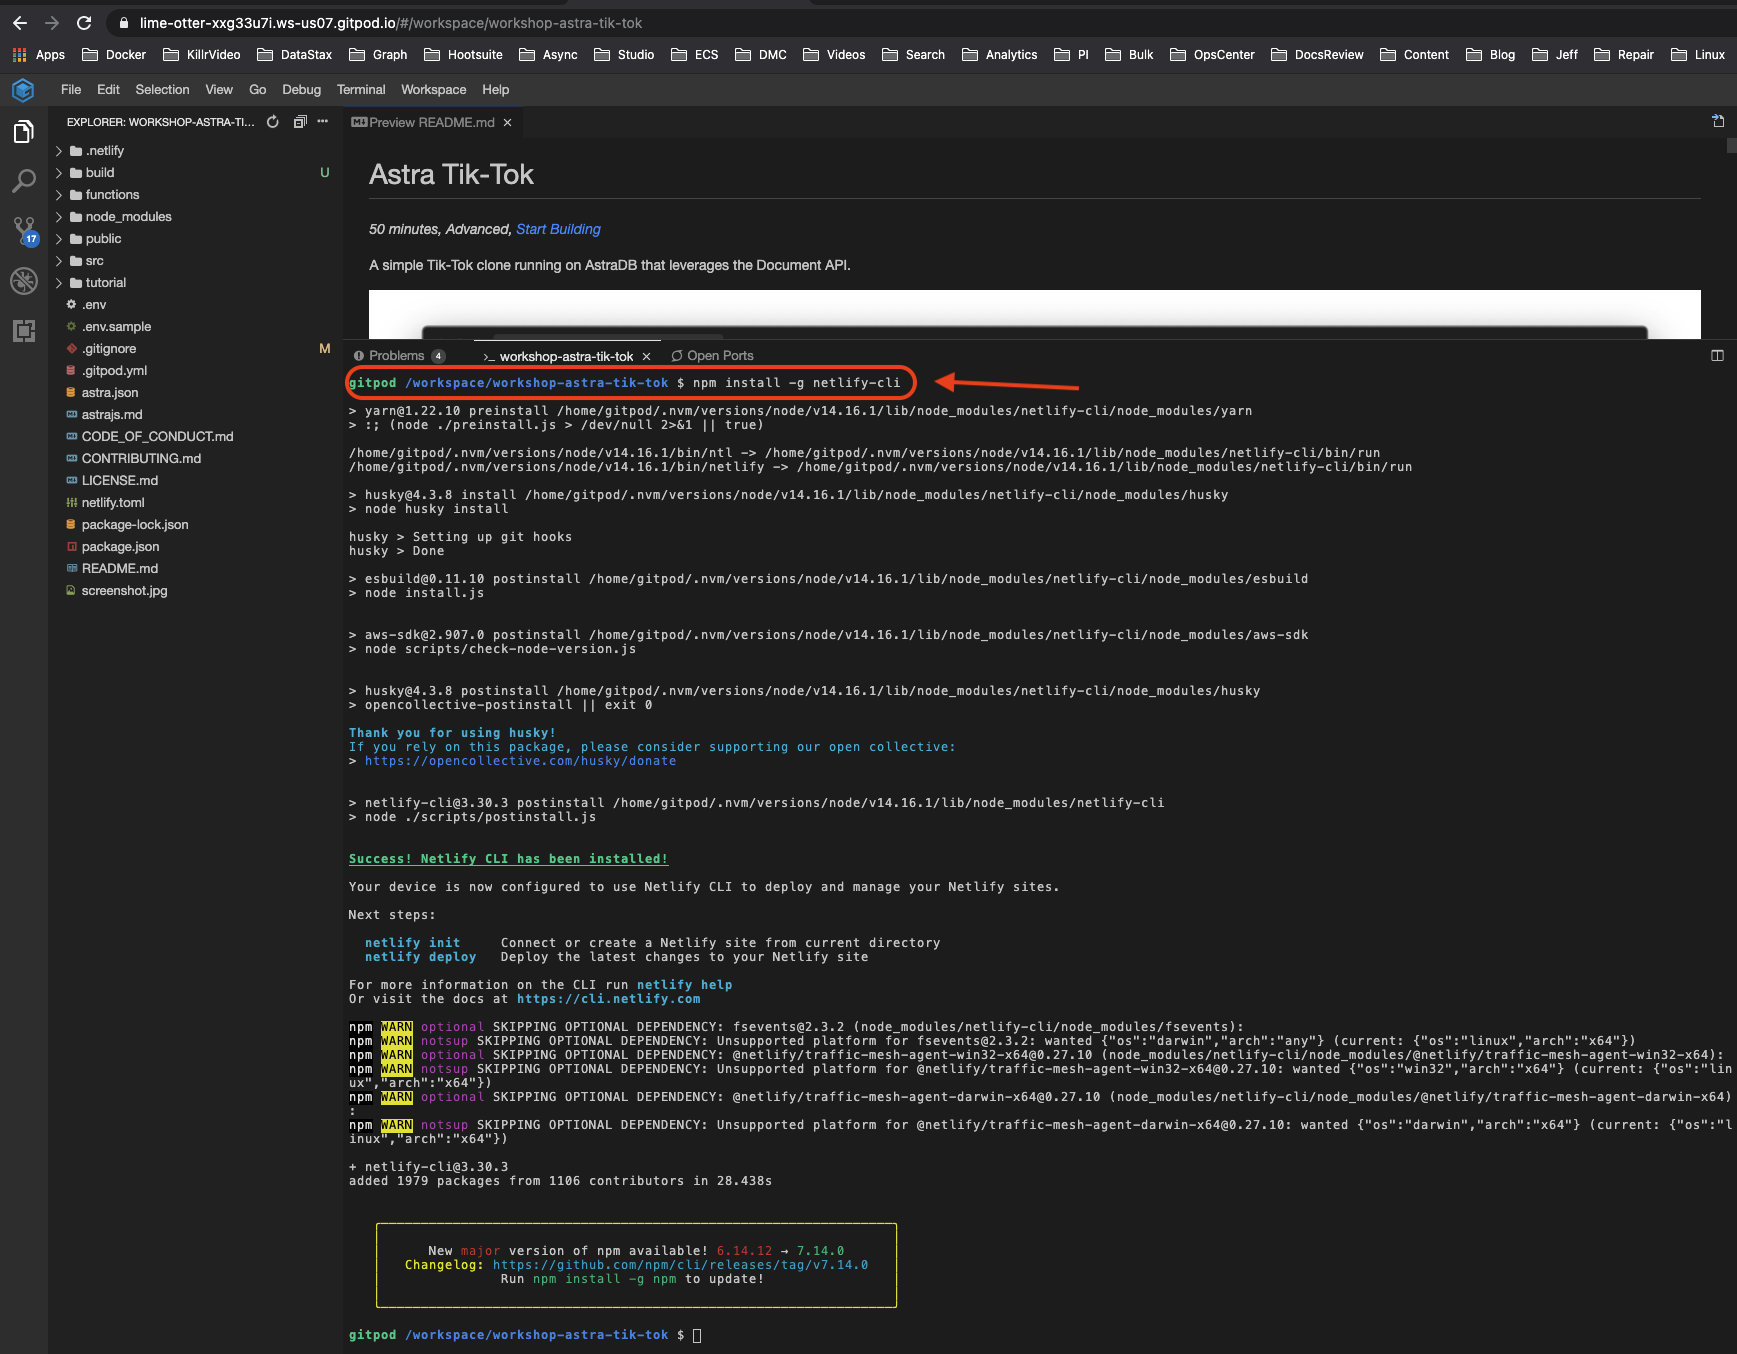
5. Install the Netlify CLI (Command Line Interface)
- In the
workshop-astra-tik-tokdirectory run the following command to install the netlify-cli
npm install -g netlify-cli
-
Show me!

6. Generate application token to securely connect to the database
Following the Documentation create a token with Database Admnistrator roles.
-
Go the
Organization Settings -
Go to
Token Management -
Pick the role
Database Admnistratoron the select box -
Click Generate token
-
Show me!

This is what the token page looks like.
- Click the
Download CSVbutton. You are going to need these values here in a moment.

Notice the clipboard icon at the end of each value.
-
Client ID:We will not use this during this workshop -
Client Secret:We will not use this during this workshop -
Token:This is your token! We will use it as a api Key to interact with APIS
To know more about roles of each token you can have a look to this video.
7. Configure and connect database
- In the repository directory run the following command to set up your Astra DB environment. This will verify the database you created earlier or create a new one for you if it can't find your database.
npm exec astra-setup tiktok_workshop_db tiktok_keyspace
What does astra-setup do?
To setup your ASTRA instance, you want to run `npm exec astra-setup`This will do the following:
* Have you go to your [Astra DB instance](https://datastx.io/workshops) to register or login. There is no credit card required to sign up. The 'Pay as you go' option gives you a huge amount of transactions for free:
* 30 million reads
* 5 million writes
* 40 gigabytes of storage
* Give steps to grab a Database Administrator Token and paste it into the input field
* Ask you what database you want to use (default, existing, create)
* Create or access the database
* Create/update an .env file in the project root
* Create/update an .astrarc file in your home directory
* This can be used by httpie-astra `pip3 install httpie-astra`
* It can also be used by the @astra/collections and @astra/rest node modules
## Specify the database and keyspace
You can run the script and tell it which database/keyspace to use by using:
`npm exec astra-setup databasename keyspacename`
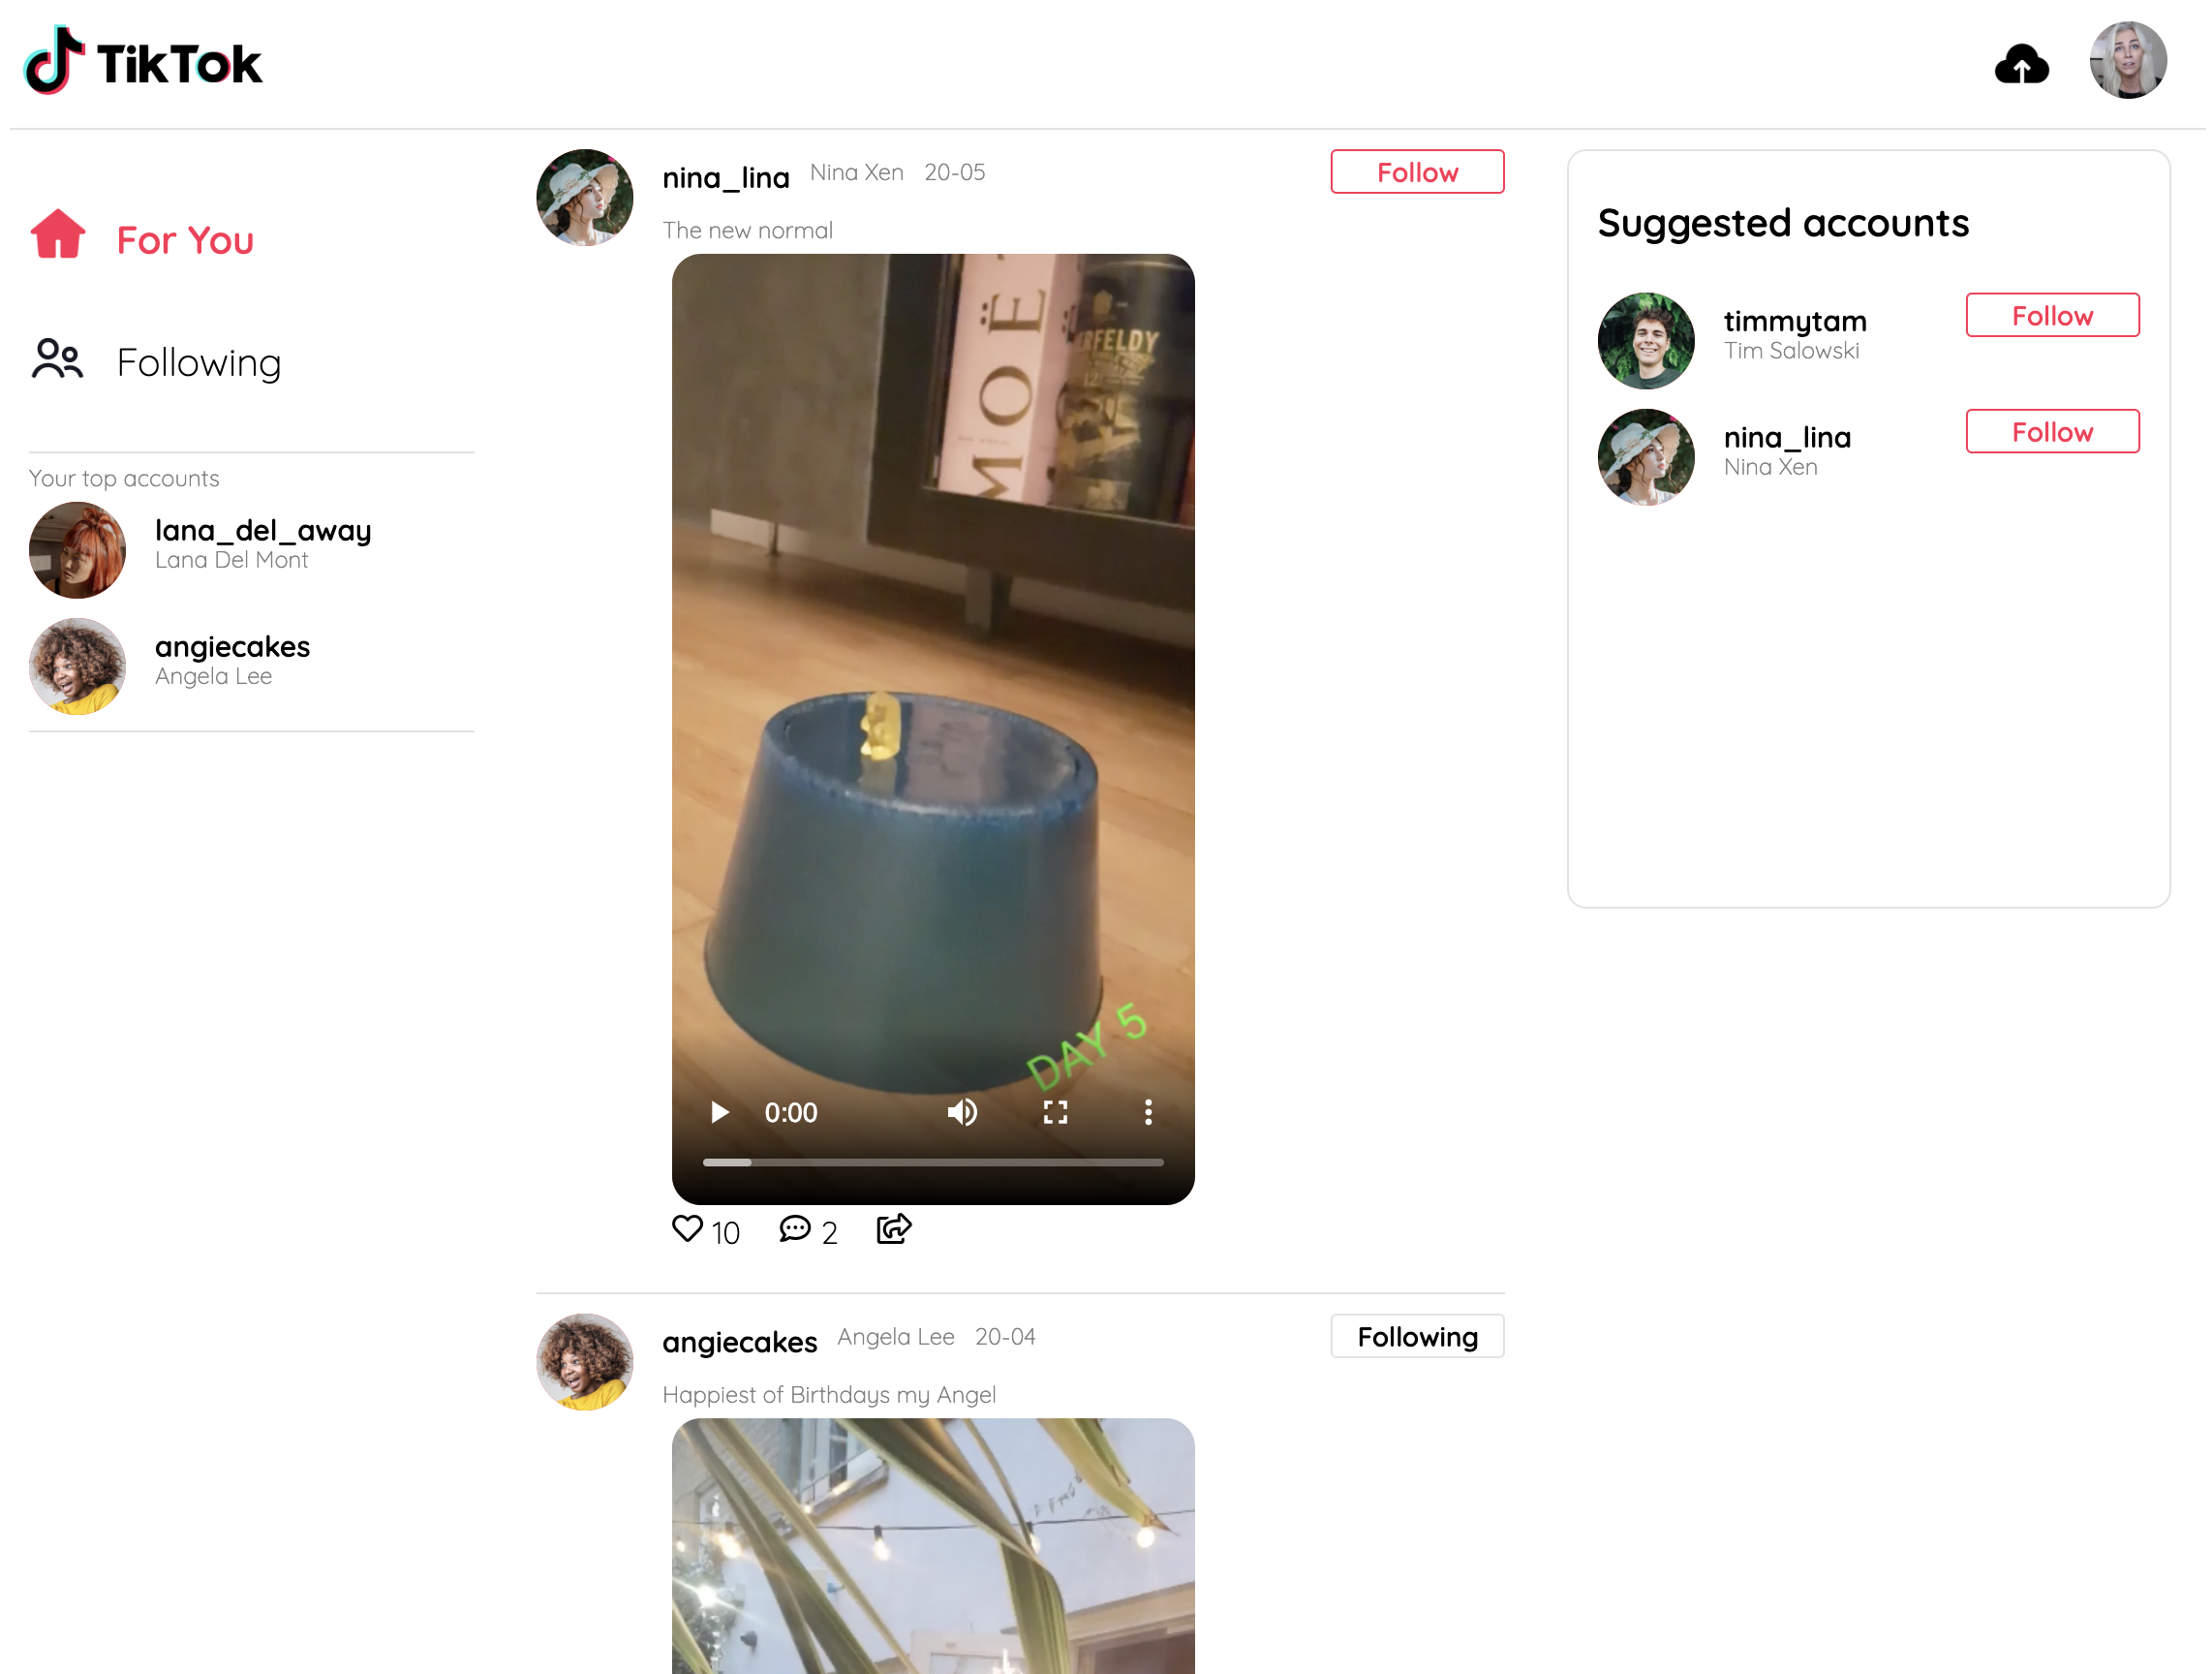
8. Launch your app
- Run the application
netlify dev
- The application should automatically launch in the GitPod preview pane
9. Connect Netlify to your site
Execute each of the commands below to link your code to your Netlify deployment.
- First thing, we'll need to STOP the
netlify devcommand we issued a moment ago. In the terminal where you executed the netlify command issue aCTRL-C(control key + the C key) in order to stop the process. - Then continue with the following commands
- This will pop up a browser to authenticate with netlify
netlify login
Note, when using GitPod the preview pane will not display this properly. You must click the "open in a new window" button in the very top right of the preview pane.
- This will link your workspace to the associated site
netlify link
- This will take the .env file created by astra-setup and upload it to netlify
netlify env:import .env
10. Deploy to production
Now that you've hooked everything up, time to deplpoy to production.
- Run
netlify build
- Then run
netlify deploy --prod
- Then finally run
netlify open:site
You've deployed your app to Netlify!
Part 2 - Working with AstraDB and the document API
11. Connecting the Database
Let's briefly dive into the connection between our serverless functions and our Astra DB.
We are using the @astrajs/collections library to make the connection using the Document API provided by Stargate. To do so, we start by creating a 'client'.
(See: functions/utils/astraClient.js)
const { createClient } = require("@astrajs/collections");

let astraClient = null;

const getAstraClient = async () => {
  if (astraClient === null) {
    astraClient = await createClient(
      {
        astraDatabaseId: process.env.ASTRA_DB_ID,
        astraDatabaseRegion: process.env.ASTRA_DB_REGION,
        applicationToken: process.env.ASTRA_DB_APPLICATION_TOKEN,
      },
      30000
    );
  }
  return astraClient;
};
Here we are defining a new method called getAstraClient that uses the createClient method from our astrajs library to create a connection to our database. We then provide it the needed database credentials we added to our environment varaiables earlier;
ASTRA_DB_IDASTRA_DB_REGIONASTRA_DB_APPLICATION_TOKEN
Then we return the astraClient we can then use in our API calls.
We also need to create a document collection to store our data.
const getCollection = async () => {
  const documentClient = await getAstraClient();
  return documentClient
    .namespace(process.env.ASTRA_DB_KEYSPACE)
    .collection("tktkposts");
};
In this method, we are using our previously created getAstraClient method to initialize the database connection, and then create a collection in the keyspace we defined in our environment variables;
ASTRA_DB_KEYSPACE
We will call the collection "tktkposts".
So now, any time we want to perform operations on our data, we will reference this method getCollection, and use the Document API from Stargate to do so.
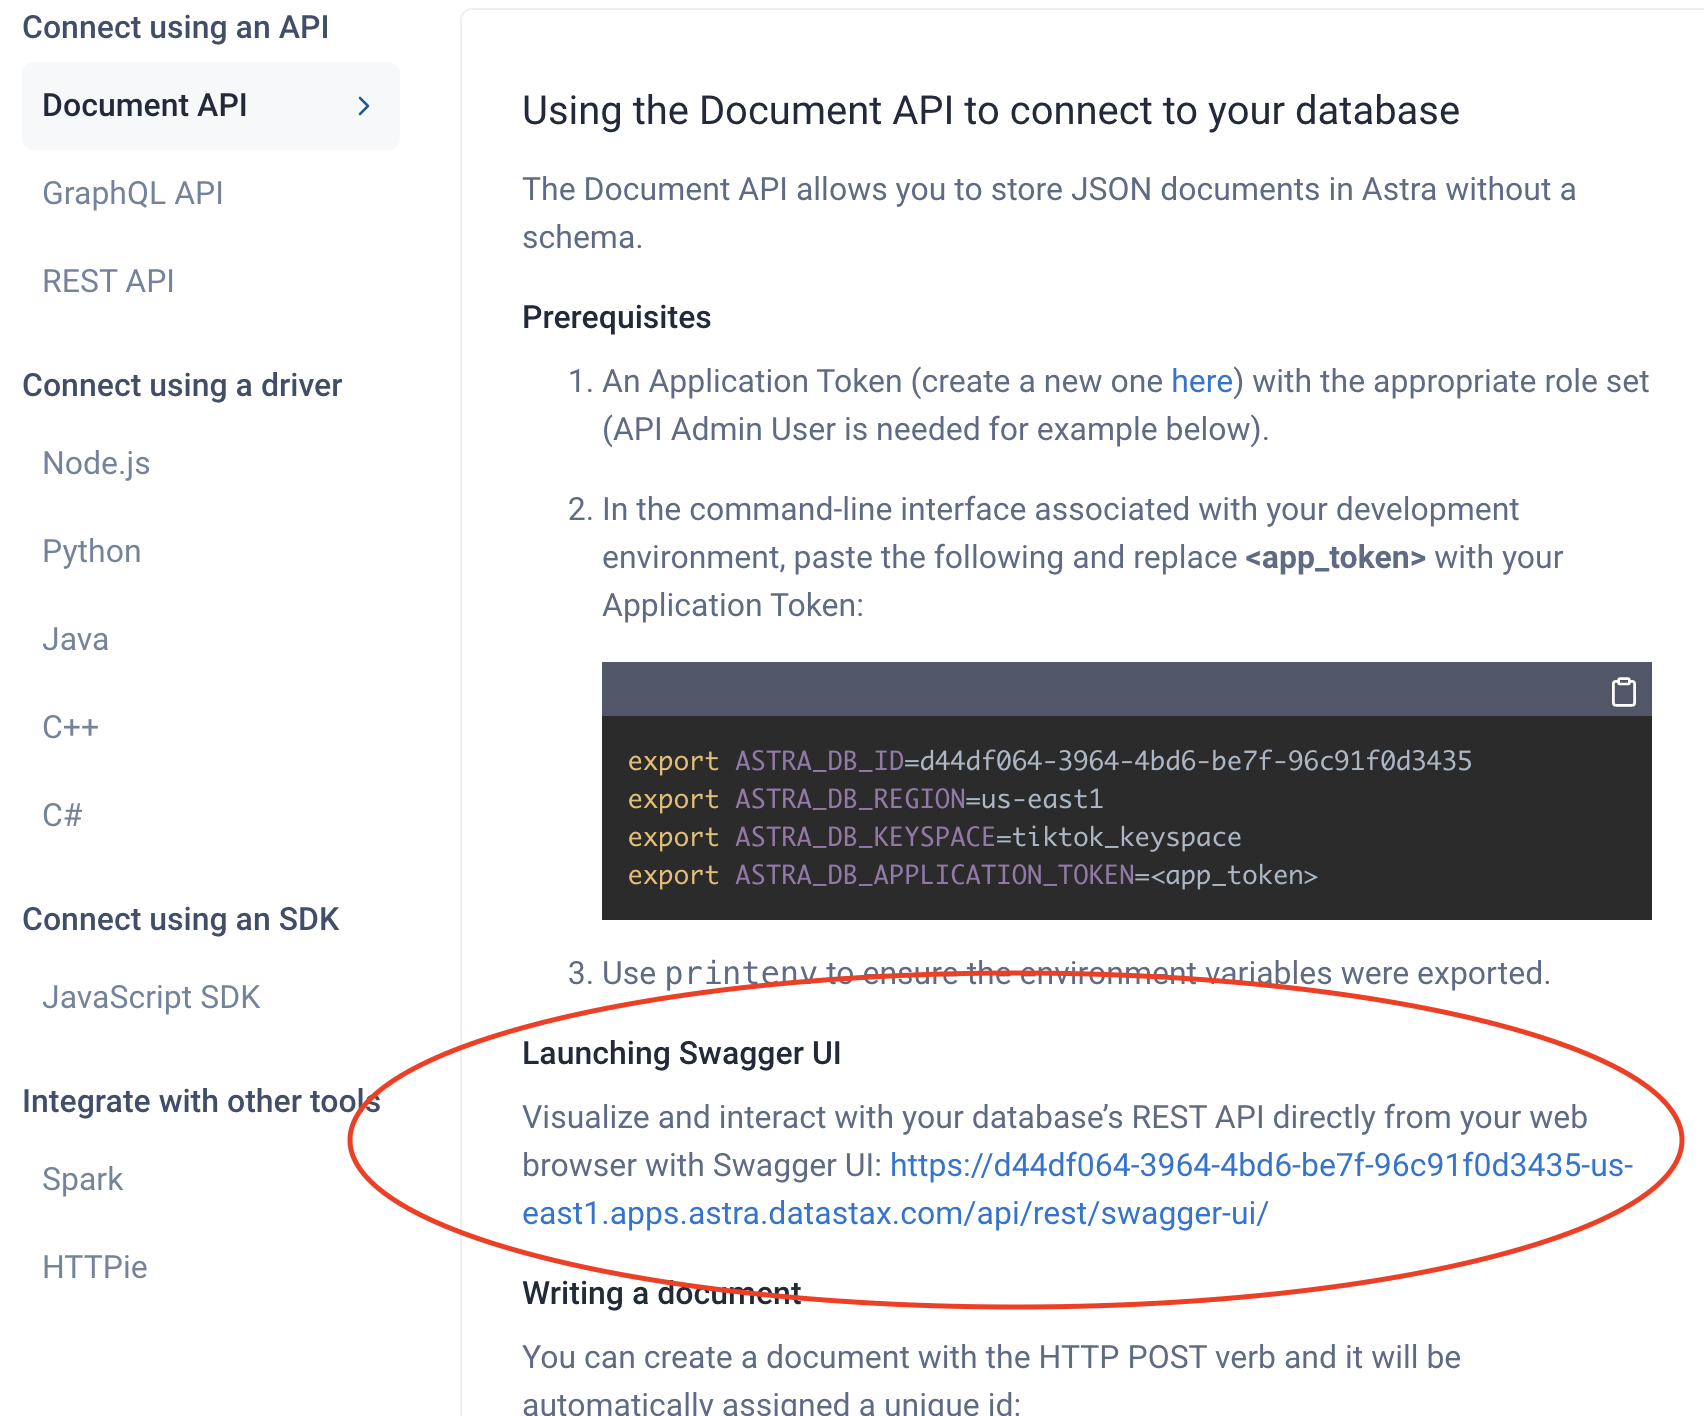
✅ Now that we have locally deployed our TikTok app, let's take a look at this in our database. Head to your Astra DB dashboard and click the Connect button next to your database ('tiktok_workshop_db').

✅ Then scroll down to the section called 'Launching SwaggerUI' and click the link. We'll be using SwaggerUI to make api calls to our database and see the results.
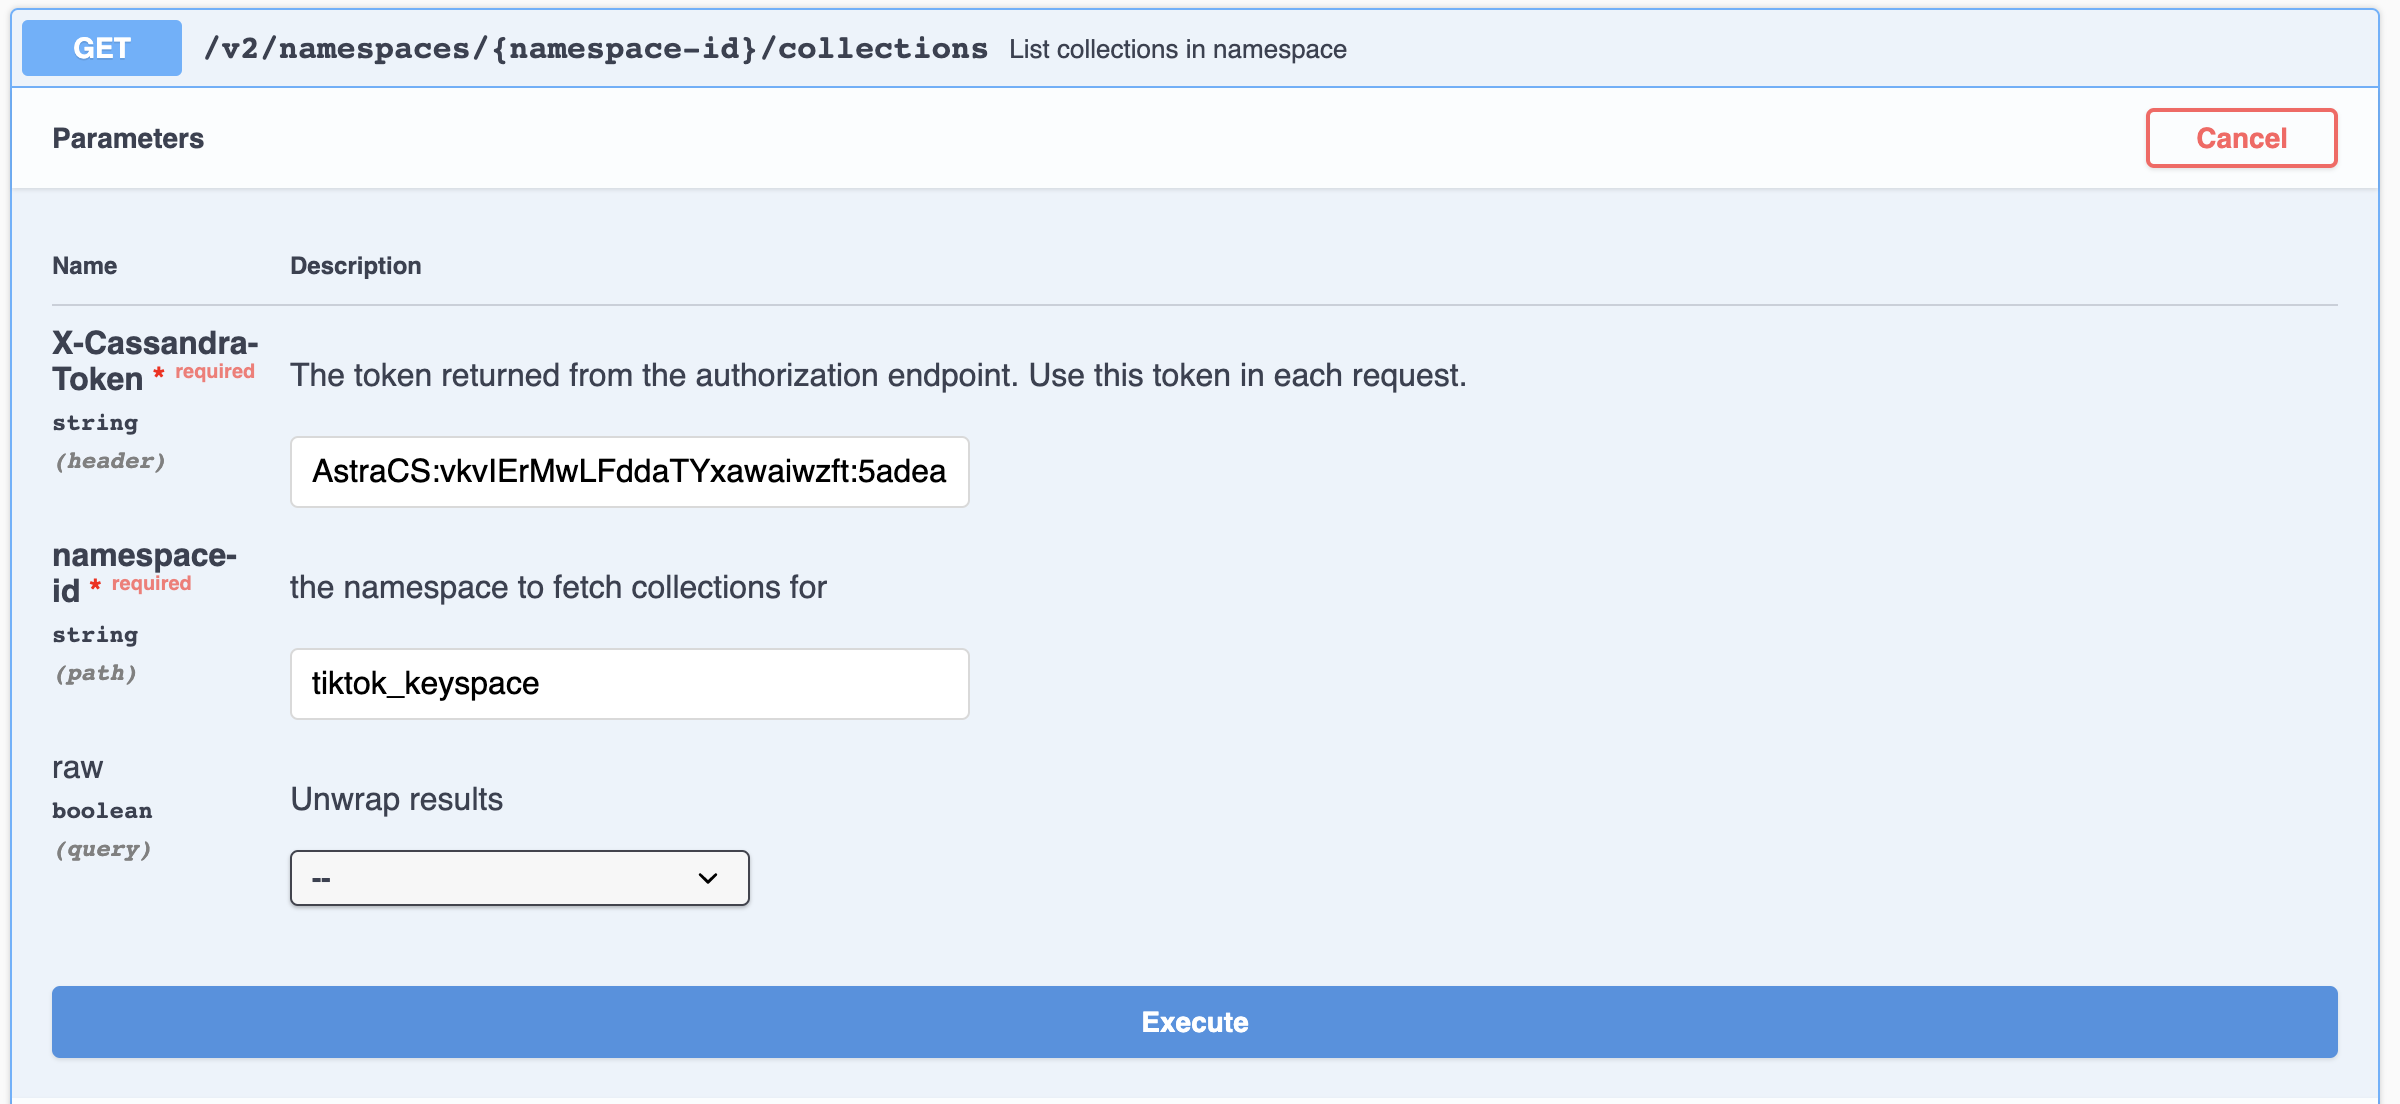
✅ Open up the first section labelled "List collections in namespace" and click the button "Try it out".

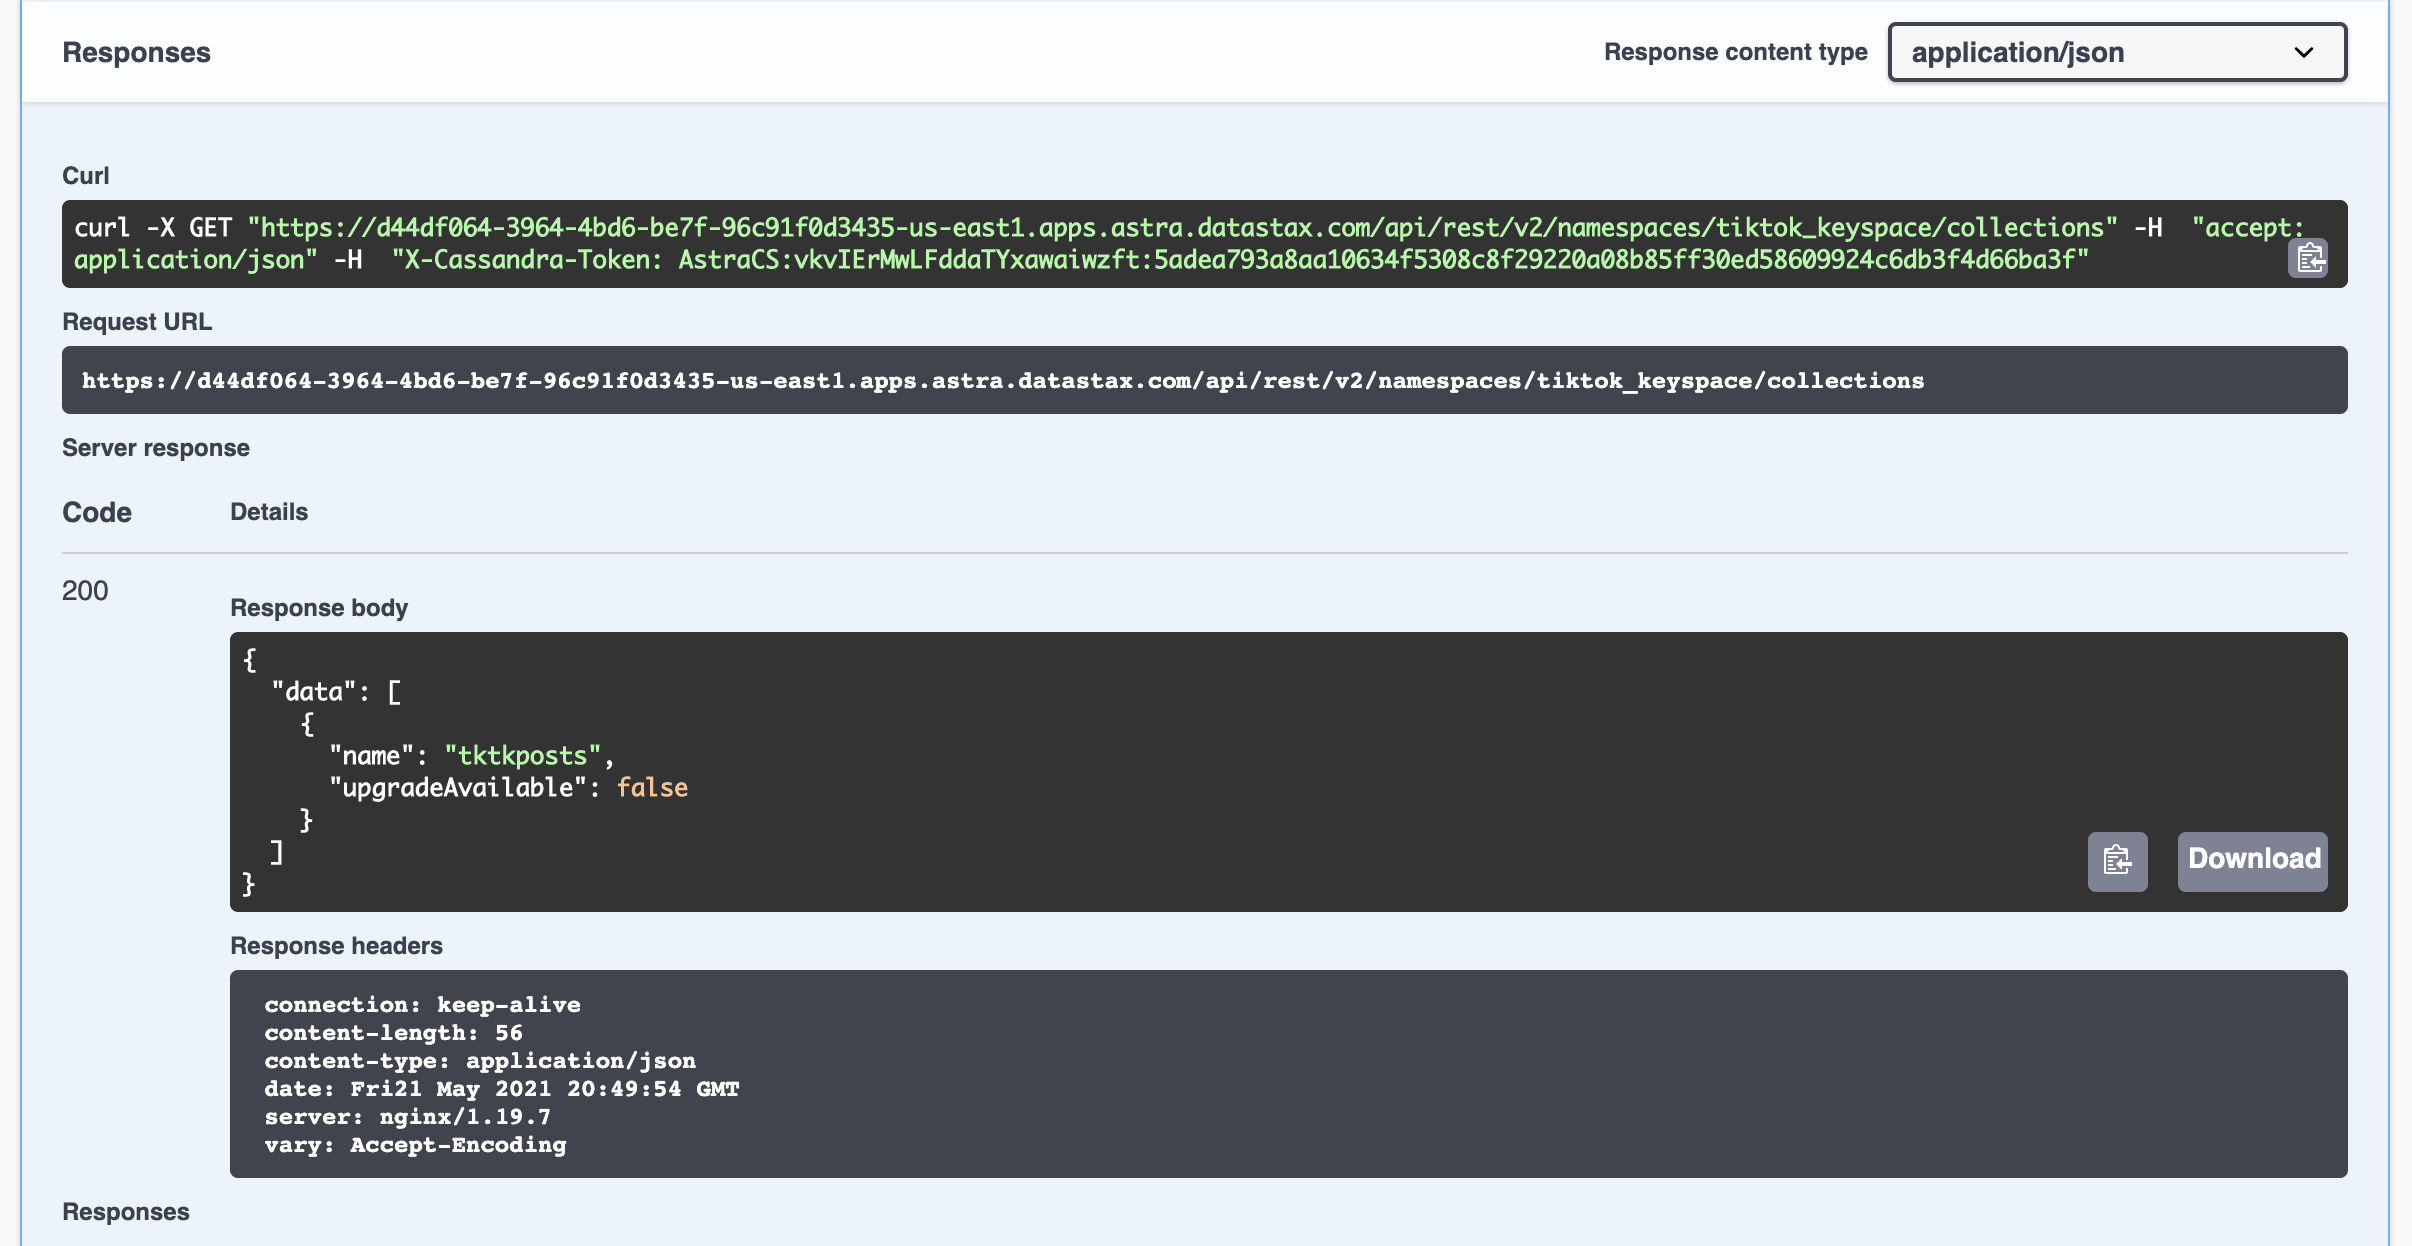
✅ We need to provide our Application Token, and our keyspace name. Fortunately we have these already saved in our environment variables in the .env file. Go ahead and copy those over, then click 'Execute'.
And there we go, we see that a collection has been made in our database called "tktkposts"
Document API
For our TikTok app, we will not be dealing with the Document API directly. Instead @astrajs/collections does that for us, and provides us with easy to use methods.
If you want a comprehensive list of the capabilities of @astrajs/collections, check out this documentation: AstraJS Collections
For now, let's go over the 3 methods we'll be using in this app:
createupdatefind
12. Create
The create method is used when we want to add documents to our collection. For example, in functions/add.js we get our collection from the database using our getCollection method.
const users = await getCollection();Then we use the create method to create a document, providing the collection id, and body of the document.
try {
    const user = await users.create(id, event.body);
    return {
      statusCode: 200,
      body: JSON.stringify(user),
    };
}
13. Update
The update method is used to update portions of existing documents. Take a look at functions/edit.js. Again we use getCollection() to get our collection from the database, then we use the update method, provide it with an id for the document we want to edit, and the data that needs updating.
try {
    users.update(body.userId, body.data);
    return {
      statusCode: 200,
    };
  }
14. Find
And finally the find method is used to retrieve documents. In functions/posts.js we are again using getCollections() and using the find method on the result.
try {
    const res = await users.find({});
    return {
      statusCode: 200,
      body: JSON.stringify(Object.keys(res).map((i) => res[i])),
    };
  }
In this case, we are passing an empty object to retrieve all documents. In a real-world scenario, we would pass a qualifier to get only the documents relevant to a specific user.
Let's go back to SwaggerUI and give this a test.
✅ Back in SwaggerUI, open up the section labelled "Search documents in a collection".

✅ Again, we have to provide the Application Token, keyspace name, and this time we will also include the collection id: tktkposts. We should also increase the page size as the tool defaults to only returning 1 document, and we will be retrieving many. Go ahead and fill those fields and click 'Execute'.

And we see all of the documents stored in our database.

Part 3 - Serverless Functions, how they work
So how do these functions work with no back-end server?
The short answer is that Netlify is providing the back-end environment for us. All we have to do is tell Netlify where to find the functions. Netlify will do the rest.
15. Serverless configuration
Take a look at netlify.toml.
[build]
command = "npm run build"
functions = "functions"
publish = "build"
This is the configuration file we include in our codebase that tells Netlify how to build our app. In our case it's really simple. First we give the build command to build our app: npm run build. Then we tell Netlify where to find our serverless functions, and finally where to find the resulting app after build.
So Netlify will create endpoints for our serverless functions based on the files it finds in our functions folder.
For example, we have a function called posts.js. As we saw before, this function returns all of the current posts in our database. Netlify will see that file in our functions directory and dynamically create an endpoint at /.netlify/functions/posts.
✅ We can see these functions in our Netlify account.
- Go to netlify.com and sign in.
- Select your site from the list.
- Select the "Functions" tab at the top.

From here we can see all our functions and get direct links as well as watch real time logs.
We can also see this in action by manually going to the endpoint on our Netlify site: [your-site-url]/.netlify/functions/posts.

Extra resources
Video tutorial with Ania Kubow
Thank you to our wonderful friend Ania Kubow for producing the TikTok clone. If you are not aware of Ania and love learning about coding you should absolutely check out her YouTube channel listed below.
While we focused on getting you up and running to production with Astra DB and Netlify, Ania's video will dig into more details on the app itself. Check it out to dig in more.
Running Astra DB Tik-Tok
We're using Create-React-App and the Astra DB Document API to create a simple Tik-Tok clone. Follow along in this video tutorial: https://youtu.be/IATOicvih5A.
Follow the instructions below to get started.
Video Content:
- https://youtu.be/IATOicvih5A
- (00:00) Introduction
- (03:05) Creating our Database on DataStax
- (06:52) Setting up our App
- (12:37) Routing Pages
- (18:02) Creating Components
- (28:32) Introduction to Data with Netlify and Stargate
- (30:10) Introduction to using the astrajs/collections
- (34:01) Posting data to our Database (creating dummy Tik Tok posts)
- (34:01) Adding authorization to access our Database
- (43:10) Getting data from our Database (getting all our Tik Tok posts)
- (50: 32) Viewing all our Data
- (51:56) Rendering components based on our Data
- (01:17:01) Editing our Data (following/unfollowing a user)
- (01:32:57) Adding new Data to our Database (creating a Tik Tok post)
If you did like this video, please hit the Like and Subscribe button so I know to make more!
- Twitter: https://twitter.com/ania_kubow
- YouTube: https://youtube.com/aniakubow
- Instagram: https://instagram.com/aniakubow