We will be using Vue.js and Flask for this workshop. Vue is a javascript framework that we will be using for frontend and Flask is a python-written framework that we will be using for backend.
We'll be building a single page app that can do the following:
- Takes as input different events for our class posted by each student
- The output is a collaborative notice board for cs52!
- Our hope is to guide you through the steps and have you pick up some Vue and Flask along the way!
Be sure to look out for the following notations:
- 💻 run in terminal
- 🚀 this is a key step
Fork it here and then clone the repo
Now we want to install vue.js and vue resource, as well as bootstrap for frontend formatting. Vue resource allows us to make web requests.
💻 Install vue.js, vue resource, and bootstrap from your command line:
npm install vue vue-resource bootstrap
💻 Now we want to install Flask:
pip install Flask
Import vue.js and vue resource into your html. 🚀 Put these tags at the end of your html body:
<script src="node_modules/vue/dist/vue.js"></script>
<script src="node_modules/vue-resource/dist/vue-resource.js"></script>
<script src="app.js"></script>
💻 Let’s run it to see what it looks like:
Python -m SimpleHTTPSERVER 9000
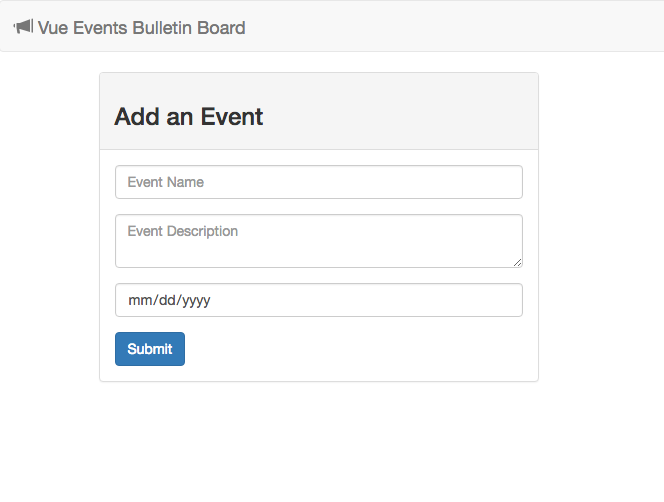
Visit http://localhost:9000/! Your site should look something like this:
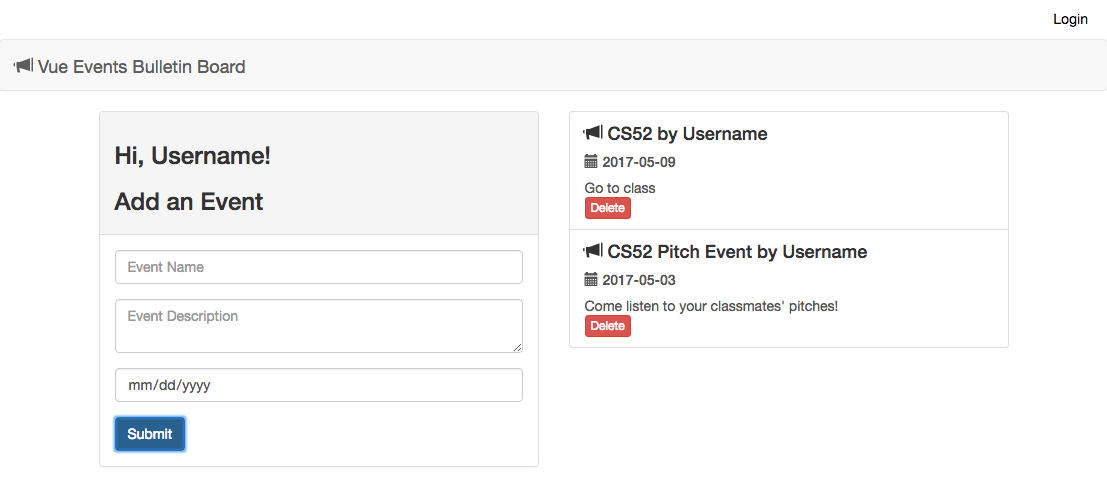
Fun fact: You can sign in! On the top right corner log in with your name. The app should greet you now.
🚀 Copy and paste this into the end of your app.js file:
var someVue = new Vue({

  // We want to target the div with an id of 'events'
  el: '#events',

  // Here we can register any values or collections that hold data
  // for the application
  data: {
    event: { user: '', name: '', description: '', date: '' },
    events: []
  },

  // Anything within the ready function will run when the application loads
  mounted: function() {},

  // Methods we want to use in our application are registered here
  methods: {}
});
What do we have here?
- el targets divs with a #events id. Now vue will be available wherever div id=#events.
- data will be the object where the html can access vue’s data
- mounted is a function that will be called when the app loads and used to call other methods that will initialize the app’s data
- methods is where we will hold all our functions
Let’s connect our html to vue! In the div class “panel-body” in index.html, you will see three “form-group” classes. In each class is either an input or a textarea element. :rocket: We are going to use v-model to incorporate vue like so:
<input class="form-control" placeholder="Event Name" v-model="event.name">🚀 Now do the same for description and date inputs by using event.description and event.date.
V-model assigns a specific spot on an event to it’s element. The value we input into these fields will be attached to ViewModel and be available for vue.
We also want to add an on-click event for vue to handle. 🚀 In the button element of the panel-body class, add:
v-on:click="addEvent"
v-on specifies the type of event that you want an element to react to.
Let's get our app to be able to add events! First we need a way to fetch events and render them. Lets create a fetchEvents method in app.js. 🚀 in the methods portion of app.js put:
fetchEvents: function() {
  var events = [];
  this.events = events;
},
Notice this.events. It's kind of like React! We're basically resetting vue's events here.
🚀 Now add fetchEvents to your mounted function. We will want to call it as:
this.fetchEvents();Next we want the user to be able to add additional events. 🚀 Add this to methods as well:
addEvent: function() {
  if(this.event.name) {
    this.event.user = user;
    // push the event to this.events below!

    this.event = { name: '', user: '', description: '', date: '' };
  }
},
Here's what's suppose to happen: if a name is inputted, then the function will set the user and then push the current event. How do we do this? The event that you want to push is called this.event. The events that you are pushing to is called this.events. Use push to add this.event to this.events.
Finally, add a delete function. 🚀 Add this to methods:
deleteEvent: function(index) {
  if(confirm("Are you sure you want to delete this event?")) {
    // $remove is a Vue convenience method similar to splice
    this.events.splice(index, 1);
  }
},
Yay! Now you can add and delete events!
But wait, your events show no content. That's because we have to connect the data to vue. Go to the "list-group" class in index.html. First, notice v-for="(event, index) in events" in the "list-group-item" class. What this does is loop through all the events from vue.
Now notice the use of {{ event.name }} by {{ event.user }}. What's going on here? Basically the html is now accessing the user-inputted name for each event, as well as the username.
Now try it! Let the html handle each event's date and description. Use event.date and event.description.
Now you have the frontend of your app working! Check it out! :computer::
Python -m SimpleHTTPSERVER 9000
After adding events, you should get something like this:
You thought you were done, didn't you. Now we want to connect our events page to a backend so that
Testing out Vue
Trying Vue for the first time, and getting this awesome tutorial working with Vue 2.0.

