Flask web app to manage cloud-based desktop machines
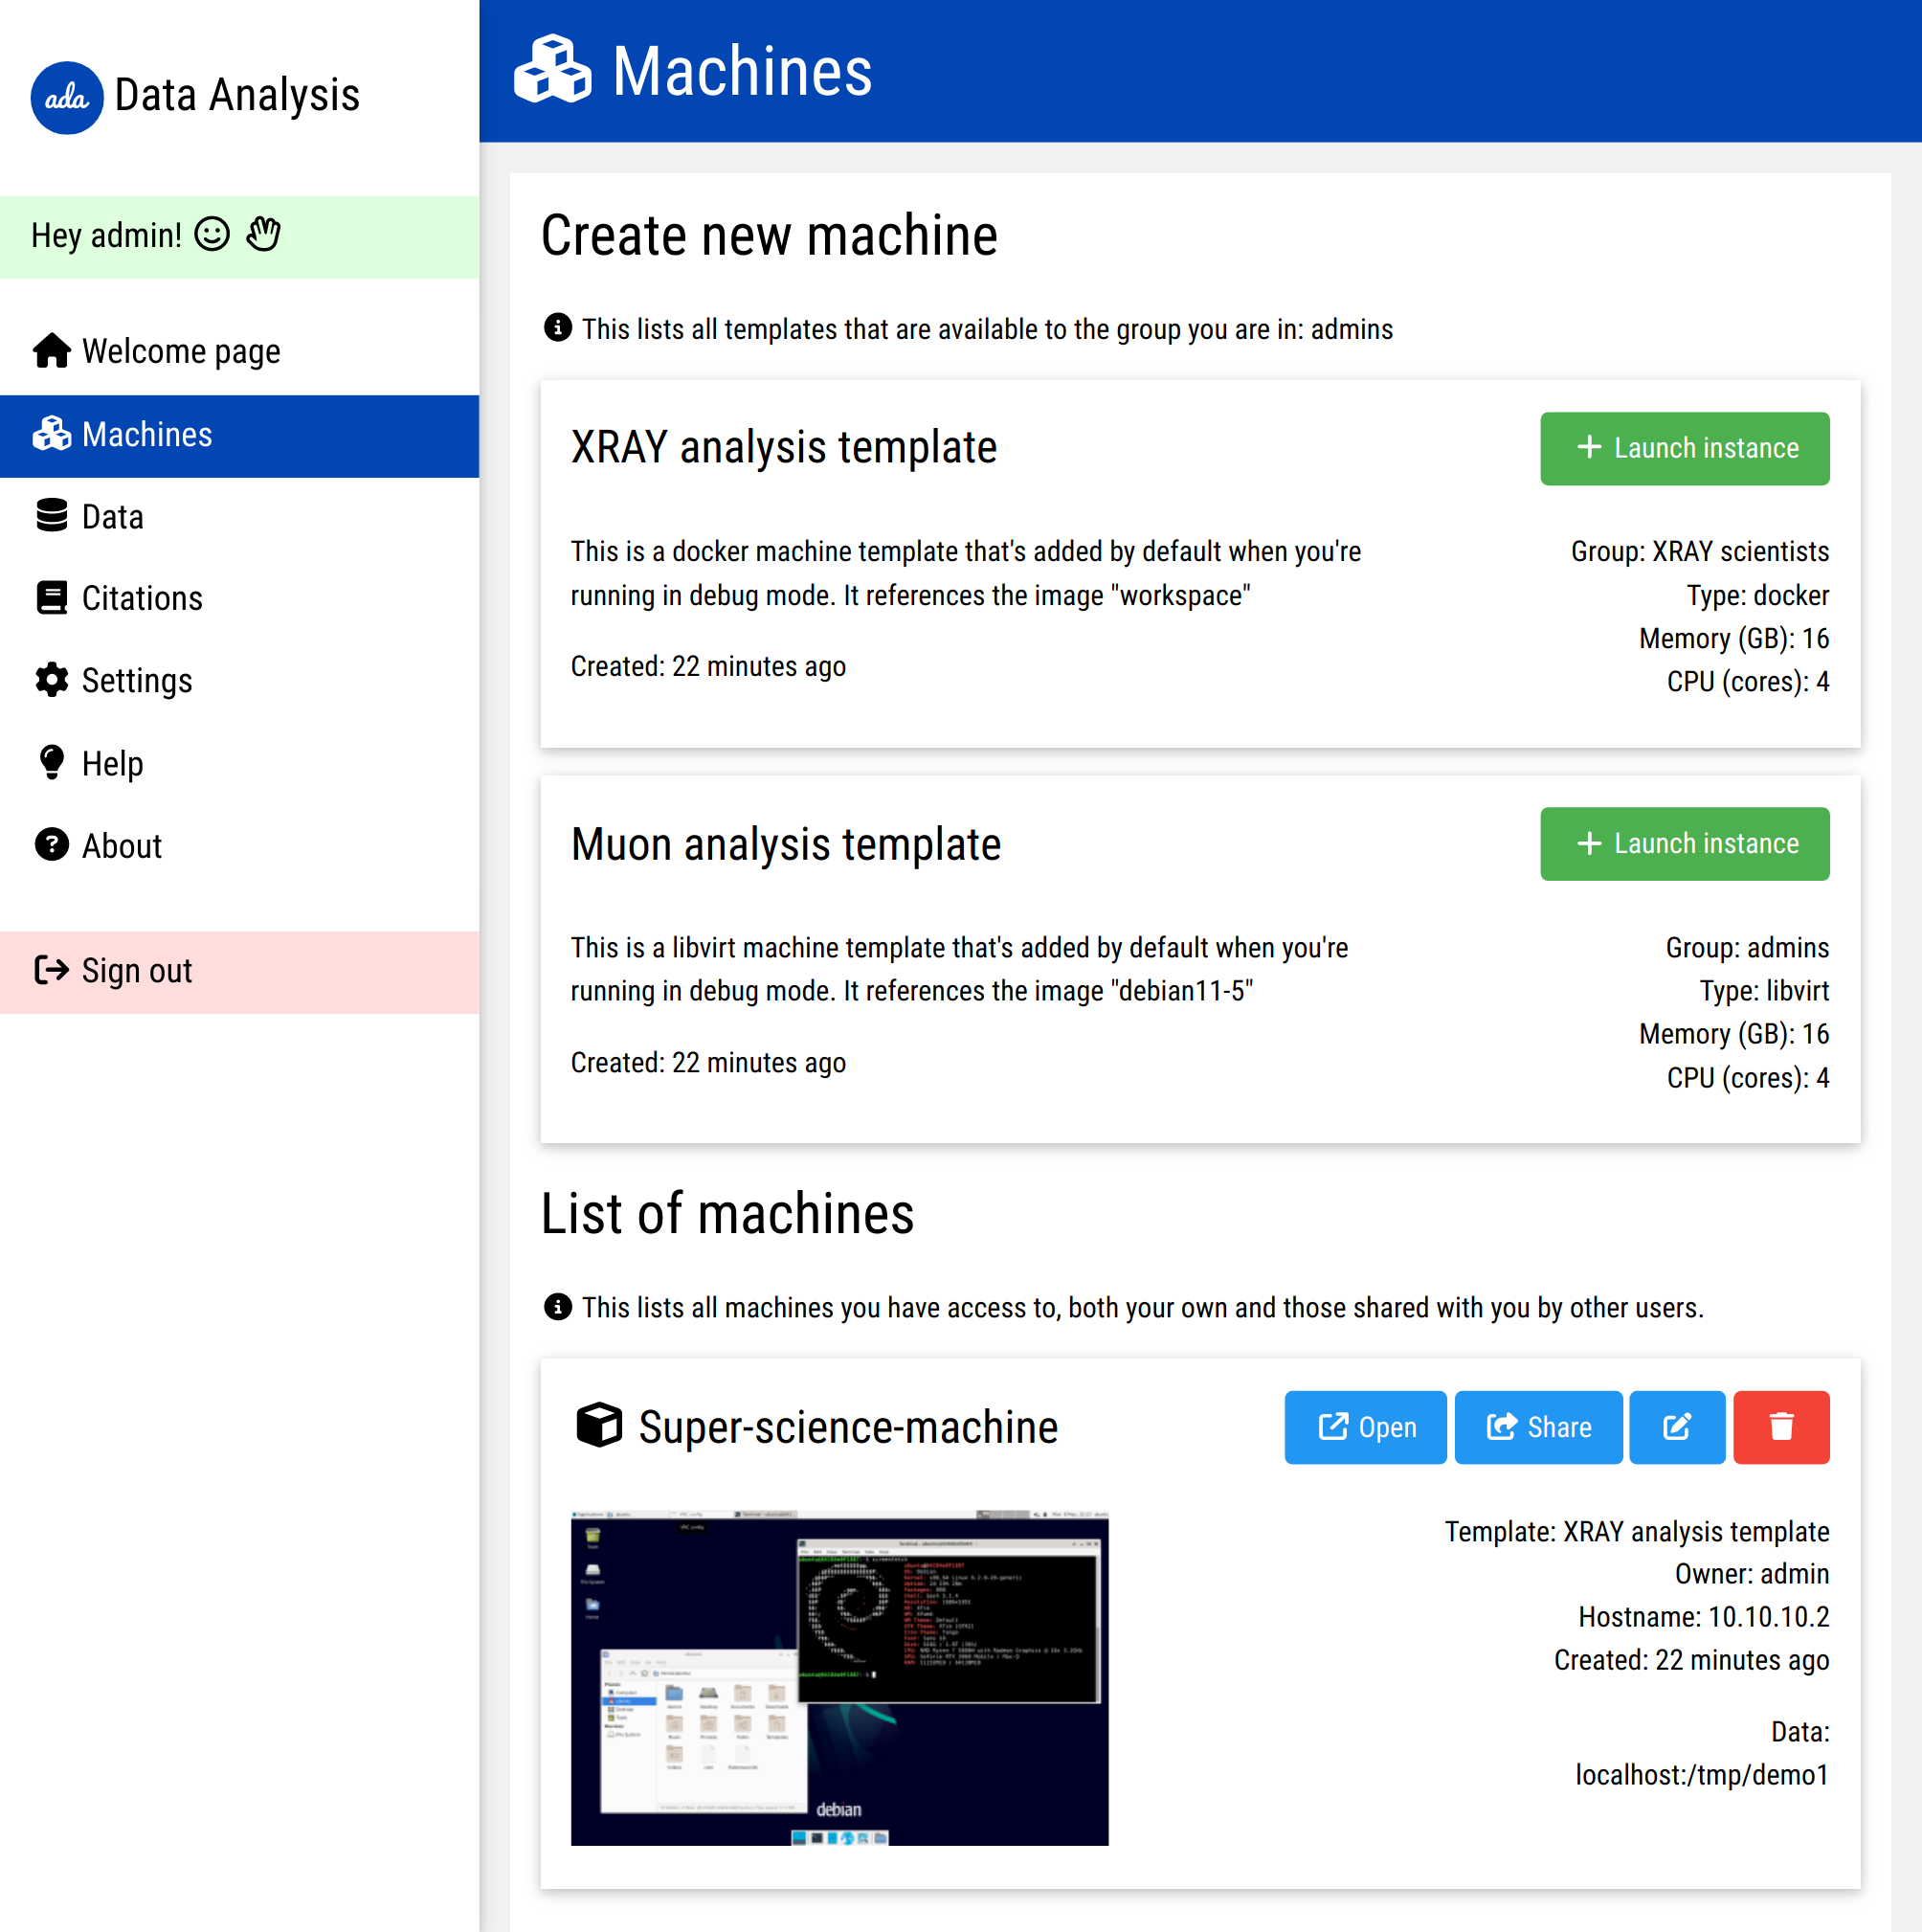
Ada2025 allows you to create, run, and share machines from various templates, all through a single, unified interface. This interface can also be used to manipulate data sources, use a desktop in a web browser, manage files through an integrated file browser, and much more.
- Create machines from pre-defined templates
- Manage machines across various platforms:
- Docker containers
- Libvirt virtual machines
- OpenStack virtual machines
- Share machine access with other users
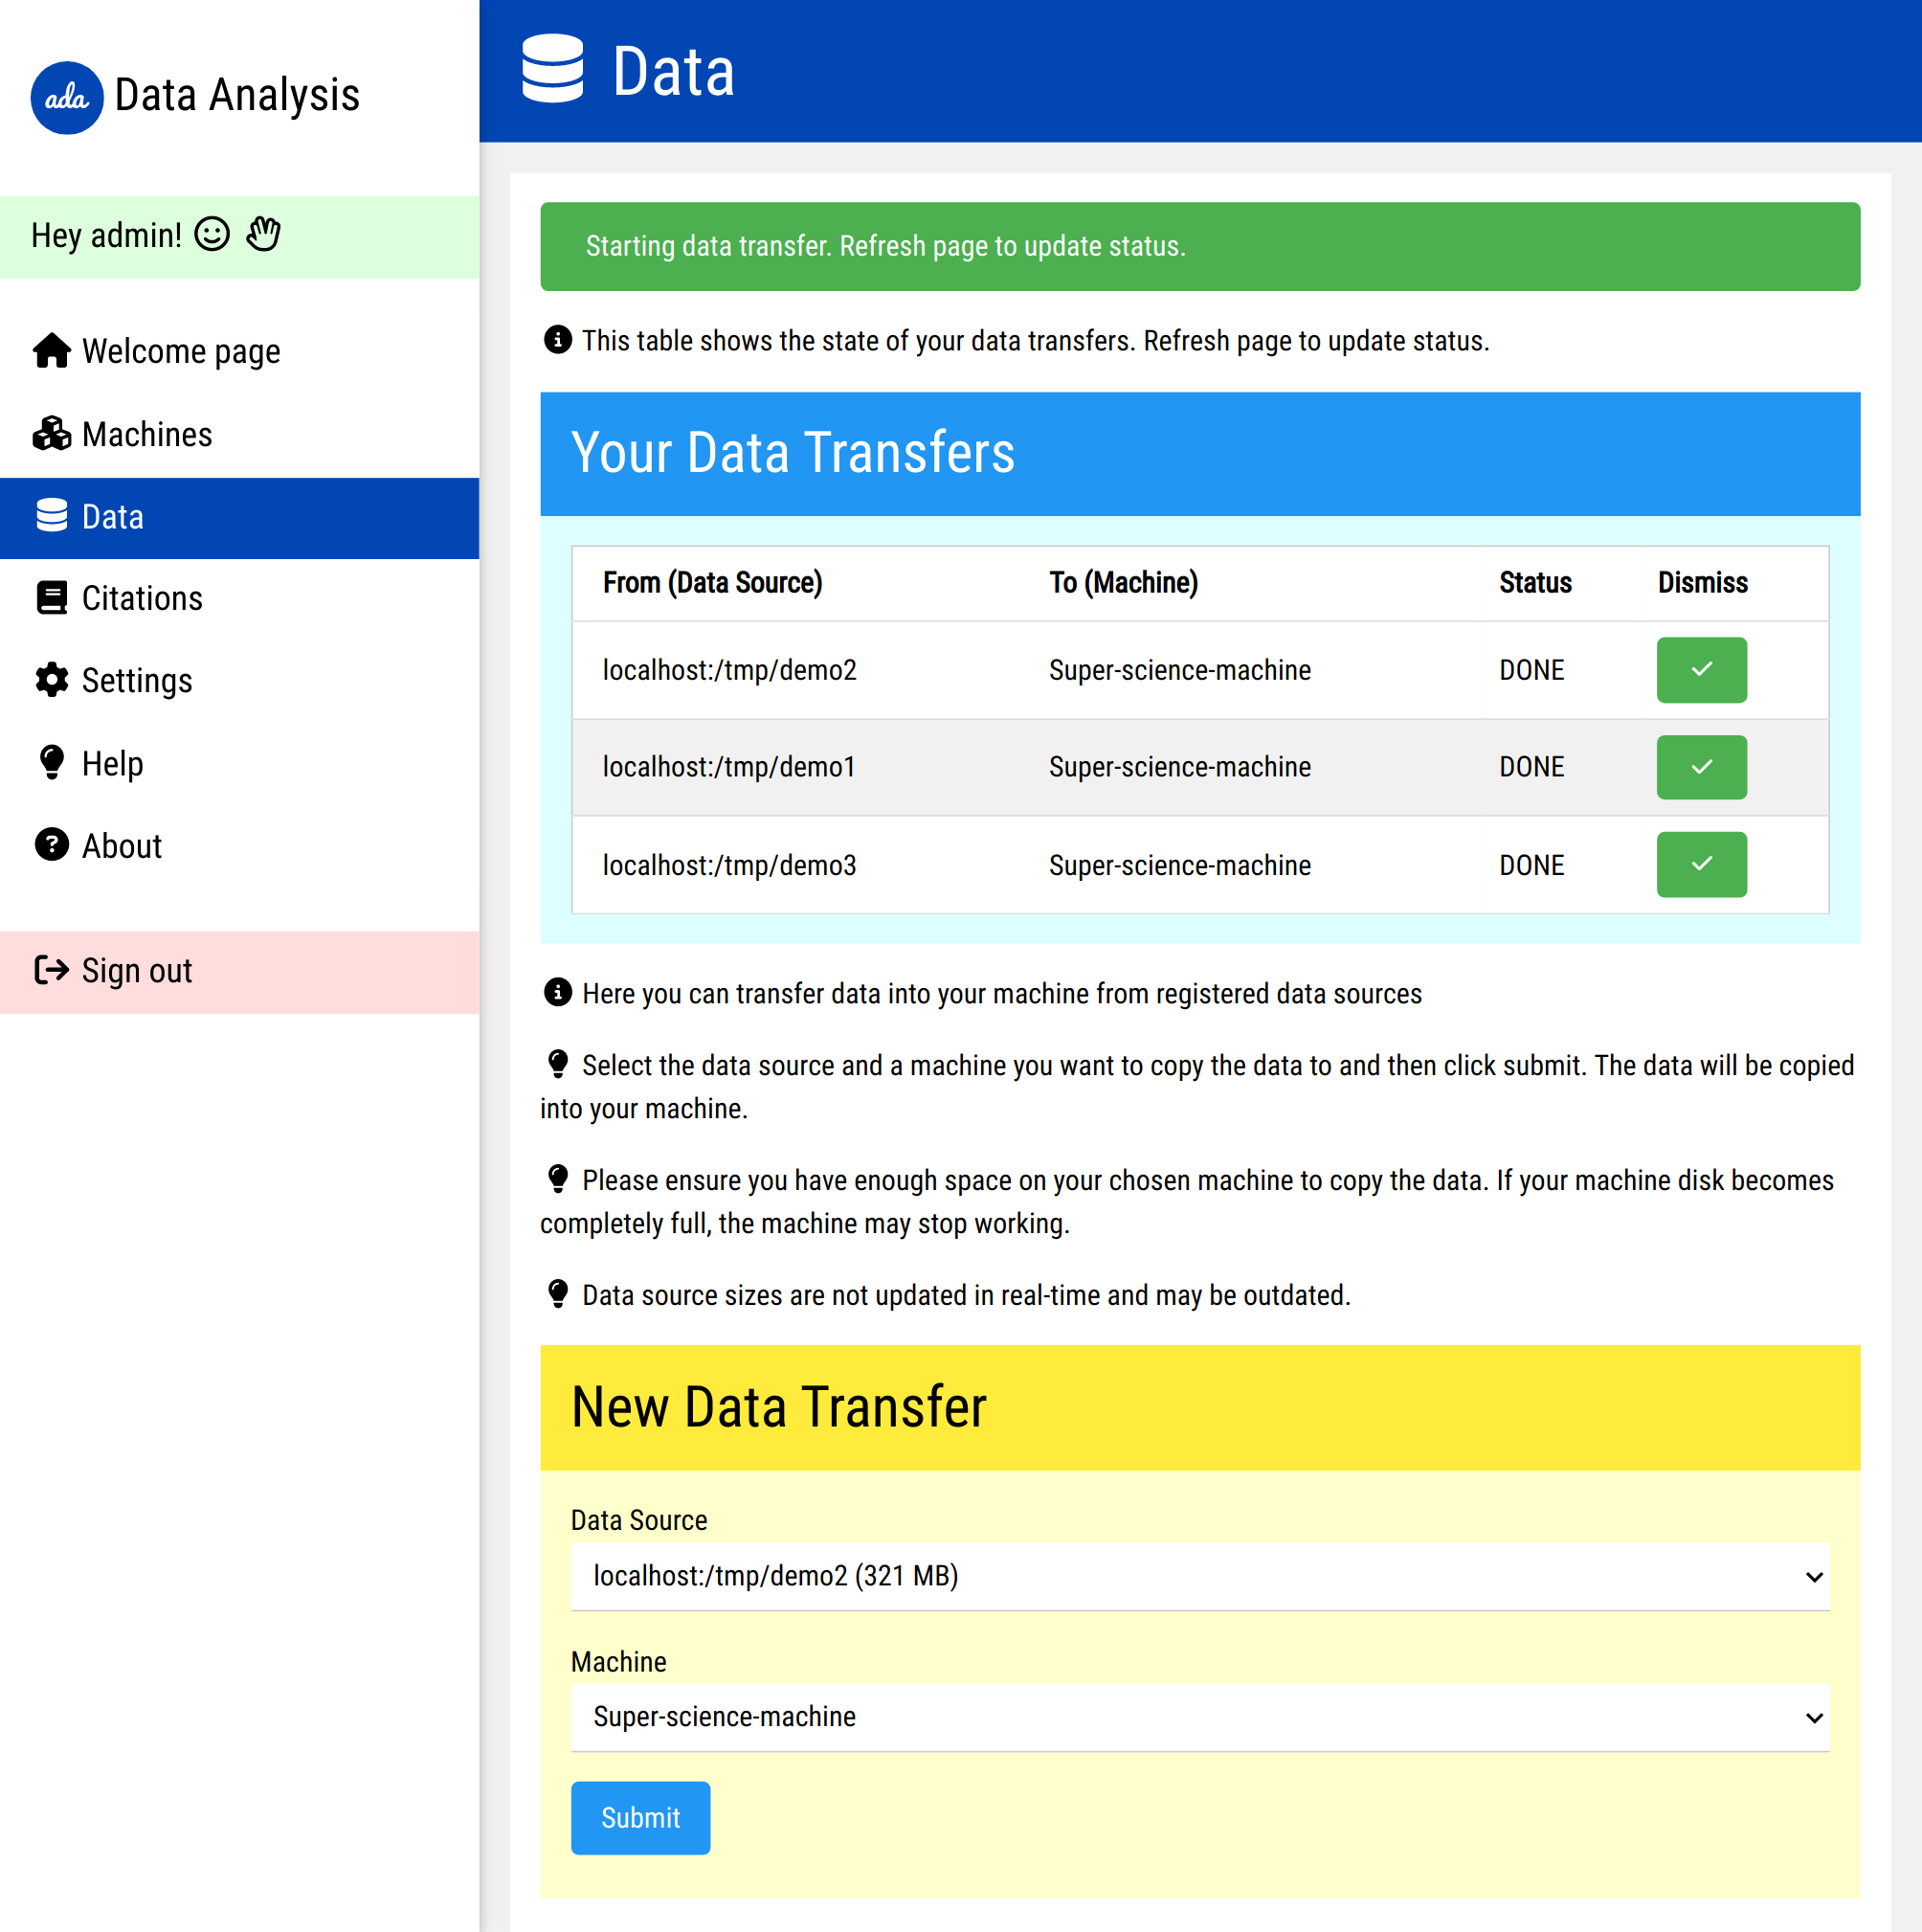
- Import data from various sources into your machines
- Access a fully-featured desktop environment in your browser
- Group admins can approve/remove users from groups, manage what data users have access to, and define a custom welcome page.
- Integrated file browser for uploading and downloading files
- Multi-language support: English, Chinese, Slovenian
- Login with local account, IRIS IAM, Google, or ORCID with optional reCaptcha for added security
- In-app user problem reporting system
- Colorful admin interface with action auditing for increased transparency
- Easy deployment options with bare metal or Docker
- Email notifications for group admins and users
- One click image building from image templates with customization
The following technologies were used to build Ada2025:
- Backend: Python 3.11+, Flask, Flask-SQLAlchemy, Flask-Migrate, Flask-WTForms, Flask-Login, Flask-Admin, Flask-Babel, Flask-Limiter, Flask-ReCaptcha, Authlib, sentry-sdk, paramiko
- Infrastructure: Debian, Docker, libvirt, python-openstack
- Frontend: TigerVNC, noVNC, filebrowser
- Networking: Nginx
- Data Transfer: rsync
Follow these steps to get Ada2025 running on your machine:
Before proceeding with the installation of the web application, ensure that you have the following prerequisites:
- Python 3.11 or later (earlier versions are not tested)
If you are using Ubuntu 23.04, you should also install some additional packages:
sudo apt update
sudo apt -y install --no-install-recommends pkg-config build-essential libvirt-clients virtinst libvirt-dev python3-openstackclient python3-glanceclient libpq-dev libvirt-daemon-system
Please note, these instructions are specifically for Ubuntu 23.04. If you are using a different operating system, please adjust the commands accordingly.
Clone the repository and install the required Python packages:
git clone https://github.com/dvolk/ada2025
cd ada2025
python3 -m venv env
source env/bin/activate
pip3 install -r requirements.txt
flask db upgrade
pybabel compile -d translationsTo run the web app:
python3 app.pyThen, open your web browser and navigate to http://localhost:5000.
The randomized admin password is printed on the console on first startup.
As an alternative to manually installing Ada2025, you can use Docker and Docker Compose to simplify the process. This method is especially recommended if you are planning to deploy the application in a containerized environment.
Before proceeding, ensure that you have installed:
- Docker
- Docker Compose
This can be done using the following command:
sudo apt update
sudo apt -y install docker.io docker-compose
You also need to install libvirt-daemon-system using:
sudo apt -y install libvirt-daemon-systemClone the repository:
git clone https://github.com/dvolk/ada2025
cd ada2025
Create the adanet network (skip this if you've done it):
sudo docker network create --driver bridge --subnet=10.10.10.0/24 --gateway=10.10.10.1 adanetBuild and start the Docker containers:
sudo docker-compose up -d --build # note that docker-compose.yml will mount the docker and libvirt sockets in the container, allowing you to launch docker and libvirt machines on the host. If you don't want this, comment it out in the file.Your Ada2025 app should now be up and running at http://localhost:5000.
The randomized admin password is printed on the console on first startup. Note that when using docker-compose, you may need to run the following command in order to view this information:
sudo docker-compose logs appRemember to stop the services once you're done:
sudo docker-compose downYou can also set the following optional environment variables to further configure Ada2025:
ADA2025_MAIL_SENDER # set to the email of the sender
ADA2025_MAIL_SERVER # set to the mail server hostname
ADA2025_MAIL_PORT # set to the mail server port
ADA2025_MAIL_USERNAME # mail server username
ADA2025_MAIL_PASSWORD # mail server password/app password
ADA2025_MAIL_USE_TLS # True or False if you want to use TLS
ADA2025_MAIL_USE_SSL # True or False if you want to use SSL
ADA2025_SENTRY_DSN  # set to DSN to have sentry.io integration
ADA2025_SENTRY_ENVIRONMENT  # sentry.io environment string (eg. "dev" or "prod")
ADA2025_FLASK_SECRET_KEY  # set to string or one will be randomly generated
ADA2025_SQLALCHEMY_URL  # set to database URL if you don't want SQLite
LOGIN_RECAPTCHA  # set to 1 if you want reCaptcha on the login screen
RECAPTCHA_SITE_KEY  # your reCaptcha v2 site key
RECAPTCHA_SECRET_KEY  # your reCaptcha secret key
GOOGLE_OAUTH2_CLIENT_ID  # your Google OAuth2 client ID
GOOGLE_OAUTH2_CLIENT_SECRET  # your Google OAuth2 client secret
ADA2025_IRIS_IAM_OAUTH2_CLIENT_ID  # your IRIS IAM OAuth2 client ID
ADA2025_IRIS_IAM_OAUTH2_CLIENT_SECRET  # your IRIS IAM OAuth2 client secret
ADA2025_EMAIL_LOGIN_SECRET_KEY # email login (passwordless) encoding key
ADA2025_SHARE_TOKEN_SECRET_KEY # share token encoding key
ADA2025_EMAIL_CONFIRMATION_SECRET_KEY # email confirmation token encoding key
ADA2025_USE_EMAIL_CONFIRMATION # set to True if you want to require confirmation of email addresses
ADA2025_INSTANCE_IDENTIFIER # used to identify build machines requested by this instance. optional.
ADA2025_USE_2FA # set to true/false to enable 2FA
Apply database migrations:
flask db upgrade
This section is relevant for both standard AND docker web app deployment methods.
This is needed for running Ada machines on docker/libvirt, not for running the Ada web app itself.
For Docker and libvirt setup, ensure that Docker and libvirt are installed on your system:
-
Docker: Docker can be installed using the official package available in Ubuntu repositories:
sudo apt update
sudo apt -y install docker.io
For detailed instructions, follow the official Docker installation guide.
-
libvirt: On Ubuntu, you can install libvirt using the package
libvirt-daemon-systemwhich provides the necessary tools and systems daemons for running libvirt:sudo apt -y install libvirt-daemon-system
After installing these packages, make sure to add your user to the docker and libvirt groups:
sudo usermod -aG docker $USER
sudo usermod -aG libvirt $USER
Remember to log out and back in for these changes to take effect.
This is needed for running Ada machines on docker, not for running the Ada web app itself.
Create a Docker bridge network and build the example Docker desktop container:
docker network create --driver bridge --subnet=10.10.10.0/24 --gateway=10.10.10.1 adanet
cd machines/docker_example
docker build . -f Dockerfile -t workspaceThis is needed for running Ada machines on libvirt, not for running the Ada web app itself.
Follow these steps to prepare a libvirt virtual machine:
- Install a new Debian 11 system on a virtual machine named "debian11-5".
- Copy the files located in machines/debian11_vm to the virtual machine.
- SSH into the virtual machine and execute setup.bash.
- Shut down the virtual machine.
To update the translation files, use the following commands:
pybabel -v extract  -F babel.cfg -o translations/messages.pot .
pybabel update -N -i translations/messages.pot -d translations
For further assistance, please open an issue or reach out directly.