Get unlimited amount of data in Cloudflare's WARP, most versatile code translated in our beloved Python! ethically of course.
Easily navigate through out the guide and pick the best method that suits you and your requirements!
- ♻️ WARP UNLIMITED ADVANCED
- 🆕 What's New
- 📑 Features
- 🪧 Before you Proceed
- ⚙️ How to use ? 😅 How to get WARP CLIENT ID ?
- → 🕹️ Run on Google Colab
- →
 Deploy on Koyeb (24x7)
 - → ⚡ Host on Heroku (24×7)
- → 🧿 Host on Railway (24×7)
- → 🪬 Host on Okteto (24×7)
- → 🖥️ Run on Computer/VPS
- → 🧫 Deploy through GitHub Actions
- → 📲 Run on Mobile Phone
- → 🎲 Run on Replit
- → 🧰 Run on Jupyter Server
- → 📈 Update Values (📲 For Mobile & 🖥️ For Windows/Linux)
- 🎯 Points to be Remembered
- 📥 Download Cloudflare WARP (1.1.1.1)
- ❓FAQ
- 🖥️ How to use this Data on PC ?
- ⛑ Contact Us
- ❤️ Credits & Thanks
- 🍵 Other Projects
1. New Interactive mode!
2. Get values from System Environment.
3. Log Events inside runtime-log.txt
4. Fixed error when SEND_LOG is not enabled & BOT_TOKEN not provided.
5. New repl for replit.com.
6. Added building instructions in Dockerfile for Docker Image.
7. Fixed the broken code due to which program was not working.
8. Bot will now not flood chat with multiple messages, will edit same message continuously.
9. Changed CHANNEL_ID to CHAT_ID.
10. Replaced config.env with config.py
11. Fixed Okteto deployment.
12. Updated README.md as per v4.5.7
13. Moved all .ipynb files to ipynb folder.
14. Deploy on Koyeb totally for free.
1. It doesn't matter if you have WARP or WARP+, this program works for both.
2. We are not hacking or gaining access to any Cloudflare system or their servers nor we are changing any official records illegally. We are just using Official Cloudflare's API.
3.Recommended Python Version: 3.7.x...3.11.x.
0. First Get your WARP CLIENT ID by navigating to App > Settings > Advanced > Diagnostics and copy the ID under CLIENT CONFIGURATION section (note that you can get that ID only in the mobile app, not on the desktop app)
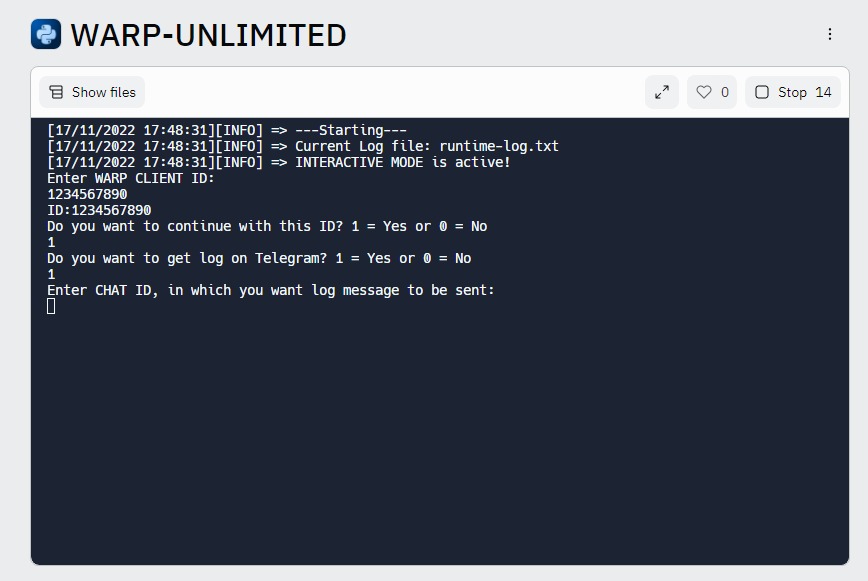
Below given variables should be filled in config.py file or can be passed as Environment Variables (ENVs), added to this you can also enable INTERACTIVE_MODE to enter new values during each run.
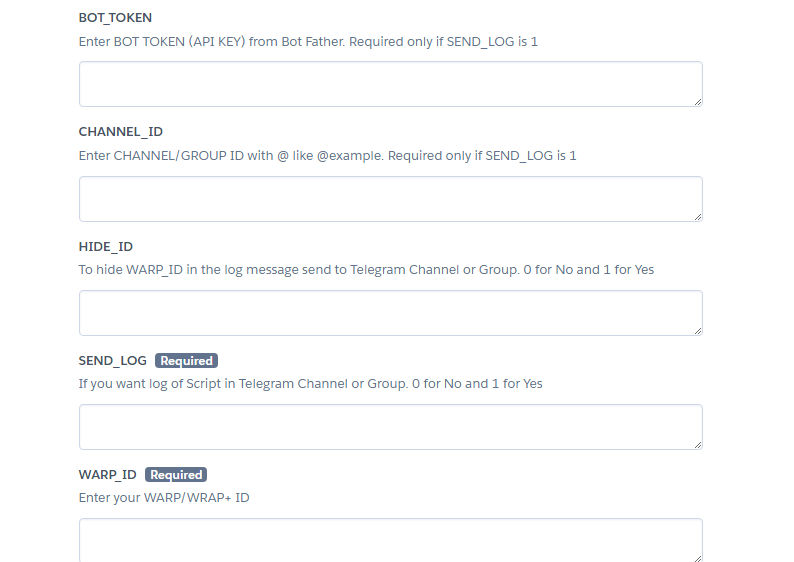
ENV: Set it toTrueto let program get values from system environment orFalseif you are filling it inconfig.pyitself or in case ofINTERACTIVE_MODEboolINTERACTIVE_MODE: Set it toTrueif you want program to ask for new values during each run or simplyFalse.boolWARP_ID: Enter your WARP CLIENT ID. How to get?strSEND_LOG: Get notification on Telegram regarding total data generated, total attempts & failed attempts.0= No &1= Yes.strBOT_TOKEN: Enter Telegram BOT API Token from @BotFather. Required ifSEND_LOGisTrue.strCHAT_ID: Enter CHAT_ID on which you want log message to be sent. It can be group/channel ID (mostly for private chats) like-1001877005515or group/channel Username like@mychannelor@mygroup.strHIDE_ID: To hide your WARP CLIENT ID from log message sent to your chat.0= No &1= Yes.str
1. Open Code on Google Colab: Open NoteBook
2. Now enter your WARP_CLIENT_ID and run The WARP (1.1.1.1) Code as shown in the Image (click on the Play button on top-left corner)
Run program totally for free on Koyeb with single click deployment button!
2. Fill the given variables as discussed above and click Deploy.
⛔NOTE: This method uses ready-to-use Docker Image made specially for Koyeb, hence any change requires building of new image with NPM's http-server or Flask to listen on port 8000 & 8080.
1. First, create account or login on Railway
1. First Create your Okteto Account. You need one GitHub account as Okteto supports only one Method to either Create or Login: Create Account
5. Additionally, you can setup cron-job using Cron-Job.org to automatically restart your program once it sleeps after 24 hours.
For Windows: (WinGet)
winget install python3.10
winget install Git.Git
For Linux: (APT)
sudo apt-get update && sudo apt-get install -y python3.10 git
For Mac: (HomeBrew)
brew install python@3.10 git
git clone https://github.com/TheCaduceus/WARP-UNLIMITED-ADVANCED.git
pip install -r requirements.txt
4. Fill config.py as discussed here.
py warp-plus.py
cat runtime-log.txt
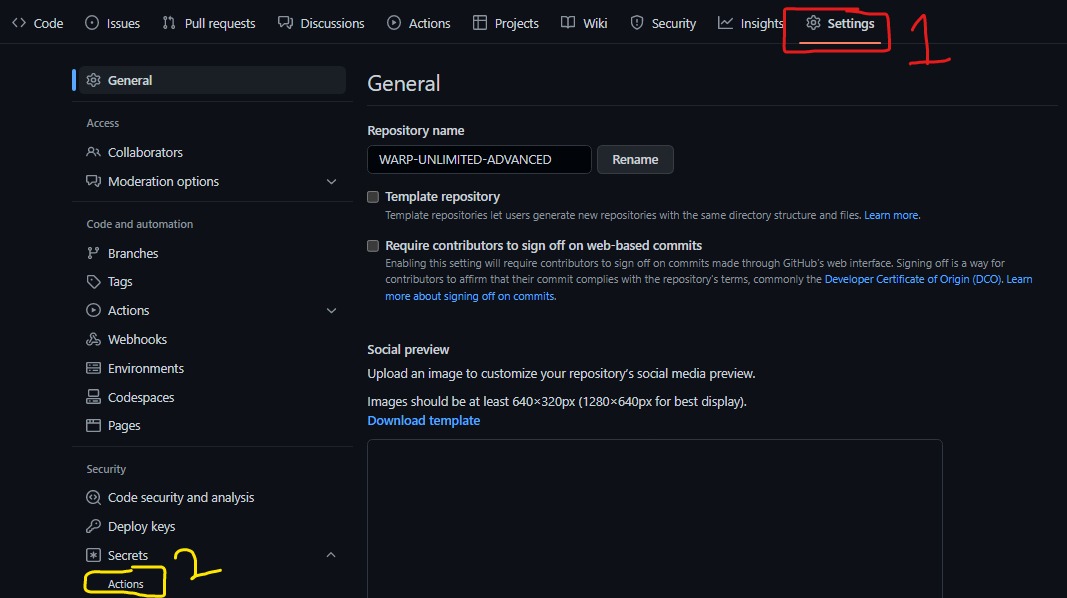
3. After doing that, create following values as secret + values discussed here:
HEROKU_API_KEY- Enter your Heroku API Key as value.HEROKU_APP_NAME- A unique app name in small letters only.HEROKU_EMAIL- Your Heroku Email ID.
4. Go to Actions Tab then click Deploy on Heroku and Run Workflow. Now it will be automatically get deployed on given Heroku Account.
1. First Download the Termux app from here (Play Store version is deprecated).
- Download Python:
pkg install python
- Download Git:
pkg install git
- Download Repository:
git clone https://github.com/TheCaduceus/WARP-UNLIMITED-ADVANCED.git
- Install requirements:
pip install -r requirements.txt
- Run the program:
python warp.py
- Getting http/SSL Error ? Run following code to fix it:
termux-setup-storage && pkg update && pkg i git python wget -y && pkg upgrade && pip install --upgrade pip
1. Open repl: Open it
1. First install Python with PIP: from here
- To install Jupyter:
pip install jupyter
- To install Notebook:
pip install notebook
- Start Jupyter Server:
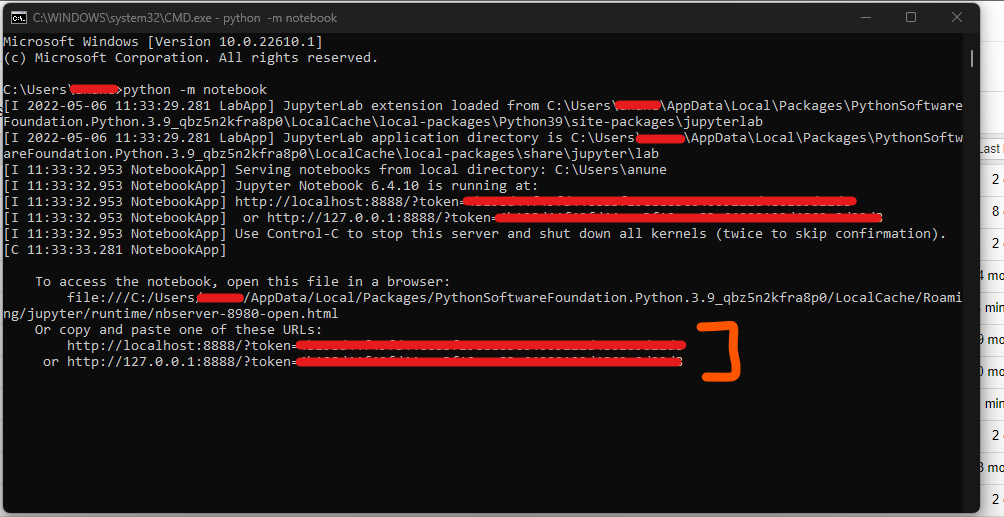
python -m notebook
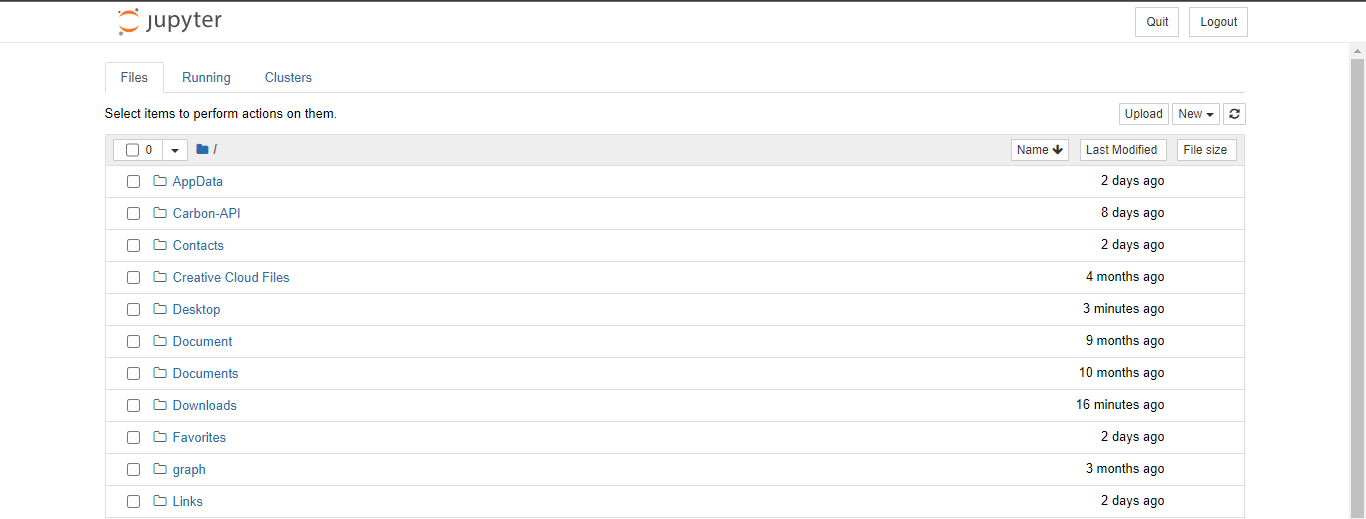
3. Once you started your Server, Jupyter will give you its link (as shown in Image), just open it in your Browser.
4. Now Download the "Server.ipynb" file: from here only
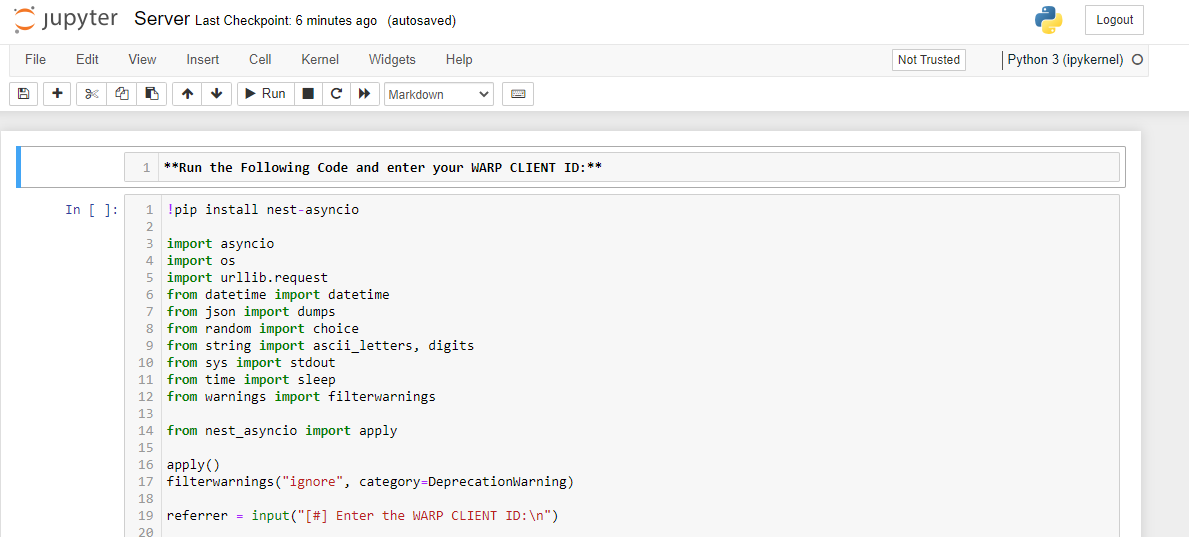
5. After downloading it, locate that file through your Jupyter server and open it as shown in the image and click Run.
Just again enter your activation key! For getting activation key, navigate to App → Settings → Account → Copy Key`
Get activation key in the mobile app (Settings → Account → Copy Key), then open terminal and execute:
warp-cli set-license $KEY_HERE
2. On your device, the program will run and give you 1GB data / 20 Second while your machine is on and the terminal window is open.
3. If you are hosting this program on your PC or Local System then confirm that it is connected to INTERNET CONNECTION.
Cloudflare's WARP which is based on 1.1.1.1, world's fastest DNS resolver helps you to encrypt your Network traffic and surf the web faster and available for major Operating-Systems (OS):
📱Android: Download
📟iOS: Download
🖥️Windows: Download
🍎Mac: Download
💻Linux: Download
I will recommend to host/run 3 or less than 3 (< 3) instances for each account because Cloudflare's API have request limits. Hosting/Running too many instances can cause "Too many Requests" error which indicates that API is getting too many requestes from the same account and that's why there is a cooldown timer of 20 seconds to prevent this.
As already discussed above, Hosting/Running too many instances for same account cause this. So just switch off some instances and bring down the number to 3 or < 3 instances for the same account. Please refer to Issue #3 for more details on this.
No, this program NOT cause ban because it just use the API provided by Cloudflare for referral system. Neither this program create any type of load or bypass any limit set by Cloudflare for their API nor it hacks anything or changes any official record illegally.

You can run the below given command in Termux to fix it easily:
termux-setup-storage && pkg update && pkg i git python wget -y && pkg upgrade && pip install --upgrade pip
No, this program comes in category of Cron-Job because program just takes the WARP CLIENT ID from user and arrange it in a particular format and start pinging it in an interval of 20 seconds. This program is lightweight and don't have any load on system. You can refer to Issue #5 for more details on this.
6. I deployed it on a platform that allow setting Environment Variables, but program not accepting it?
Before deploying it on any platform which allow users to set variables in system environment, just make sure you enable ENV mode & disable INTERACTIVE_MODE.
WARP+ is for lifting the speed cap imposed by Cloudflare on free users which is server-side limit and it can't be bypassed by just modifying client-side code. So, availabe mods of WARP is fake? yes, they are just showing premium branding while doing nothing in reality.
Open the WARP app in your Phone and go to Settings > Account > Key and copy the License Key. Now enter that key in WARP app on Windows or MacOS or Linux.
Join our Update Channel at Telegram: @TheCaduceusOfficial
Directly Contact the Developer using Telegram @HelpAutomatted_Bot
Dr.Caduceus: For heavy modification as well as making New 10 Methods and this all in one Guide.
ALI-B: The Original Developer of the Base Script
- Dr.Graph: Online Anonymous Text / Pasting platform without limits.
- Dr.FileStreamBot: Get Download / Stream links for Telegram files and use as host.


