Have you ever wanted to receive a radio signal from space? It's fun and actually a lot easier than you might think!
-
Short answer
- You convert a picture into sound, transmit the sound via radio, and convert the received sound back into a picture on the other end.
-
Long answer
- SSTV is a picture transmission method for transmitting and receiving static pictures via radio. Similar to a fax machine, or a 90s dial up modem, SSTV is an analogue audio signal that sounds like a high pitch racket of bleeps and screeches. It uses frequency modulation, where the frequency of a tone shifts up or down to designate pixel brightness and colour. A transmission consists of horizontal lines of pixels, scanned from left to right, encoded as audio. The audio is transmitted using radio and converted back into the picture at the other end using special software.
The International Space Station has a long history of transmitting SSTV pictures for global events, each lasting several days, where people the world over tune their radios to the ISS and try to receive the pictures every time it flies over their home.
Typically a picture is transmitted continuously for about two minutes with two minutes of silence before the next picture starts. The ISS usually takes about 10 minutes to fly from horizon to horizon when it passes over your home and so, each time, you can usually get several images.
These are great fun to participate in and often there’s some healthy competition between people to see who can receive the pictures with the most clarity. You can monitor how well everyone else is doing by looking in the #sstv hashtags on social media.
| A good/perfect reception | A reception with noise/interference |
|---|---|
 |
 |
| If you get one this good you're doing really well. | It looks like the ISS went below the horizon towards the end of this one. |
These instructions show you how to set up a ground station and receive SSTV pictures using just a Raspberry Pi computer and an RTL-SDR USB dongle. Why use a Raspberry Pi? This could be done using a desktop PC or Mac however you often need to leave the receiver running overnight, waiting for the ISS to fly over your location, and it's usually easier to tie up a Raspberry Pi with this task than your main utilitarian computer that you use all the time.
To have a quick play, it is possible to install a mobile phone app that decodes SSTV through its microphone input. Playing the bleeps and screeches of an SSTV signal with the phone placed near the speaker is usually good enough.
Here's an MP3 test file you can download and play.
This should work in a classroom provided there isn't too much background noise, if you ask everyone to install the app and then play the test recording at a reasonable volume all the phones will decode the picture. It will give everyone a good idea of how long it takes to obtain one image. Make sure you sneeze or cough half way through to show how this causes interference.
- Raspberry Pi 2B or later, with the usual peripherals.
- RTL-SDR USB dongle (search RTL2832U).
- Don't buy the little 30 cm mag-mount antennas. You will have little or no hope of picking up the ISS with them.
- This RTL-SDR starter kit is good and comes with a nice beginners dipole antenna that will pick up the ISS.
-
A guide for setting up your Raspberry Pi can be found here.
-
We presume you are running Rasbian Stretch Desktop edition available here and are online.
-
Switch the audio output to the headphone jack. This is needed for the way pulse audio loops back the system audio as an input device.
- Start > Accessories > Terminal;
sudo amixer cset numid=3 1 -
Install prerequisites.
- Start > Accessories > Terminal
sudo apt-get update sudo apt-get install rtl-sdr sox pulseaudio qsstv ntpdate -
Set the correct time.
- Start > Preferences > Raspberry Pi Configuration > Localisation tab > Set Timezone
- Change Area and Location accordingly > OK
- Start > Accessories > Terminal
sudo ntpdate pool.ntp.org -
Insert RTL-SDR dongle and connect/deploy the antenna.
-
Verify RTL-SDR is working with
rtl_testprogram.- Start > Accessories > Terminal
rtl_testExpected output:
Found 1 device(s):
  0:  MAKE, MODEL, SN: 00000001

Using device 0: Generic RTL2832U OEM
Found MAKE MODEL tuner
Supported gain values (XX): XX, XX, XX...
[R82XX] PLL not locked!
Sampling at 2048000 S/s.

Info: This tool will continuously read from the device, and report if
samples get lost. If you observe no further output, everything is fine.

Reading samples in async mode...
Leave for 30 seconds and look out for any messages about loss of samples. Press
Ctrl-Cwhen 30 seconds as elapsed. The loss of 100 bytes or so is acceptable. -
Verify RTL-SDR can tune to a commercial FM radio station with
rtl_fmprogram. The command below pipes raw data fromrtl_fminto to soxplaywhich will then decode the raw data to produce audio output. Modify the value after the-fto specify your own FM station/frequency (98.8 is BBC Radio One in the UK).- Start > Accessories > Terminal
rtl_fm -M wbfm -f 98.8M | play -r 32k -t raw -e s -b 16 -c 1 -V1 -Expected output:
Found 1 device(s):
  0:  MAKE, MODEL, SN: 00000001

Using device 0: Generic RTL2832U OEM

-: (raw)

  Encoding: Signed PCM
  Channels: 1 @ 16-bit
Samplerate: 32000Hz
Replaygain: off
  Duration: unknown

Found MAKE MODEL tuner
Tuner gain set to automatic.
Tuned to 99071000 Hz.
oversampling input by: 6x.
Oversampling output by: 1x.
Buffer size: 8.03ms
Exact sample rate is: 1020000.026345 Hz
Create UDP thread
Created UDP thread
Main socket started! :-) Tuning enabled on UDP/6020
Sampling at 1020000 S/s.
Output at 170000 Hz.
In:0.00% 00:00:02.60 [00:00:00.00] Out:XXXk  [ -====|====- ]        Clip:0
Note that the
Tuned tovalue is doesn't match. This is due to DC spike and can be ignored. You should now be able to hear audio from the commercial FM station. Move the antenna around or select a different FM radio station with a closer transmitter if the audio is noisy. PressCtrl-Cto quit fromrtl_fm. -
Check QSSTV settings are correct.
- Start > Internet > QSSTV
- Options > Configuration > Sound tab
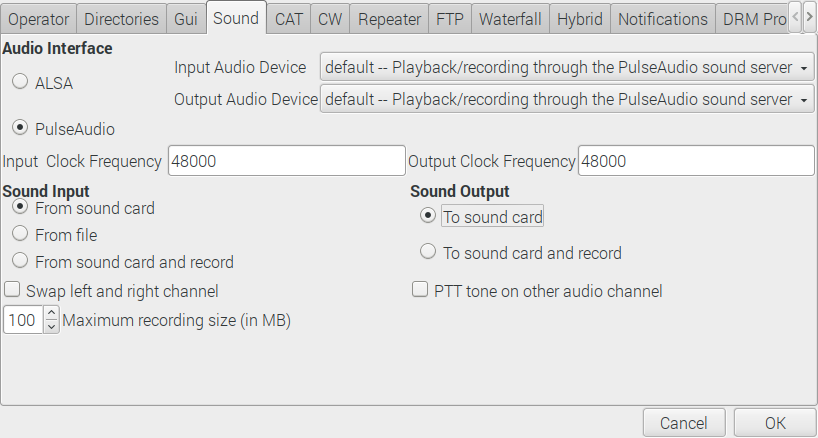
- Audio Interface =
PulseAudio - Input and Output Audio Device =
default -- Playback/recording through the PulseAudio sound server - Sound Input =
From sound card - Sound Output =
To sound card - OK
-
Calibrate QSSTV.
- Options > Calibrate
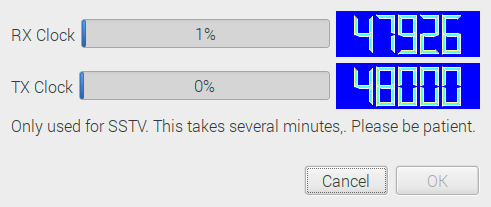
- Go make a cup of tea/coffee.
- Click
OKwhen both progress bars reach 99%.
-
Verify QSSTV decodes slow scan TV test file correctly.
- Download test file
- Start > Accessories > Terminal
wget https://raw.githubusercontent.com/davidhoness/sstv_decoder/master/sstv_test.mp3- Select
Receivetab in QSSTV.
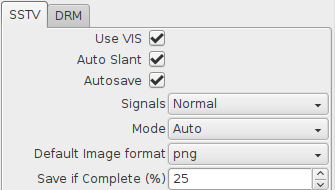
- Use VIS =
ON - Auto Slant =
ON - Autosave =
ON - Signals =
Normal - Mode =
Auto - Click play
►button. Nothing will happen, but just click it to start the receiver. - Open
sstv_test.mp3in the Chromium browser. You can either drag and drop the file from File Manager or just enterfile:///home/pi/sstv_test.mp3into the address bar. - Let it play. Note that with VLC Media Player you get a skewed image sometimes.
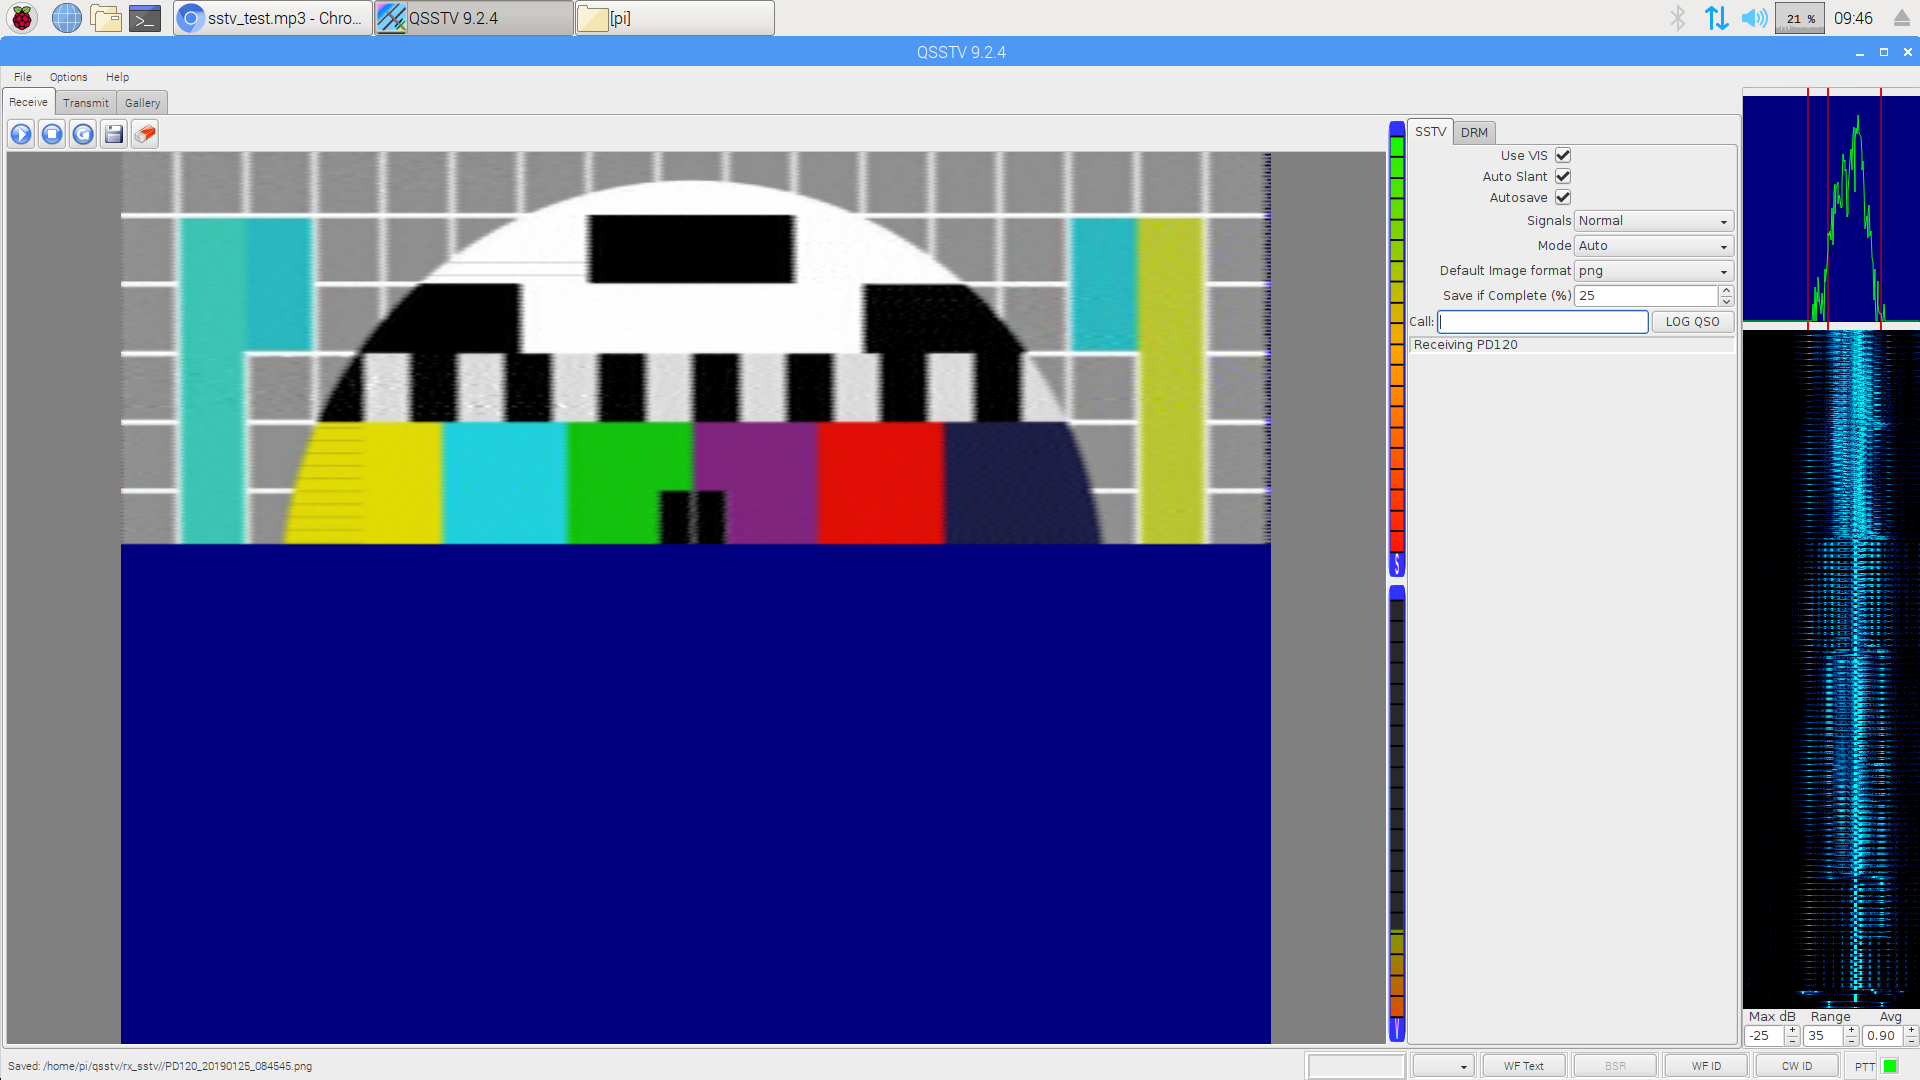
- Observe the decoding in QSSTV. Notice the FFT and waterfall display activity on the right of the screen.
- Other SSTV test recordings can be found online such as: https://soundcloud.com/spacecomms/pd120-sstv-test-recording


- What is it? A common example of Doppler shift is the change of pitch heard when a police car or ambulance passes you. Compared to the emitted frequency of the siren, the frequency you hear is higher during the approach, identical at the instant of passing by, and lower during departure. The same thing happens with radio waves as with sound waves.
- The ISS is moving at ~27,600 km/h. This motion causes Doppler shift in the radio waves received at your location.
- To compensate for the effects of Doppler shift, ground stations must continually re-tune their receiver as the ISS approaches, passes overhead and flies away.
- As the ISS comes over the horizon (AOS or Acquisition of Signal) you would need to tune approx 3.5 kHz ABOVE 145.8 MHz.
- At the instant when the ISS is directly overhead the actual transmitting frequency of 145.8 MHz can be used.
- Just before ISS goes down over the horizon (LOS or Loss of Signal) you would need to tune approx 3.5 kHz BELOW 145.8 MHz.
- The amount of re-tuning is dependent on the elevation of the ISS above the horizon. For example, an overhead pass requires a lot of re-tuning because there's a huge change in distance and relative speed as the ISS passes by. A low elevation pass, where it just peeks above the horizon and goes down again, requires relatively little.
- No Doppler shift compensation is performed on the ISS. All compensation must all be handled by individual ground stations.
- More information: https://www.qsl.net/ah6rh/am-radio/spacecomm/doppler-and-the-iss.html
- Luckily QSSTV can deal with Doppler shift itself and so you don't have to do anything to compensate after tuning to 145.8 MHz.
- If you want to do Doppler correction anyway it won't do any harm. It could, in fact, be a nice coding activity for a classroom.
- Here is a pre-made python script to compensate for Doppler shift. This program tracks the ISS using
ephem, computes the Doppler corrected frequency for when the ISS is passing over and re-tunesrtl_fmvia a UDP socket. - You will need to modify this python script to set your location. You can easily look up the latitude and longitude of your location using Google Maps geocoder. Usually the postal code and country is sufficient.
- To do this you need to know three things:
- When the ISS will be transmitting the SSTV signal. It's not always on.
- What frequency the SSTV signal will be transmitted on (usually 145.8 MHz).
- When the ISS will fly over your location.
- The ISS flies over most places a few times every day (unless you live in the Arctic/Antarctic).
- You can find out when the ISS is transmitting here: http://ariss-sstv.blogspot.com/
- There is often an SSTV event in April for the birthday of Yuri Gagarin.
- They usually last for a few days at a time meaning you will get multiple ISS passes during which you can receive the SSTV signal.
- You can look up when the ISS will next pass your location on: https://www.heavens-above.com/
- Click
Unspecifiedin the top right to set your location. - Type your postal code and country into Enter place to search for and click
Search. - Scroll down and click
Update. - You'll now be back on the home page, under Satellites click
ISS. - Under Passes to include click
all.- The Alt value under Highest point is the maximum elevation of the pass above the horizon, 90 would be directly overhead.
- Passes with higher maximum elevation will give better results than lower ones.
- Clicking on any row in the table shows the sky chart for that pass.
- Imagine holding that picture above your head and aligning it with the compass directions.
- The line shows the flight path of the ISS and this is useful for roughly positioning your antenna.
- It can also be useful to look at the
Ground track(see link in top right).
- Click
- Plan ahead and set up your ground station with time to spare before the ISS flies over.
- If you are using the RTL-SDR kit antenna, please read the getting started guide for it.
- It's a good idea to adjust the length of the telescopic arms based on this dipole calculator to match the antenna's resonant frequency to 145.8 MHz. This will help pick up weaker signals from low elevation passes.
- Under
Desired Frequencyenter145.8 - Under
Select Antenna CalculationselectOne Side - Click
Calculate - Remember there is about 2 cm of metal in each side of the antenna base. So take the calculated value and, before screwing in the arms, make them both this length minus 2 cm (excluding the screw threads). It doesn't have to be perfect but make it as close as possible.
- Under
- To start with, deploy the dipole in a vertical v-shape and orient it with the flight path of the ISS that you find on https://www.heavens-above.com/
- Perhaps a better way of saying this is, with the dipole flat, align it with the flight path of the ISS and then bend the two arms upwards into a right-angle v-shape.
- Antennas and their performance are sometimes a bit of an art form as opposed to an exact science.
- Experiment with different configurations on different ISS passes. Try one arm horizontal and one arm vertical for instance.
- It's a good idea to adjust the length of the telescopic arms based on this dipole calculator to match the antenna's resonant frequency to 145.8 MHz. This will help pick up weaker signals from low elevation passes.
- Try to get your antenna up as high as possible with a good view of the sky in all directions.
- Set the correct time on the Raspberry Pi. QSSTV saves the images with a UTC time filename and this is useful later when working out which ISS passes they are from.
- Start > Accessories > Terminal
sudo ntpdate pool.ntp.org - Start
rtl_fmin a Terminal window (keep this window open)- Start > Accessories > Terminal
rtl_fm -M fm -f 145.8M -s 48k | play -r 48k -t raw -e s -b 16 -c 1 -V1 -- Note this command is different to the commercial radio station one. A commercial radio station uses wide band FM whereas the ISS transmission uses narrow band FM and so we have to set
rtl_fmup differently.
- OPTIONAL: If you are doing Doppler correction start
doppler.pyin another Terminal window (keep this window open too). - Start QSSTV
- Start > Internet > QSSTV
- Select
Receivetab in QSSTV. - Use VIS =
ON - Auto Slant =
ON - Autosave =
ON - Mode =
Auto - Save if Complete (%) =
10 - Click play
►button. - FFT and waterfall display on the right should show noise coming from
rtl_fm
- Wait for the ISS to arrive. You may want to leave your ground station overnight or over the weekend to capture several passes.
- OPTIONAL: If you are doing Doppler correction, you could manually set the system clock to one minute before an upcoming pass to test what the tuning will be like, although nothing will be received of course.
- Start > Accessories > Terminal
sudo date -s "YYYY-MM-DD HH:MM:SS"- Ensure you return the system clock to the correct time before leaving the ground station running.
sudo ntpdate pool.ntp.org - When you return to your ground station select the
Gallerytab in QSSTV to see what images were received. - Go here to upload your SSTV images for recognition.
- The pictures can be found in
/home/pi/qsstv/rx_sstv
- The pictures can be found in
- You can potentially get a certificate like this even if you only decode a few lines of one picture. Check the information on http://ariss-sstv.blogspot.com/ to find out how to apply for it. A great incentive for kids!