Object detection allows for the recognition, detection, and localization of multiple objects within an image. It provides us a much better understanding of an image as a whole as apposed to just visual recognition.
Why Object Detection?

First, with python and pip installed, install the scripts requirements:
pip install -r requirements.txtThen you must compile the Protobuf libraries:
protoc object_detection/protos/*.proto --python_out=.Add models and models/slim to your PYTHONPATH:
export PYTHONPATH=$PYTHONPATH:`pwd`:`pwd`/slimNote: This must be ran every time you open terminal, or added to your
~/.bashrcfile.
Run the script:
python object_detection/create_tf_record.pyOnce the script finishes running, you will end up with a train.record and a val.record file. This is what we will use to train the model.
Training an object detector from scratch can take days, even when using multiple GPUs! In order to speed up training, we’ll take an object detector trained on a different dataset, and reuse some of it’s parameters to initialize our new model.
You can find models to download from this model zoo. Each model varies in accuracy and speed. I used faster_rcnn_resnet101_coco for the demo.
Extract the files and move all the model.ckpt to our models directory.
Note: If you don't use
faster_rcnn_resnet101_coco, replacefaster_rcnn_resnet101.configwith the corresponding config file.
Run the following script to train the model:
python object_detection/train.py \
        --logtostderr \
        --train_dir=train \
--pipeline_config_path=faster_rcnn_resnet101.configThe training time is dependent on the amount of training data. My model was pretty solid at ~4.5k steps. The loss reached a minimum at ~20k steps. I let it train for 200k steps, but there wasn't much improvement.
Note: If training takes way to long, read this.
I recommend testing your model every ~5k steps to make sure you’re on the right path.
You can find checkpoints for your model in Custom-Object-Detection/train.
Move the model.ckpt files with the highest number to the root of the repo:
model.ckpt-STEP_NUMBER.data-00000-of-00001model.ckpt-STEP_NUMBER.indexmodel.ckpt-STEP_NUMBER.meta
In order to use the model, you first need to convert the checkpoint files (model.ckpt-STEP_NUMBER.*) into a frozen inference graph by running this command:
python object_detection/export_inference_graph.py \
        --input_type image_tensor \
        --pipeline_config_path faster_rcnn_resnet101.config \
        --trained_checkpoint_prefix model.ckpt-STEP_NUMBER \
        --output_directory output_inference_graph
You should see a new output_inference_graph directory with a frozen_inference_graph.pb file.
Just run the following command:
python object_detection/object_detection_runner.pyIt will run your object detection model found at output_inference_graph/frozen_inference_graph.pb on all the images in the test_images directory and output the results in the output/test_images directory.
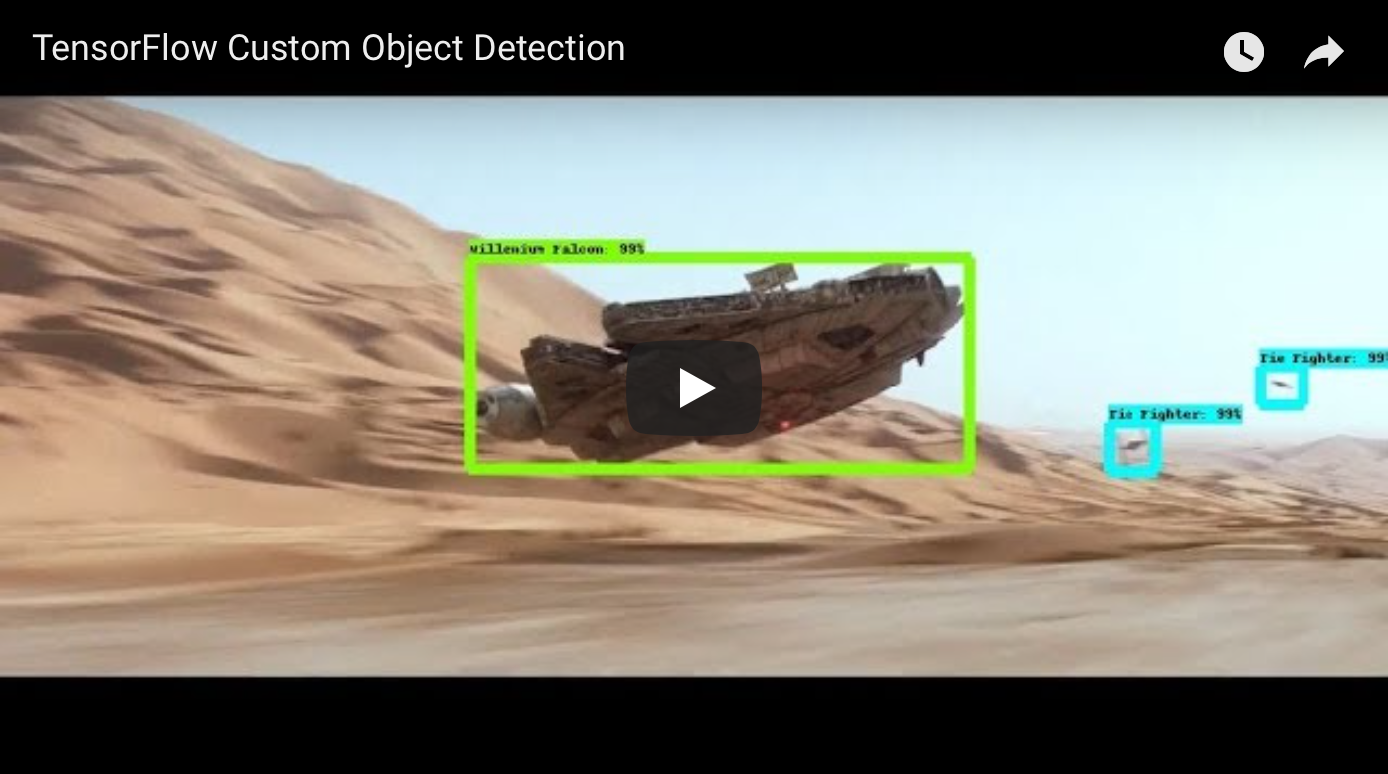
Here’s what I got from running my model over all the frames in this clip from Star Wars: The Force Awakens.