Some of my Home Assistant configuration
This repository contains some of my favorite Home Assistant configuration.
Home Assistant is an amazing home automation software that gives you full control over all your smart devices and allows you to integrate different platforms. To learn more about it check the Home Assistant Website.
Lovelace card for Mi Air Purifier 3H
Description
This is a customized Lovelace card, that can be used to control the Mi Air Purifier 3H. It is based on similar cards and work by schilea, by Tomaae, and by bjorn.sivertsen, that is published in the Home Assistant community forum.
It's a minimalistic card, so it resembles the card made by bjorn.sivertsen the most, with some changed and some added features. My take on this has the following features:
- On/Off switch.
- Fan mode with the 3 default levels (33.33%, 66.66% and 100% fan speed).
- Silent/night mode (this default mode will keep the sound level of the unit at or below 38 dB).
- Auto mode that will adjust fan speed according to the air quality (based on PM 2.5 level, with default threshold values controlled by the firmware in the unit).
- Favorite mode, with the ability to adjust the favorite fan speed (from 1 to 14). In this mode the favorite icon color will indicate the air quality (PM 2.5 level) as follows (note that this is different from the color indicator shown on the actual air purifier unit):
- Green - PM 2.5 level is below 15 µg/m³.
- Yellow - PM 2.5 level is between 15 and 40 µg/m³.
- Orange - PM 2.5 level is between 40 and 80 µg/m³.
- Red - PM 2.5 level is above 80 µg/m³.
- With the help of one of the automations further down, this mode can also automatically control the favorite fan speed level (from 1 to 14) based on the air quality (PM 2.5 level) as follows:
- PM 2.5 is below 10 µg/m³ - favorite fan level will be set to 1.
- PM 2.5 is below between 10 and 25 µg/m³ - favorite fan level will be set to 2.
- PM 2.5 is below between 25 and 40 µg/m³ - favorite fan level will be set to 4.
- PM 2.5 is below between 40 and 60 µg/m³ - favorite fan level will be set to 6.
- PM 2.5 is below between 60 and 80 µg/m³ - favorite fan level will be set to 8.
- PM 2.5 is below between 80 and 100 µg/m³ - favorite fan level will be set to 10.
- PM 2.5 is below between 100 and 120 µg/m³ - favorite fan level will be set to 12.
- PM 2.5 is above 120 µg/m³ - favorite fan level will be set to 14.
- Change the display brightness on the air purifier (bright, dim or off)
- Enable/disable the buzzer in the air purifier.
- Lock/unlock the operation of the display button on the air purifier.
- Filter time left indicator (in percentages).
- Current air quality (PM 2.5 level) indicator.
- Graph display of historical air quality (PM 2.5 level) for the past 24 hours.
- Only displays what is necessary/relevant in the current mode.
I chose not to display temperature and humidity, partially because I have other sensors for that, and partially because of space restraints on the card as I didn't want it any larger than it already is.
Prerequisites
Integration
I use the Core Xiaomi Miio integration, and I strongly suggest that you do the same as this will expose all the necessary entities for this card to work as intended.
Please make sure that this integration is configured for your air purifier before you proceed.
Custom Cards
The following custom cards are needed:
- Stack In Card - It allows to group multiple cards into one card without the borders.
- Mini Graph Card - The card displays a sensors current state as well as a line graph representation of the history.
- Number Box Card - NumberBox for input sliders and number entities.
- Card Mod 3 - Allows you to apply CSS styles to various elements of the Home Assistant front-end.
Please make sure that these cards are installed before you proceed, in order for all functionality to work properly.
Installation
NB: All the files that I refer to below can be found under the directory mii_air_purifier_3h_card in this repository.
-
Add the content of the file
configuration.yamlto your ownconfiguration.yaml, make sure that you rename the entities to mach those of your own air purifier. And watch your indentation, this is YAML! By doing this you will be adding a few template binary_sensors that are necessary for this card to work correctly. -
After saving your
configuration.yamlyou must either restart your Home Assistant instance, or reload your template sensor's. You can do the latter by going toSettings->Developer Tools->YAMLin your HA installation, and then clicking onTEMPLATE ENTITIES. It's always a good idea to first click onCHECK CONFIGURATIONto verify that what you added to yourconfiguration.yamlvalidates, or at least that it doesn't prevent Home Assistant from starting (this check will not catch all types of errors). -
Now add the transparent image file
AP-Card-Background.pngto the folderconfig/www/in your own Home Assistant installation. This is an important step as the card will not work if you don't do this. -
Now it's time to edit the YAML for the card so that it matches the entities of your own air purifier. Just open the content of the file
lovelace.yamlin your favorite editor, and make sure that all the entities in the file are changed to those of your own air purifier. Mine is named "air_purifier_studio" so if you just search for and replace all entities whose name includes that string you should be pretty much set. And, you probably want to change the title of the card as well. -
Next it's time to add the actual card to your Home Assistant configuration, the easiest way to do this is by using the GUI. Just select the dashboard you want to add this card to, and then select
Edit Dashboardfrom thekebab menu(three vertical dots) in the top-right corner of your browser window. Next click onADD CARD, then select the card typeManual, then paste in the edited card YAML code from the step above. Make sure to delete/replace the first line that saystype: ''when you add a manual card. And again, watch your indentation, this is still YAML!
If you have followed the instructions above exactly as they were written you should now see a custom card for your air purifier, and it should be ready to be used to operate your air purifier from within Home Assistant. If you see an error message instead then re-check each step in this guide. It should look something like in the image below it it's off:
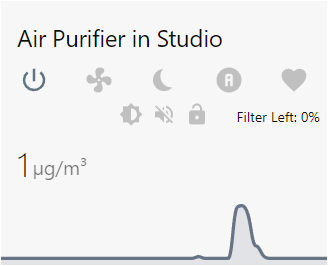
Note: If you don't want or need the ability to adjust your favorite fan levels then you can use the file lovelace_noadjust.yaml instead in step 4 above. This will show the text Level # (where # is the current favorite fan level) instead of an option to adjust the favorite fan level when the air purifier is on and in the Favorite mode.
Usage
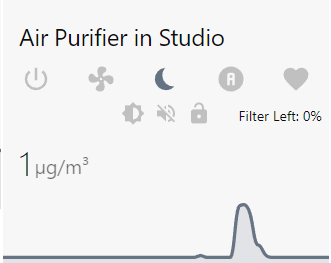
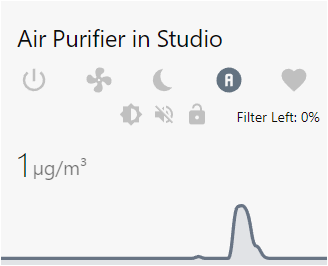
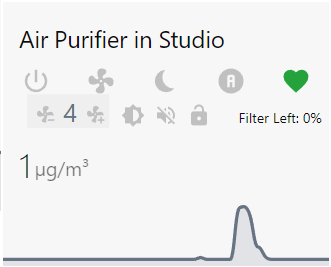
How to use this card should be pretty self-explanatory, and all the buttons on the card have a hover text. Here is what the card looks like in all the different air purifier states:
Fan mode:

Silent mode:
Auto mode:
Favorite mode:
Automations
The air purifier can be operated just fine without any automations, but these are the automations I consider important in order to maintain the best possible air quality.
Automations - Adjust favorite fan level based on air quality (PM 2.5 level)
This automation will adjust the favorite fan level as follows when the air purifier is on and the mode is set to Favorite:
- PM 2.5 is below 10 µg/m³ - favorite fan level will be set to 1.
- PM 2.5 is below between 10 and 25 µg/m³ - favorite fan level will be set to 2.
- PM 2.5 is below between 25 and 40 µg/m³ - favorite fan level will be set to 4.
- PM 2.5 is below between 40 and 60 µg/m³ - favorite fan level will be set to 6.
- PM 2.5 is below between 60 and 80 µg/m³ - favorite fan level will be set to 8.
- PM 2.5 is below between 80 and 100 µg/m³ - favorite fan level will be set to 10.
- PM 2.5 is below between 100 and 120 µg/m³ - favorite fan level will be set to 12.
- PM 2.5 is above 120 µg/m³ - favorite fan level will be set to 14.
To enable this automation just do the following:
-
Open the content of the file
automations.yamlin your favorite editor, and make sure that all the entities in the file are changed to those of your own air purifier. Mine is named "air_purifier_studio" so if you just search for and replace all entities whose name includes that string you should be pretty much set. Again, mind your indentation! -
Paste the edited YAML code from the step above into your own automations.yaml file and either restart your Home Assistant instance, or reload your automations. You can do the latter by going to
Settings->Developer Tools->YAMLin your HA installation, and then clicking onAUTOMATIONS. It's always a good idea to first click onCHECK CONFIGURATIONto verify that what you added to yourconfiguration.yamlvalidates, or at least that it doesn't prevent Home Assistant from starting (this check will not catch all types of errors).
If you have followed the instructions above exactly as they were written this automation should now be active.
NB: This is an alternative to the default Auto mode, and it has a bit more aggressive settings for when it will ramp up the fan speed. The default Auto setting seems to be more suitable for places with a higher pollution level than where I am located. Personally I prefer clean indoor air, so this setting will automation up the fan speed a lower pollution levels than the default Auto setting will do.
Automations - Start and stop the air purifier based on a schedule
This automation will start and stop your air purifier based on a schedule. It uses the Favorite mode to make sure that the favorite fan level is adjusted according to the air quality (PM 2.5 level), so the previous automation must be enabled for this to work as intended.
To enable this automation just do the following:
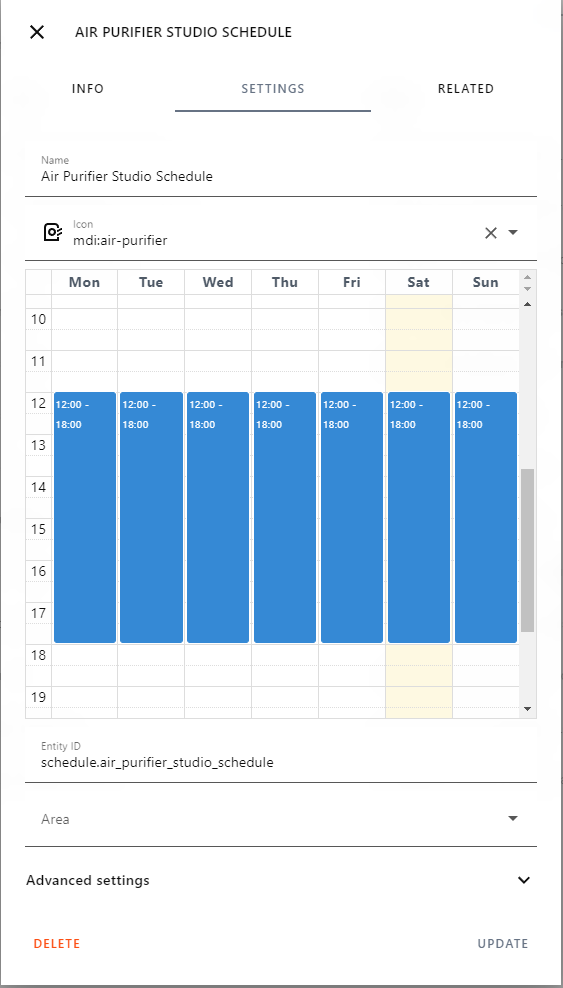
- First you have to define a schedule that defines when your air purifier should be on and off. You do this by going to
Settings->Devices & Services->Helpersin your HA installation, and then clicking onCREATE HELPER. Then chooseScheduleand give it a suitable name. I named mine "Air Purifier Studio Schedule", so the resulting schedule entity id would beschedule.air_purifier_studio_schedule(you will need this name later when you edit the automation YAML code). Just drag with your mouse to select the days and time of the days when your air purifier should beon. My schedule looks something like in the image below:
-
Open the content of the file
automations_2.yamlin your favorite editor, and make sure that all the entities in the file are changed to those of your own air purifier. Mine is named "air_purifier_studio" so if you just search for and replace all entities whose name includes that string you should be pretty much set. Again, mind your indentation! And make sure you get your own schedule's identity_id correct, if you are not sure what it is you can find it by going toSettings->Developer Tools->STATESin your HA installation, and then typeschedule.in theFilter entitiessearch box. You should now see it. -
Paste the edited YAML code from the step above into your own automations.yaml file and either restart your Home Assistant instance, or reload your automations. You can do the latter by going to
Settings->Developer Tools->YAMLin your HA installation, and then clicking onAUTOMATIONS. It's always a good idea to first click onCHECK CONFIGURATIONto verify that what you added to yourconfiguration.yamlvalidates, or at least that it doesn't prevent Home Assistant from starting (this check will not catch all types of errors).
NB: This automation will also silence the buzzer in the air purifier, so it does not make a sound when it its mode or fan speed, as well as set the display brightness to dim. You can of course change this according to your own preference.
That's it, your air purifier should now start and stop according to the schedule you created, and it's favorite fan level should be automatically adjusted according to the air quality (PM 2.5 level).
Automations - Start the air purifier if the air quality is bad (PM 2.5 level is high)
This automation will turn on your air purifier if the air quality is bad, e.g. the PM 2.5 level goes above a pre-defined level. I chose 25 for my own air purifiers, so they will automatically start if the PM 2.5 level goes above 25 µg/m³.
To enable this automation just do the following:
- Open the content of the file
automations_3.yamlin your favorite editor, and make sure that all the entities in the file are changed to those of your own air purifier. Mine is named "air_purifier_studio" so if you just search for and replace all entities whose name includes that string you should be pretty much set. Again, mind your indentation!
One more thing, for this automation to work you will also need to know the device_id of your air purifier in Home Assistant, the device_id is a somewhat long alpha-numeric string. The easiest way to find your device_id is to go to Settings -> Devices & Services in your HA installation, and then finding the Xiaomi Miio integration on that page. Select (click on) your own air purifier and its device_id will be the last part of the URL you see in your browser. Mine looks like in the image below:
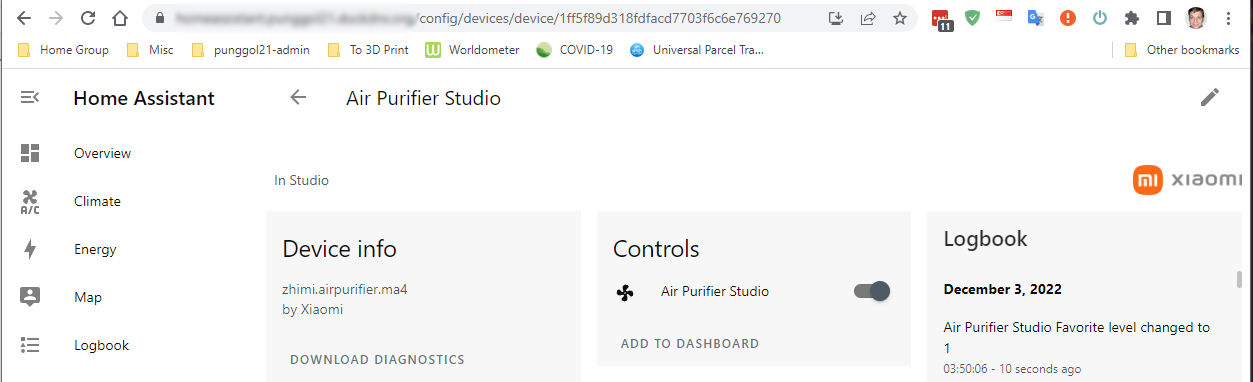
Make sure that you replace my device_id in this file with that of your own air purifier!
- Paste the edited YAML code from the step above into your own automations.yaml file and either restart your Home Assistant instance, or reload your automations. You can do the latter by going to
Settings->Developer Tools->YAMLin your HA installation, and then clicking onAUTOMATIONS. It's always a good idea to first click onCHECK CONFIGURATIONto verify that what you added to yourconfiguration.yamlvalidates, or at least that it doesn't prevent Home Assistant from starting (this check will not catch all types of errors).
That's it, your air purifier should now automatically start if the air quality is bad, e.g. the PM 2.5 level goes above 25 µg/m³ or whatever value you chose in case you modified this.
NB: This automation does not stop the air purifier again, personally I just let it run and then be stopped by it's defined schedule in the automation above.