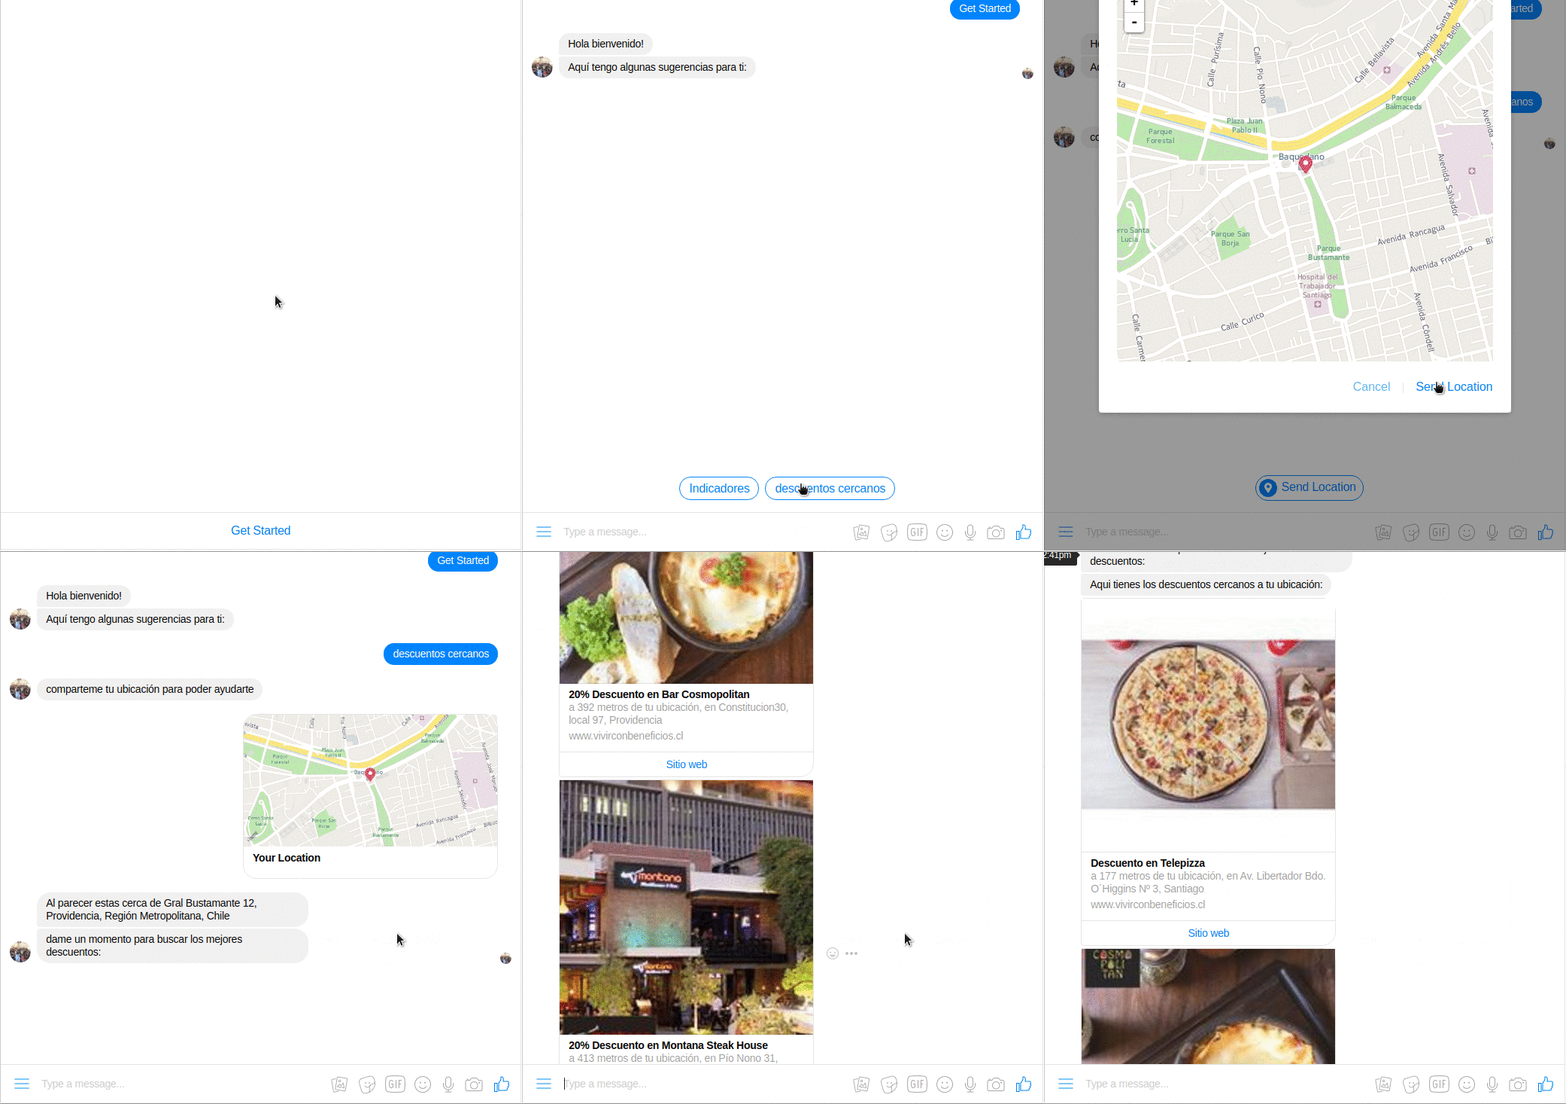
All you need to launch your own functional Ruby bot for Facebook Messenger integrated with BCI APIs.
Read more about this bot on Speaker Deck
- Clone the boilerplate.
- Customize message bindings and commands for your bot.
- Push your bot to Heroku and review it with Facebook.
- You're live! 💬
This chatbot is based on Rubotnik, a minimalistic boilerplate and a microframework proof-of-concept that allows you to launch your functional bot on a Messenger Platform in a matter of minutes. It is a companion to ingenious facebook-messenger gem and piggybacks on its Bot.on :event triggers. The main promise of Rubotnik is to speed up bot development in Ruby and provide a more natural mental model for bot-user interactions. To learn more about bot interactions please read Rubotnik's Documentation
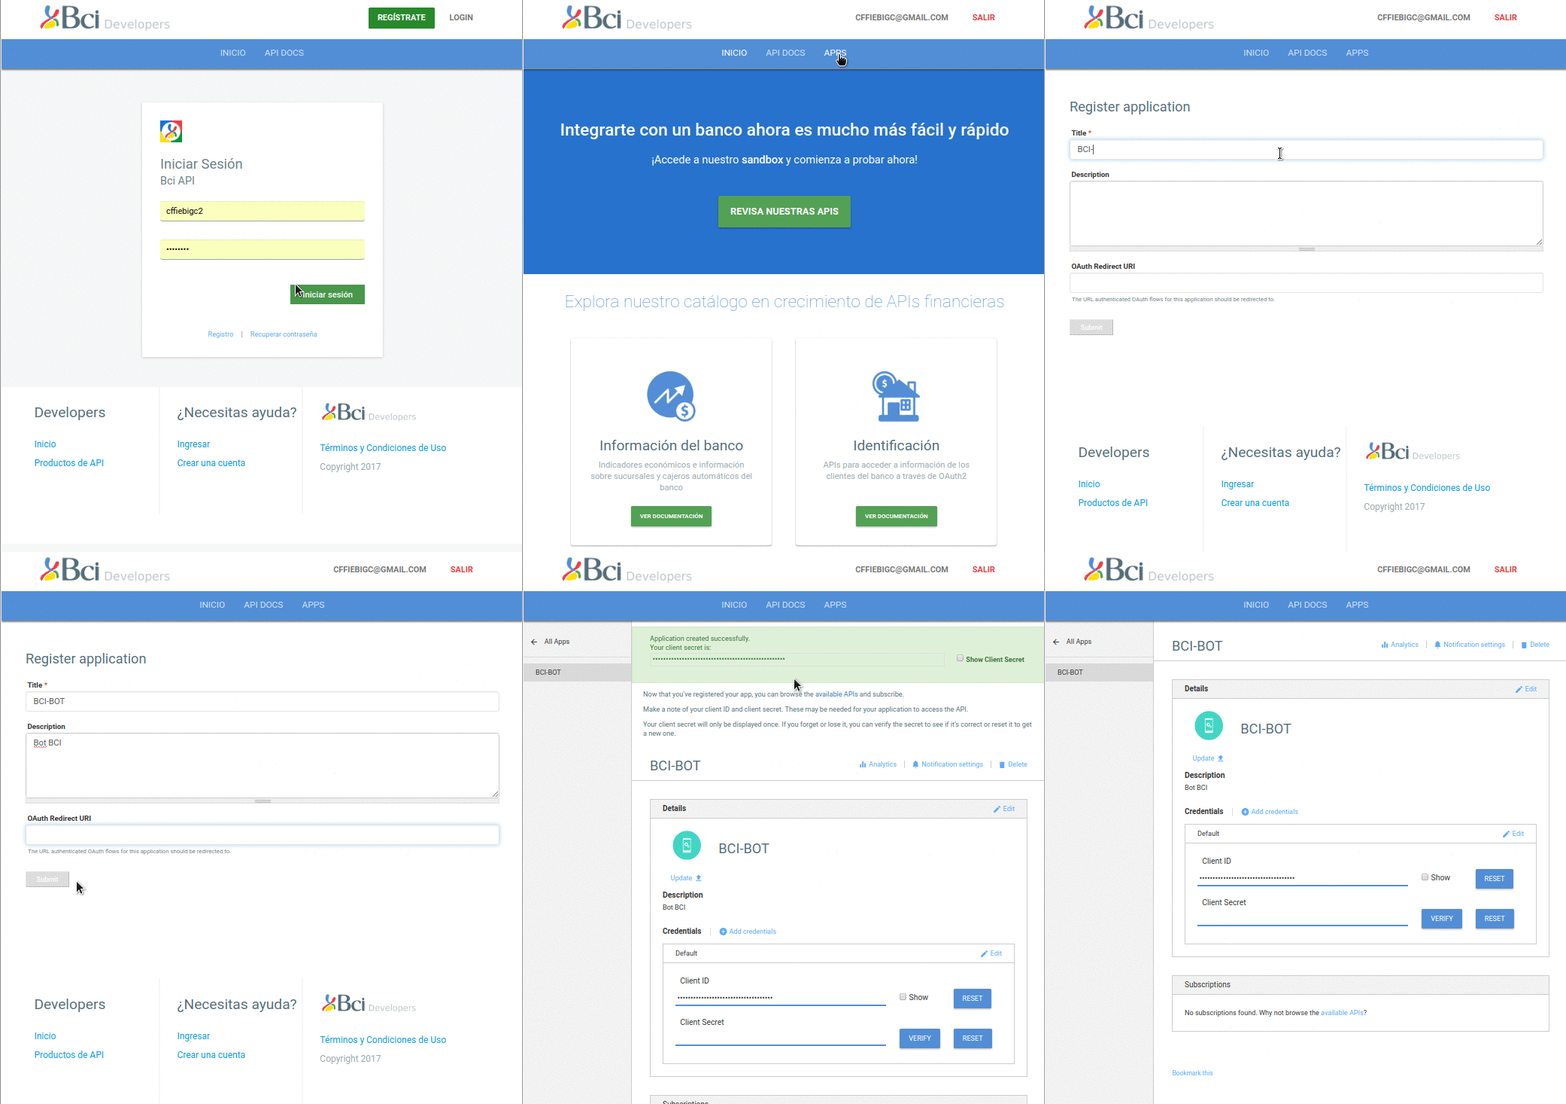
Register and create your app in the developers portal to get your API_KEY
Follow this instructions to get your Google Maps API KEY
Create a file named .env on the root level of the boilerplate. Create another file called .gitignore and add this single line of code:
.env
Save the .gitignore file. Now open your .env and put two tokens (one you've just generated and another you need to come up with and save for later) inside:
BCI_API_KEY=your_recently_created_bci_api_key
GOOGLE_API_KEY=your_google_maps_api_key
From now on, they can be referenced inside your program as ENV['BCI_API_KEY'] and ENV['GOOGLE_API_KEY'].
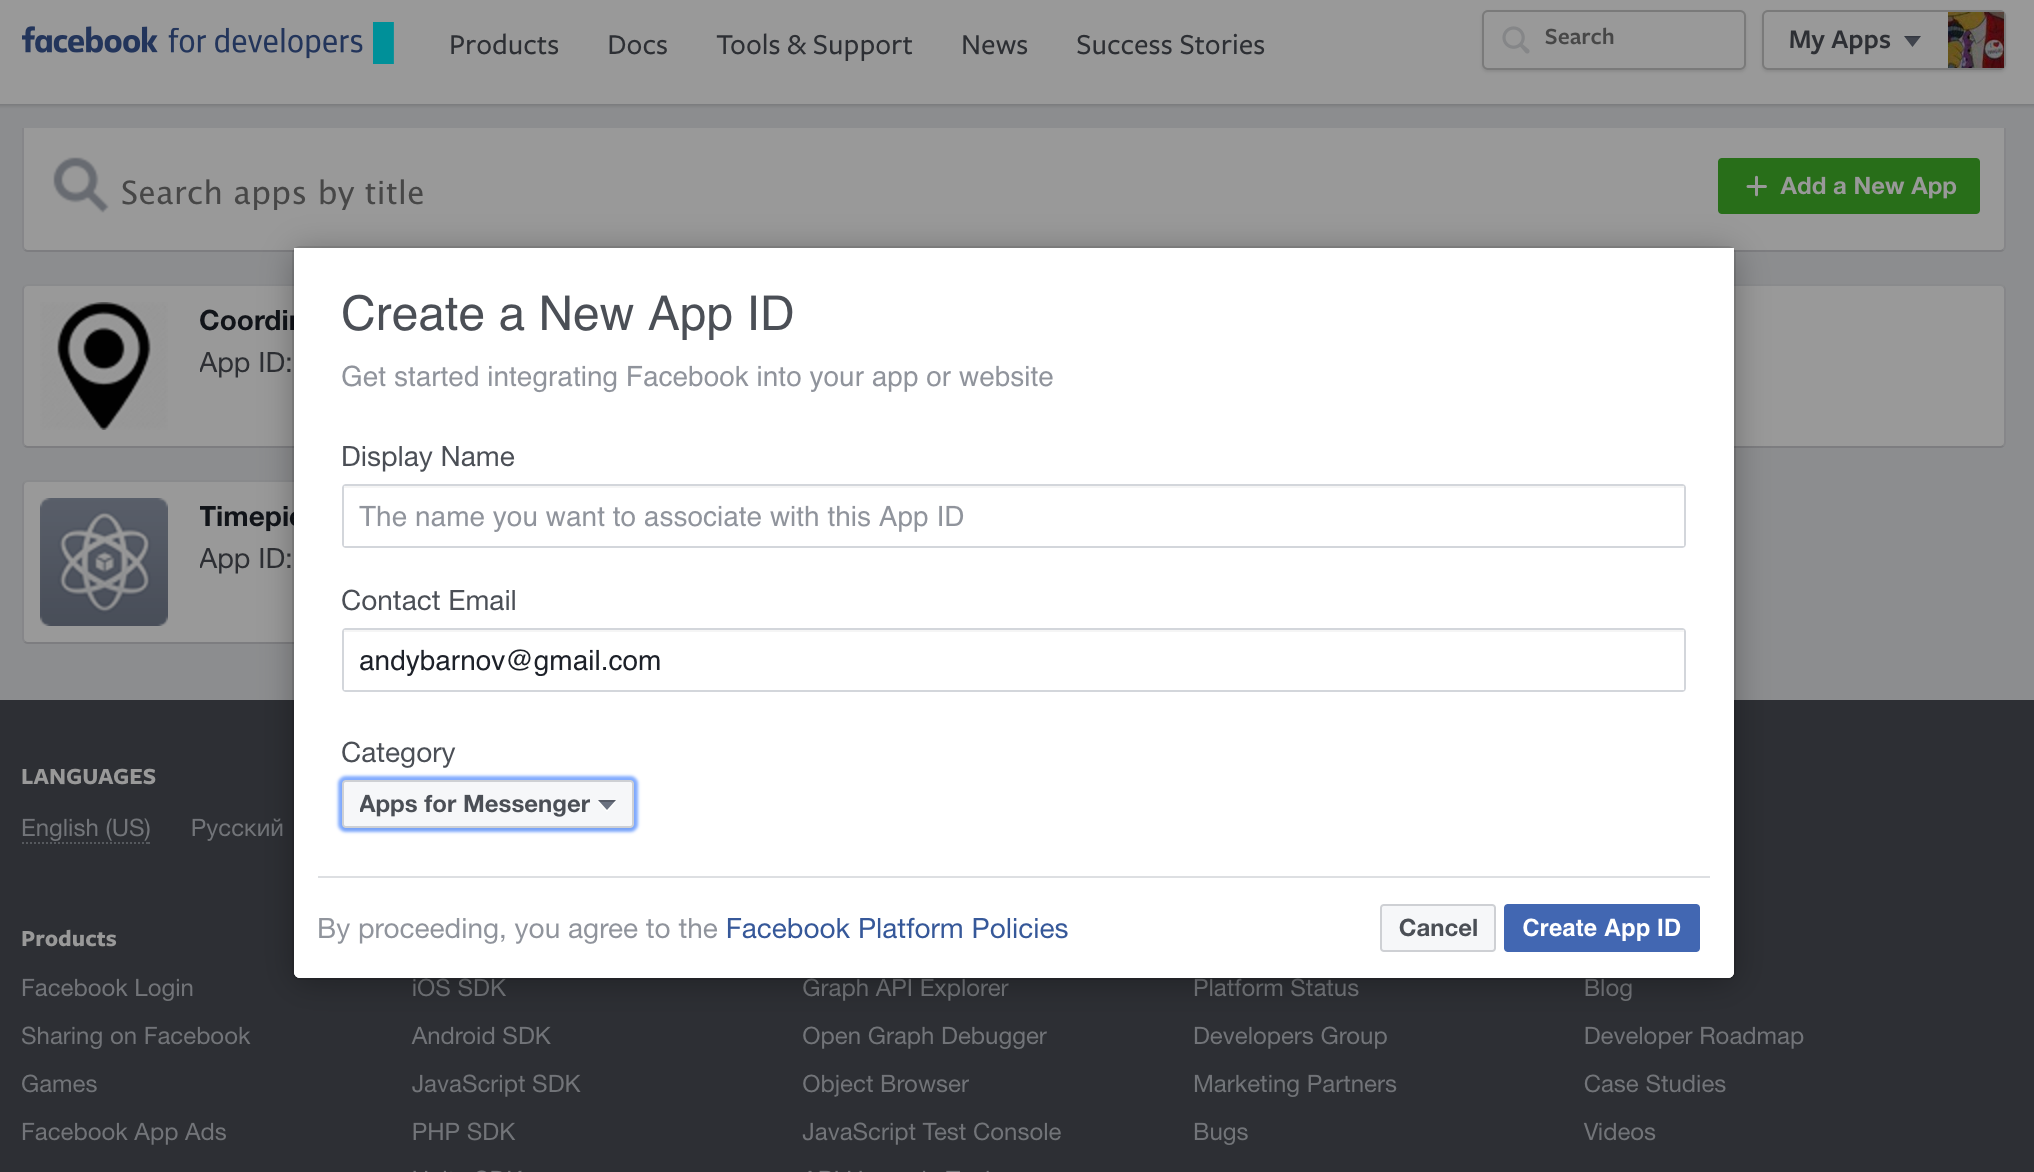
Login to Facebook For Developers. In the top right corner, click on your avatar and select "Add a new app"
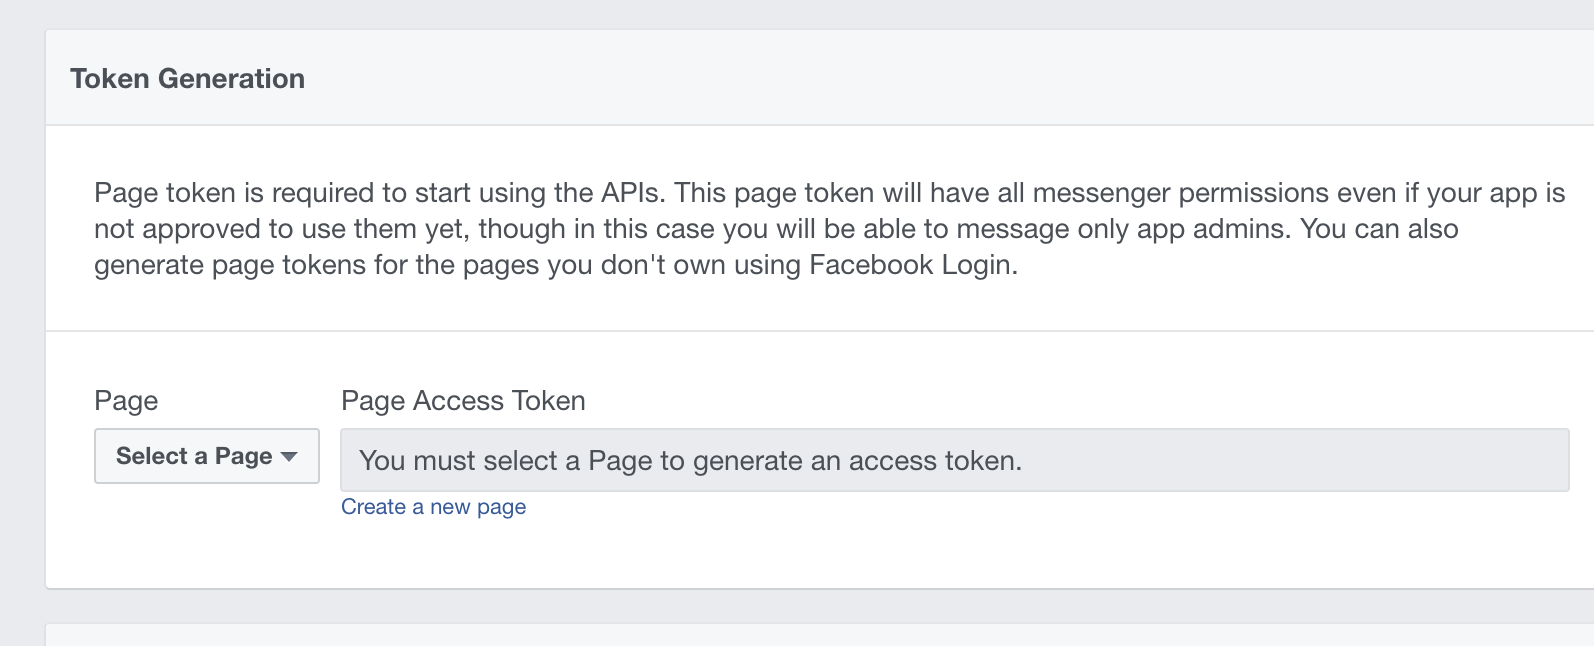
In the resulting dashboard, under PRODUCTS/Messenger/Settings, scroll to "Token Generation" and either select an existing page for your bot (if you happen to have one) or create a new one.
Copy Page Access Token and keep it at hand. Don't close this window.
Now open your .env and put two tokens (one you've just generated and another you need to come up with and save for later) inside:
ACCESS_TOKEN=your_page_access_token_from_the_dashboard
VERIFY_TOKEN=come_up_with_any_string_you_will_use_at_next_step
They can be referenced inside your program as ENV['ACCESS_TOKEN'] and ENV['VERIFY_TOKEN'].
Note:
Rubotnik stores its environment variables (aka config vars) locally in .env file (here goes the standard reminder to never check this file into remote repository) heroku local loads its contents automatically, so you don't need to worry about setting them manually. If you don't want to use heroku local and prefer an old good rackup, make sure to uncomment require 'dotenv/load' on top of bot.rb so variables will be loaded in your local environment by dotenv gem. If you do so, don't forget to comment it out again before pushing to Heroku for production. In production, you will have to set your config variables by hand, either in your dashboard, or by using heroku config:set VARIABLE_NAME=value command in the terminal.
Make sure you have Heroku CLI and bundle. If you haven't done it before run bundle install to install all the required gems and once it finished run heroku local to start bot server on localhost.
Provided you set up your token correctly, you should see something like this:
By default, bot will run on port 5000. Start ngrok on the same port:
ngrok http 5000
This will expose your localhost for external connections through an URL like https://92832de0.ngrok.io (the name will change every time you restart ngrok, so better keep it running in a separate terminal tab). Make note of the URL that start with https://, you will give to Facebook in the next step.
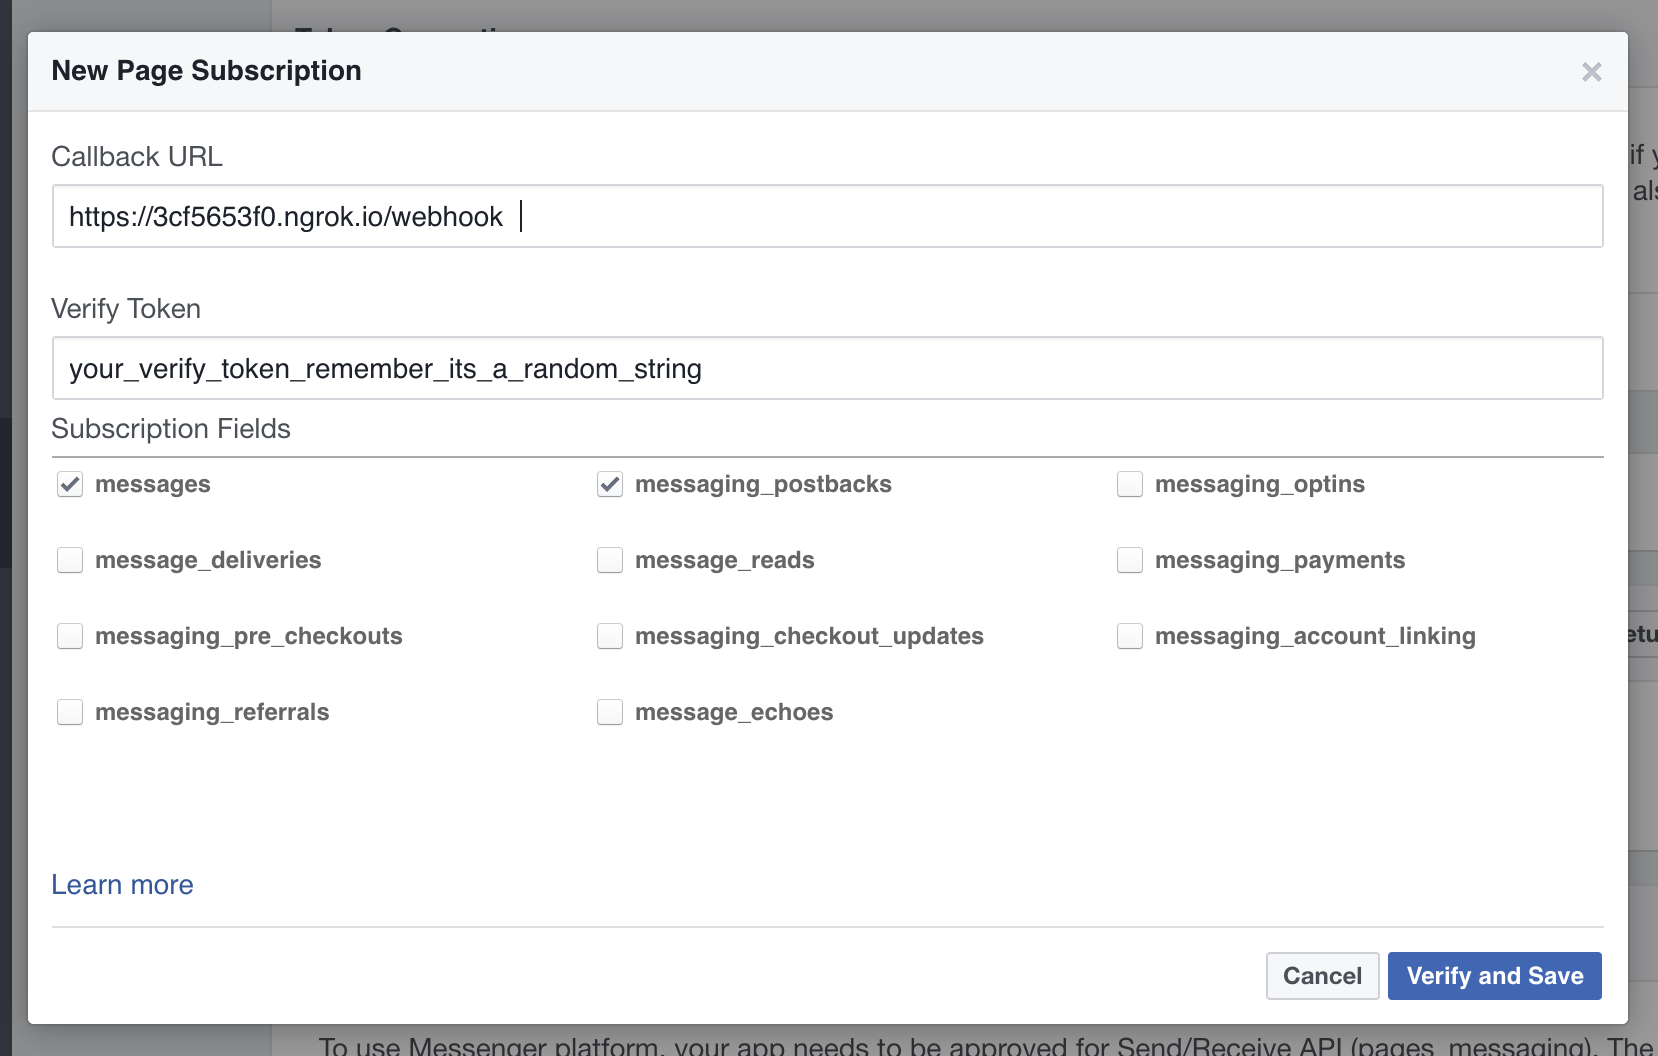
Now that your bot is running on your machine, we need to connect it to the Messenger Platform. Go back to your dashboard. Right under Token Generation find Webhooks and click "Setup Webhooks". In the URL field put your HTTPS ngrok address ending with /webhook, provide the verify token you came up with earlier and under Subscription Fields tick messages and messaging_postbacks. Click "Verify and Save".
🎉 Congrats! Your bot is connected to Facebook! You can start working on it.
Once you have designed your bot and tested in on localhost, it's time to send it to the cloud, so it live its life without being tethered to your machine. Assuming you already have a Heroku account and Heroku CLI tools installed, here's pretty much the whole process:
heroku create YOUR_APP_NAME
heroku config:set ACCESS_TOKEN=your_own_page_token
heroku config:set VERIFY_TOKEN=your_own_verify_token
heroku config:set BCI_API_KEY=your_own_bci_api_key
heroku config:set GOOGLE_API_KEY=your_own_google_api_key
git push heroku master
Now don't forget to go back to your Facebook developer console and change the address of your webhook from your ngrok URL to Heroku one. That's it!
