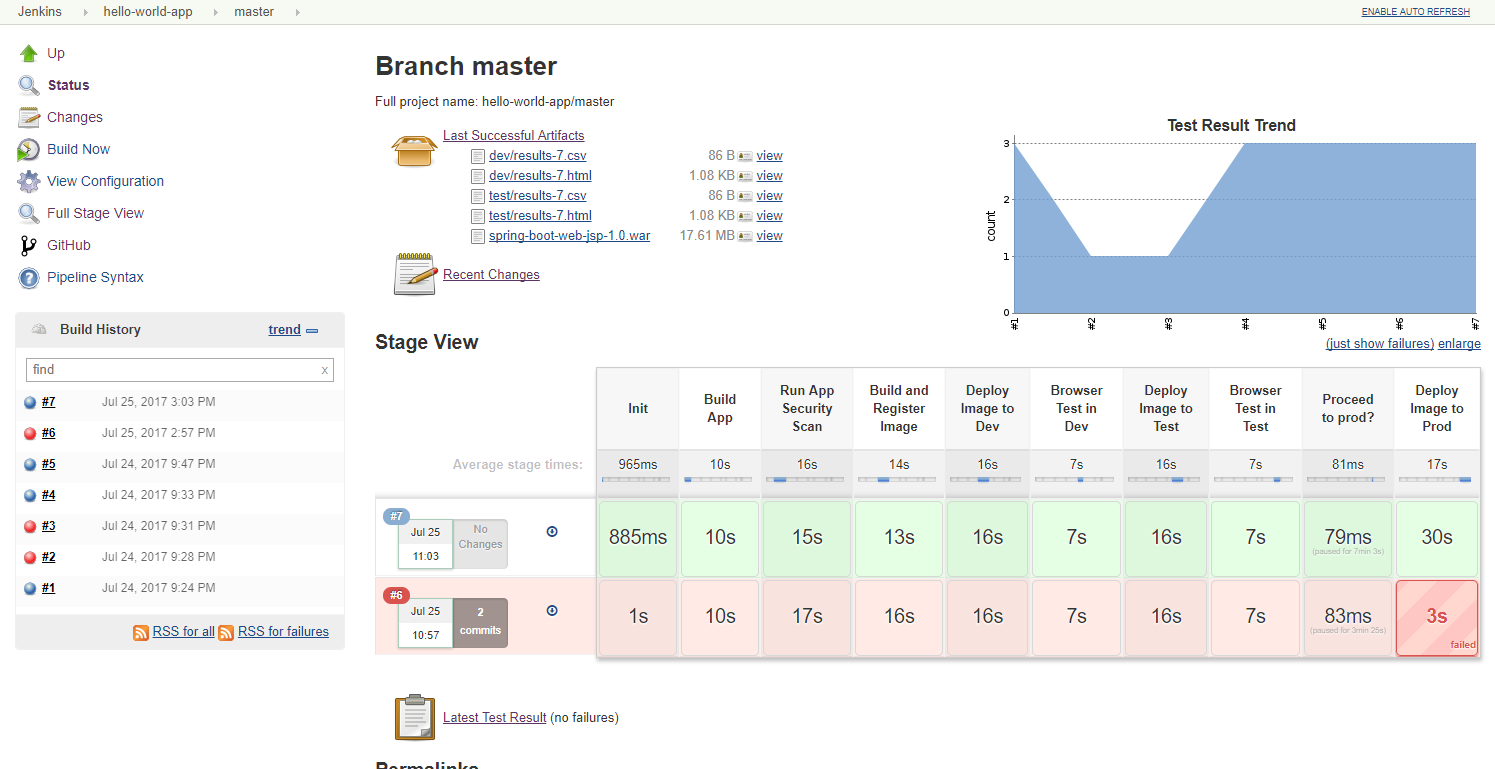
This example uses a Jenkins multi-branch pipelines. The code for this pipeline can be found here.
Jenkins multi-branch pipelines build all your branches in your repository under source code control (e.g. github) automatically. Note that you can explicitly include/exclude branch using regular expressions. This allows for a development approach with short-lived feature and bugfix branches that can be build, deployed, and tested simultaneously. This is important, because it allows developers to update and test the pipeline as part of the change request (or bugfix) they are working on, so the pipeline code always stays in sync with the the application code. Furthermore, "standard" development processes can now not only be applied to the application code, but also to the pipeline code, specifically source code control, testing, and code review.
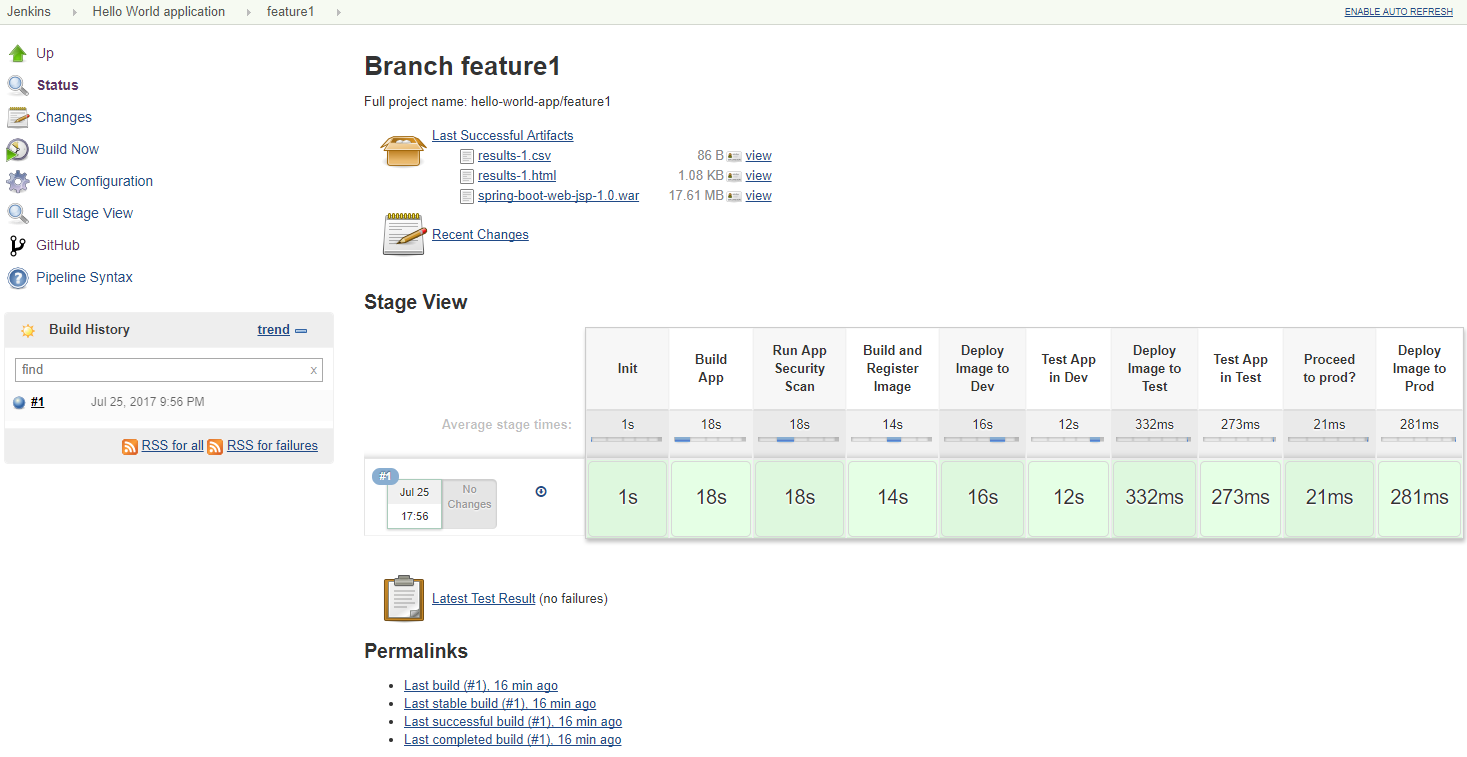
- Build the Java Spring Boot application using Apache Maven This includes running unit tests.
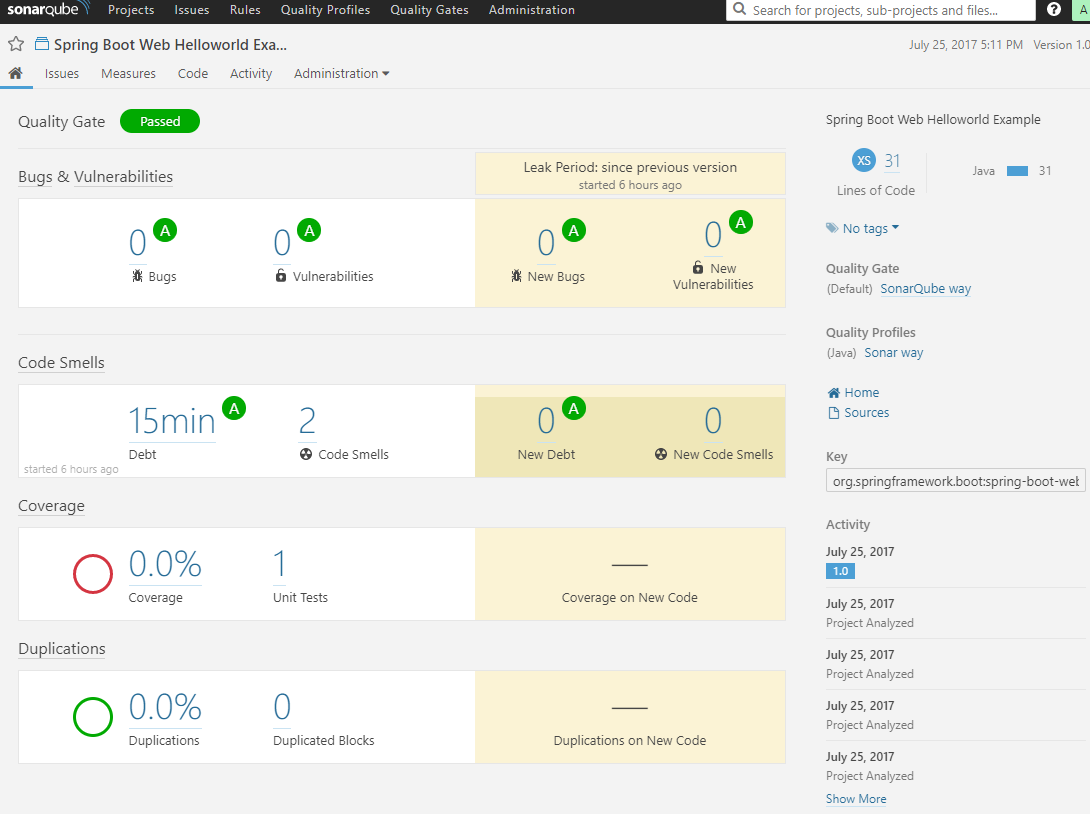
- Performs a security scan on the Java code base using SonarQube via Maven
- Build and register a version of the Docker image
- Deploy the image to the
devenvironment - Run the automated browser tests against the application in the
devenvironment. The browser tests are written in Python using the Python Selenium Webdriver API binding. - Deploy the image to the
testenvironment - Run the automated browser tests against the application in the
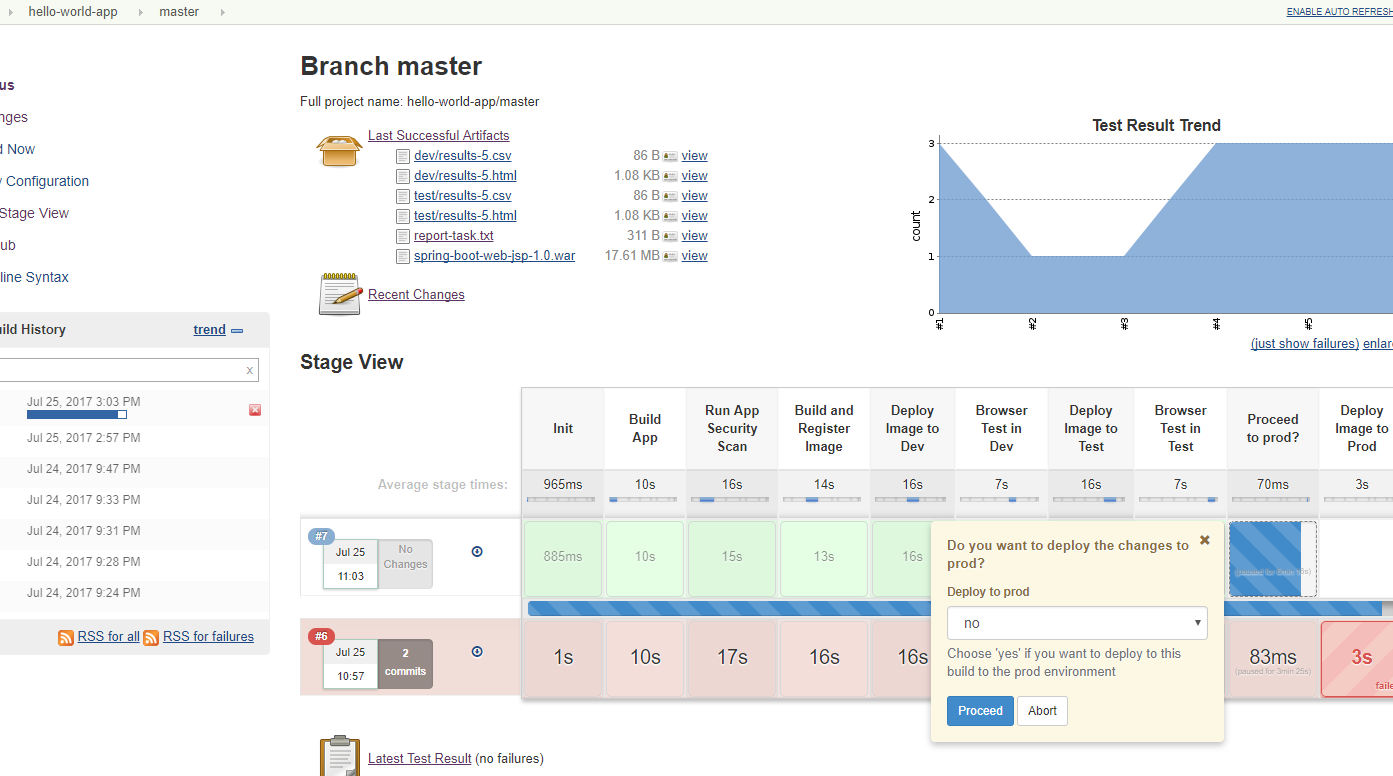
testenvironment - Pause for confirmation that the new image can be deployed to the
prodenvironment. Allow for some manual tests to be executed before This step times out after some (configurable amount of) time. - Deploy the image to the
prod(or live) environment
SonarQube (security scan) output:
Note that in the above steps, steps 5 and up in the pipeline are only
executed against the master branch.
The pipeline code is configured to treat development (feature/bugfix) branches as
additional dev environments.
These temporary additional dev environments can quickly be created using the application's
cloud-formation script and
setting the Environment parameter to dev-<branch-name> and the SecurityContext parameter
to dev.
The new dev-<branch-name> environment now operates in the same security context as the dev
environment`.
Now when a new temporary development branch is created of the master branch, the Jenkins pipeline will automatically discover the new branch and execute the pipeline code from that specific branch allow a developer to build and test the branch specific changes in isolation, including changes to the pipeline code.
Multiple branch executions (feature1 and master) after creating the feature1 branch:

Development branch (feature) execution details:
The following outlines how this development pipeline would be used in a (typical) development process:
- A user story (or bug) ticket is assigned to a developer
- Create a temporary and short-lived development (feature/bugfix) branch environment
using the Hello World application
cloud formation script.
Run the script setting the
Environmentparameter todev-<name>and the theSecurityContextparameter todev. - A development branch is created in the repository using the format feature/ or
bug-fix/ from the
masterbranch - The developer implements and tests the changes, include new and/or updated automated tests.
- Changes are committed to the branch and tested. The developer references the ticket in the commit message to allow for integration with the ticketing system, e. GitHub-Jira Integration.
- Changes are pushed to the central git server.
- A git webhook triggers the Jenkins pipeline for the feature branch.
- If pipeline build fails, either fix infrastructure issue, or return to step 3
- Manually test the changes
- Once satisfied acceptance criteria are met, create a Pull Request (PR) to the master branch and assign a reviewer.
- Reviewer verifies changes.
- If not accepted, return to step 3
- Reviewer accepts changes, the reviewer or developer merges the PR into
masterand deletes the branch - Delete the temporary development branch environment.
- A git webhook triggers the Jenkins pipeline for the master branch
- Manual tests (if any are executed against the Test environment
- If problems are detected, return to step 3
- Accept changes and push to production
- Automate the creation and deletion of temporary development branch environment
- Create separate test suites to allow for a smoke vs. a full suite of tests. Smoke tests would always be applied to each environment, including production. The full suite of tesst would only be executed against pre-production environments.
- Application/browser tests are executed against all targetted brower/platform configurations using a hosted service, such as Browserstack or Saucelabs.
- Add performance testing in the pipeline, e.g. using Taurus and/or Apache jMeter.
- Penetration tests are executed as part of the pipeline,e.g. using OWAPS' ZAProxy
- Integrate a notification mechanism with the pipeline, e.g. Slack
- If an Restful API component is added, use Newman to run API tests using Postman test collections via Newman Docker image.
Installation instructions can be found here.
