IoT Deep Dive - LoRaWAN
Welcome to the IoT Deep Dive session on LoRaWAN. If you have any questions, please just give a shout. We are here to help.
In this session you'll be building some examples, introducing you to:
- Building IoT devices with Arm Mbed OS.
- Connecting your device to The Things Network using LoRaWAN.
- Data visualization through the TTN API.
In case you're stuck, this document will help you get back on track. If you're a fast learner, there are "extra credit" assignments at the end of this workbook. Please help your neighbors as well. :-)
Prerequisites
-
Create an Arm Mbed online account here.
-
Create a The Things Network Account
-
Then install the following software for your operating system below:
Note make sure you are using the latest mbed-cli. You can update it by running
pip install -U mbed-cli
Windows
If you are on Windows, install:
-
Mbed CLI - Windows Installer, this will install a serial terminal and the windows serial driver
-
Node.js - to run the webapp later.
NOTE If you have any problems with your board please check the board page for your board. Some boards may require interface firmware updates or special drivers.
Linux
If you're on Linux, install:
- Mbed CLI -
pip install -U mbed-cli - Node.js - to show visualizations.
MacOS
If you're on MacOS, install:
- Mbed CLI -
pip install -U mbed-clior try out the OSX Installer - Node.js - to show visualizations.
Hardware
-
A Mbed Enabled LoRa board and radio or a Mbed Enabled LoRa Module. Here are some great options.
-
DHT11 Temperature Sensor (optional)
NOTE if you do not have a DHT11 sensor make sure to change the value of
real-sensorto 0 inmbed_app.json. This will then simulate a sensor.
Building the circuit
We're using the Semtech SX1272 radio shield together with the ST Nucleo L476RG board. In addition, you can use a Grove temperature & humidity sensor. Let's connect these sensors and verify that the board works.
Grab the following items:
- Nucleo Development board.
- Semtech Radio Shield
- Mini-USB cable.
- Grove temperature and humidity sensor.
Click the Grove connector onto the temperature sensor. Connect the wires to the development board like this:

1. Building an application
Now let's build a simple application which reads the sensor data and prints it to the serial console.

-
Go to https://os.mbed.com and sign up (or sign in).
-
Go to the ST Nucleo L476RG platform page. Alternatively open the
MBED.HTMon the board and it will be auto-added to your compiler. -
Import the example program into the Arm Mbed Compiler by clicking this link.
-
Click Import.
-
In the top right corner make sure you selected your target as 'Nucleo L476RG'.
This has cloned the repository. Now it's time to create some keys for this device so it can join the network.
Open mbed_app.json and locate lora.device-eui, lora.application-eui, lora.application-key. We will get these values from The Things Network in the next steps.
2. Connecting to The Things Network
We need to program some keys in the device. LoRaWAN uses an end-to-end encryption scheme that uses two session keys. The network server holds one key, and the application server holds the other. (In this tutorial, TTN fulfils both roles). These session keys are created when the device joins the network. For the initial authentication with the network, the application needs its device EUI, the EUI of the application it wants to join (referred to as the application EUI) and a preshared key (the application key). Because the number of people in this workshop we're programming the session keys in directly. This is not safe and should not be done in production!
Let's register this device in The Things Network and grab some keys! Either follow the gif or the steps below! Make sure to set your application data format to Cayenne!

Connecting to The Things Network
Setting up
-
Login with your account or click Create an account
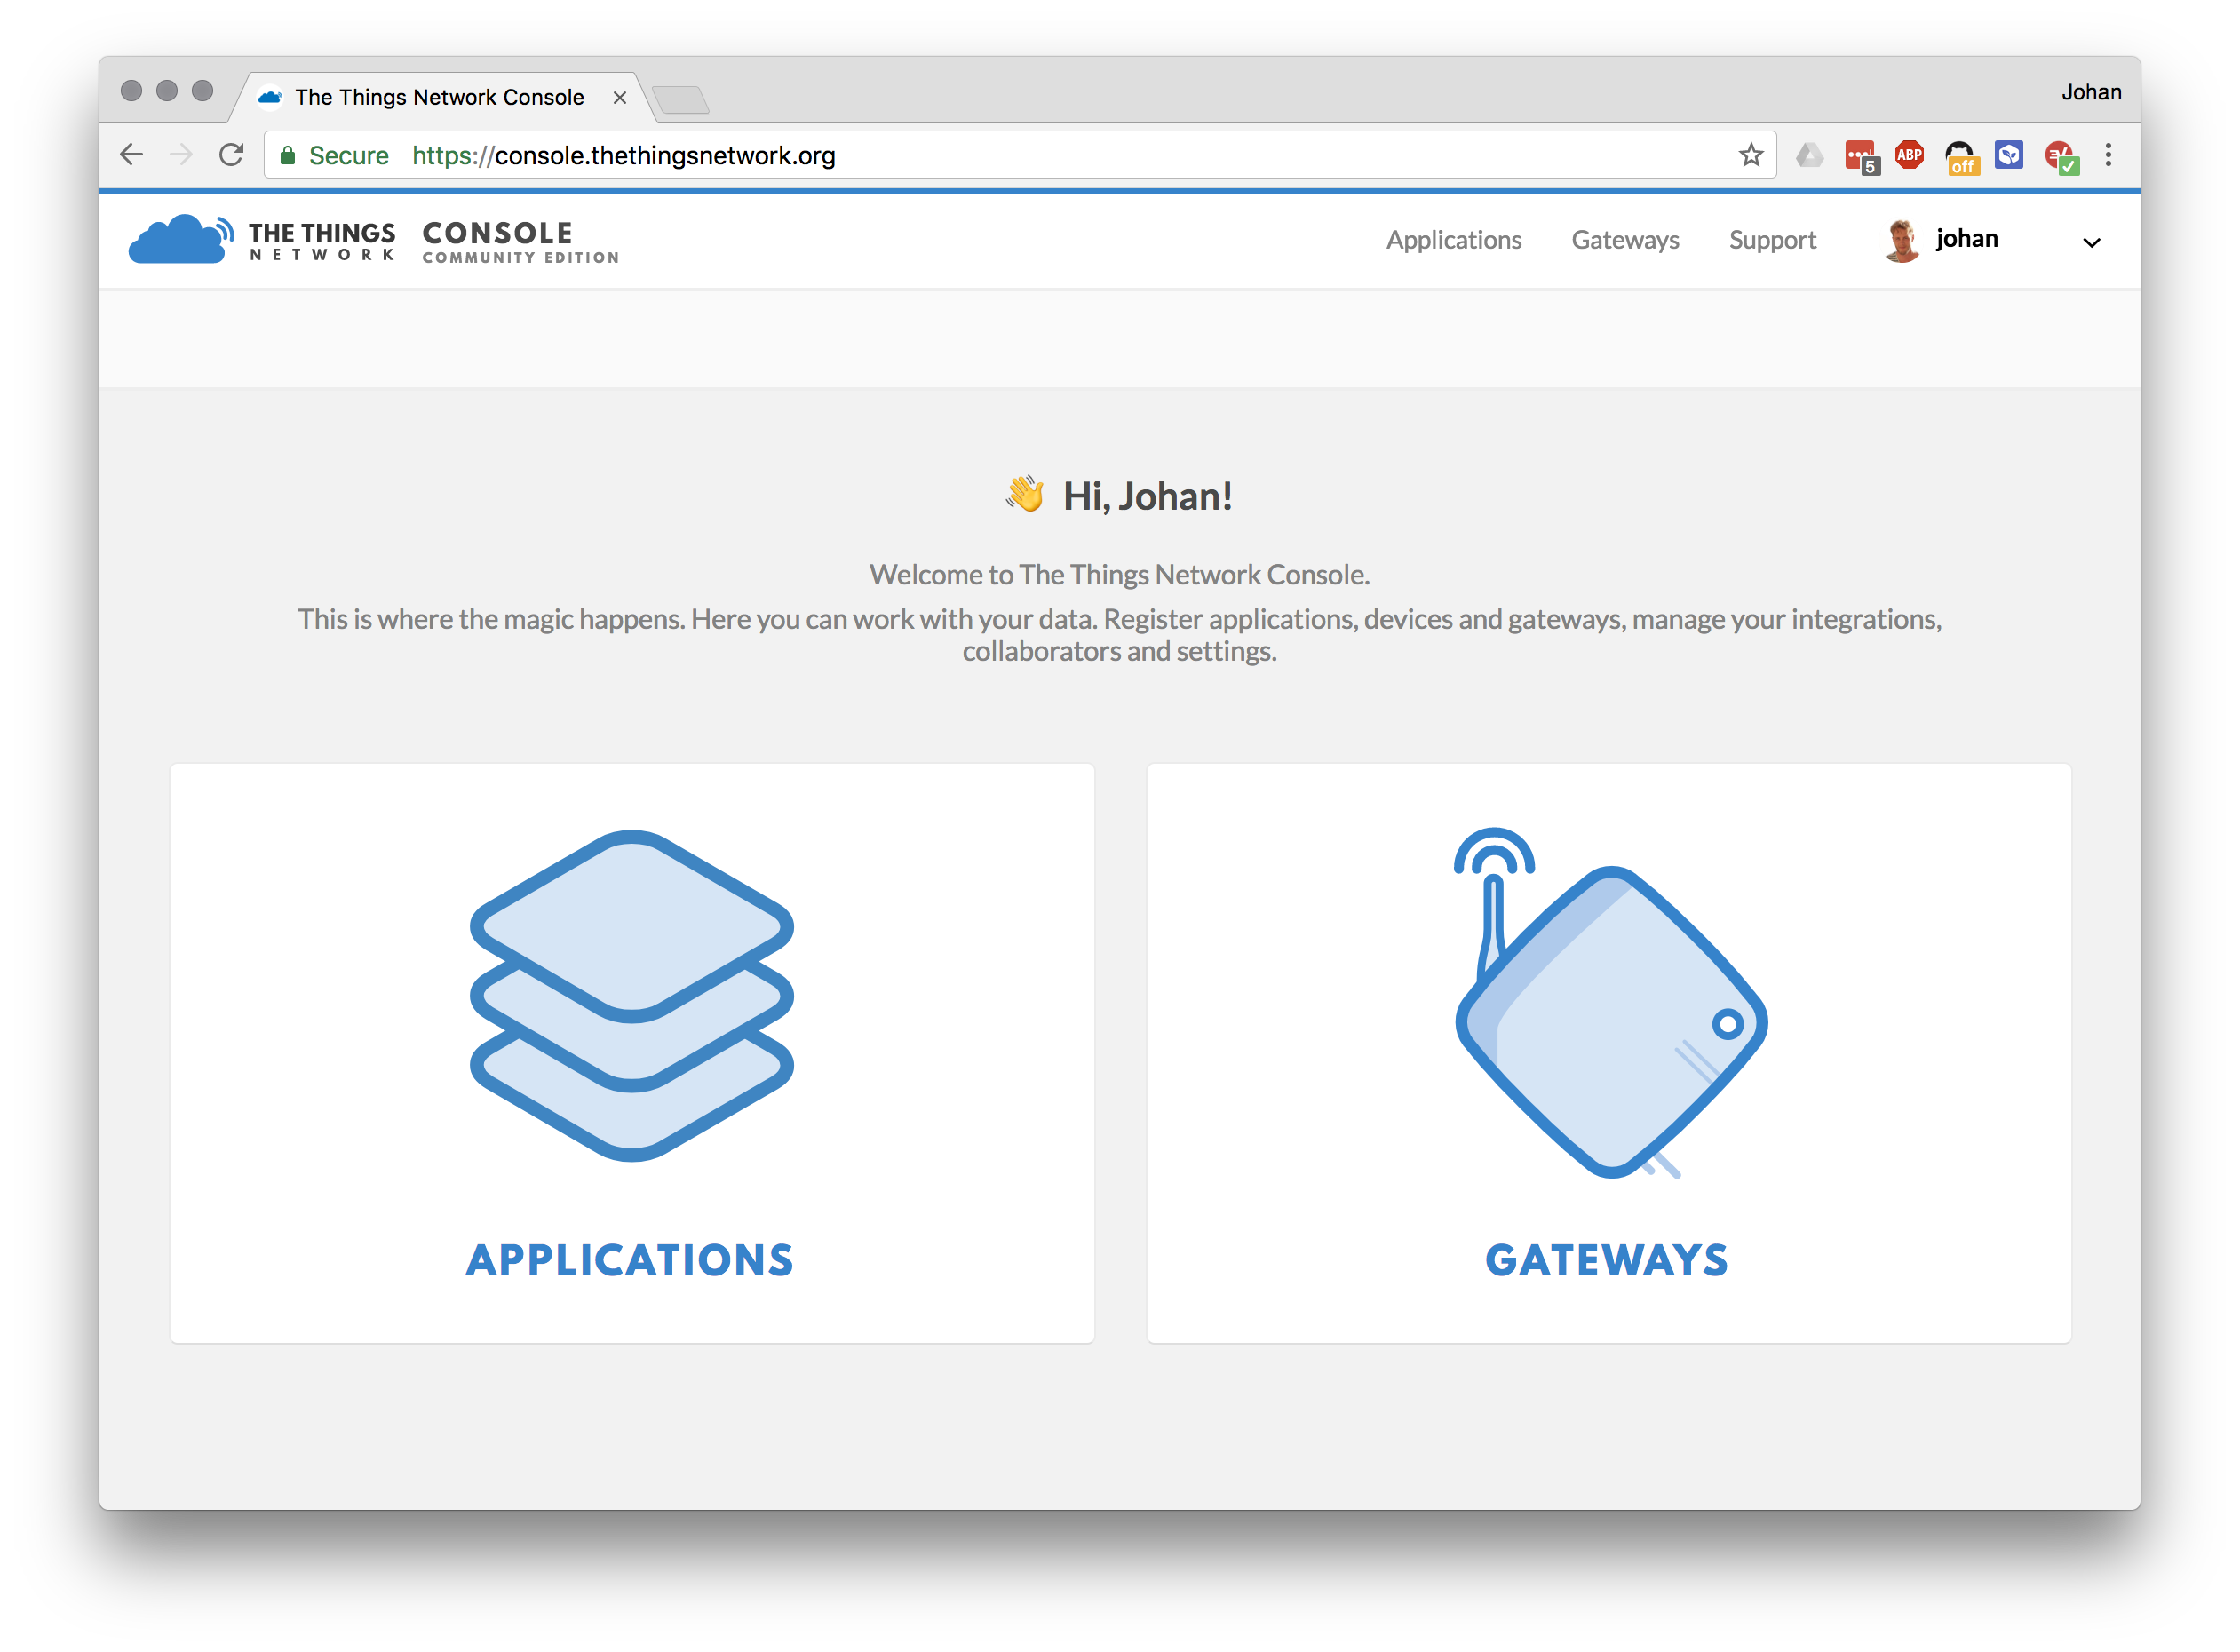
The Console allows you to manage Applications and Gateways.
-
Click Applications
-
Click Add application
-
Enter a Application ID and Description, this can be anything
-
Be sure to set the closest handler in Handler registration if you are in the United States that would be the
ttn-handler-us-westserver, scroll down to the bottom to see it.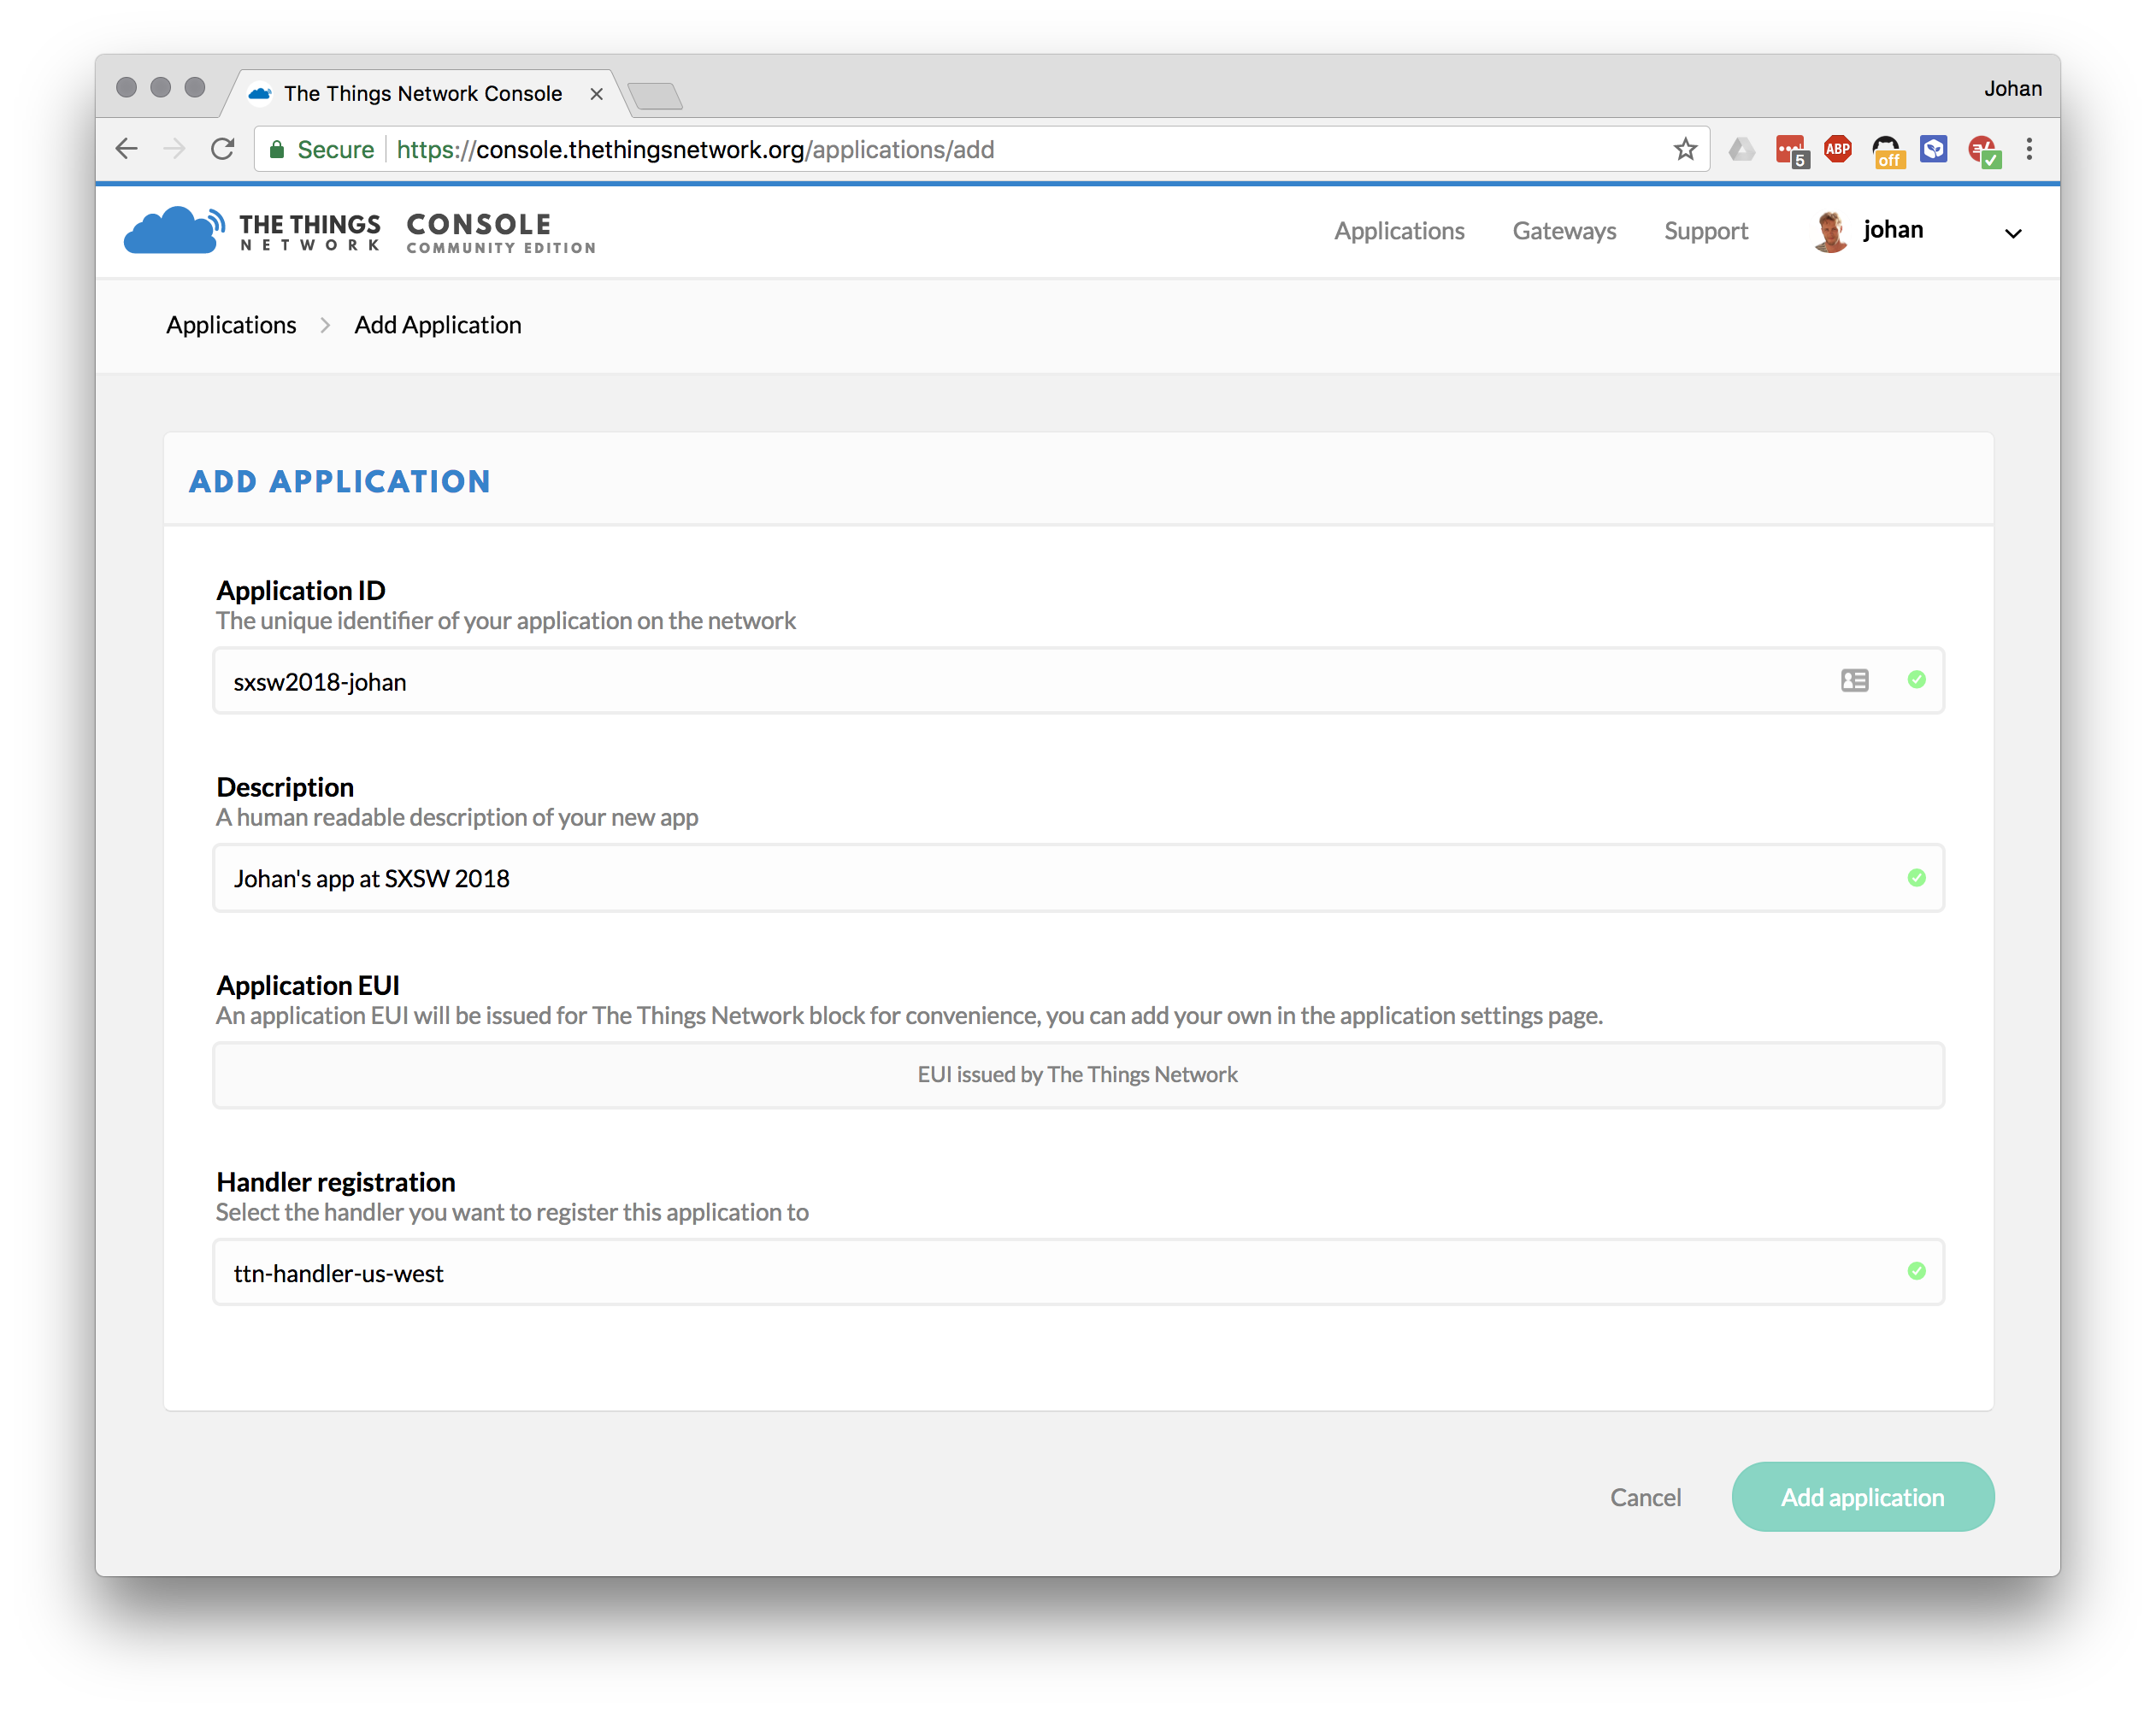
The Things Network is a global and distributed network. Selecting the Handler that is closest to you and your gateways allows for higher response times.
-
Click Add application
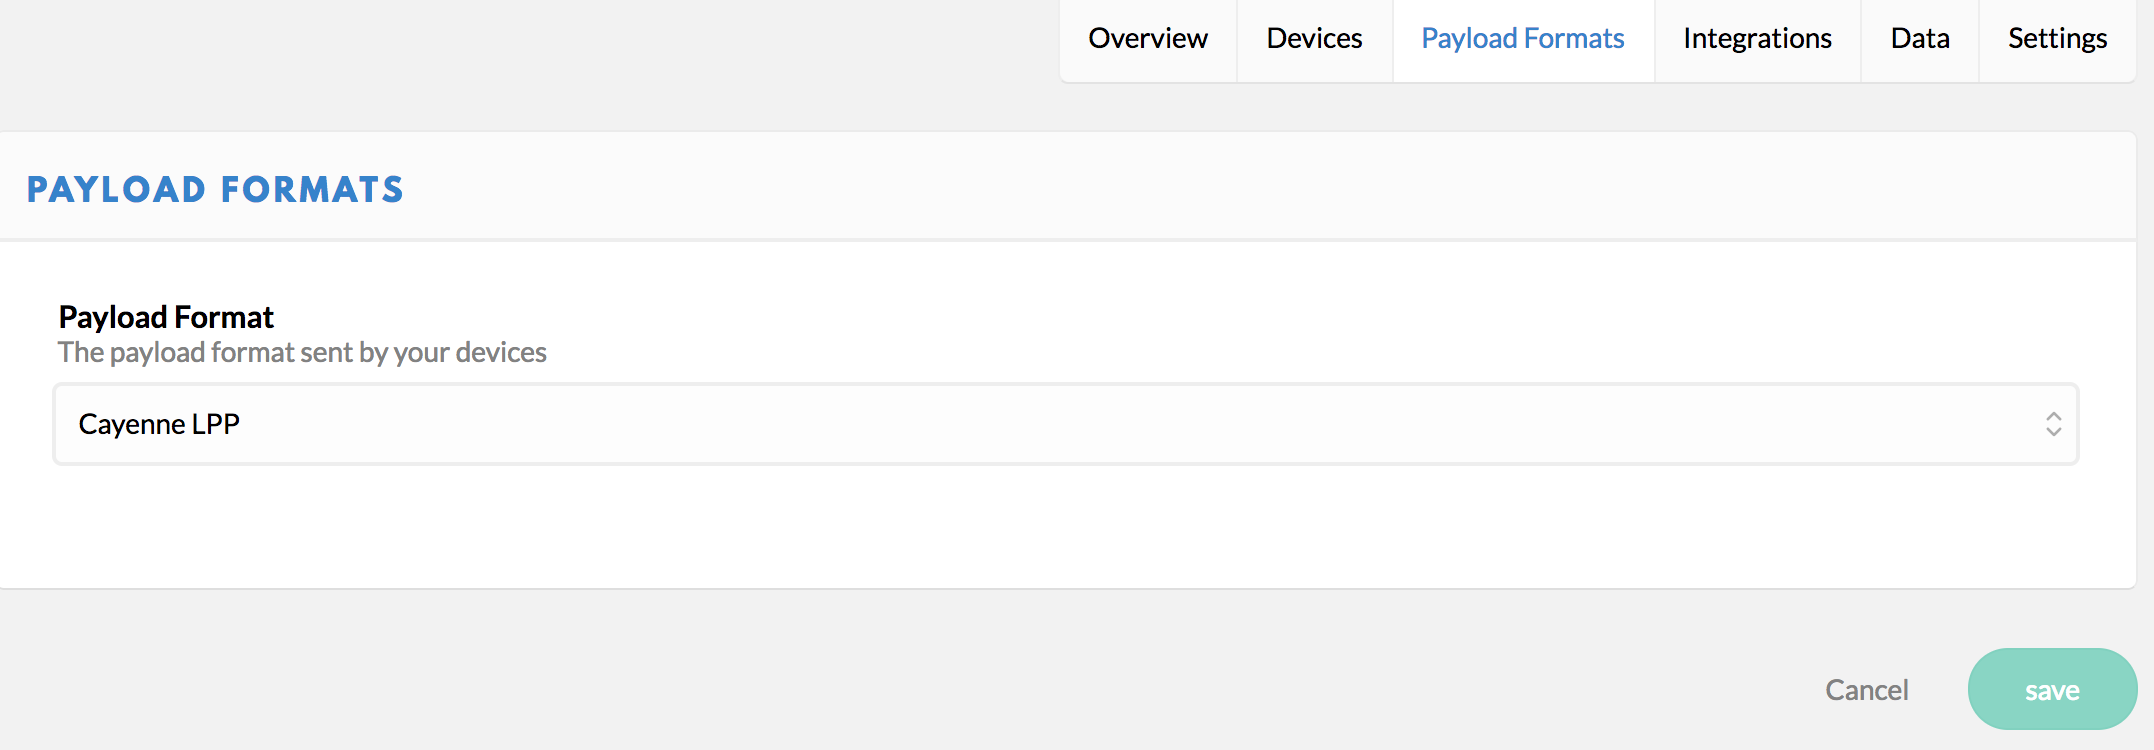
LoRaWAN devices send binary data to minimize the payload size. This reduces channel utilization and power consumption. Applications, however, like to work with JSON objects or even XML. In order to decode binary payload to an object, The Things Network supports CayenneLPP and Payload Functions: JavaScript lambda functions to encode and decode binary payload and JSON objects. In this example, we use CayenneLPP.
-
Go to Payload Format and select CayenneLPP


Registering your Device
-
In your application, go to Devices
-
Click register device
-
Give your device a unique Device ID, be creative!
-
Click on the <> for Device EUI to change it to auto-generated.:
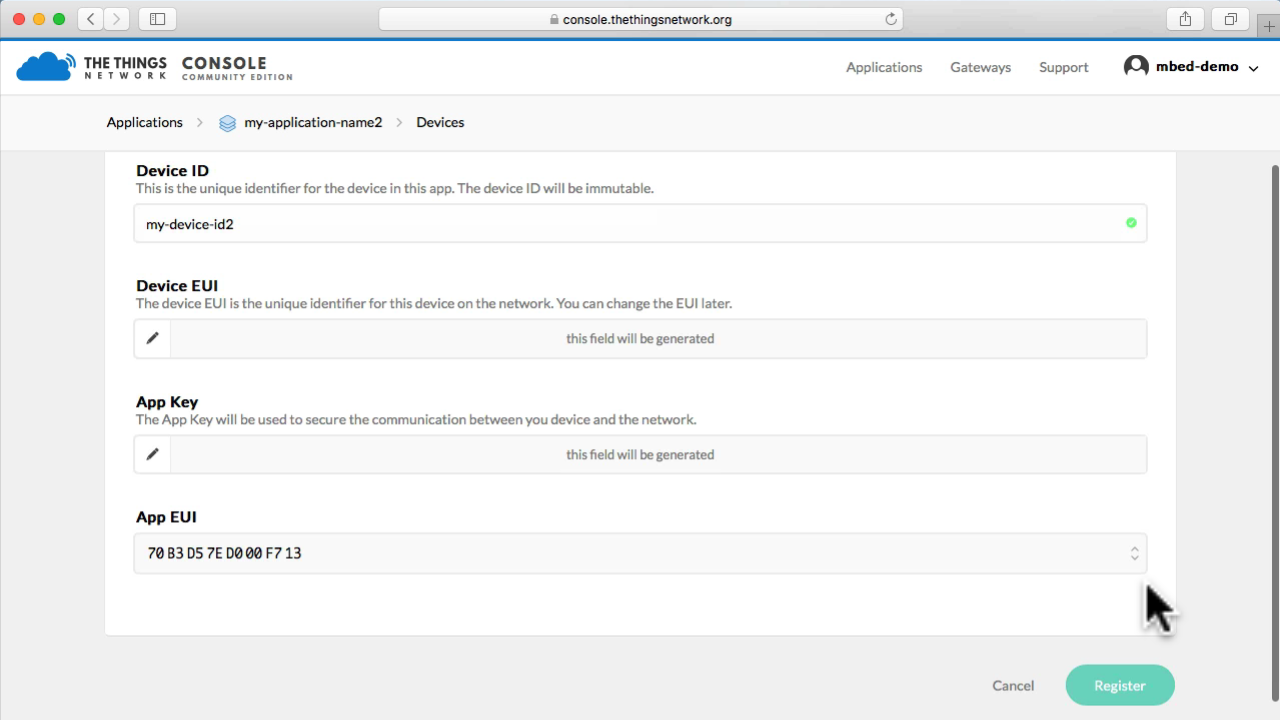
You can leave the Application EUI to be generated automatically.
-
Click Register
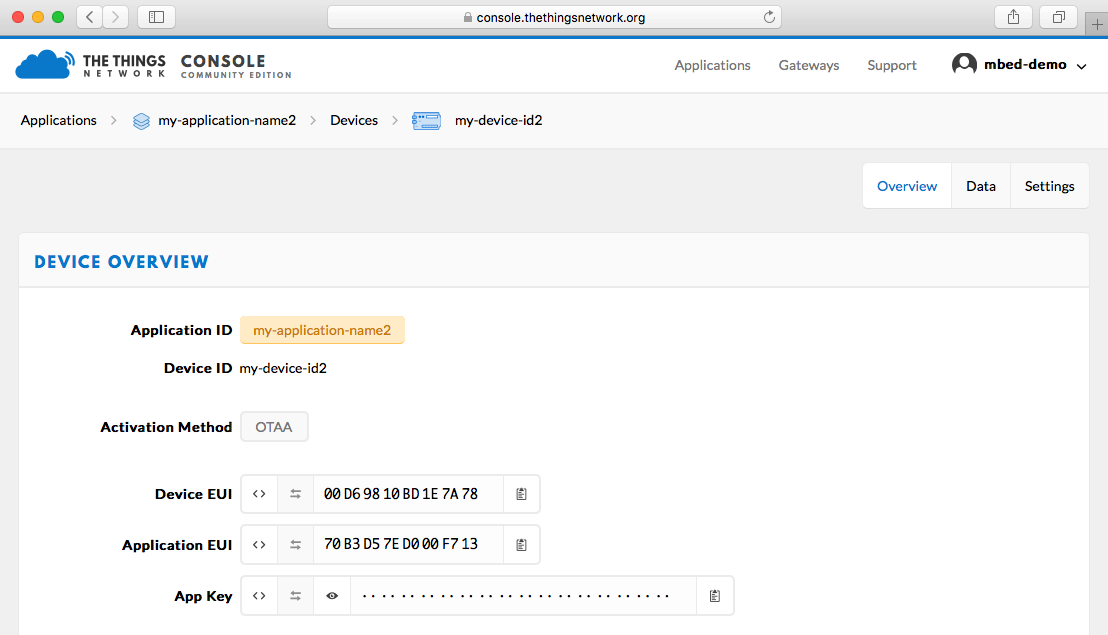


Now we need to get the Device EUI, Application EUI and Appliaction Key.
-
Click the
< >button of the Device EUI and Application EUI and App Key values to show the value as C-style array.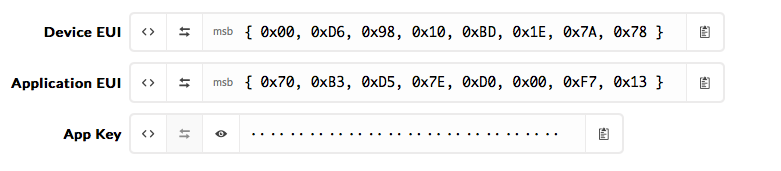
-
Copy / paste these three values into the online compiler in the next section.

Pasting them in the Online Compiler
In the Online Compiler now open mbed_app.json, and paste the keys in:

Note: Make sure to put 0x in front of the values!!! (i.e. "lora.device-eui": "0x26021CED",)
Now compile the application:
-
Click Compile.

-
A binary (.bin) file downloads, use drag-and-drop to copy the file to the DAPLINK device (like a USB mass storage device).
Note: Here's a video.
-
When flashing is complete, hit the RESET button on the board (next to USB).

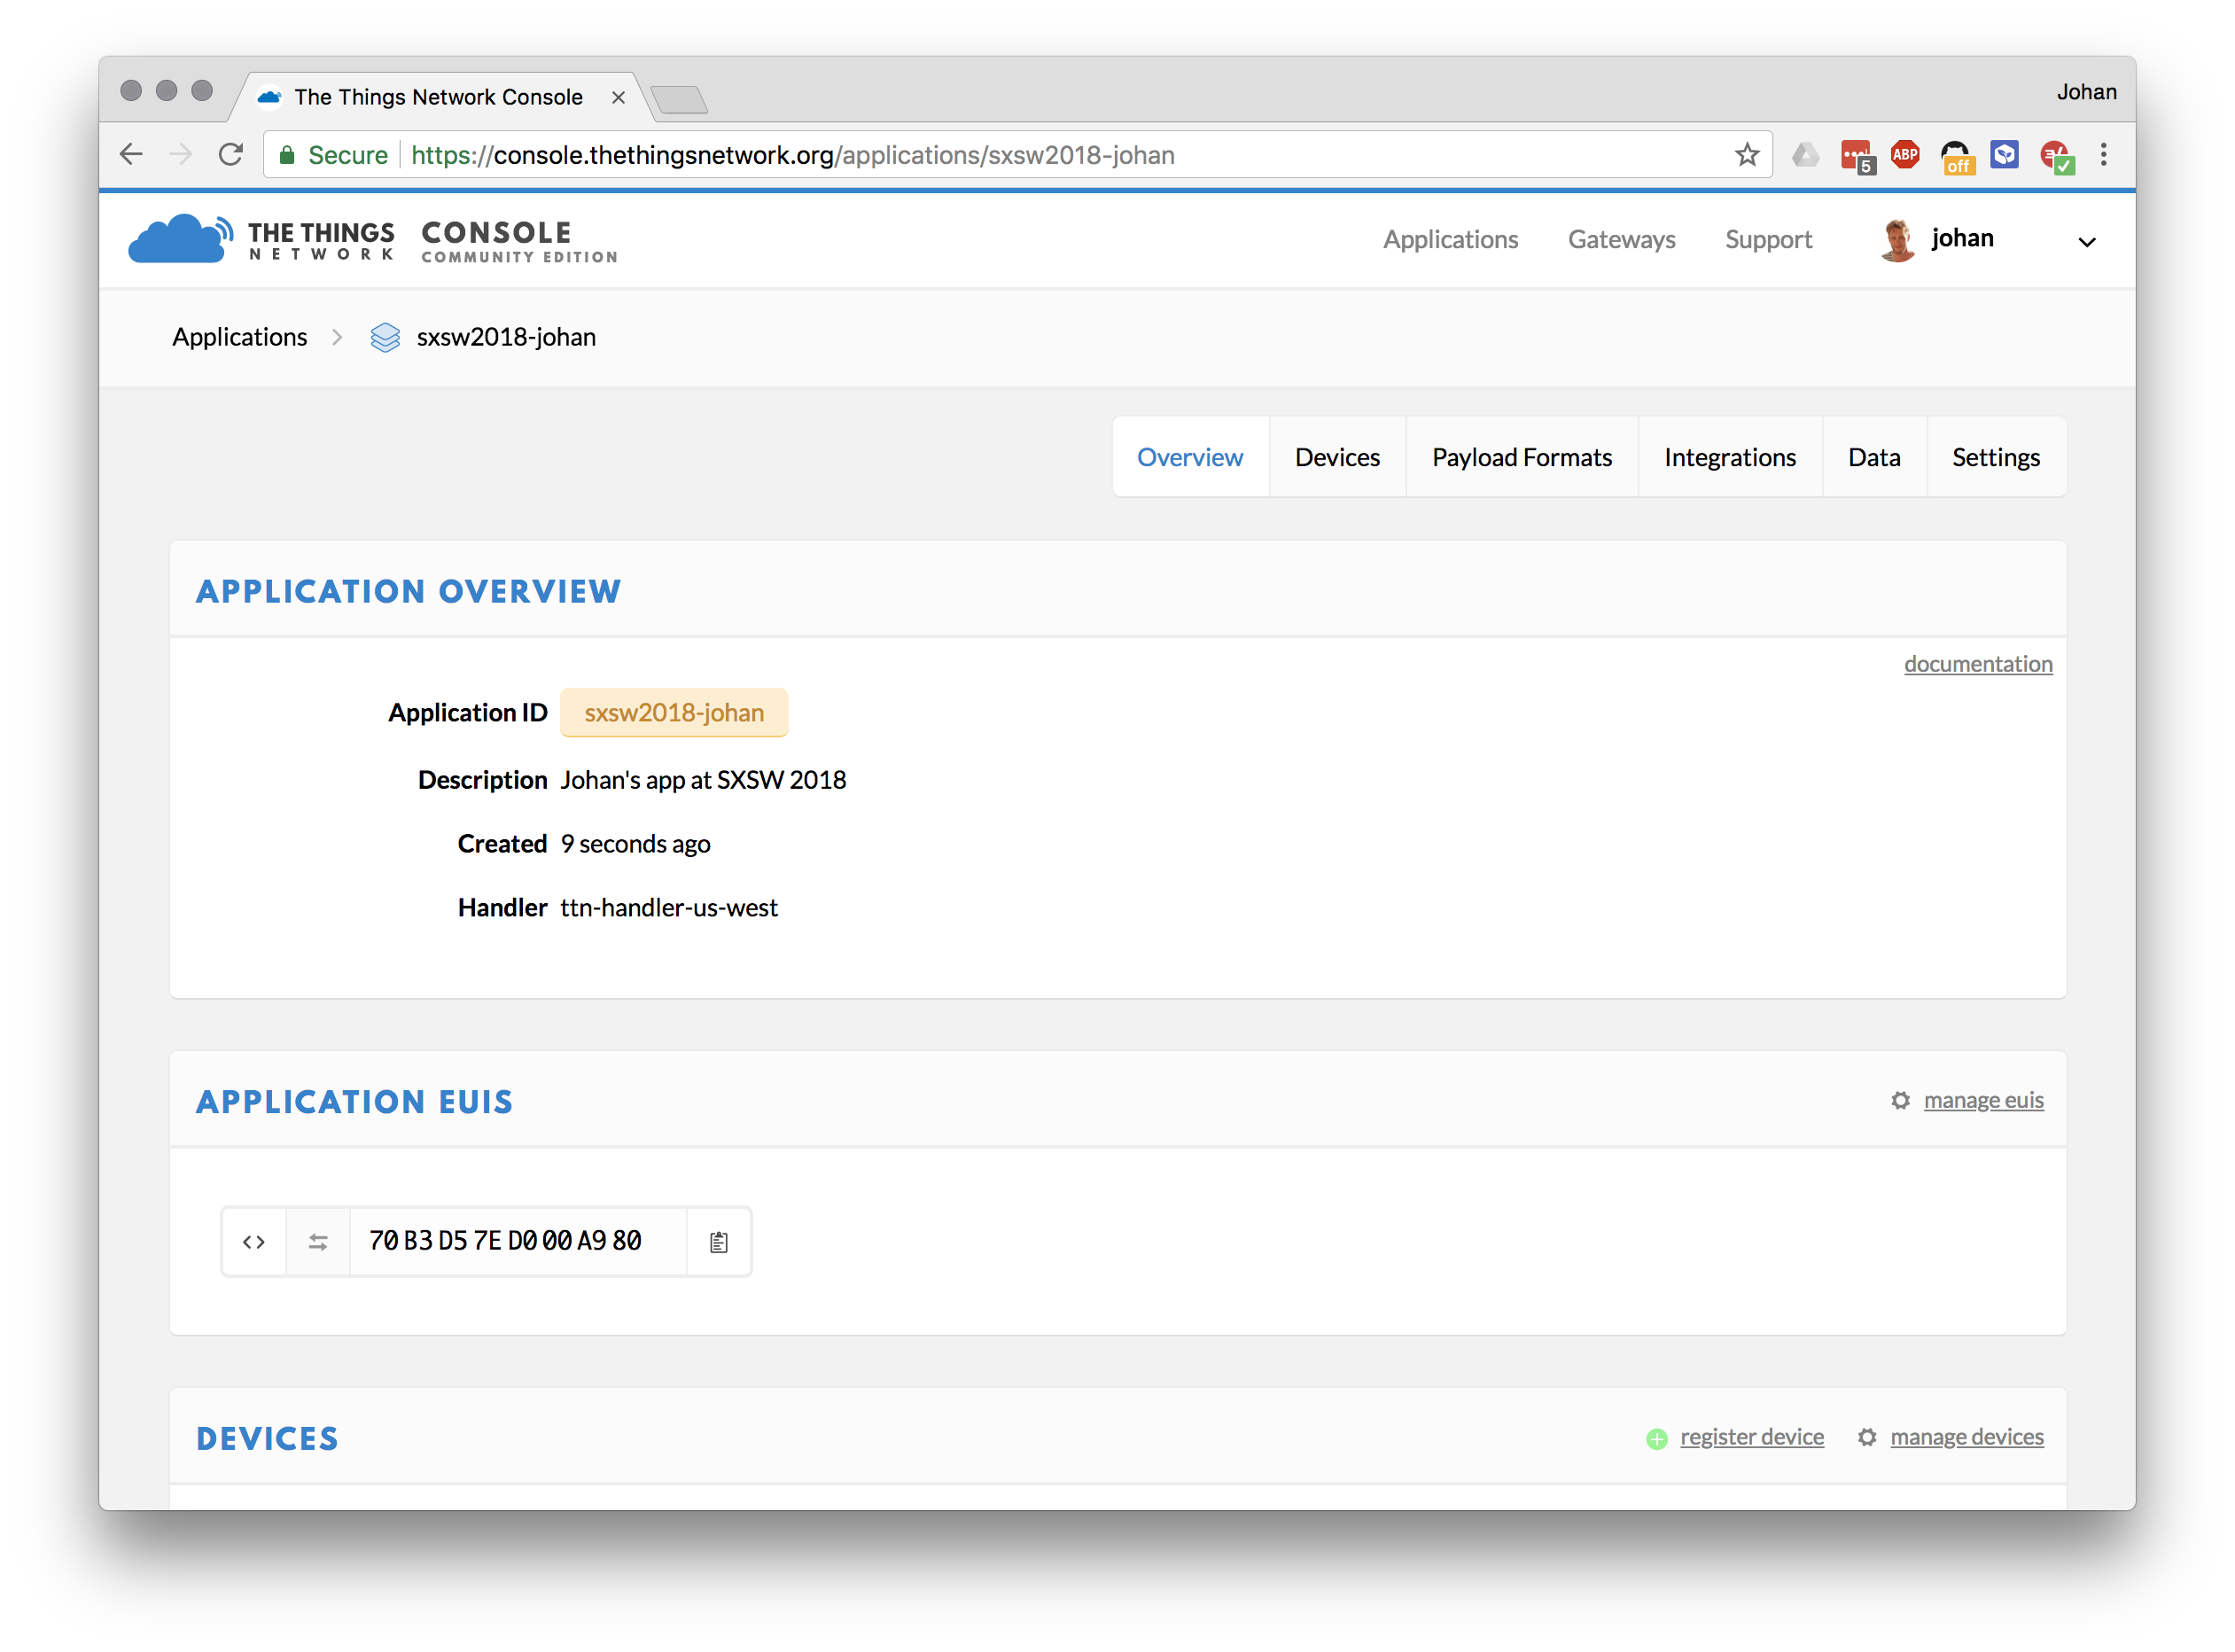
The board should now connect to The Things Network. Inspect the Data tab in the TTN console to see the device connecting.

No data: Check the logs!
Troubleshooting
- Make sure the
lora.phyis set to the correct region that you're in. US is 8, europe is 0....etc - Set Application Data format to Cayenne
- Make sure you are using Over the Air activation
3. Showing logs
Something not right? Let's inspect the logs... If all is well, you should see something similar to:
LoRaWAN stack initialized
Connection - In Progress ...
Connection - Successful
Sensor value is 23.00
[INFO][LSTK]: RTS = 4 bytes, PEND = 0
[DBG ][LMAC]: Next Channel Idx=6, DR=0
[DBG ][LSTK]: Frame scheduled to TX..
4 bytes scheduled for transmission
Message Sent to Network Server
You should see the channels jumping between 8 and 15. If not, wait about a minute to let the sub-band frequency set. Often it takes a while to recognize the right channels.
To open up a serial terminal run mbed sterm and it will open up an automatically connect at 9600 baud to the board. Press ctrl+c to exit.
4. Getting data out of The Things Network
To get some data out of The Things Network you can use their API. Today we'll use the Node.js API, but there are many more languages available. To use the API we will need your Application ID and App Access Key.

Application ID
-
Open the TTN console and go to your application.
-
Your application ID is noted on the top, write it down.

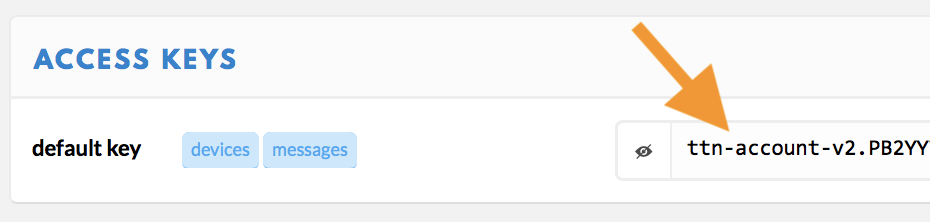
Application Access Key
-
Your application Access Key is at the bottom of the page. Click the 'show' icon to make it visible and note it down.

Make a NodeJS Application from scratch
With these keys we can write a Node.js application that can retrieve data from TTN.
If you havent already, please go install Node.js.
-
Open a terminal or command prompt.
-
Create a new folder:
$ mkdir ttn-api $ cd ttn-api -
In this folder run:
$ npm install ttnNote: You can ignore the
ENOENT: no such file or directoryerrors. -
Create a new file
server.jsin this folder, and add the following content (replace YOUR_APP_ID and YOUR_ACCESS_KEY with the respective values from the TTN console):let TTN_APP_ID = 'YOUR_APP_ID'; let TTN_ACCESS_KEY = 'YOUR_ACCESS_KEY'; const ttn = require('ttn'); TTN_APP_ID = process.env['TTN_APP_ID'] || TTN_APP_ID; TTN_ACCESS_KEY = process.env['TTN_ACCESS_KEY'] || TTN_ACCESS_KEY; ttn.data(TTN_APP_ID, TTN_ACCESS_KEY).then(client => { client.on('uplink', (devId, payload) => { console.log('retrieved uplink message', devId, payload); }); console.log('Connected to The Things Network data channel'); });
-
Now run:
$ node server.js
The application authenticates with the The Things Network and receives any message from your device.
5. Run Map with Sensors
Now that you have an understanding of how the underlying TTN API works, lets run some nice looking pre-written code for you.
cd webapp
npm install
npm server.js
Open up a webbrowser to localhost:7270 and enter your App ID and then App Access Key into the browser. This will then map your device onto the map.

6. Extra Credit
For the extra awesome people in the room try the following excercises
- Make a small dashboard out of the node.js app, show a nice graph!
- Add readings from the humidity sensor, and send them to the dashboard too.
Further Reading...
Add coverage
The Things Network is a collaborative network. You can extend the network yourself by placing a gateway, or you can use existing coverage from community members. See The Things Network Map to see if there is coverage in your area or region.
Setting up a gateway is easy and becomes more and more affordable. Here are two recommended options:
- The highly configurable Multi-Tech Conduit; you need an
MTAC-LORA-915orMTAC-LORA-868depending on your country, as well as aMTCDTConduit; - The Things Network's own product, The Things Gateway 915 MHz or The Things Gateway 868 MHz
Follow our evangelists on linkedin / twitter to stay up to date on the latest developments
Jan Jongboom:
- @JanJongboom on Twitter
Austin Blackstone
- @engineer_austin on Twitter