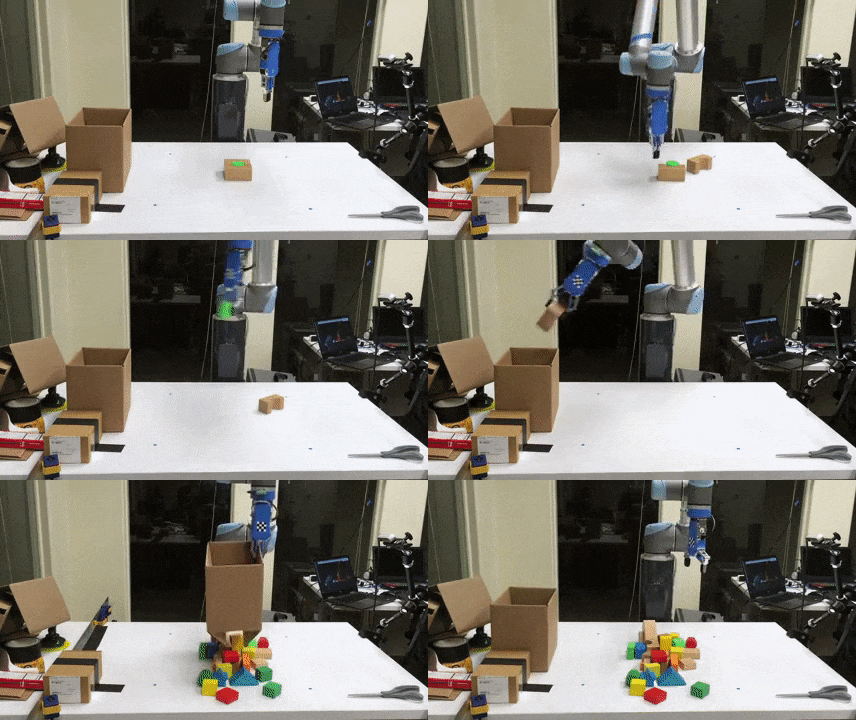
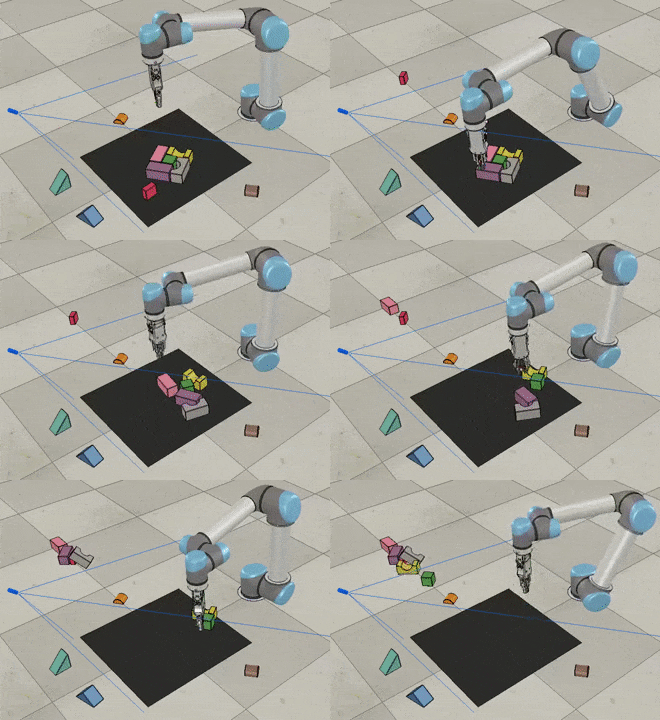
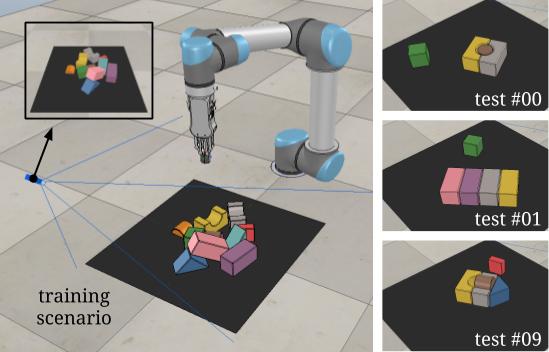
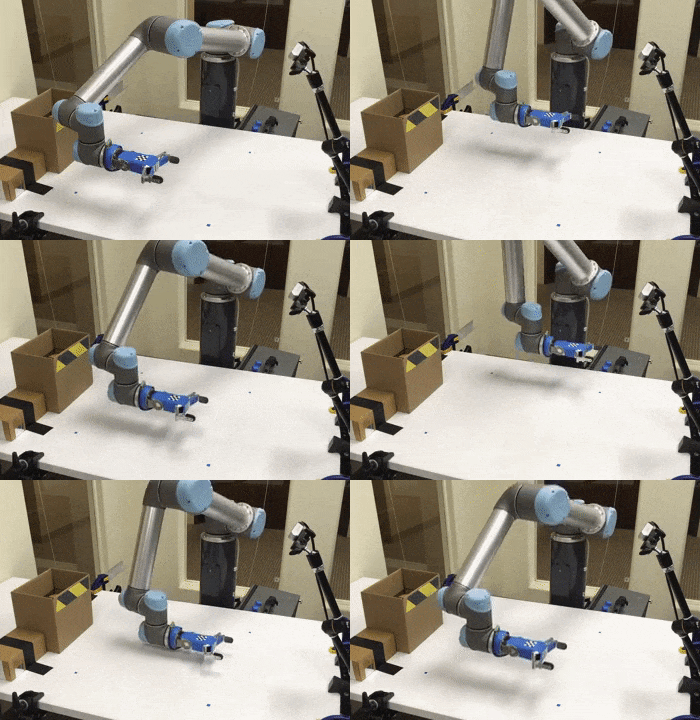
Visual Pushing and Grasping (VPG) is a method for training robotic agents to learn how to plan complementary pushing and grasping actions for manipulation (e.g. for unstructured pick-and-place applications). VPG operates directly on visual observations (RGB-D images), learns from trial and error, trains quickly, and generalizes to new objects and scenarios.
This repository provides PyTorch code for training and testing VPG policies with deep reinforcement learning in both simulation and real-world settings on a UR5 robot arm. This is the reference implementation for the paper:
Andy Zeng, Shuran Song, Stefan Welker, Johnny Lee, Alberto Rodriguez, Thomas Funkhouser
IEEE/RSJ International Conference on Intelligent Robots and Systems (IROS) 2018
Skilled robotic manipulation benefits from complex synergies between non-prehensile (e.g. pushing) and prehensile (e.g. grasping) actions: pushing can help rearrange cluttered objects to make space for arms and fingers; likewise, grasping can help displace objects to make pushing movements more precise and collision-free. In this work, we demonstrate that it is possible to discover and learn these synergies from scratch through model-free deep reinforcement learning. Our method involves training two fully convolutional networks that map from visual observations to actions: one infers the utility of pushes for a dense pixel-wise sampling of end effector orientations and locations, while the other does the same for grasping. Both networks are trained jointly in a Q-learning framework and are entirely self-supervised by trial and error, where rewards are provided from successful grasps. In this way, our policy learns pushing motions that enable future grasps, while learning grasps that can leverage past pushes. During picking experiments in both simulation and real-world scenarios, we find that our system quickly learns complex behaviors amid challenging cases of clutter, and achieves better grasping success rates and picking efficiencies than baseline alternatives after only a few hours of training. We further demonstrate that our method is capable of generalizing to novel objects.
If you find this code useful in your work, please consider citing:
@inproceedings{zeng2018learning,
  title={Learning Synergies between Pushing and Grasping with Self-supervised Deep Reinforcement Learning},
  author={Zeng, Andy and Song, Shuran and Welker, Stefan and Lee, Johnny and Rodriguez, Alberto and Funkhouser, Thomas},
  booktitle={IEEE/RSJ International Conference on Intelligent Robots and Systems (IROS)},
  year={2018}
}
Demo videos of a real robot in action can be found here.
If you have any questions or find any bugs, please let me know: Andy Zeng andyz[at]princeton[dot]edu
This implementation requires the following dependencies (tested on Ubuntu 16.04.4 LTS):
-
Python 2.7 or Python 3
-
NumPy, SciPy, OpenCV-Python, Matplotlib. You can quickly install/update these dependencies by running the following (replace
pipwithpip3for Python 3):pip install numpy scipy opencv-python matplotlib
-
PyTorch version 0.3. Since 0.3 is no longer the latest version, see installation instructions here or run the following:~~``` pip install torch==0.3.1 torchvision==0.2.0 -
PyTorch version 1.0+ (thanks Andrew for the support!):
pip install torch torchvision
-
V-REP (now known as CoppeliaSim) simulation environment
Accelerating training/inference with an NVIDIA GPU requires installing CUDA and cuDNN. You may need to register with NVIDIA for the CUDA Developer Program (it's free) before downloading. This code has been tested with CUDA 8.0 and cuDNN 6.0 on a single NVIDIA Titan X (12GB). Running out-of-the-box with our pre-trained models using GPU acceleration requires 8GB of GPU memory. Running with GPU acceleration is highly recommended, otherwise each training iteration will take several minutes to run (as opposed to several seconds). This code automatically detects the GPU(s) on your system and tries to use it. If you have a GPU, but would instead like to run in CPU mode, add the tag --cpu when running main.py below.
This demo runs our pre-trained model with a UR5 robot arm in simulation on challenging picking scenarios with adversarial clutter, where grasping an object is generally not feasible without first pushing to break up tight clusters of objects.
-
Checkout this repository and download our pre-trained models.
git clone https://github.com/andyzeng/visual-pushing-grasping.git visual-pushing-grasping
cd visual-pushing-grasping/downloads
./download-weights.sh
cd ..
-
Run V-REP (navigate to your V-REP/CoppeliaSim directory and run
./vrep.shor./coppeliaSim.sh). From the main menu, selectFile>Open scene..., and open the filevisual-pushing-grasping/simulation/simulation.tttfrom this repository. -
In another terminal window, run the following (simulation will start in the V-REP window). Please note: our pre-trained models were trained with PyTorch version 0.3, so this will only run with PyTorch 0.3. Training from scratch (next section) should still work with PyTorch 1.0+.
python main.py --is_sim --obj_mesh_dir 'objects/blocks' --num_obj 10 \
    --push_rewards --experience_replay --explore_rate_decay \
    --is_testing --test_preset_cases --test_preset_file 'simulation/test-cases/test-10-obj-07.txt' \
    --load_snapshot --snapshot_file 'downloads/vpg-original-sim-pretrained-10-obj.pth' \
    --save_visualizations
Note: you may get a popup window titled "Dynamics content" in your V-REP window. Select the checkbox and press OK. You will have to do this a total of 3 times before it stops annoying you.
To train a regular VPG policy from scratch in simulation, first start the simulation environment by running V-REP (navigate to your V-REP directory and run ./vrep.sh). From the main menu, select File > Open scene..., and open the file visual-pushing-grasping/simulation/simulation.ttt. Then navigate to this repository in another terminal window and run the following:
python main.py --is_sim --push_rewards --experience_replay --explore_rate_decay --save_visualizationsData collected from each training session (including RGB-D images, camera parameters, heightmaps, actions, rewards, model snapshots, visualizations, etc.) is saved into a directory in the logs folder. A training session can be resumed by adding the flags --load_snapshot and --continue_logging, which then loads the latest model snapshot specified by --snapshot_file and transition history from the session directory specified by --logging_directory:
python main.py --is_sim --push_rewards --experience_replay --explore_rate_decay --save_visualizations \
    --load_snapshot --snapshot_file 'logs/YOUR-SESSION-DIRECTORY-NAME-HERE/models/snapshot-backup.reinforcement.pth' \
    --continue_logging --logging_directory 'logs/YOUR-SESSION-DIRECTORY-NAME-HERE' \
Various training options can be modified or toggled on/off with different flags (run python main.py -h to see all options):
usage: main.py [-h] [--is_sim] [--obj_mesh_dir OBJ_MESH_DIR]
               [--num_obj NUM_OBJ] [--tcp_host_ip TCP_HOST_IP]
               [--tcp_port TCP_PORT] [--rtc_host_ip RTC_HOST_IP]
               [--rtc_port RTC_PORT]
               [--heightmap_resolution HEIGHTMAP_RESOLUTION]
               [--random_seed RANDOM_SEED] [--method METHOD] [--push_rewards]
               [--future_reward_discount FUTURE_REWARD_DISCOUNT]
               [--experience_replay] [--heuristic_bootstrap]
               [--explore_rate_decay] [--grasp_only] [--is_testing]
               [--max_test_trials MAX_TEST_TRIALS] [--test_preset_cases]
               [--test_preset_file TEST_PRESET_FILE] [--load_snapshot]
               [--snapshot_file SNAPSHOT_FILE] [--continue_logging]
               [--logging_directory LOGGING_DIRECTORY] [--save_visualizations]
Results from our baseline comparisons and ablation studies in our paper can be reproduced using these flags. For example:
-
Train reactive policies with pushing and grasping (P+G Reactive); specify
--methodto be'reactive', remove--push_rewards, remove--explore_rate_decay:python main.py --is_sim --method 'reactive' --experience_replay --save_visualizations -
Train reactive policies with grasping-only (Grasping-only); similar arguments as P+G Reactive above, but add
--grasp_only:python main.py --is_sim --method 'reactive' --experience_replay --grasp_only --save_visualizations -
Train VPG policies without any rewards for pushing (VPG-noreward); similar arguments as regular VPG, but remove
--push_rewards:python main.py --is_sim --experience_replay --explore_rate_decay --save_visualizations
-
Train shortsighted VPG policies with lower discount factors on future rewards (VPG-myopic); similar arguments as regular VPG, but set
--future_reward_discountto0.2:python main.py --is_sim --push_rewards --future_reward_discount 0.2 --experience_replay --explore_rate_decay --save_visualizations
To plot the performance of a session over training time, run the following:
python plot.py 'logs/YOUR-SESSION-DIRECTORY-NAME-HERE'Solid lines indicate % grasp success rates (primary metric of performance) and dotted lines indicate % push-then-grasp success rates (secondary metric to measure quality of pushes) over training steps. By default, each point in the plot measures the average performance over the last 200 training steps. The range of the x-axis is from 0 to 2500 training steps. You can easily change these parameters at the top of plot.py.
To compare performance between different sessions, you can draw multiple plots at a time:
python plot.py 'logs/YOUR-SESSION-DIRECTORY-NAME-HERE' 'logs/ANOTHER-SESSION-DIRECTORY-NAME-HERE'We provide a collection 11 test cases in simulation with adversarial clutter. Each test case consists of a configuration of 3 - 6 objects placed in the workspace in front of the robot. These configurations are manually engineered to reflect challenging picking scenarios, and remain exclusive from the training procedure. Across many of these test cases, objects are laid closely side by side, in positions and orientations that even an optimal grasping policy would have trouble successfully picking up any of the objects without de-cluttering first. As a sanity check, a single isolated object is additionally placed in the workspace separate from the configuration. This is just to ensure that all policies have been sufficiently trained prior to the benchmark (i.e. a policy is not ready if fails to grasp the isolated object).
The demo above runs our pre-trained model multiple times (x30) on a single test case. To test your own pre-trained model, simply change the location of --snapshot_file:
python main.py --is_sim --obj_mesh_dir 'objects/blocks' --num_obj 10 \
    --push_rewards --experience_replay --explore_rate_decay \
    --is_testing --test_preset_cases --test_preset_file 'simulation/test-cases/test-10-obj-07.txt' \
    --load_snapshot --snapshot_file 'YOUR-SNAPSHOT-FILE-HERE' \
    --save_visualizations
Data from each test case will be saved into a session directory in the logs folder. To report the average testing performance over a session, run the following:
python evaluate.py --session_directory 'logs/YOUR-SESSION-DIRECTORY-NAME-HERE' --method SPECIFY-METHOD --num_obj_complete Nwhere SPECIFY-METHOD can be reactive or reinforcement, depending on the architecture of your model.
--num_obj_complete N defines the number of objects that need to be picked in order to consider the task completed. For example, when evaluating our pre-trained model in the demo test case, N should be set to 6:
python evaluate.py --session_directory 'logs/YOUR-SESSION-DIRECTORY-NAME-HERE' --method 'reinforcement' --num_obj_complete 6Average performance is measured with three metrics (for all metrics, higher is better):
- Average % completion rate over all test runs: measures the ability of the policy to finish the task by picking up at least
Nobjects without failing consecutively for more than 10 attempts. - Average % grasp success rate per completion.
- Average % action efficiency: describes how succinctly the policy is capable of finishing the task. See our paper for more details on how this is computed.
To design your own challenging test case:
-
Open the simulation environment in V-REP (navigate to your V-REP directory and run
./vrep.sh). From the main menu, selectFile>Open scene..., and open the filevisual-pushing-grasping/simulation/simulation.ttt. -
In another terminal window, navigate to this repository and run the following:
python create.py
-
In the V-REP window, use the V-REP toolbar (object shift/rotate) to move around objects to desired positions and orientations.
-
In the terminal window type in the name of the text file for which to save the test case, then press enter.
-
Try it out: run a trained model on the test case by running
main.pyjust as in the demo, but with the flag--test_preset_filepointing to the location of your test case text file.
The same code in this repository can be used to train on a real UR5 robot arm (tested with UR Software version 1.8). To communicate with later versions of UR software, several minor changes may be necessary in robot.py (e.g. functions like parse_tcp_state_data). Tested with Python 2.7 (not fully tested with Python 3).
The latest version of our system uses RGB-D data captured from an Intel® RealSense™ D415 Camera. We provide a lightweight C++ executable that streams data in real-time using librealsense SDK 2.0 via TCP. This enables you to connect the camera to an external computer and fetch RGB-D data remotely over the network while training. This can come in handy for many real robot setups. Of course, doing so is not required -- the entire system can also be run on the same computer.
-
Download and install librealsense SDK 2.0
-
Navigate to
visual-pushing-grasping/realsenseand compilerealsense.cpp:cd visual-pushing-grasping/realsense cmake . make
-
Connect your RealSense camera with a USB 3.0 compliant cable (important: RealSense D400 series uses a USB-C cable, but still requires them to be 3.0 compliant to be able to stream RGB-D data).
-
To start the TCP server and RGB-D streaming, run the following:
./realsense
Keep the executable running while calibrating or training with the real robot (instructions below). To test a python TCP client that fetches RGB-D data from the active TCP server, run the following:
cd visual-pushing-grasping/real
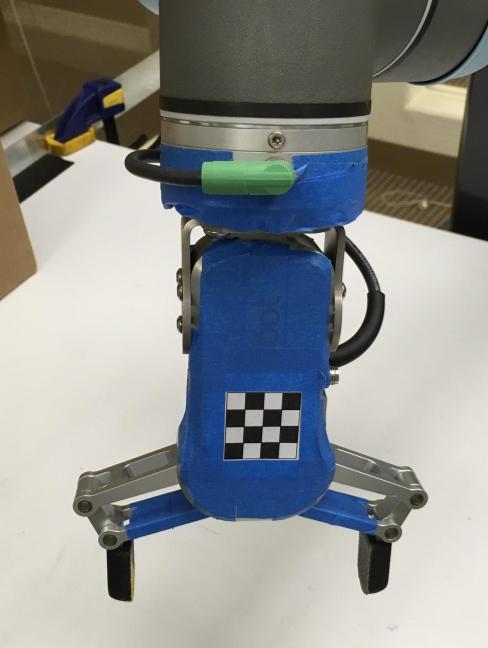
python capture.pyWe provide a simple calibration script to estimate camera extrinsics with respect to robot base coordinates. To do so, the script moves the robot gripper over a set of predefined 3D locations as the camera detects the center of a moving 4x4 checkerboard pattern taped onto the gripper. The checkerboard can be of any size (the larger, the better).
-
Predefined 3D locations are sampled from a 3D grid of points in the robot's workspace. To modify these locations, change the variables
workspace_limitsandcalib_grid_stepat the top ofcalibrate.py. -
Measure the offset between the midpoint of the checkerboard pattern to the tool center point in robot coordinates (variable
checkerboard_offset_from_tool). This offset can change depending on the orientation of the tool (variabletool_orientation) as it moves across the predefined locations. Change both of these variables respectively at the top ofcalibrate.py. -
The code directly communicates with the robot via TCP. At the top of
calibrate.py, change variabletcp_host_ipto point to the network IP address of your UR5 robot controller. -
With caution, run the following to move the robot and calibrate:
python calibrate.py
The script also optimizes for a z-scale factor and saves it into real/camera_depth_scale.txt. This scale factor should be multiplied with each depth pixel captured from the camera. This step is more relevant for the RealSense SR300 cameras, which commonly suffer from a severe scaling problem where the 3D data is often 15-20% smaller than real world coordinates. The D400 series are less likely to have such a severe scaling problem.
To train on the real robot, simply run:
python main.py --tcp_host_ip 'XXX.XXX.X.XXX' --tcp_port 30002 --push_rewards --experience_replay --explore_rate_decay --save_visualizationswhere XXX.XXX.X.XXX is the network IP address of your UR5 robot controller.
- Use
touch.pyto test calibrated camera extrinsics -- provides a UI where the user can click a point on the RGB-D image, and the robot moves its end-effector to the 3D location of that point - Use
debug.pyto test robot communication and primitive actions

