So, my company just got a free ESP-EYE development board from Espressif (the maker of ESP32, ESP8266 chip) itself. It's developed officially by Espresif as an attempt to quickly get started to create image recognition or audio processing-related application.
Espressif develops a sample application that makes the most use of the board, namely: esp-who. To me, it's an awesome project that shows how to do speech recognition and face recognition, all done at the edge or on the board itself, not in the cloud.
While esp-who is great for making use of the board and embracing edge intelligence, I want to do something else. As a Microsoft Most Valuable Professional (MVP) of Microsoft Azure (my profile), I want to make use of Azure services, specifically Azure Custom Vision, to be used as cloud-based image recognition engine. It is exactly the reason I created this repo.
I did a live coding to show the step by step how to develop the firmware from scratch and show how to setup Azure Custom Vision. There're 4 videos and indeed long ones with the total of 5 hours. If you're keen to know the details, go to this Youtube playlist
To see what we can do with the project, I made a video that shows you how we can do "live" face recognition:
I made a C++ class named CustomVisionClient that wraps the functionality to access Azure Custom Vision, that you can easily take and use it for another project. However, note that the code is specifically for ESP32's ESP-IDF framework, as I use esp_http_client component that's part of ESP-IDF framework.
As you can guess that this project is made with Espressif IoT Development Framework (ESP-IDF). So, I assume you're already familiar with it and have the development environment set up. Please check ESP-IDF docs for getting started instructions. If you use Arduino for ESP32 framework, I think it's still very easy to convert.
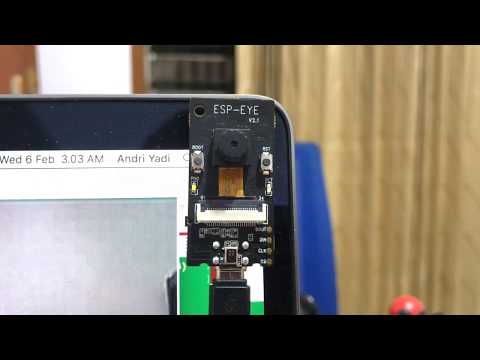
This project has been tested using following boards:
- ESP-EYE
- ESP-WROVER-KIT
- TTGO T-Camera
- You should be able to use it for another board with camera. Just adapt the code yourself, PRs are always welcome.
This image shows the architecture of the project:

- Clone this repo, recursively:
git clone --recursive https://github.com/andriyadi/esp32-custom-vision.git - If you clone project without
--recursiveflag, please go to theesp32-custom-visiondirectory and run command this command to update submodules which it depends on:git submodule update --init --recursive - Create
secrets.hfile insidemainfolder. Explained below. - On Terminal/Console, in root folder, do
make menuconfig. Go toApp Configuration-->Select Camera Dev Board (ESP-EYE). Here you can select the development board, either: ESP-EYE, ESP-WROVER-KIT, or TTGO T-Camera. Exit and save the menuconfig. - Still in root folder, try to
make flash monitor. Fingers crossed :)
Under main folder, create a file named secrets.h with the content:
#ifndef MAIN_SECRETS_H_
#define MAIN_SECRETS_H_


#define SSID_NAME "[YOUR_OWN_WIFI_SSID_NAME]"
#define SSID_PASS "[YOUR_OWN_WIFI_SSID_PASSWORD]"

// Azure Custom Vision-related settings
#define AZURE_CV_PREDICTION_KEY "[YOUR_OWN_AZURE_CUSTOM_VISION_PREDICTION_KEY]"
#define AZURE_CV_HOST "southcentralus.api.cognitive.microsoft.com"
#define AZURE_CV_PROJECT_ID "[YOUR_OWN_AZURE_CUSTOM_VISION_PROJECT_ID]"
#define AZURE_CV_ITERATION_ID "YOUR_OWN_AZURE_CUSTOM_VISION_ITERATION_ID]"

#endif /* MAIN_SECRETS_H_ */
Replace all values with format of [...] inside quote.
Obviously, you need to have access to Azure Custom Vision to make this project works. You can try it for free at customvision.ai. If you already have Microsoft Azure account, you're good to go.
In the live coding videos above-mentioned, I explained and showed how to get started with Azure Custom Vision. Watch this video
AZURE_CV_PREDICTION_KEY can be determined by clicking "Prediction URL" in "Performance" tab that will display this dialog:
 You can see there's a
 Prediction-Key value. Use it.
Still in above dialog, you'll find URL like: https://southcentralus.api.cognitive.microsoft.com/customvision/v2.0/Prediction/28bdc115-xxxx-48e5-xxxx-0f627d67137d/image?iterationId=13ebb90a-xxxx-453b-xxxx-3586788451df. From the URL, you can determine:
AZURE_CV_HOST=southcentralus.api.cognitive.microsoft.comAZURE_CV_PROJECT_ID=28bdc115-xxxx-48e5-xxxx-0f627d67137dAZURE_CV_ITERATION_ID=13ebb90a-xxxx-453b-xxxx-3586788451df
Note that AZURE_CV_ITERATION_ID is quite important as you can switch between training iterations, just by setting that iteration id.
Upon successful build and flashing the firmware to the board, on Terminal/Console you'll see the firmware runs and showing the logs, then eventually show these lines:
I (2870) DXWIFI: SYSTEM_EVENT_STA_CONNECTED. Station: 44:79:57:61:72:65 join, AID: 45
I (6130) event: sta ip: 192.168.0.20, mask: 255.255.255.0, gw: 192.168.0.1
I (6130) DXWIFI: SYSREM_EVENT_STA_GOT_IP. IP Address: 192.168.0.20

I (6130) DXWIFI: WiFi connected
I (6130) APP: Starting web server on port: '80'
Take a look that there's: IP address: 192.168.0.20. It's the IP address of the board when it's connected to specified WiFi Access Point. It will be different on your machine.
Now, open your favourite web browser and type http://[BOARD_IP_ADDRESS] with [BOARD_IP_ADDRESS] is the IP addrees you got above. You should see the hello text.
Now, type URL: http://[BOARD_IP_ADDRESS]/capture, you should see the captured image by the board's camera on the browser.
Then, type URL: http://[BOARD_IP_ADDRESS]/recog, the board will capture an image, send the image to Azure Custom Vision for inferencing, then show the detected face on the browser as this image:

For showing live video streaming on the browser and do live recognition, you can use http://[BOARD_IP_ADDRESS]/stream URL. The demo video is as above-mentioned, you can watch it here.
For any questions, please raise an issue. That's it. Enjoy!