- Explain what branches are and why they're useful.
- List and create branches with the
git branchcommand. - Navigate between branches with the
git switchandgit checkoutcommands. - Compare branches with
git diff. - Stash changes with the
git stashcommand.
In earlier lessons, we talked about the fact that Git automatically creates a
default main (or master) branch for us. It also allows us to create
additional branches, as many as we like. Using branches helps us organize our
work, protects our code from breaking, and makes it easier to collaborate with
others.
In this lesson, we'll learn a bit more about what branches are and how to work
with them. Then, in the next lesson, we'll learn how to incorporate the work
we've done in a branch into the main branch, a process known as merging.
Imagine you've been working on a project and have gotten your code doing what you want, but you now want to go back and refactor. Your code is working now, but you know that once you start refactoring — reorganizing, renaming variables, creating functions for repetitive code, etc. — things will likely break (temporarily, of course). You could just jump in and hope for the best, but there's a better approach: create a new branch for your refactoring.
A "golden rule" of working with Git is that you should keep the main branch of
your project functioning at all times. The way to do this is by creating a new
branch for any work you're doing that might break something — or, even, for any
work at all! This will become especially important when you're working as part
of a team, and it's a very good habit to get into. Making sure you always have a
working version of your code will also free you up to make major changes and
improvements, and to try new things!
So what exactly is a branch? Basically, it's just a particular history of your
code (a series of commits) that can be referenced using the branch name. Just as
the main branch consists of a series of saved (committed) versions of your
code, so too do any other branches you create.
Once you've created a branch off of the main branch (often called a feature
branch), any work you do in that branch will have no effect on the main
branch — it's basically a "parallel universe":

In the diagram above, the new-feature branch was created after the second
commit on the main branch. main knows nothing about the three commits that
have been made on new-feature, and new-feature knows nothing about the last
four commits made on main (the ones made after the new-feature branch was
created). If we were to run git log on the new-feature branch, it would
include (in reverse chronological order) the three commits on new-feature and
the first two commits on main.
Once we've finished the work on our new feature and we're ready to incorporate
it into the code base, we need to merge those changes into the main branch.
(We'll learn how to do that in the next lesson.) Or we may never incorporate
changes back into main. If we decide to abandon the new feature, we won't have
to undo all that work — we can just abandon the new-feature branch. As long as
we haven't merged those changes in, our working code in the main branch will
be unaffected.
Let's create a list of study resources to help us learn Python. Be sure to code along, and to follow the instructions carefully.
Get set up by completing the following steps:
- Create a new directory to contain the project.
- Navigate into the directory and initialize it as a Git repo.
- Create a blank document,
python-resources.md. - Make your initial commit.
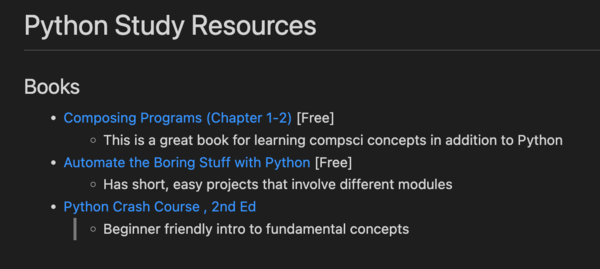
Then add the following to the document:
# Python Study Resources

## Books

- Composing Programs (Chapter 1-2) [Free]
  - This is a great book for learning compsci concepts in addition to Python
- Automate the Boring Stuff with Python [Free]
  - Has short, easy projects that involve different modules
- Python Crash Course , 2nd Ed
  - Beginner friendly intro to fundamental concepts
Recall that, when using markdown, we use # and ## to indicate our top- and
second-level headers, respectively. In addition, note that we can create a
nested list by simply indenting the nested elements.
Once you've entered the books, add and commit your changes. If you run git log, it should look something like this:
$ git log
commit 17e1f35776dc41bb27df3351496a810a680b65df (HEAD -> main)
Author: Your Name <youremail@email.com>
Date:   Thu May 5 12:49:53 2022 -0400

    add books to list

commit 360e55abd98041c4542cf826b0b35a8197b2c7f6
Author: Your Name <youremail@email.com>
Date:   Thu May 5 12:48:26 2022 -0400

    initial commit
Note, in the first line of the output, that HEAD is currently pointing to the
main branch and, more specifically, to the last commit on the main branch.
Next, we want to add links for each of the books on our list, so let's create a feature branch where we can do that.
Currently, our repo should contain just the main branch. We can verify that
using the git branch command:
$ git branch
* main
This command lists all the branches we currently have in our local repo. The asterisk indicates the branch that we are currently on.
To create a new branch, we use git branch again, followed by the name of the
branch to create. It's a good idea to make your branch name descriptive (without
getting too carried away). The name cannot contain any spaces:
$ git branch add-linksNothing is displayed after running the command above, so let's run git branch
again to see our new branch:
$ git branch
  add-links
* main
We can see that our new branch has been created, but we're still on the main
branch. To switch to our feature branch, we use the git switch command:
$ git switch add-links
Switched to branch 'add-links'
You may recall from an earlier lesson that git switch is a relatively new Git
command. Before git switch was added, git checkout was used to switch
branches. The syntax is the same.
Let's switch back to main, using checkout this time:
$ git checkout main
Switched to branch 'main'
The choice of whether to use switch or checkout is a matter of preference.
Because, in most cases, when you create a new branch you also want to switch to
it, both the git switch and git checkout commands provide shortcuts that
combine the two steps. With git switch it looks like this:
git switch -c add-linksAdding the c flag (which stands for "create") to the switch command tells
Git it first needs to create the branch then switch to it.
Somewhat confusingly, the shortcut for the checkout command looks similar, but
uses a different flag, b:
git checkout -b add-linksPractice: using whichever of the shortcuts you prefer, create and switch to a new
testbranch. Rungit branchto verify that the new branch has been created and that there's an asterisk in front of it, indicating you're on that branch. When you're done, switch back tomain.
Now that we've created our new branch, we're ready to add the links. At this
point, you should be on the main branch. One way to verify that is by running
git branch, but you can also verify it in VS Code. If you look in the lower
left corner of the VS Code window, you should see something like this:

Switch back to add-links using whichever command you prefer (git switch or
git checkout), then go back to VS Code and verify that the new branch is now
shown:

Now that we're on the add-links branch, let's go ahead and add our links.
The markdown syntax for creating a hyperlink consists of the text to be displayed enclosed in square brackets, followed by the URL in parentheses, with no space in between:
[text to display](url)So we can update the list of books as follows:
- [Composing Programs (Chapter 1-2)](https://composingprograms.com/) [Free]
  - This is a great book for learning compsci concepts in addition to Python
- [Automate the Boring Stuff with Python](https://automatetheboringstuff.com/) [Free]
  - Has short, easy projects that involve different modules
- [Python Crash Course , 2nd Ed](https://nostarch.com/pythoncrashcourse2e)
  - Beginner friendly intro to fundamental concepts
Note that we use the full URL, including the http prefix.
If you preview the document (by right-clicking on the name of the file in the file list and selecting "Open Preview"), you should see the links being displayed:
If you click one of the links in the preview, it should open the page in your browser.
Go ahead and add and commit the changes, then run git log. You should see
something like this:
$ git log
commit b612a58ebd33ed5c112a1cbd791da3879f32ca5d (HEAD -> add-links)
Author: Your Name <youremail@email.com>
Date:   Thu May 5 14:13:20 2022 -0400

    add links for book titles

commit 17e1f35776dc41bb27df3351496a810a680b65df (main)
Author: Your Name <youremail@email.com>
Date:   Thu May 5 12:49:53 2022 -0400

    add books to list

commit 360e55abd98041c4542cf826b0b35a8197b2c7f6
Author: Your Name <youremail@email.com>
Date:   Thu May 5 12:48:26 2022 -0400

    initial commit
On the first line of the output, we can see that HEAD is currently pointing to
the add-links branch.
As you can see, the history for our new branch includes the commit we just made
as well as the two commits from the main branch. These three commits comprise
the entire history of our add-links branch.
Question: if we were to switch back to the main branch and run git log, what
would we see? If you aren't sure, go ahead and try it!
Recall in an earlier lesson, we learned that we can use the git diff command
to compare either the differences between our working directory and an earlier
commit, or between any two commits. We can also use it to compare branches!
Now that we've committed our changes to the add-links branch, we can use the
following command to compare our two branches:
$ git diff main add-links
diff --git a/python-resources.md b/python-resources.md
index 26ca4f7..fdfd20f 100644
--- a/python-resources.md
+++ b/python-resources.md
@@ -2,10 +2,10 @@

 ## Books

-- Composing Programs (Chapter 1-2) [Free]
+- [Composing Programs (Chapter 1-2)](https://composingprograms.com/) [Free]
   - This is a great book for learning compsci concepts in addition to Python
-- Automate the Boring Stuff with Python [Free]
+- [Automate the Boring Stuff with Python](https://automatetheboringstuff.com/) [Free]
   - Has short, easy projects that involve different modules
-- Python Crash Course , 2nd Ed
+- [Python Crash Course , 2nd Ed](https://nostarch.com/pythoncrashcourse2e)
   - Beginner friendly intro to fundamental concepts
The output above shows that each line containing a book title has been removed
from the earlier version of the file (in main) and replaced (in add-links)
with a line that includes the links.
Note that you can list the names of the branches to be compared in whichever
order makes sense to you. We have listed main first in keeping with the
convention of having the a file represent the earlier point in time.
Now that we've added our hyperlinks and everything is looking the way we want it
to, the next step is to merge the changes we made in add-links into the main
branch. We'll learn how to do that in the next lesson, but first, there's one
last situation we need to cover.
Let's switch back to our main branch and add another book to the end of our
list:
- Serious Python
  - Does a great job of explaining some of the more difficult topics not covered
    in depth in the beginner books
Save the file, but don't stage or commit it, then try to switch back into the
add-links branch:
$ git switch add-links
error: Your local changes to the following files would be overwritten by checkout:
	python-resources.md
Please commit your changes or stash them before you switch branches.
Aborting
Because there are changes that haven't been committed in main and would
therefore be lost, Git is giving you a chance to save those changes before
switching to the other branch. Git is also giving you a clue as to your options
for how to do it: Please commit your changes or stash them before you switch branches.
As the message says, you can either go ahead and add and commit your changes,
or, if you aren't ready to commit yet for some reason, you can use the git stash command:
$ git stash
Saved working directory and index state WIP on main: a383ee3 add books to list
Go ahead and run git stash, then look at the file in VS Code. You'll see that
the last book is no longer shown. Git has saved it into the "stash" and will
keep it there until you retrieve it.
Now, if you try to switch back to add-links, it should work:
$ git switch add-links
Switched to branch 'add-links'
And if you check the file in VS Code, you'll see that the links are back.
Once we've finished whatever we needed to do in add-links, we can then switch
back to main and retrieve the stashed changes using git stash pop:
$ git switch main
Switched to branch 'main'
$ git stash pop
On branch main
Changes not staged for commit:
  (use "git add <file>..." to update what will be committed)
  (use "git restore <file>..." to discard changes in working directory)
	modified:   python-resources.md

no changes added to commit (use "git add" and/or "git commit -a")
Dropped refs/stash@{0} (9e37213057a4dafae11594abc998104b8770e65a)
If you look at the file in VS Code, you'll see that the unsaved changes are
back. And if you look at the output from the git stash pop command, or run
git status, you'll see that they're unstaged, just as they were before. The
last line of the output tells us that the changes have been removed from the
stash.
Note: this issue of switching branches with uncommitted changes can be confusing, because sometimes you'll get the error and sometimes you won't. See the first answer in this stack overflow thread for a nice explanation. But for now if you aren't sure when you will and won't get the error, that's okay: just remember that when you do get it, you can use
git stashto temporarily save any unstaged changes without having to make a commit, andgit stash popto retrieve them.
We're going to continue working with our Python Study Resources project in the
next lesson, so to simplify things, go ahead return the main branch back to
what it was before we added that fourth book. In other words, you need to
discard the changes that have been made since the last commit. There are several
ways you can do it, but try to do it using Git.
Hint #1: Take a look at the information in the output of the git stash pop
command.
Hint #2: To refresh your memory, look back at the last lesson on undoing changes.
Hint #3: If you aren't sure you've done it correctly, run git status. You
should see the following:
$ git status
On branch main
nothing to commit, working tree cleanBefore moving on to the next lesson, check your understanding of this material by answering the following question in your own words:
- What are branches and how does using them help us?
In this lesson, we've learned how to create a new branch where we can make
changes without having to be concerned about breaking something. But of course
the ultimate goal is not to have our changes on a separate branch, but instead
to incorporate them into the working code on our main branch. This process is
known as merging, and we will learn how to do that next.