⚠ This project is not maintained anymore. Feel free to fork and make it your own ^^
A toolkit to help JavaScript teachers evaluate their students' skills more efficiently.
Alternative short description: a file-based way to produce, publish, collect and grade student assessments.
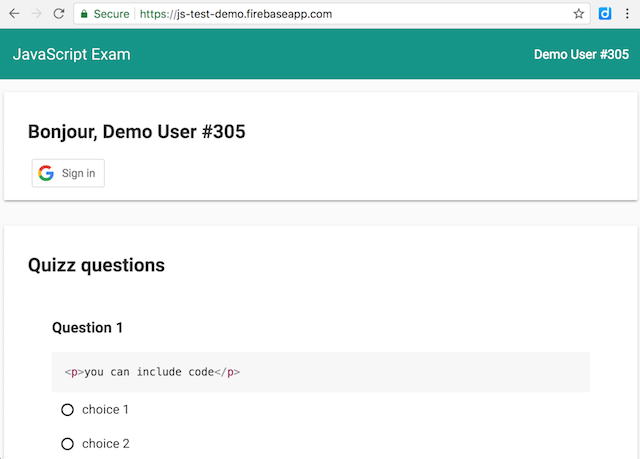
In the frame of my JavaScript course at EEMI, I developed an online exam application for students, using Google Polymer and Firebase. It's designed to display different variants of each exercise to prevent fraud, and automatic student evaluation/grading, for both quizzes and coding exercises.
It's made of:
- a simple Markdown-based language to define quizz and coding exercises;
- a web app that students will use to give their answers;
- scripts to deploy, evaluate, collect (e.g. from Google Forms) and grade students' answers automatically.
🇫🇷 Annonce de sortie en Français: Un exerciseur en ligne + script pour corriger et noter le code de vos étudiants

- 100% paperless examination/evaluation/training software, 100% online;
- designed for automated testing and evaluation of students' answers;
- exams/quizzes/exercises defined as Markdown files;
- variants based on student id;
- students identified using their Google Apps account;
- answers submitted to a Firebase account, can be exported to a JSON file;
- students scores can be evaluated in real time, from a web dashboard;
- beautiful UI thanks to Google Polymer and Material Design.
I've been using js-test:
- to measure the understanding of my students; (quizz at the end of a class)
- to grade my students; (exams)
- to help my students self-assess and train their skills individually.
Run the following steps in a bash-compatible terminal:
$ git clone https://github.com/adrienjoly/js-test.git && cd js-test
$ nvm use # to use the right node.js version
$ npm install # to install dependencies
$ npm run create # to generate sample exercises and configuration to `/exam-data`
$ vi /exam-data/ex.01.quizz.template.md # to edit quizz questions
$ vi /exam-data/ex.02.code.template.md # to edit coding exercise(s)Video walkthrough: How I create automated student exams using Markdown - YouTube
After editing the exercise files (see above), run the following commands:
$ npm run build # to compile exercise data into `/public/scripts/exam-data.js`
$ npm start # to run the web server, until you press ctrl-c
Then, open localhost:8080 to test the assessment.
Read how to write assessments (a.k.a. exam templates) and examples to learn how to write quizzes and coding exercises.
After editing and testing the exercise files locally (see above):
- Create a new project on Firebase
- Click on "Add Firebase to your web app"
- Copy the values of the given
apiKey,databaseURLandmessagingSenderIdproperties to theFIREBASE_CONFIGobject of your/exam-data/exam-config.jsfile (i.e. overwrite existing values) - Still in your
/exam-data/exam-config.jsfile:- set
backend.typetofirebase, - un-comment the
FIREBASE_CONFIGobject.
- set
- Run
npm run buildto re-compile your configuration into/public/scripts/exam-data.js - Run
npm run deploy-firebase(ornpm run deploy-firebase-instances) to push the project to production on Firebase Hosting - Test your Firebase project from the given URL, by simulating a student's submission
ℹ️️ After disabling PUBLIC_TEST_MODE in /exam-data/exam-config.js, don't forget to toggle the active property (to 1 or 0) of your Firebase database, to (de-)activate student access to the assessment.
/public/scripts/app-firebase.js.
At all times, you can:
- Go to the "Database" section of your Firebase project's dashboard to see the submitted answers
- Export the submitted data as a JSON file, for backup and/or offline evaluation and grading
After having run the steps above, you can either:
- Run
npm run eval(npm run eval-instances) to compute the scores of answers stored in your Firebase database; - Or
npm run eval-firebase-dumpsto do it offline, from a JSON export of your Firebase database.
In both cases, resulting grades will be stored in the /exam-data/scores.csv file.
As an alternative to using Firebase as a back-end, it's possible to ask students to submit their answers by email, or to Google Forms. This alternative has been useful with schools which don't provide Google-based authentification for their students.
- In the
/exam-data/exam-config.jsfile:- set
PUBLIC_TEST_MODEtotrue, - set
backend.typeto'email-submit', - set
backend.EMAIL_SUBMIT_CONFIGtoreadfile('public/data/submitted.md'), - un-comment the
FIREBASE_CONFIGobject.
- set
- In the
/public/data/intro.mdfile, write a message to let students know that refreshing (or changing) the page will cause them to loose their answers. - In the
/public/data/submitted.mdfile:- include a HTML link to a Google Forms where your students will paste their answers in JSON format, with the
target="_blank"attribute, to prevent them from loosing their answers during that process. - also include
<pre>{{hashedAnswers}}</pre>to display the JSON code in question.
- include a HTML link to a Google Forms where your students will paste their answers in JSON format, with the
- Run
npm run buildthen commit the pending changes to thegitrepository that holds yourjs-testcopy and your exercises. - Run
npm run deploy-firebase, as specified in the procedure above. (i.e. you will need to setup a Firebase app first)
- At the time of the exam, provide the resulting URL to students, so they can fill their answers.
- At the end of the exam, go to the "answers" tab of the Google Forms, click the icon to save them into a Google Spreadsheet, then open that spreadsheet.
- Export the spreadsheet as a csv file, then use https://www.csvjson.com/csv2json to convert it into a JSON file. Download that file in your
js-testdirectory, and rename it asstudent-submissions.csv.json. - Run
node src/extract-student-submissions-from-spreadsheet-json.js ./student-submissions.csv.json=> this creates astudentsdirectory that contains one JSON file per student submission.
- Run
npm run eval-student-submissionsto evaluate and grade these student submissions and store their results inexam-data/email-submission.If you see any error during this process, it may mean that your testing code needs some fixes. Student mistakes and runtime errors are reported in their own file, not in stdout.
- When you're done, send these result files back to students, so they can read the feedback and grade of their work.
Checkout this YouTube playlist for examples.
ℹ️️ These instructions are not complete yet.
- Change Google's client ID (from
/exam-data/exam-config.js) so that students can identify using your own google apps domain name (or localhost), buildanddeployagain to your assessment's hosting account. (e.g. Firebase or Heroku)
- Add variants to Quizzes.
- Allow per-variable variants. => more combinations.
- Add access rules. (per student group and timeslot)
- read more: ROADMAP.md, Kanban board and issues