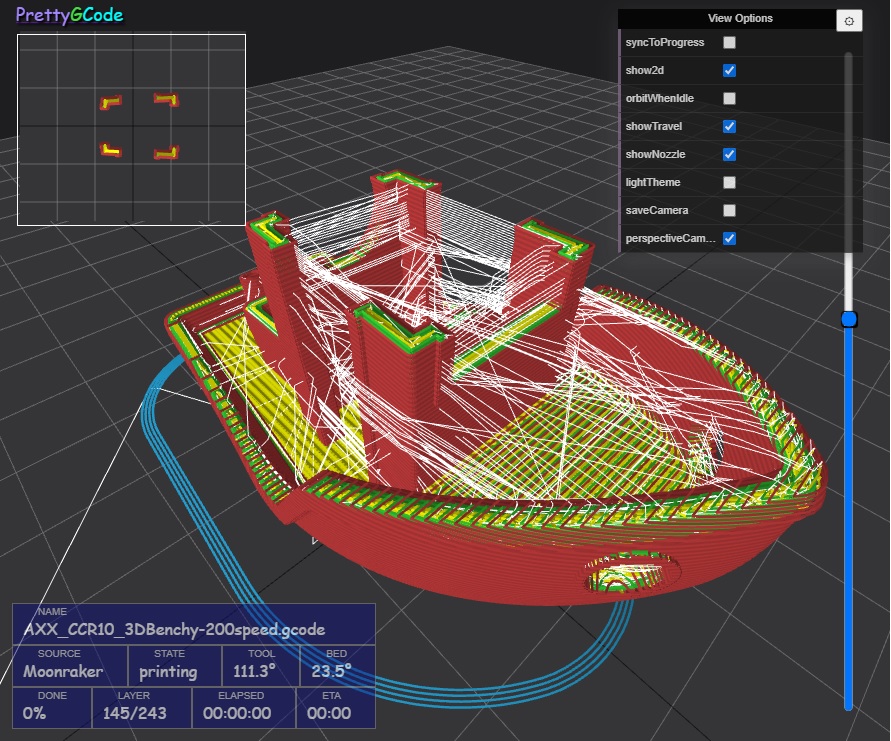
PrettyGCode WebGL based GCode preview and simulator
- 3D WebGL preview of GCode
- Tested with desktop Chrome, Firefox, Edge and Safari. Works on mobile browsers if the GCode isn't too large.
- Sync to Klipper/Moonraker/Fluidd print jobs in real time
- Compatible with OBS Studio browser for easy Streaming (requires command line flag)
- Drag drop GCode files to 3d window for quick preview
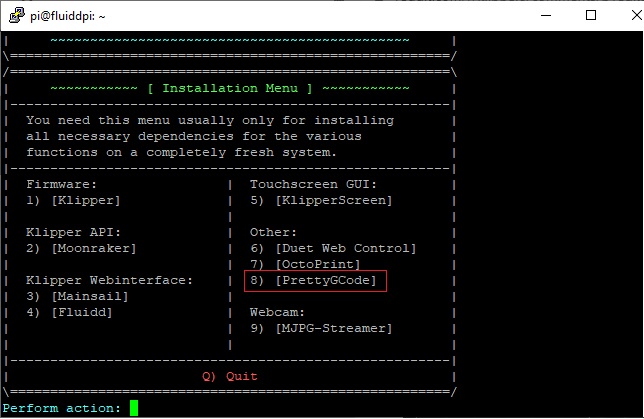
PrettyGCode can now be installed using the Kiauh installer. This is by far the easiest method to install.
https://github.com/th33xitus/kiauh
On the main Kiauh screen select Option 1) [Install] and then select PrettGCode:
Port can be set as part of installation. Default port is 7136
Depending on your setup you will probably have to edit Moonraker.conf to allow access. This can be done in Fluidd in the Configuration menu.
- Check to see if authorization is enabled or not. If it is you will need to use an API key.
- You will also have to allow PrettyGCode access in the cors_domains: section. Check that the machine AND port you are browsing from is included in the cors_domains and/or trusted_clients sections.
- You may also have to turn on octoprint_compat. This allows auto detection of connections.
Partial moonraker.conf
[authorization]#<--If this section is present then PrettyGCode needs to use an API Key to connect
cors_domains:
  *.local
  *.lan
  *://app.fluidd.xyz
  *:7136  #<--Allow PrettyGCode (port 7136) on all domains (recommended) OR...
  *.local:7136  #<--Allow PrettyGCode (port 7136) on just .*local domain. (more secure I guess)

trusted_clients:
    10.0.0.0/8
    127.0.0.0/8
    169.254.0.0/16
    172.16.0.0/12
    192.168.1.0/160  #<--Trust local network machines. Only needed if [authorization] enabled.
    FE80::/10
    ::1/128

# enables support for slicer uploads via partial Octoprint API impl
[octoprint_compat]
If you haven't already you may have to enable SD support in Fluidd
Partial Fluidd client.cfg
[virtual_sdcard]
path: ~/gcode_files
Assuming you installed on a machine with a local name of "fluiddpi" you can access the PrettyGCode page by using this url.
http://fluiddpi.local:7136 <-Should automatically connect to the local instance of Fluidd
If you installed to some other machine subsititute the ip address or name.
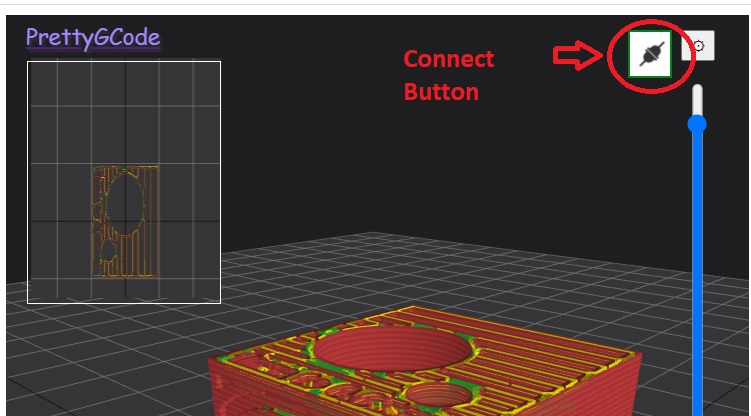
The above URL should take you to the PrettyGCode home page. If don't have your printer machine set to require login it should automatically connect. If you have your system secured you will have to use an API key to allow access. To configure the connection to the printer click on the connection button in the upper right of the screen. There you can enter your server address and any API key.
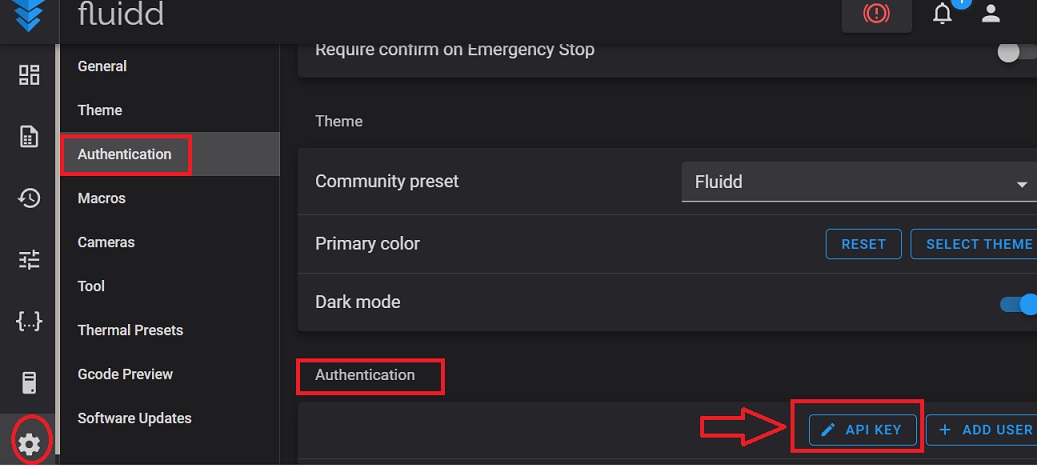
If you have Moonraker secured behind a user name and password then you can use an API key to allow PrettyGCode to connect.
You can get your API key in Fluidd via the System configuration menu
For now to trouble shoot the connection you need to open the browsers developer console and look for warnings in the console.
- Check to make sure the server url starts with http://
- Make sure the API key (if used) is set in the connection dialog
- Make sure the domain you are browsing from is included in the cors_domain section of moonraker.conf
[authorization]#<--If this section is present then PrettyGCode needs to use an API Key to connect
cors_domains:
  *.local
  *.lan
  *://app.fluidd.xyz
  *  #<--Allow all domains
You may have to enable [octoprint_compat] in moonraker.conf file.
If your server is located on another machine or isn't being detected you can specifiy it on the command line like this:
http://fluiddpi.local:7136?server=http://fluiddpi.local:7125 <-Connect to the local instance of Moonraker (port 7125 by default)
or.
http://pgcode url:7136?server=http:// moonraker machine url:port
NOTE: For now URLS must be in the format http://servername:port without any trailing path info.
Specify the API key in the URL like this:
http://fluiddpi.local:7136?apiKey=
or http://fluiddpi.local:7136?server=http://fluiddpi.local:7125&apiKey=
By default the bed volume is 300x300 with the origin at the corner. If that doesn't match your printer you can adjust it via a URL parameter. Supported origins are currently, "center" and "lowerleft"
For example this will set a 200x200 volume with the origin at the "center"
http://fluiddpi.local:7136?bed.width=200&bed.depth=200&bed.origin=center
- Sync to progress. Sync the 3d view to approximately where the printer is printing. See notes on syncing below.
- Fatlines. Display lines with thickness. This looks much better but can cause a performance hit on slower machines.
- Orbit when idle. After 5 seconds of no mouse/camera movement the camera will orbit around the center. Options are stored in cookies in the users browser. So they should across browser sessions.
Syncing to print progress is harder than it sounds. The built in OctoPrint GCode visualizer and PrettyGCode uses the File Position to sync the line drawing in the view. This is actually when the line of GCode is read from the file on disk and NOT when it is actually printed. In this plugin I also display the nozzle in the 3d view. This is calculated based on when the GCode line is sent to the printer. This means the print head should be closer to where it actually is. But it will not match the lines being drawn in the 3d view. It is a compromise.
PrettyGCode uses WebGL and Three.js for rendering. WebGL may not be supported on all browsers. And performance maybe slow on older computers, especially with larger GCode models.
- Tested browsers
- Chrome
- Firefox
- Edge
- Android Chrome
My primary use for this plugin is to visually show print status when I stream my prints on Twitch. I use OBSStudio for streaming, but to get the browser plugin to render the 3D view you need to launch OBS with the --enable-gpu flag:
To make the background transparent in OBS Studio paste this CSS in the Browser source options set the CSS to something like this:
body { background-color: rgba(110, 0, 0, 0); margin: 0px auto; overflow: hidden; }
canvas {background-color:rgba(0,0,0,0.5) !important; }