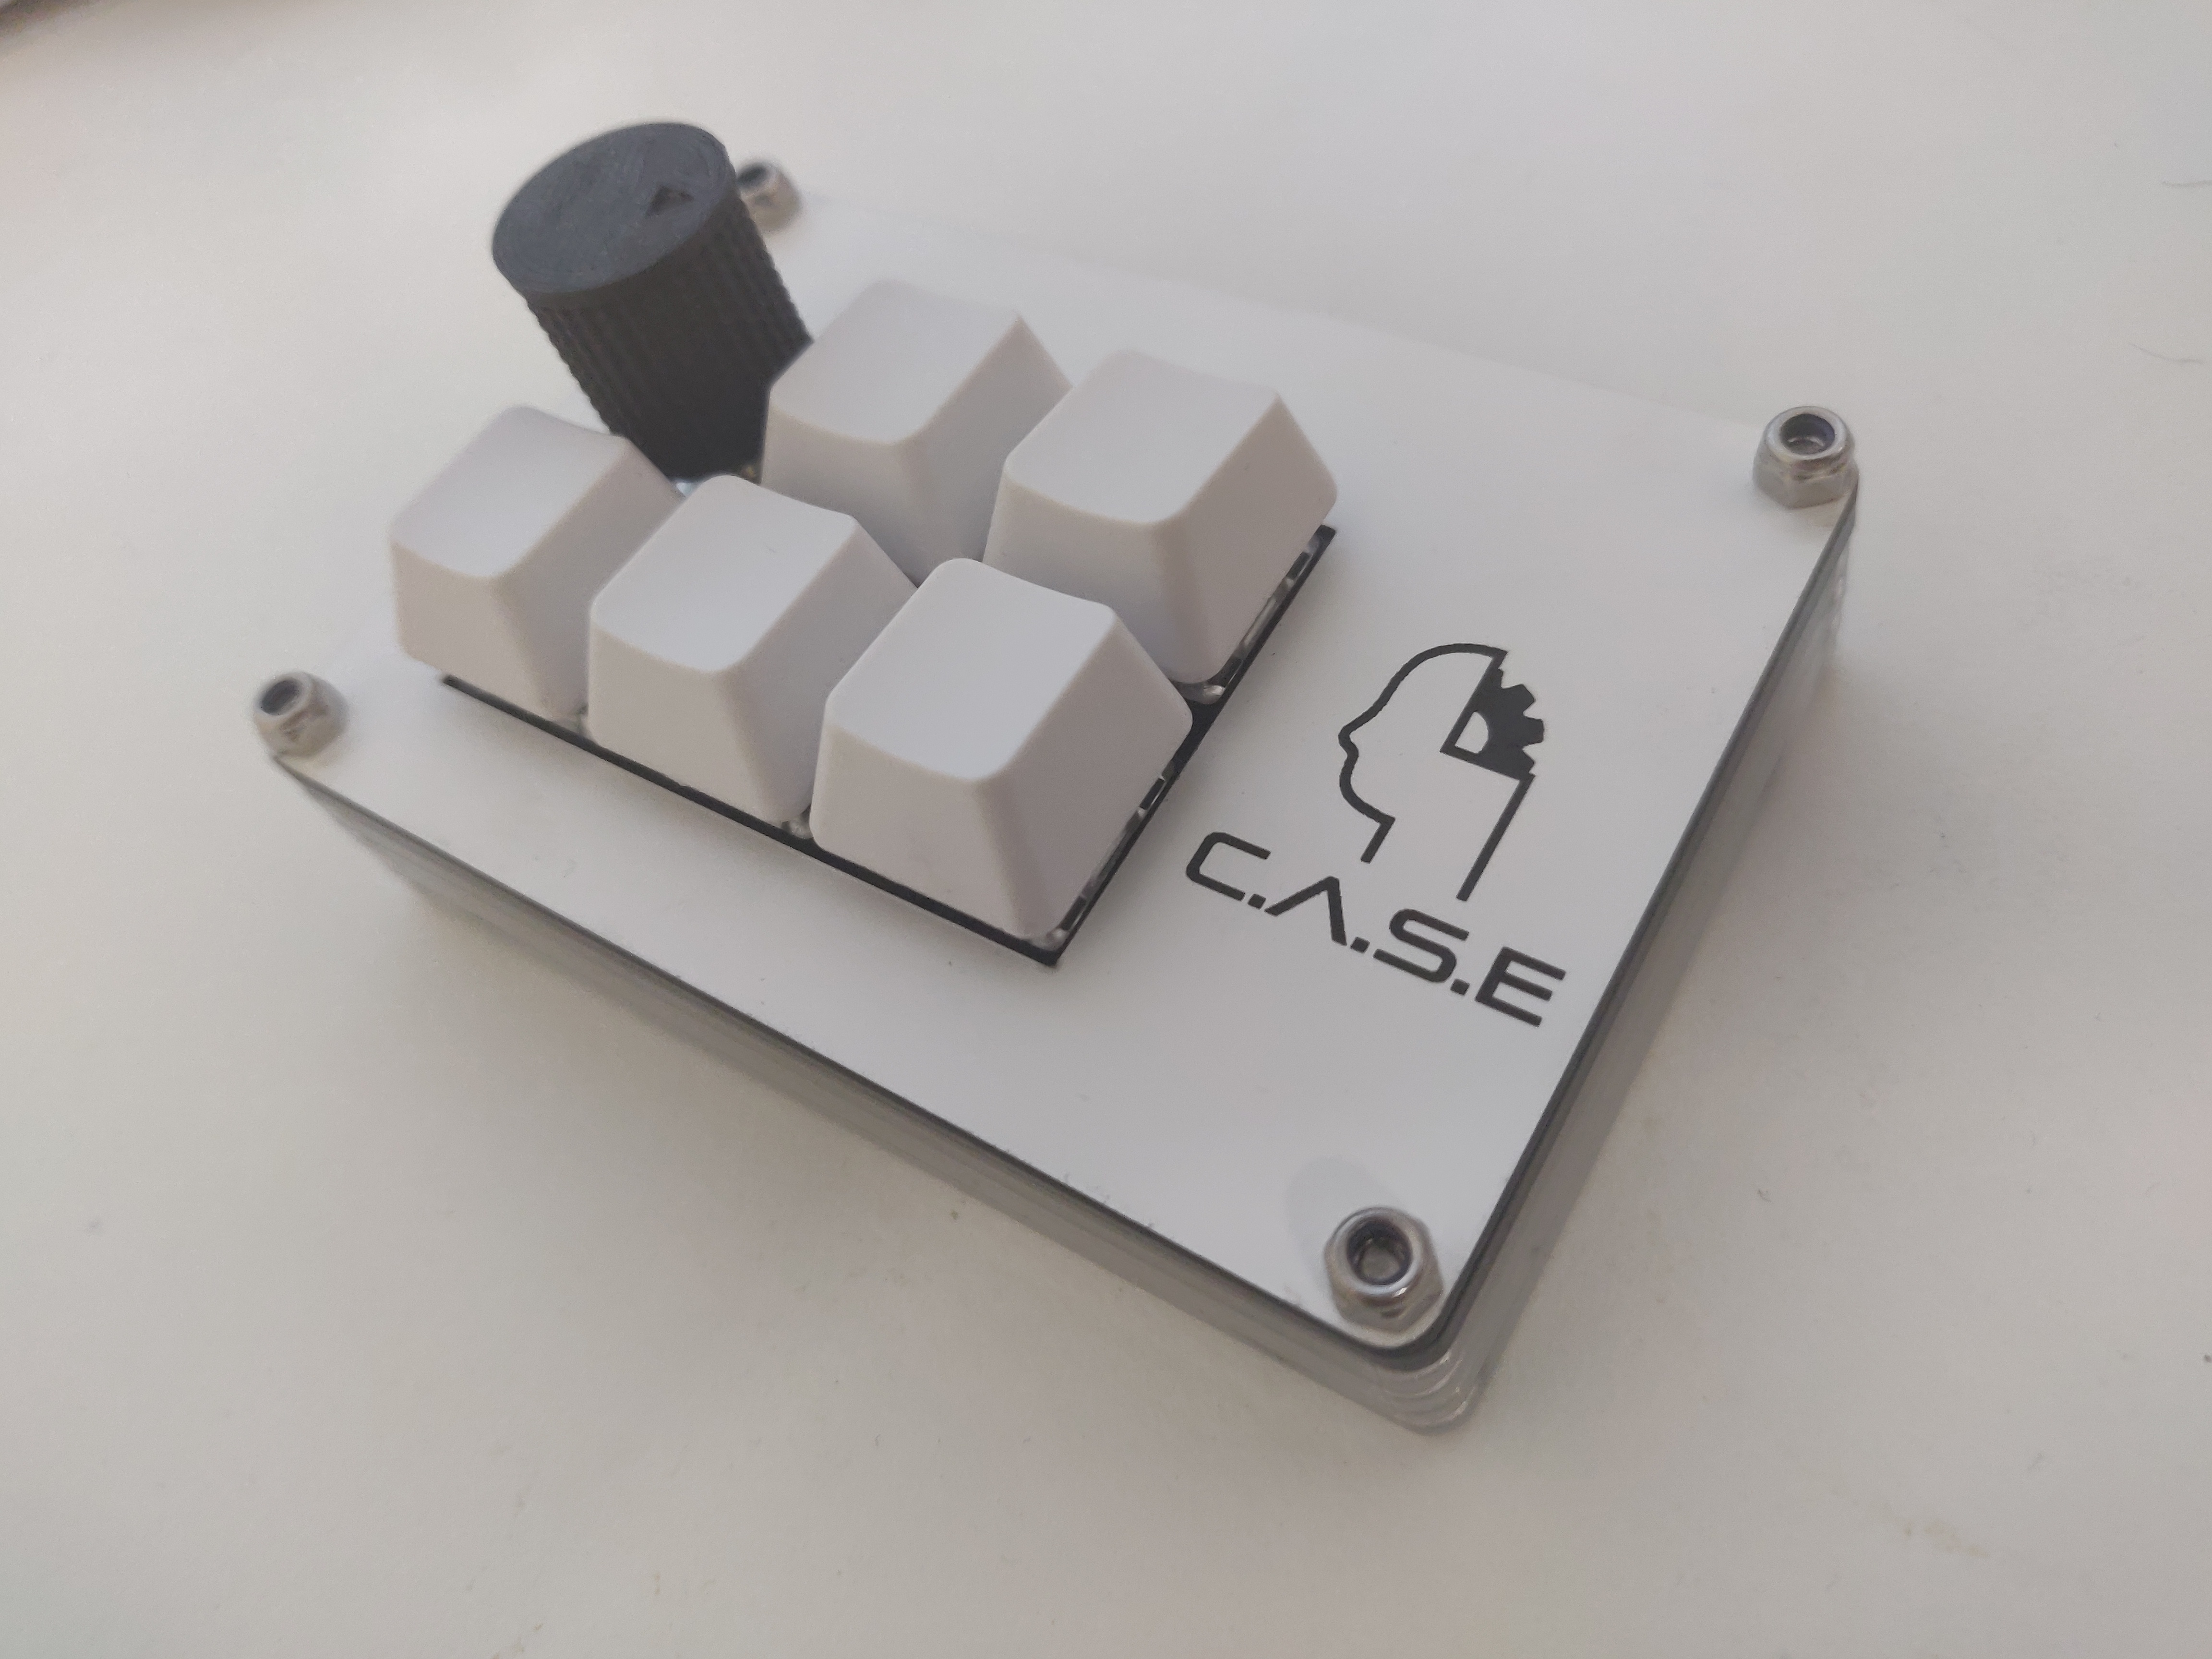
Extremely simple 2x3 macropad with sandwich case.
- QMK firmware
- Acrylic sandwich case
- Encoder support
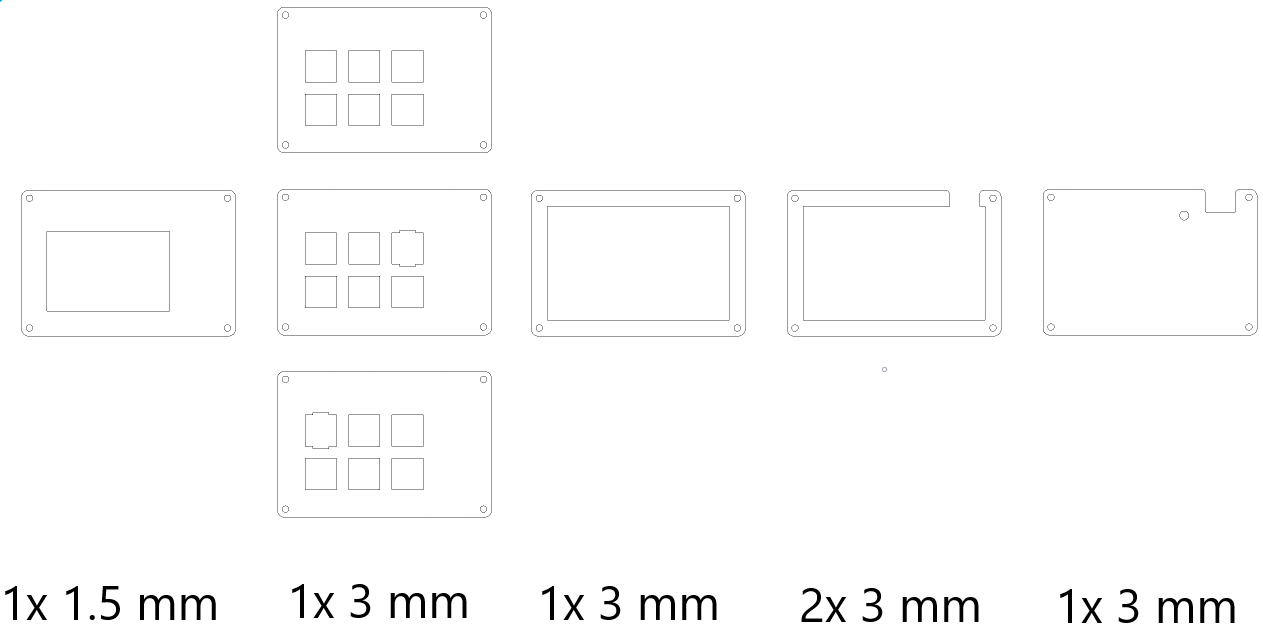 Case plates for laser cutting. 0.15 mm kerf already accounted for in .dxf files.
Choose one of the three switch plates according to your encoder placement.
For same results as image above, engrave on 2 layer acrylic.
Case plates for laser cutting. 0.15 mm kerf already accounted for in .dxf files.
Choose one of the three switch plates according to your encoder placement.
For same results as image above, engrave on 2 layer acrylic.
- 4x M3 20mm screws
- 4x M3 nuts
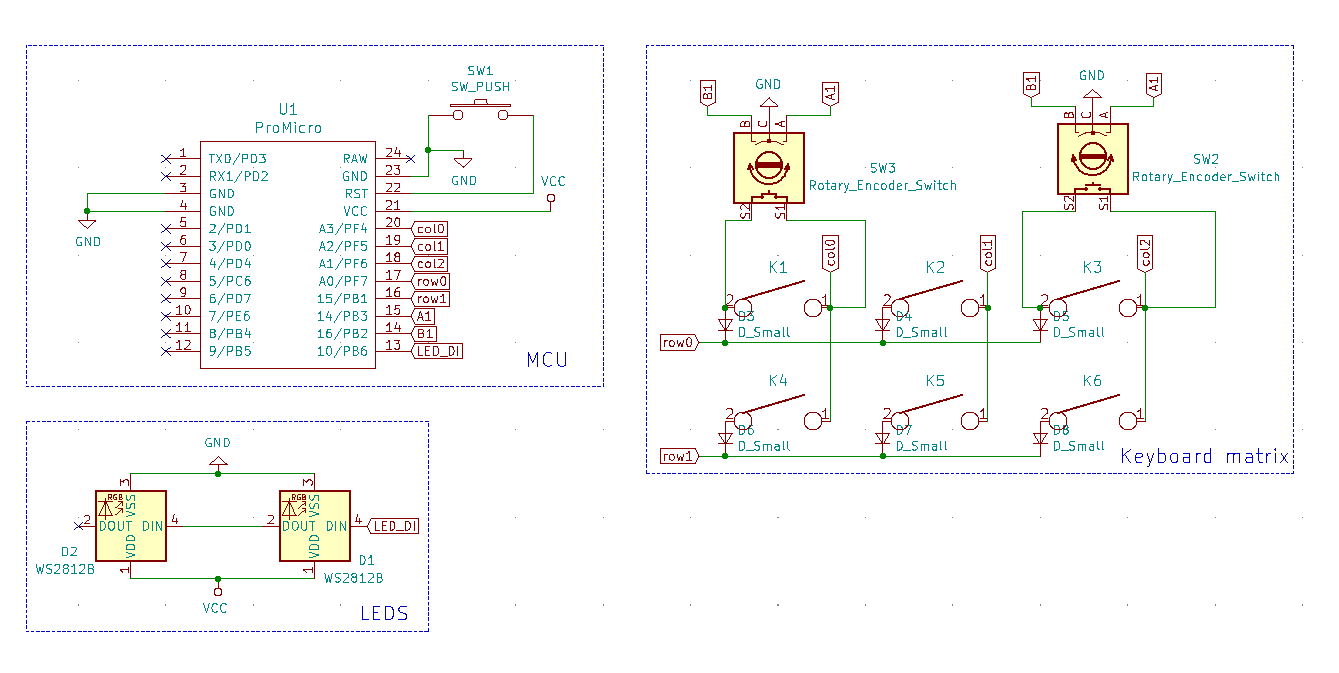
Running on QMK firmware. Use QMK Toolbox to flash with provided HEX file. Then use VIA configurator to configure keybinds. For further customization (encoder keycodes), setup a QMK build environment and compile your own HEX files.
- Download and open QMK Toolbox
- Select HEX file
- Choose ATMega32u4 as microcontroller
- Push reset button on board and then press flash button in toolbox.
- Download and install VIA Configurator
- Open VIA and go to File->Import Keymap
- Select the keymap.json file
- Plug in the macropad
| Component | Quantity | Link |
|---|---|---|
| MX switches | 6x (5x) | |
| 1N4148 diodes | 6x | |
| 5.2x5.2mm SMD pushbutton | 1x | Mouser |
| Arduino Pro Micro 5V 16 MHz | 1x | |
| WS2812B | 2x | |
| EC11 Encoder 15mm shaft | 1x |
WS2812B optional as undeglow is not the best on this board due to few LEDs and bad placement. Only 5 switches needed if also using encoder.