This is the Repository for the Social App Project 🔥
HOW TO CONTRIBUTE TO OPEN SOURCE accepts PR's (pull requests) from newbies only, this is to help newbies get familiar with contribution processes.
Issues can be submitted by anyone, seasoned developers or newbies.
-
If you are new to Git and Github, it is advisable you go through GitHub For Beginners before moving to the next step.
-
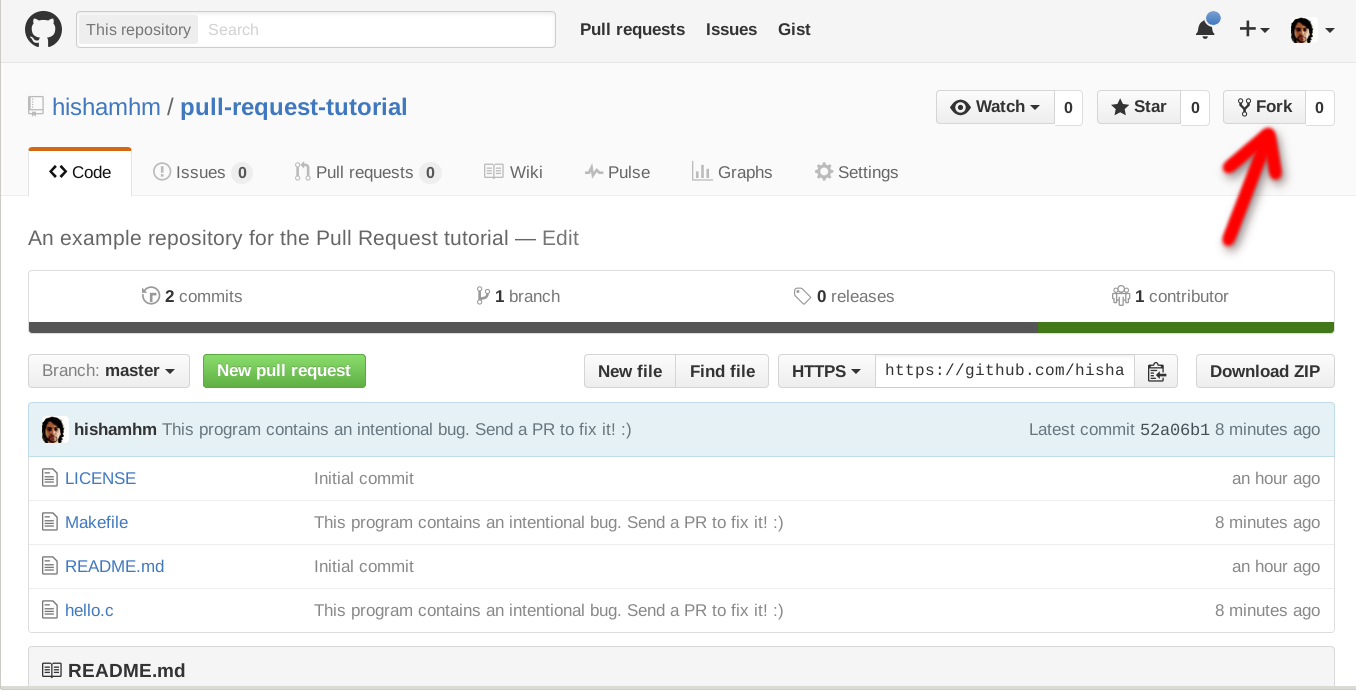
Fork the project on Github, Help Guide to Fork a repository.
-
Clone the project.
-
Create a branch specific to the issue you are working on.
git checkout -b update-readme-file
For clarity to yourself and others on the issue you're working on, name your branch something like `update-xxx` or `fix-xxx` where `xxx` is a short description of the changes you're making. For example `update-readme` or `fix-typo-on-contribution-md`. -
Open up the project in your favourite text editor, select the file you want to contribute to and make your changes.
If you are making changes to the README.md file, you would need to have Markdown knowledge. Visit here to read about GitHub Markdown and here to practice.
- If you are adding a new project/organisation to the README, make sure it's listed in alphabetical order.
- If you are adding a new organisation, make sure you add an organisation label to the organisation name. This would help distinguish projects from organisation projects.
-
After making your changes in the new git branch then add your modified files to git, How to add, commit, push and go.
git add path/to/filename.ext
You can also add all unstaged files using:

```shell
git add .
Note, using a
git add .will automatically add all files. You can do agit statusto see your changes, but do it beforegit add. -
Commit your changes using a descriptive commit message.
git commit -m "Brief Description of Commit" -
Push your commits to your Github Fork:
git push -u origin branch-name
-
Submit a pull request.
Within GitHub, visit this main repository and you should see a banner suggesting to make a pull request. While you're writing up the pull request, you can add
Closes #XXXin the message body where#XXXis the issue you're fixing. So an example would beCloses #42would close issue#42.

If you decide to fix an issue, it's advisable to check the comment thread in case there's somebody already working on a fix. If no one is working on it at the moment, kindly leave a comment stating that you intend to work on it so other people don't accidentally duplicate your effort.
In a situation whereby somebody decides to fix an issue but doesn't follow up for a particular period of time, say 2-3 weeks, it's acceptable to still pick up the issue but make sure to leave a comment.
Laravel is often referred to as the “PHP Framework For Web Artisans”. It is an interesting technology to work with as a server-side(back-end) developer but as a front-end developer you can work with it too.
Requirements To be able to work on a laravel project, there are some basic requirements:
-
Composer: This is a tool for dependency management in PHP, if you do not have it installed in your computer globally please pause and install it here
-
PHP: It is advisable to root for PHP versions >= 7.0, get it here
Command Line Interface : No actual recommendation here, anyone you choose is suitable(git bash, CMD, Terminal etc).
Introduction
Laravel uses a different view rendering technique called blading.
Blade is the simple, yet powerful templating engine provided with Laravel. Unlike other popular PHP templating engines, Blade does not restrict you from using plain PHP code in your views. In fact, all Blade views are compiled into plain PHP code and cached until they are modified, meaning Blade adds essentially zero overhead to your application. Blade view files use the .blade.php file extension and are typically stored in the resources/views directory.
- Stage 1: Setting up project on local machine
-
Clone the socialapp project to your local machine preferably in you www(windows) and www/html(linux) folder.
-
Enter into the project directory my running the cd command
cd socialappcd src -
Run the composer command to download and install are required laravel dependencies.
composer install -
Make a copy of the sample environment file (at this point the project should be open in your text editor) cp .env.example .env (you should see the new file added through your editor).
-
Generate you unique APP_KEY
php artisan key:generateThe key will automatically be updated in your environment file in your editor. If it doesn’t you can always copy and paste.
- Stage 2: Connecting your database
-
Go to your
localhost/phpmyadmin, login and create a new database -
Go to your .env file and edit DB_DATABASE , DB_USERNAME and DB_PASSWORD to match the credentials you just created, where DB_USERNAME and DB_PASSWORD are the credentials of your phpmyadmin.
-
Go to your CLI and run php artisan migrate to create the appropriate tables for you in your local database.
-
Run php artisan db:seed seed the tables for you in your local database.
-
Or you can run step 3& 4 together as php artisan migrate --seed to create the appropriate tables and seed them in your local database.
- Stage 3: Food is ready
The project is ready to be served in your local machine. To do this run php artisan serve to serve the project at localhost:8080 or 127.0.0.1:8000 .
To alternatively serve in through another port run php artisan serve --port= . For instance if port 8000 is occupied you can run it on 8080 like this php artisan serve --port=8080 .
Visit 127.0.0.1:8000 or 127.0.0.1:<port no> to see your project up and running