基于VueCli3.0创建Typescript应用
Believel opened this issue · comments

VueCli3.0
安装
npm install -g @vue/cli创建项目
vue create vuebyts
图形化界面
cd vuebyts
vue ui
文件结构
.
|-- README.md
|-- babel.config.js
|-- package.json
|-- public
|   |-- favicon.ico
|   `-- index.html
|-- src
|   |-- App.vue
|   |-- assets
|   |-- components
|   |-- main.ts        // 入口文件
|   |-- router.ts      // 路由文件
|   |-- shims-tsx.d.ts // 兼容jsx
|   |-- shims-vue.d.ts // 兼容vue
|   |-- store.ts       // vuex入口文件
|   `-- views
|-- tests
|   `-- unit
|-- tsconfig.json
|-- tslint.json
`-- yarn.lock
安装插件
- https://microsoft.github.io/TypeSearch/ 查看插件是否可以使用vue+ts项目
- 利用图形化管理工具安装插件,例如安装axios,就需要下载
axios和相关ts的@types/axios
vue-property-decorator插件的使用
1.组件声明
// @Component 不传参时
import { Component, Vue } from 'vue-property-decorator';
@Component
export default class TodoItem extends Vue {
    // ...
}

// @Component 传参时
import { Component, Vue } from 'vue-property-decorator';
import TodoItem from '@/components/TodoItem';

@Component({
  components: {
    TodoItem
  }
})
export default class Home extends Vue {
    // ...
}
2.data对象
import { Component, Vue } from 'vue-property-decorator';
@Component
export default class TodoItem extends Vue {
    // data
    lists: Todo[] = [
        { text: '吃饭', complete: true},
        { text: '睡觉', complete: false},
        { text: '打豆豆', complete: false}
    ];
    private name: string;
    constructor() {
        super()
        this.name = 'zpp';
    }
}
3.prop声明
import { Component, Vue } from 'vue-property-decorator';
@Component
export default class TodoItem extends Vue {
    @Prop(Object) public item !: Todo;
    @Prop({default: 'default value'}) readonly propB!: string
    @Prop([String, Boolean]) readonly propC: string | boolean | undefined
}
4.自定义方法
import { Component, Vue } from 'vue-property-decorator';
@Component
export default class TodoItem extends Vue {
  public say(msg: string):void {
    console.log('收到子组件发送的消息:'+ msg)
  }
}
5.watch监听属性
import { Component, Vue, Watch } from 'vue-property-decorator';
@Component
export default class TodoItem extends Vue {
    public i: number = 0;

    @Watch('i', { immediate: true, deep: true })
    public fn(): void {
        console.log('监听到数据i的变化' + this.i);
    }
}
6.computed计算属性
import { Component, Vue } from 'vue-property-decorator';
@Component
export default class TodoItem extends Vue {
    public get allname() {
       return 'computed ' + this.name;
    }
}
7. emit事件
import { Component, Vue, Emit } from 'vue-property-decorator';
@Component
export default class TodoItem extends Vue {
    // 向父级发送事件,如果不传参数,默认函数名和父级传过来的值要一一对应,如果传入父级给的函数名的参数,那么子级中的函数名可以任意起名字
    // 方式1: 默认事件名
    @Emit()
    public say() {
        return 'hello';
    }
    // 方式2:起别名
    @Emit('say')
    public sayHello() {
        return 'helloWorld';
    }

    @Emit()
    addToCount(n: number) {
        // n为传过去的参数
        this.count += n
    }
}
vuex + ts 结合
1.安装npm i vuex-class -S
2.usage
import { Component, Vue } from 'vue-property-decorator'
import {
  State,
  Getter,
  Action,
  Mutation,
  namespace
} from 'vuex-class'
@Component
export default class TodoItem extends Vue {
    // 'lists' 是store中定义的属性名
    @State('lists') public lists!:[]
    // 'hello' 是store中mutation中定义的方法名,mutationHello是自己定义的
    @Mutation('hello') public mutationHello!: ()=>void
    private mounted():void {
        this.mutationHello();
        console.log(this.lists)
    }
}
element 的引入
- 安装
npm install element-ui babel-plugin-component -D - 在main.ts中
import ElementUI from 'element-ui';
import 'element-ui/lib/theme-chalk/index.css';

Vue.use(ElementUI);- 将 .babelrc 修改为:(按需引入)
{
  "plugins": [
    [
      "component",
      {
        "libraryName": "element-ui",
        "styleLibraryName": "theme-chalk"
      }
    ]
  ]
}
axios的使用
- 安装
npm install axios @types/axios - 封装
axios.ts
import axios, { AxiosError } from 'axios';

axios.defaults.baseURL = '/v1/api';
axios.interceptors.response.use(function(response) {
  return response;
}, function(error: AxiosError) {
  return Promise.reject(error);
});

export default axios;- 调用
export async function getUnits(id: string) {
// 使用泛型可以服用接口,要定义具体的返回的数据的接口类型,否则就会报unknown的警告
const response = await axios.get<Units>(`/self/packages/${id}/units`);
return (response.data) as Units;
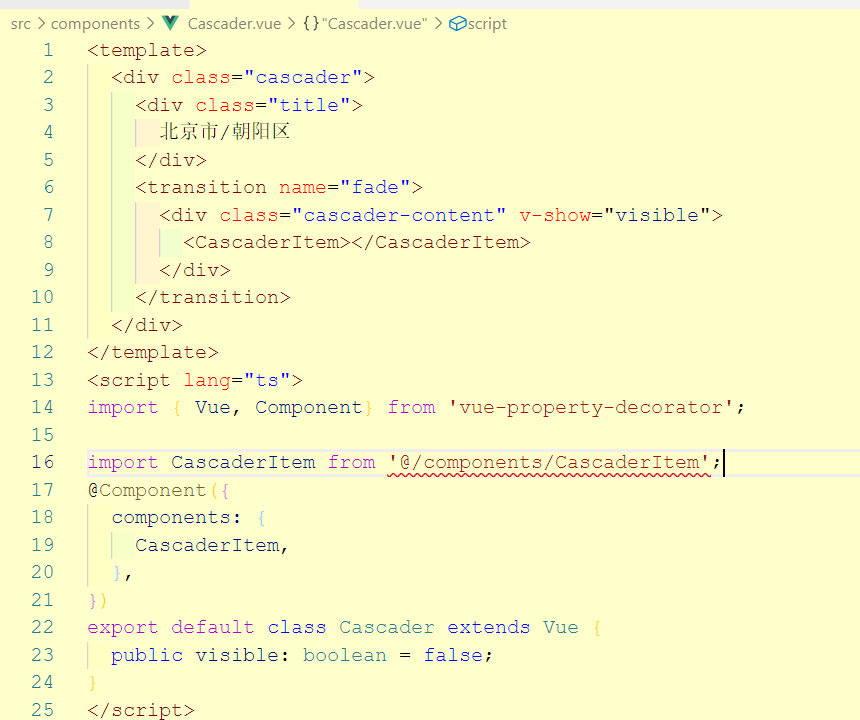
}案例1: ts实现一个vue版的级联组件
问题
- 在
.vue文件中导入.vue文件报警告?
*
- 解决办法
// 前提在`./src`下面定义的`shim.vue.d.ts`也是不能解决这个警告的
// 方法1:添加后缀名.vue
import CascaderItem from '@/components/CascaderItem.vue';
// 方法2:添加忽视注释
// @ts-ignore
import CascaderItem from '@/components/CascaderItem';
- 在使用递归的组件中使用
@emit在父级那边是收不到参数的?- 解决办法:在递归的组件中使用
this.$emit(eventName, params)传消息给父级。
- 解决办法:在递归的组件中使用
- 父级中添加不存在的属性,并且给此添加的属性赋值,此时和子级关联的这个Prop是不变化的,必须父级中的属性必须存在,这样子级才能观察到变化的值?? 这个现在用@prop观察到的是这种现象,还不知道原因。突然恍然大悟,是vue2.x中不支持直接给属性赋值的:例如:data.checked = false,需要使用set方法,才能把其变成响应式数据
相关页面
 - src
    - components
       - Cascader.vue
       - CascaderItem.vue
    - directives
       - clickOutside.ts // 点击级联元素外的元素不显示城市列表元素的指令
    - types
       - city.ts         // 城市数据的接口
    - views
       - CascaderApp.vue  // 级联入口文件
    - mock
       - data.json   // 城市的mock数据
    - shims-vue.d.ts // 定义了模块允许json文件导入
实现功能描述
- 点击级联容器,显示下拉内容,点击之外的内容,隐藏下来内容。(自定义指令实现)
- 动态渲染数据,初始先展示第一级的数据,之后动态获取
- title中的选中值的显示在最外层组件中存储([{},{},{}]),然后往下传。
- 点击选择下拉列表中的内容,就重新计算选中的值,然后把新值发给父级,父级拿到这个值,去获取下一级的列表值。获取下一级的值后,要把他放在它的对应父级的children里面
// 找父级,添加
public handle(id: string, children: City[]) {
   const cloneOptions = cloneDeep(this.options);
   let stack = [...cloneOptions];
   // 树可以深度遍历, 也可以广度遍历
   let index: number = 0;
   let current: City;
   // !采用广度遍历实现
   while (current = stack[index++]) {
     // 当前id 和 id不一样
     if (current.id !== id) {
       if (current.children) {
         // 存储孩子节点
         stack = stack.concat(current.children);
       }
     } else {
       break;
     }
   }
   // 找到匹配的说明有值
   if (current) {
     current.children = children;
     // 更新父级传过来的props中的options
     this.$emit('update:options', cloneOptions);
   }
}- 每一级选中的列表中的值高亮显示(用title中存储的值和列表中每一项值做比较,相等就是选中的一项)
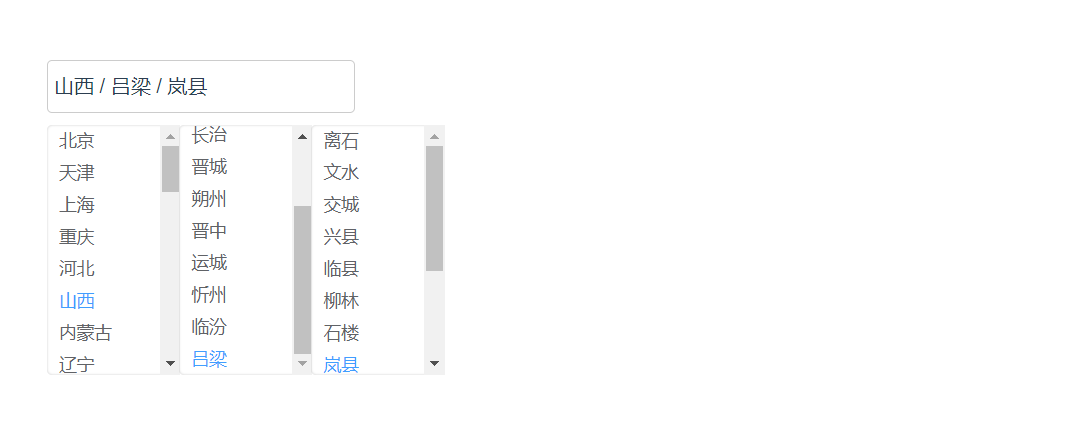
成果图
案例2:使用ts实现Vue版的树形组件
相关页面
- components
    - Tree.vue
    - TreeNode.vue
- mock
    - treeData.json
- types
    - tree.ts
- views
    - TreeApp.vue
- shims-vue.d.ts // 导入了相关图片的模块
实现功能描述
- 渲染已经存在的数据在页面中
- 点击箭头,可以展开或者折叠孩子节点,或者加载新的节点数据
- 点击复选框,可以选中或者取消选中当前节点,以及判断下层节点和上层节点的选中或者取消
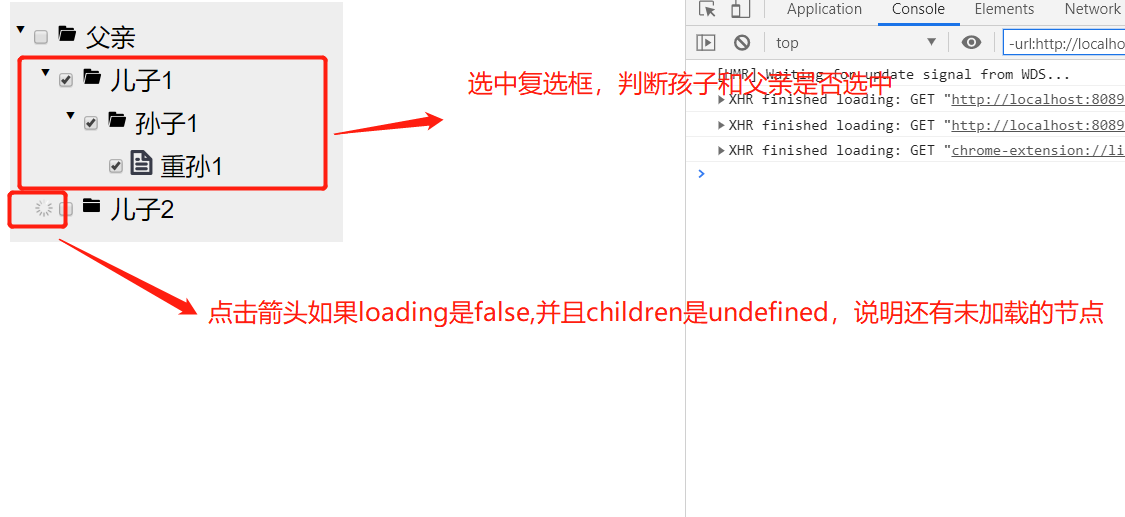
成果
案例3:一些常用的css布局实现
相关页面
- components
    - CssComponents
      - Accordion.vue  手风琴
      - BottomSticky.vue 底部自适应
      - Center.vue 高度自动撑满
      - Cursor.vue 手型
      - Flash.vue 图片闪光
      - Glass.vue 毛玻璃效果
      - Hover.vue 鼠标悬停动画
      - Loading.vue 加载
      - Popup.vue 鼠标滑过弹出内容
      - Scroll.vue 自定义滚动条样式
      - Shadow.vue  阴影效果
      - Static.vue 初始化默认css样式
      - Sticky.vue 粘性球
      - Tab.vue tab栏底部动画
- views
    - Demo.vue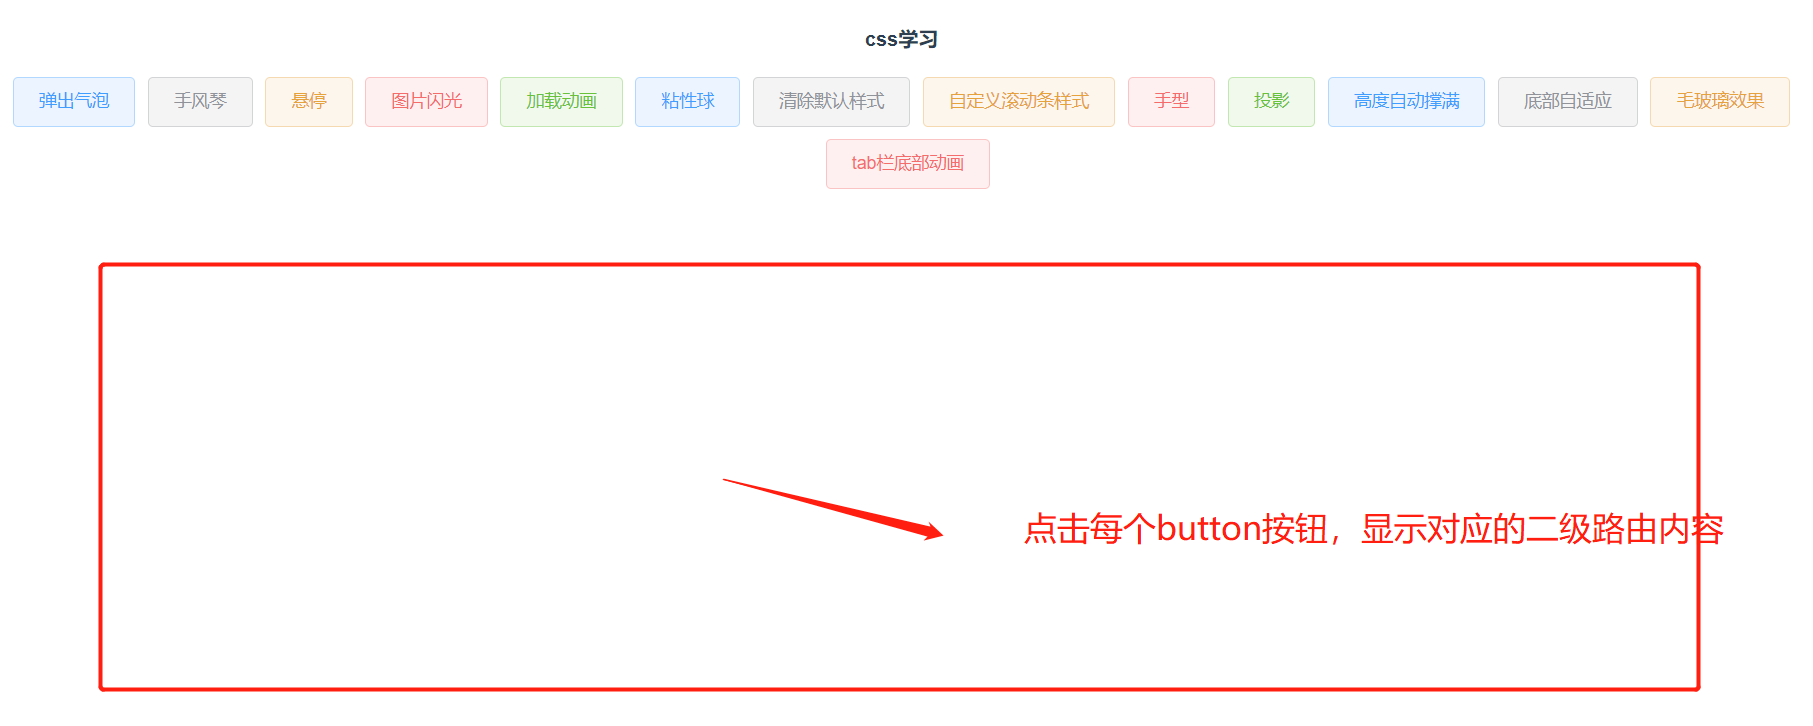
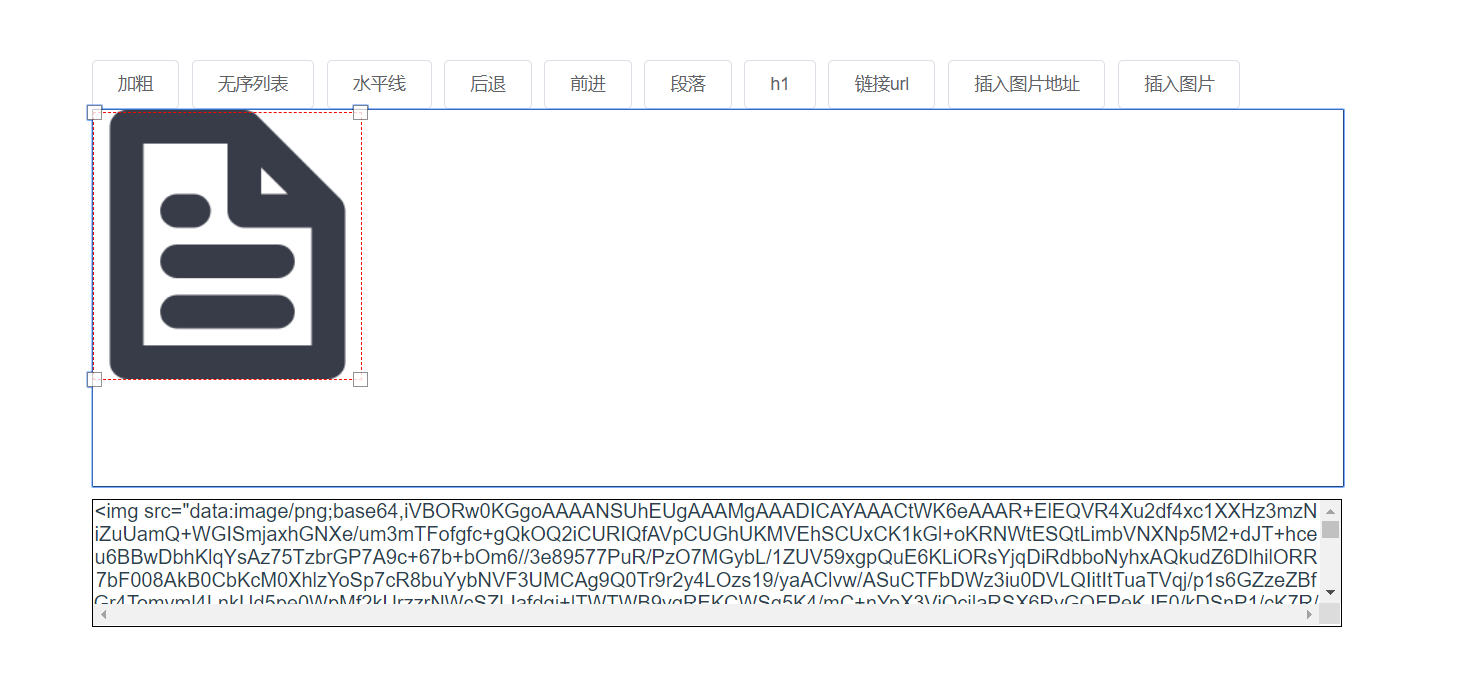
案例4:了解编辑器
相关页面
- views
    - Editor.vue